The ties that bind

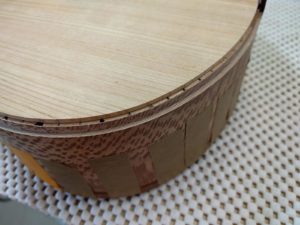
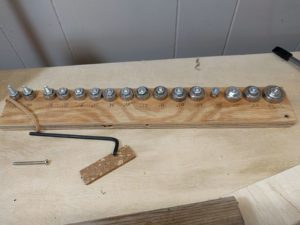
It is time to do the binding.  This involves routing small ledges in the sides of the instrument for the purfling and the actual wood binding.  To do this I have a router bit which takes one of a set of bearings, which are graded in exact small increments.

The first cut is a wide and shallow cut to establish the inside edge of the purfling.  I take digital calipers and measure the thickness of the purfling and the binding.  The sum of these becomes the size of the bearing I use.  I made a new base for my small trim router which provides much more stability and place to grip with both hands than trying to use the small base which comes with the router.  This wide base makes it easy to keep the router vertical.  As you cut one cuts ‘down hill’, that is, from the outside of the curve toward the center of the instrument.  Doing this, because of the direction of rotation of the router bit, minimizes the chances of chipping and tear-out.  I do apply a layer of sealer to the instrument before doing the routing and this also helps minimize any chipping or tear-out.

Once this first wide and shallow cut (only as deep as the purfling which is thin) is made, then the bearing matching the thickness of the binding is used to cut the narrow but deeper ledge around the instrument.  This leaves a two-ledge edge onto which the purfling & binding are glued.

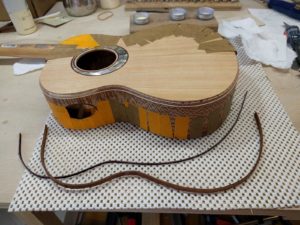
The binding and purfling is pre-bent and is attached with some strong sticky tape.  (I’m transitioning from orange to stronger brown tape here).  You apply glue with a small paint brush to a couple of inches, press (hard) and tape down the purfling & binding, and move on to the next area.  The tricky spots are the ends meet where you want the purfling and binding to meet with no visible seam.
Were you paying attention ?

I apparently was not, but I did not realize the error of my ways until I was looking at the pictures while reviewing the last post to this very blog.  But first, a little humor.

“Luthier” is a French word that means “one who swears a lot”.

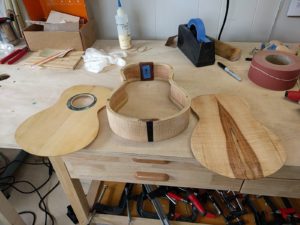
Now the specifics:  If you look carefully at the previously posted pictures you will note (as I did) that one of the ukuleles does not seem to have a side sound port.  But I put side sound ports in virtually all the instruments I build these days, what’s wrong?  Well, I glued the top and back onto the wrong side of the sides.  Since I put the sound port in first, this means that the port was on the right side of the instrument rather than the left!  [insert luthier swear words here]   What to do?  I could just continue and make this a left-handed instrument, but I have only ever had one call for a left-handed instrument, so I did not want to do that.  I briefly considered other things like putting in another sound port so there would be two, one on each side, but rejected all these ideas.  The only real solution was to practice my ‘de-construction’ skills, meaning, take the top and back off the sides, and then glue them on the right way.

So I got out a syringe of water and an iron to heat things, a sharp knife for separating the seam, and went at it.  Things went better than I expected, and in an hour I had both the top and back off, with no damage to either.  Put back the blue tape with the arrow indicating the top, which is my usual practice to avoid just this situation (which I must have done backwards before), clean the edges up, and things are ready to be glued on the correct way.

-Crisis averted.  Lutherie is a continuous process of covering up ones mistakes!


bodies are closed up

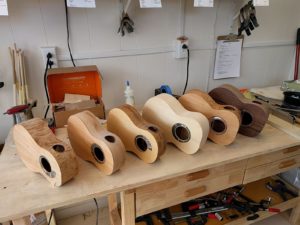
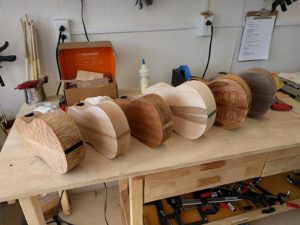
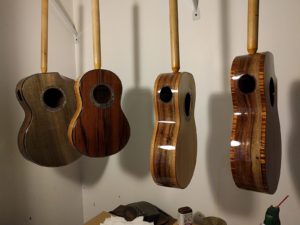
The bodies of the 6 ukuleles, 3 concerts and 3 tenors are all closed up, meaning that the top and backs are all glued on and the edges trimmed.  Now comes a lot of sanding.

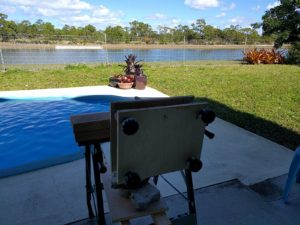
I sand the sides with a block to make sure that things are nice and straight and flat (across the side) so that when the router runs around to cut the binding channels things start out nice and flush.  I sand things to 150 grit and then put on a coat of sealer before I cut the binding channels.  I use CA glue as a sealer/pore filler, and a coat of this really hardens the surface grain which prevents chip-out when routing the binding channel and prevents glue from gluing in the binding from soaking into the adjacent side, which makes clean-up much easier.  A lot of sanding, but things could be worse than working outside in the Florida breeze, listening to the birds, watching the osprey fish in the pond while sanding.


work progresses

At the stage of gluing braces on tops and backs.  Shelf put up to hold 6 ukuleles in progress.  End grafts all done.  The new radius dishes put in-service.  The new ‘go-bar bench’ works well.

progress

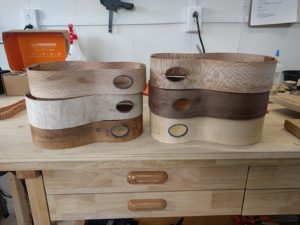
I’m working of 6 ukuleles at once this time.  When I was getting things together to bring south, there were just too many nice pieces of wood, so I ended up with 6 sets, instead of the usual 4.   3 concerts and 3 tenors.   I have the sides all bent and glued to the end blocks, and the side sound ports cut and bound.

radius dishes

The backs of most modern musical instruments have a slight arch to them, they are not flat.  The slight arch makes the instrument stronger, and allows expansion and contraction with changes in humidity.   As the back swells with increased humidity the arch gets a little higher.  I use a pretty standard arch which is a circle with a radius of 15 feet.  The back braces are also cut with this 15 foot radius arch so that when they are glued to the back, the back has the desired arch.  The braces are glued to the back in a dish which has the same 15 foot radius cut into the surface.  One can buy these radius dishes, but they are (in my mind) pretty expensive, so I have cut my own.   As I build out the shop here in Florida, I need to cut some new dishes.

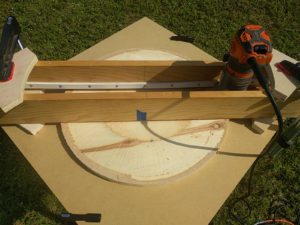
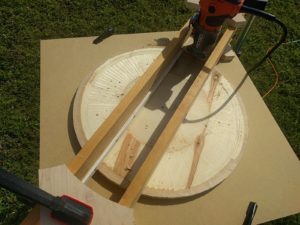
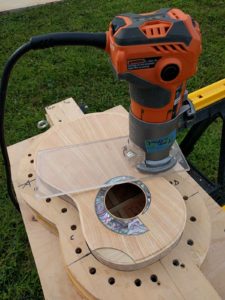
To cut a dish I made up a jig which is a channel just the width of a router base.  The bottom of the channel is made with some thin plastic trim molding which is bent along a 15 foot radius line.  Then as the router is run along, it cuts the 15 foot radius line.  The dish has a center pin, so you just rotate the dish and re-run the router along the channel.  A great project to do outside on a cool and breezy day because it makes a lot of sawdust cutting that dish out of a piece of plywood.  When you are done with the router a quick sanding to take off any unevenness and fuzz, a coat of shellac to seal the surface, and you are good to go.

building, and a bit of ‘innovation’ for the small shop

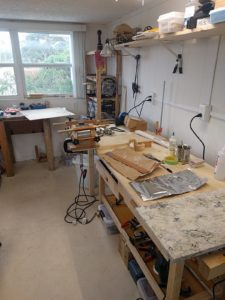
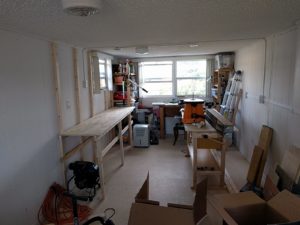
Things have progressed, and I am doing real ukulele work (along with building other jigs and fixtures).  I really like having windows in the shop for natural light and a breeze.  Bending sides for the next set.

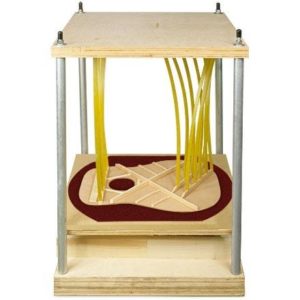
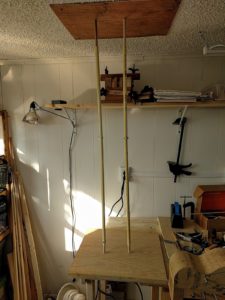
The lutherie business uses a device called a “Go-bar deck” to glue things like braces in the middle of a top or back.  It is basically top and bottom, with springy rods you bend which exert downward pressure on what you are gluing.  Something like:

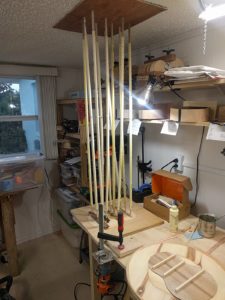
I do not have much shop space here, so using space for a go-bar deck was a little problematic.  I remembered seeing on some some video some place (I do not remember where) a luthier who had made long spring-loaded rods that fit between his workbench and the ceiling, and this was his go-bar setup.  Takes up no additional space, and the set of rods stacked neatly in a corner.  So, that is what I did.  Ordered a bunch of long compression springs that just fit inside 1/2″ CPVC pipe, got some 7/16″ dowels which also just slip fit inside the pipe, used a few cross-bolts to hold things in place, and made some tapered wooden tips, and there you go.  They seem to work great, and the whole end of my workbench is now a go-bar deck.

Building, but not directly ukuleles

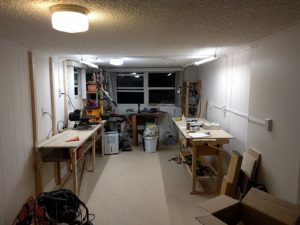
I am in the process of building out the shop here in Florida where I spend the winters.  We will be spending more time in Florida in the coming years, so I’m making the shop fully capable, so that I can do real work here, as opposed to just light stuff like pearl inlay.  This is also an exercise in deciding what is really necessary, and how to fit into a smaller space.  Still, unlike my current shop up north, this has windows on three sides, and a lovely cross breeze.  Basic benches going in, and the lighting is up.

When I get back up north in the spring, I will be doing it all over again, since I am moving there too, from the big house in the country to a smaller house in-town.


Check off another box on the ‘wood’ list

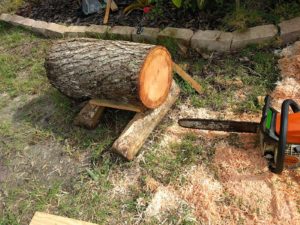
The mahogany that all that 18’th and 19’th century furniture, and those early mahogany instruments, were made from is Cuban Mahogany (aka Caribbean Mahogany, aka American mahogany) Swietenia mahagoni.   [Notice the species name mahagoni, this is the type species for mahogany]  It is supposed to be great wood, however due to over harvesting true Cuban mahogany has not been available except in very small special circumstances.  What is today referred to as ‘true mahogany’ is Central American mahogany, Swietenia macrophylla. Cuban mahogany mostly grows in the Caribbean islands, especially Cuba.  It has been planted rather extensively here in South Florida, which is the northern edge of its range.   I have been on the lookout for a chance to get some Cuban mahogany, and over the weekend I was riding my bicycle around the neighborhood, and heard the chain saws running.  Turns out the new owner of a house with several good sized Cuban mahogany trees was taking them out to put in a pool.  I got a couple of logs, and have added Cuban mahogany to my wood stash for some future instruments.

Sizing things up

cutting

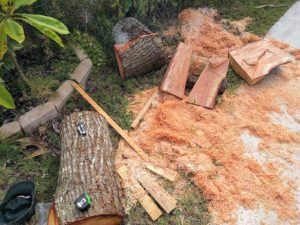
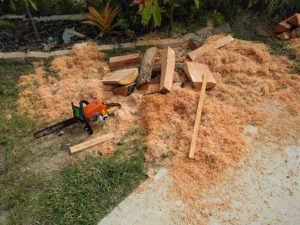
Cutting down through a log the long way (as opposed to crosswise making firewood) produces great quantities of fluffy excelsior-like sawdust so when you are done you have a bunch of small useless edge pieces, and large piles of what I’m turning into mulch.

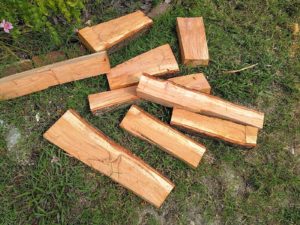
The result, quarter-sawn Cuban Mahogany billets.  I’ll cut these into sides and backs on the bandsaw.