A deeper dive into getting the bends (a little SCUBA joke)

I have been bending the sides for this next set.  I use a silicone heating blanket and a home-made form, based on a Fox bender, to do the bending as follows.

I bend one side at a time.  The ‘package’ that goes into the bender is the side, the binding, and the purfling, so I have all the necessary pieces later.  (If I forget to add the binding and purfling I have to load them up and do an extra bend, but of course, that would never happen …) Notice the piece of blue tape.  Since I bend one side at a time it is vitally important that one maintains the correct orientation of the two sides, so that book-match comes out correctly on the base of the instrument.  I lay the two sides out, and stick pieces of blue tape on the correct adjoining sides.  That blue tape end always goes on the outside of the bender, at the base of the lower bout.

I wrap things in brown paper (recycled packing material).  I have been spraying the sides with a little veneer softener as well as a little water and that seems to really help make the side bend easily.  The brown paper is sprayed with water, and the package is wrapped up tightly to keep the binding and purfling together into a nice package.  I echo the blue tape onto the outside of the brown paper with a little mark so I can keep things aligned correctly.

I use an electric silicone heating blanket to heat things up.  These blankets will get hot enough to actually char the wood, so there is plenty of heat, and one must be a little careful.  I make up a sandwich, from the inside out, consisting of a stainless steel metal slat, the wood, the heating blanket, and another metal slat.  This is clipped together with spring clamps.

Then things are put into the bender.  A lot of people start the bend from the waist, but I have found that this is a bit inexact.  I put a small metal bar at the very end of the wood, inside the metal slats, and this bar sits on registration pins sticking out of the bender.  This way the sides are always positioned exactly the same way in the bender, which yields a better butt end bookmatch.  You can see the blue tape around the metal bar at the bottom of the package.  Add the lower bout clamp to hold the package in position.

I stick a magnetic thermometer onto the metal slat, plug the blanket in, turn it on, and wait for things to heat up, which only takes a couple of minutes.  Pretty soon you start to see steam coming out, and the weight of the spring clamps and the cord pluging in the heat blanket start the bend.  I bend at around 225 – 250 degrees Fahrenheit though things start to get soft (depending on the species of wood) at around the boiling point of water, 212.

Bend things the rest of the way over, and put on the waist caul.  Tighten this down slowly to bend the waist.

When the waist is bent, put on the spring loaded bar which rides over the package and bend down the upper bout. This is just a dowel with a piece of loose copper pipe to make it slide easily.   When the sides are bent down, attach the side clamp.  I leave the spring bar in the middle of the bout just for a little added pressure.

Then put on the spring loaded bar for the lower bout, loosen the lower bout clamp, remove the registration bar, bend the bout down to make sure it is tight, re-apply the clamp, and you are done.

The whole bending process, from when you start to heat the blanket to finish is about 4 minutes.

I let the whole thing ‘cook’ for 10 minutes to dry out the wood and set the bend.  Then one lets it cool, opens it up, curses if something has gone wrong (like a side developing a crack), put the sides into the mould for final drying, and on to the next side.

I have finished all of the bends for this set, and all of them went just fine, so it is on to body assembly.

Back in the saddle again …

The new shop is set up, at least as an initial guess.  I’m sure stuff will get moved around as the build process progresses and I find where stuff most efficiently gets put.   I am starting on the next set of 4 instruments.  Three are commissions, and one is a bit of an experiment.  The instruments are:

Guilele, 19″ scale, ancient sitka spruce top, walnut back & sides

Concert, streaky redwood top, sycamore back and sides

Concert, curly redwood top, black walnut back & sides

Tenor, (the experiment), curly redwood top, redwood burl laminated back & sides

The first step is joining the two bookmatched halves of the top and back.  I cut most of my wood from larger tree billets, and one must be careful to keep all of the slices in order, so that the bookmatch can be done correctly.  To do this one makes diagonal lines across the side of the block before cutting it up so that all of the pieces can be assembled in order.  Then one selects two pieces and the marks indicate which is the ‘inside’, which will be the bookmatch.  This inside will be the ‘show’ side, it will be on the outside of the instrument and will be what you are looking at.  All through the process I make pencil marks, stick on pieces of tape, etc. to constantly reference the ‘show’ side.

The edges must ‘jointed’ to be exactly flat and straight for the glue line to be strong and invisible.  To joint the edges I made up a jig which has a high quality straight-edge embedded in the side and onto which the pair of back/top plates are clamped overhanging the staight-edge just a bit.

This straight-edge runs against a bearing on a spiral router bit, mounted in my router table (which is also my work-bench, a space saving idea of mine).  The jig is run against the router cutting a perfectly straight edge.

To glue the plates together I have made and tried a number of different clamping devices, all of which worked more or less but the method I use now is the ultimate in simplicity and works well in lots of situations.  To clamp the two sides together I use tape.  That is all.

First a piece of tape is put down the seam on what will be the inside (the opposite of the ‘show’ side) to hold the two plates together.  Then pieces of tape are put across the faces so that the plates are angled up a bit.  The tape I use, Scotch 233+, is fairly stretchy which is important.

Then the package is picked up, turned over, and glue applied along the seam between the plates.

Now the plates are placed on a piece of wax paper, on a perfectly flat surface (a quartz sink cut-out from a kitchen countertop), and the sides are pressed down, stretching the tape, which pulls one plate tight against the other.  When the plates are flat they kind of snap into place and little force is required to keep them flat.  I take a small hammer and tap along the seam to make sure that the edges are flat against the quartz surface since that will be the show side and to maintain the best bookmatch you want to do as little sanding as possible on that side.  A couple of barbell weights to keep things down, and you are done.  No equipment needed for gluing other than a roll of tape and a flat surface.  No clamps to tighten, easy to make sure that the show edges are flat.  Fast, easy, and you can do as many sets at once as you have flat surfaces.

New shop

Setting up the new shop, in the new smaller house is almost complete.  I have had to make a number of adjustments to deal with a smaller space, but I think it will work.  Painted the walls white, ran two new 20 amp circuits, new light switches, shelving, pegboard.  I’m going to have to be neater.  Even a small number of things left around makes the workspace crowded.   I’ve incorporated some of the ideas from setting up the Florida shop, also a small space.  Things like mounting a router under the end of a plywood top on the workbench, so I have a router table and work table all in one.   I also really like the new LED shop lights.  Bright, don’t draw much current, no buzzing, last for a long time, and come on instantly.  After I start working I may put up some additional lighting, or move the existing strips around to yield a better shadow-less workspace.   The bigger machines, bandsaw, thickness sander, and drill press are out in the garage, with the big dust collector.

Lots of work – but no instrument building

Moving, and the shop tools look like this:

When you have to box it all up it is amazing how many things it takes to build instruments.  Hope to have the new house and shop fixed up and ready to go in a month or two.  (The house gets priority)

Of course, this is just the ‘small stuff’.  The bandsaw, thickness sander, etc. are yet to come.  Moving the wood stash has also been a chore, but it was a good time to go through things and remember what is in the pile.  Found some things I had forgotten about, and realized how much I had of certain things, like redwood for tops, and there are some great pieces of stuff which is still in big blocks (looks like firewood to be honest) that just awaits the saw.


Name, Name, what’s in a name?

The fellow who bought the ukulele I made and donated to the Baily Mathews National Seashell Museum was intending to give it to his grandson.  However, he started to play around/play it and now does not want to give it up.  (By the way, the sound and tone of this instrument, the first one I have made with a cypress top, is really good.)  Anyway, he contacted me thinking about getting another instrument for his grandson, perhaps something with his grandson’s name inlayed on it.

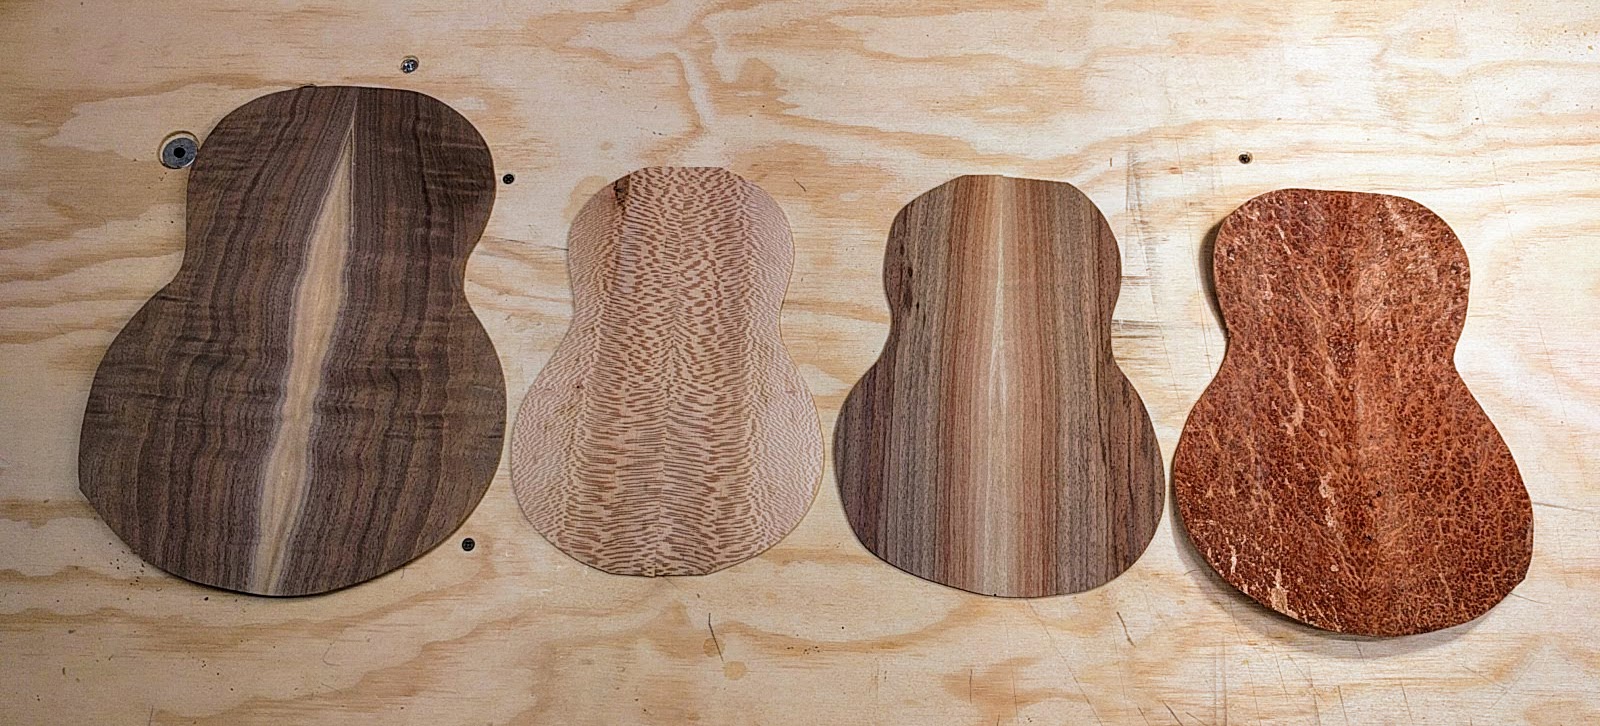
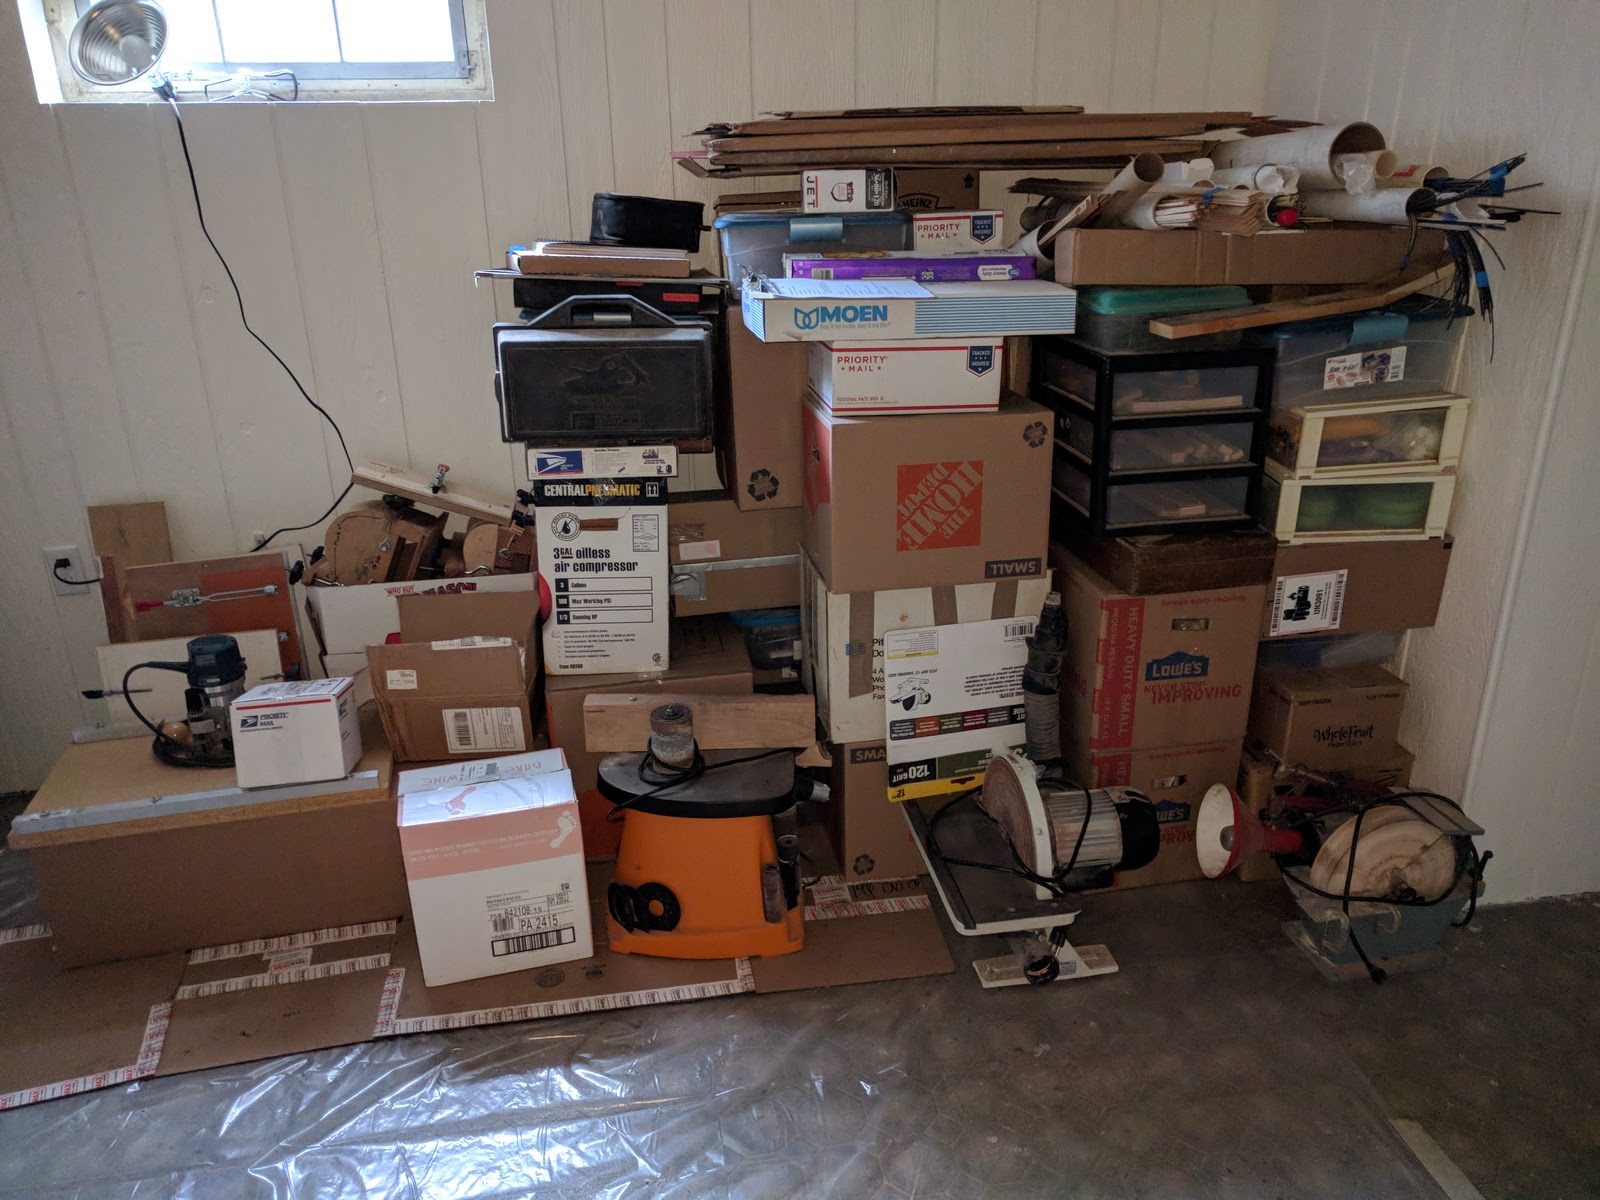
It just so happens that of the most recently completed set of 6, two of them had dark rosewood headplates that would be great for additional inlay.  It is much easier to inlay into a dark wood as any filler around the inlay blends in much more easily, and the dark color really makes the pearl ‘pop’.  I could do the inlay on the headplate, and then re-finish just the headplate pretty easily.  He decided on one of the two instruments, and then I proceeded as follows.

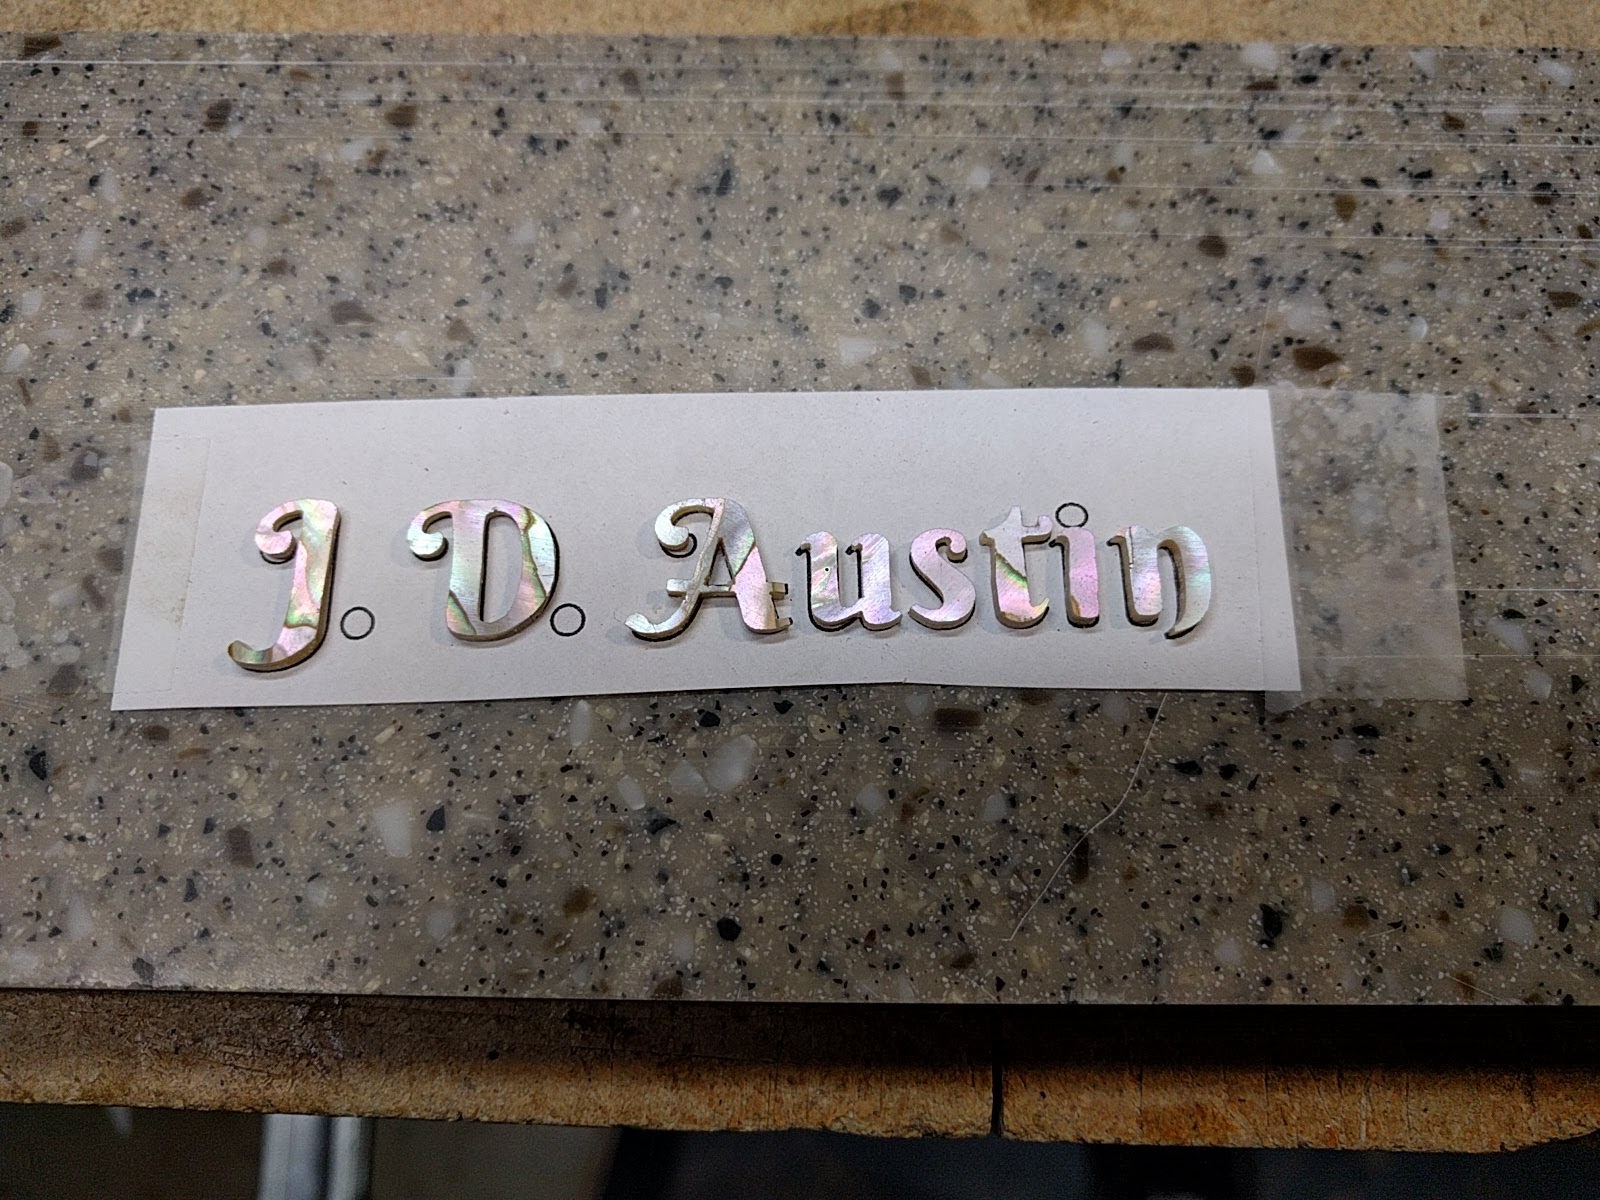
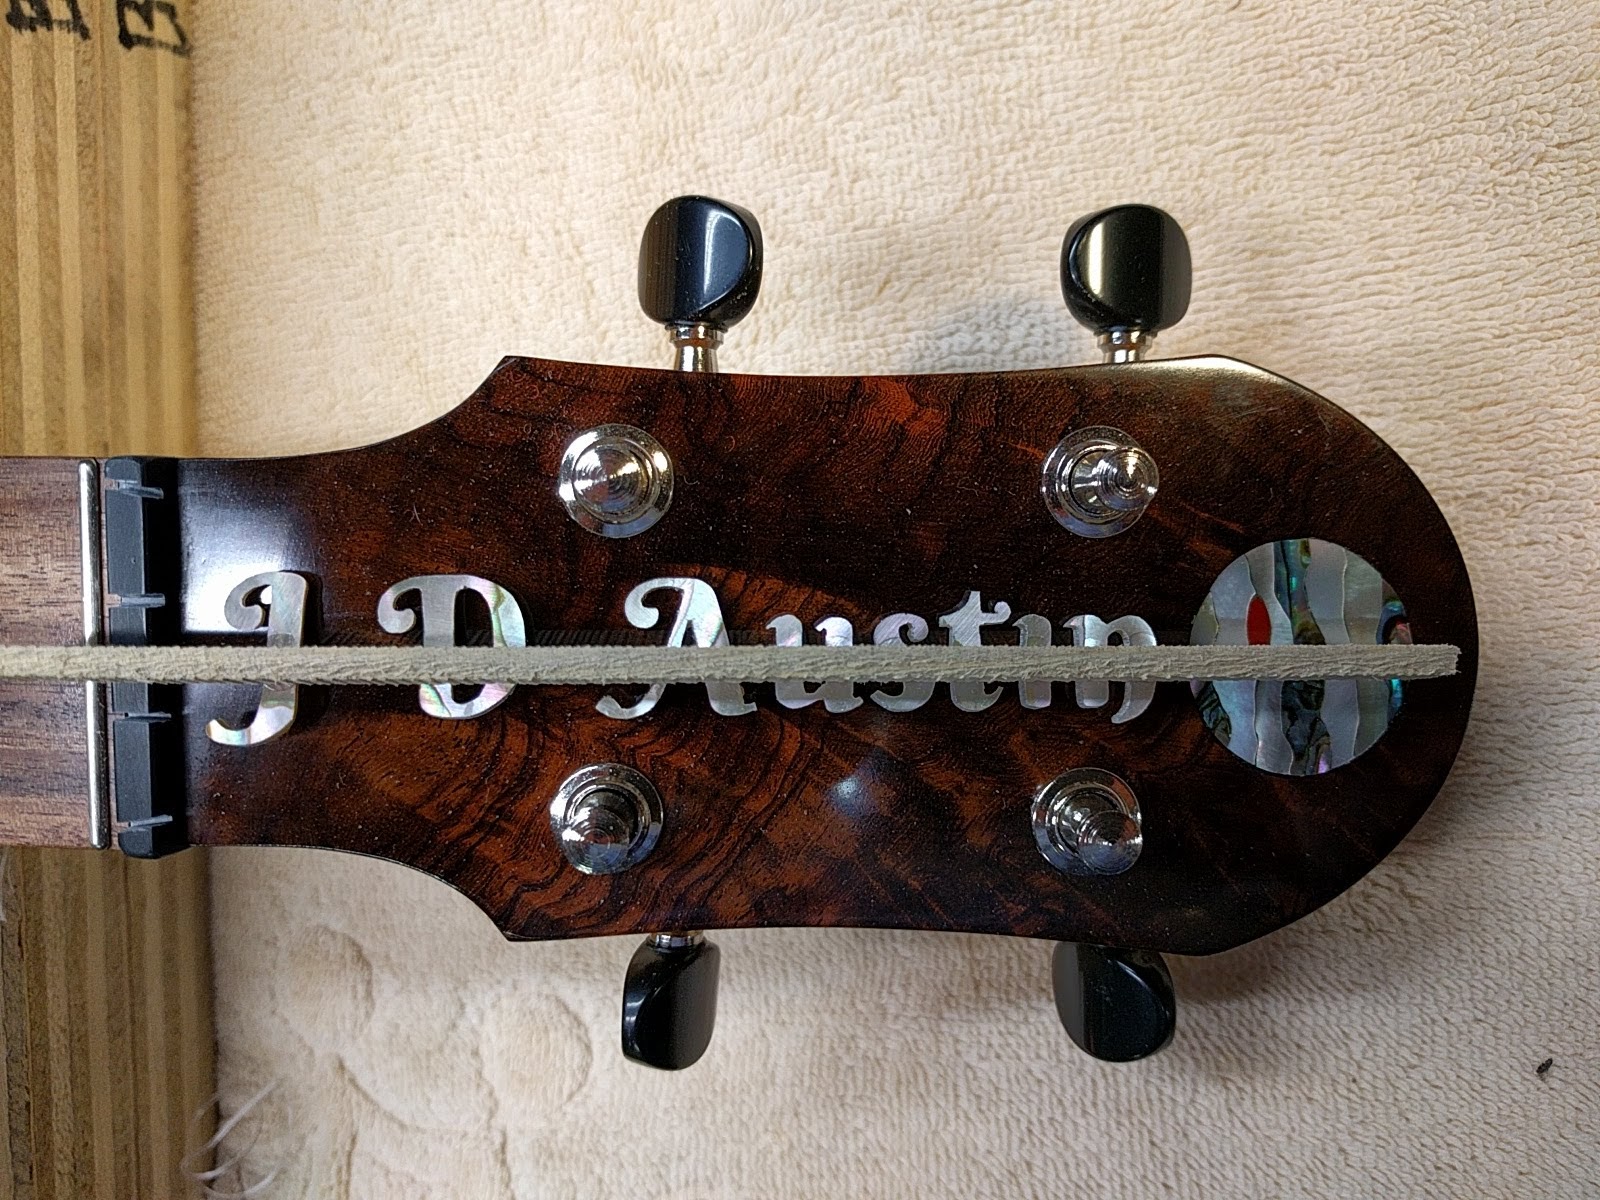
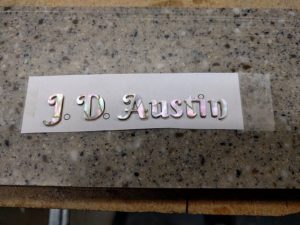
I have found a very handy internet site that will produce a stencil outline of entered text, in a wide variety of fonts.  I can then take that font image (as a bitmap), put it into Corel Draw and convert it to a vector outline format which allows easy and accurate scaling and line thickness changes.  So this is what we decided on:

The only change I made to the above was to move the to leading initials closer together.  Doing this made the overall string shorter, which means I could make the letters a bit bigger and still fit them on the headstock.

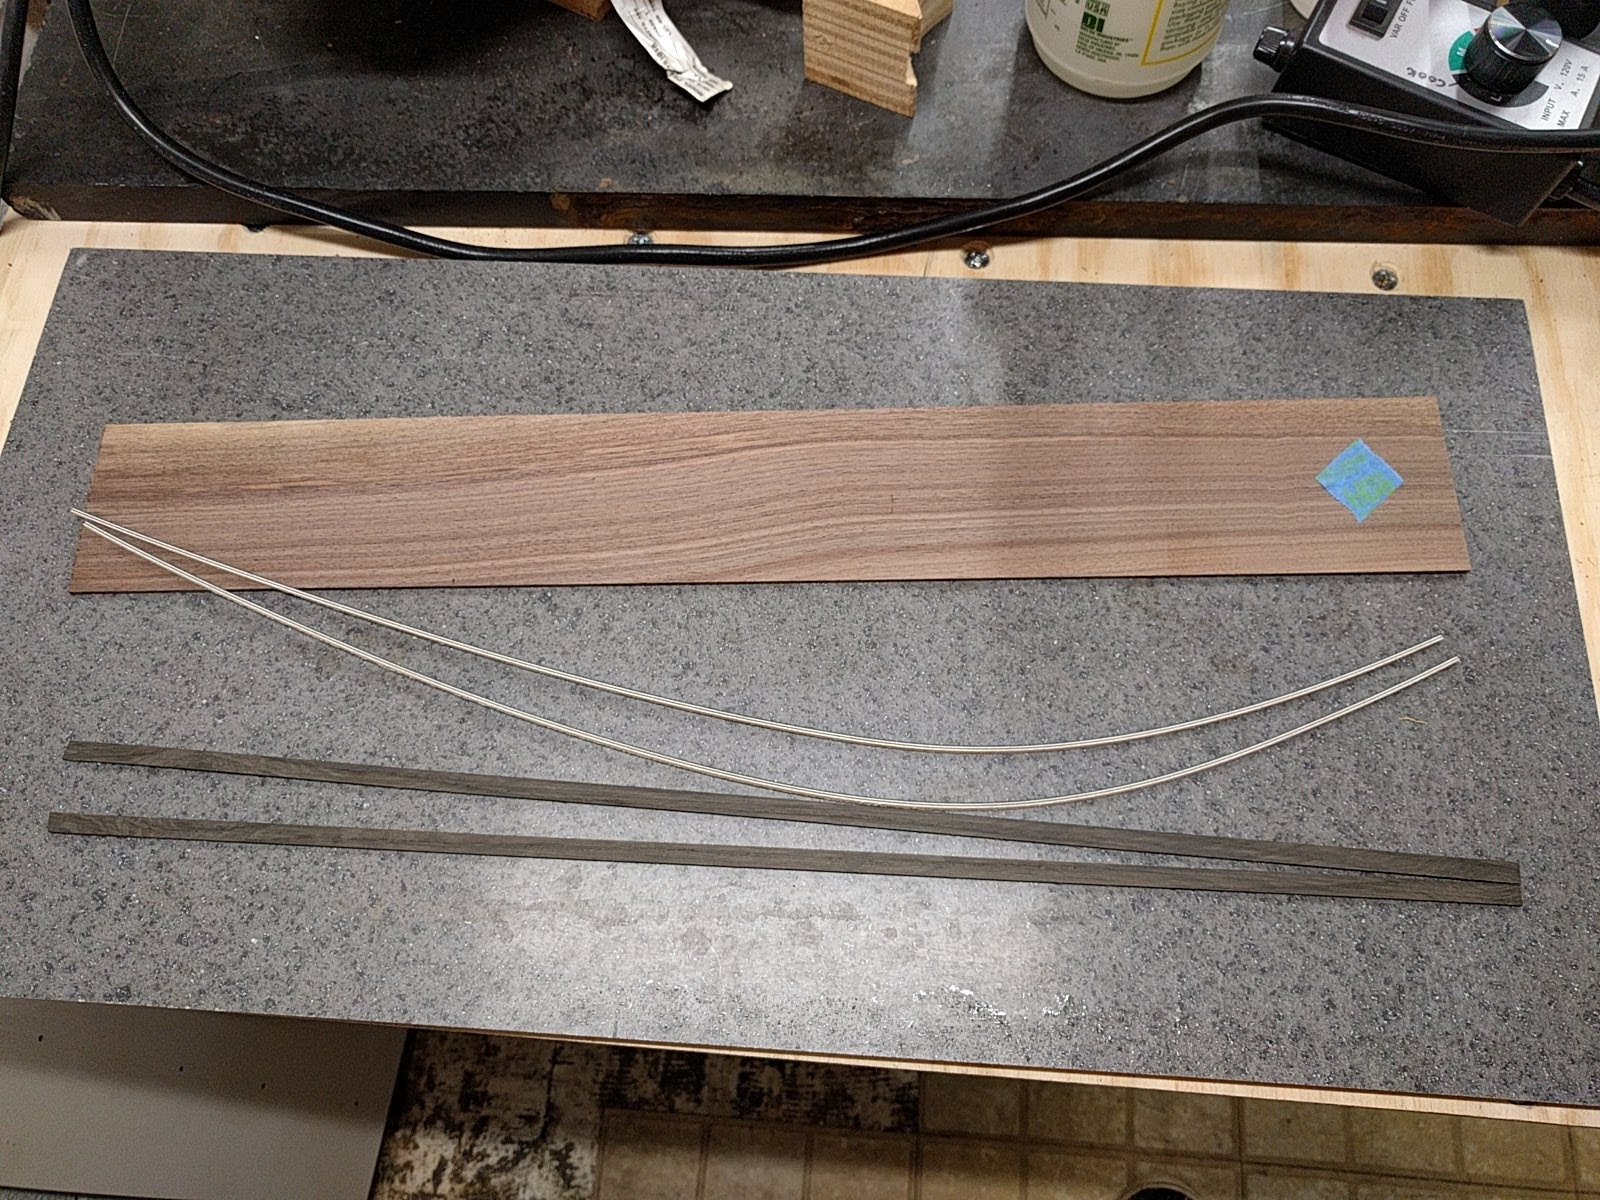
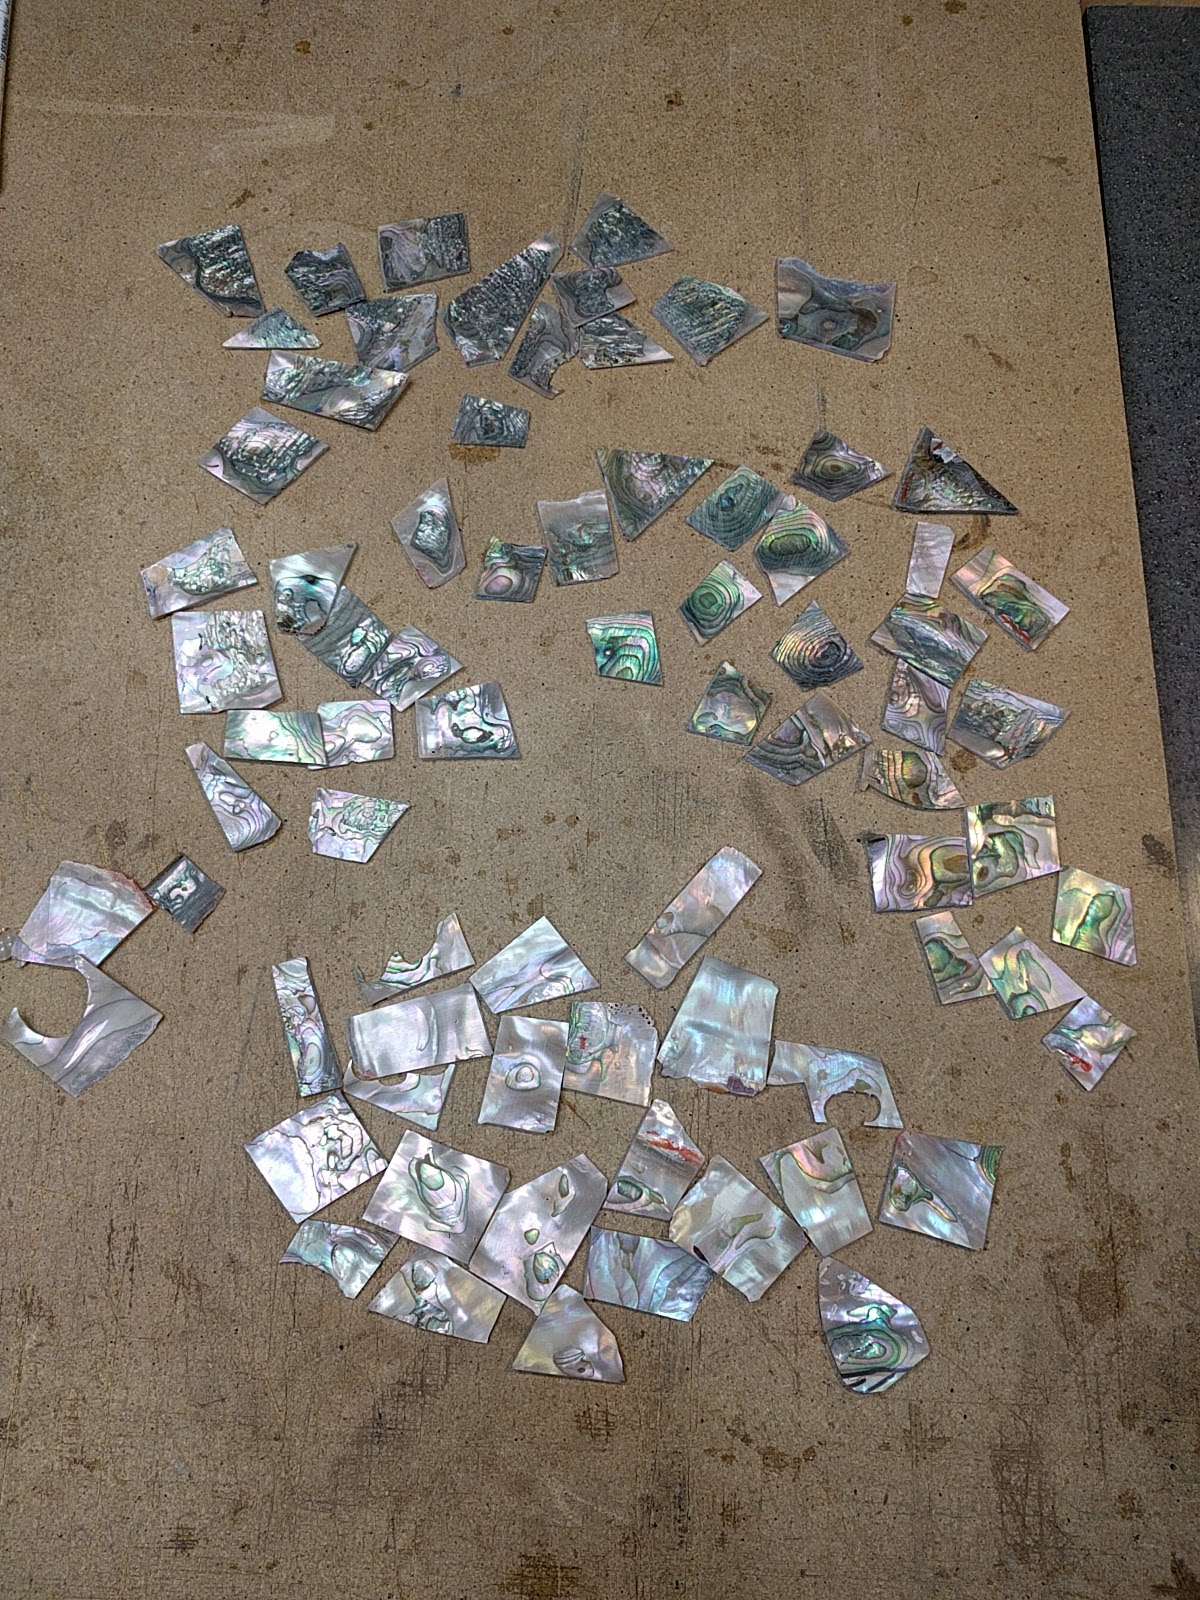
The next step is to pick out what pearl is going to be used.  This instrument has a red abalone rosette, so I decided to match that on the headstock.  Also, the pink color of the pearl would go well with the color of the rosewood.  I have a pretty big supply of red abalone pearl which I cut from shells.  (You can see the process back on page 7 of this blog, from Feb 11, 2018)  Red abalone can be either pinker or greener, and I wanted pearl without a lot of  ‘texture’ lines since the letters are not that big, and I think lines/texture would distract.  Also, these texture lines tend to be points of weakness, and some of the letters have some pretty thin areas. So I got out the box of red abalone pearl slabs, and sorted it by color and texture

To cut the inlay, I print out the text and then stick the paper onto the pearl with rubber cement.  To get the placement of the text on the pearl right, I first position the text where I want it, then tape down one side.  This gives me a little hinge, so I can rubber cement the paper and pearl, let it dry, and then close the hinge to stick the paper down in exactly the right spot.

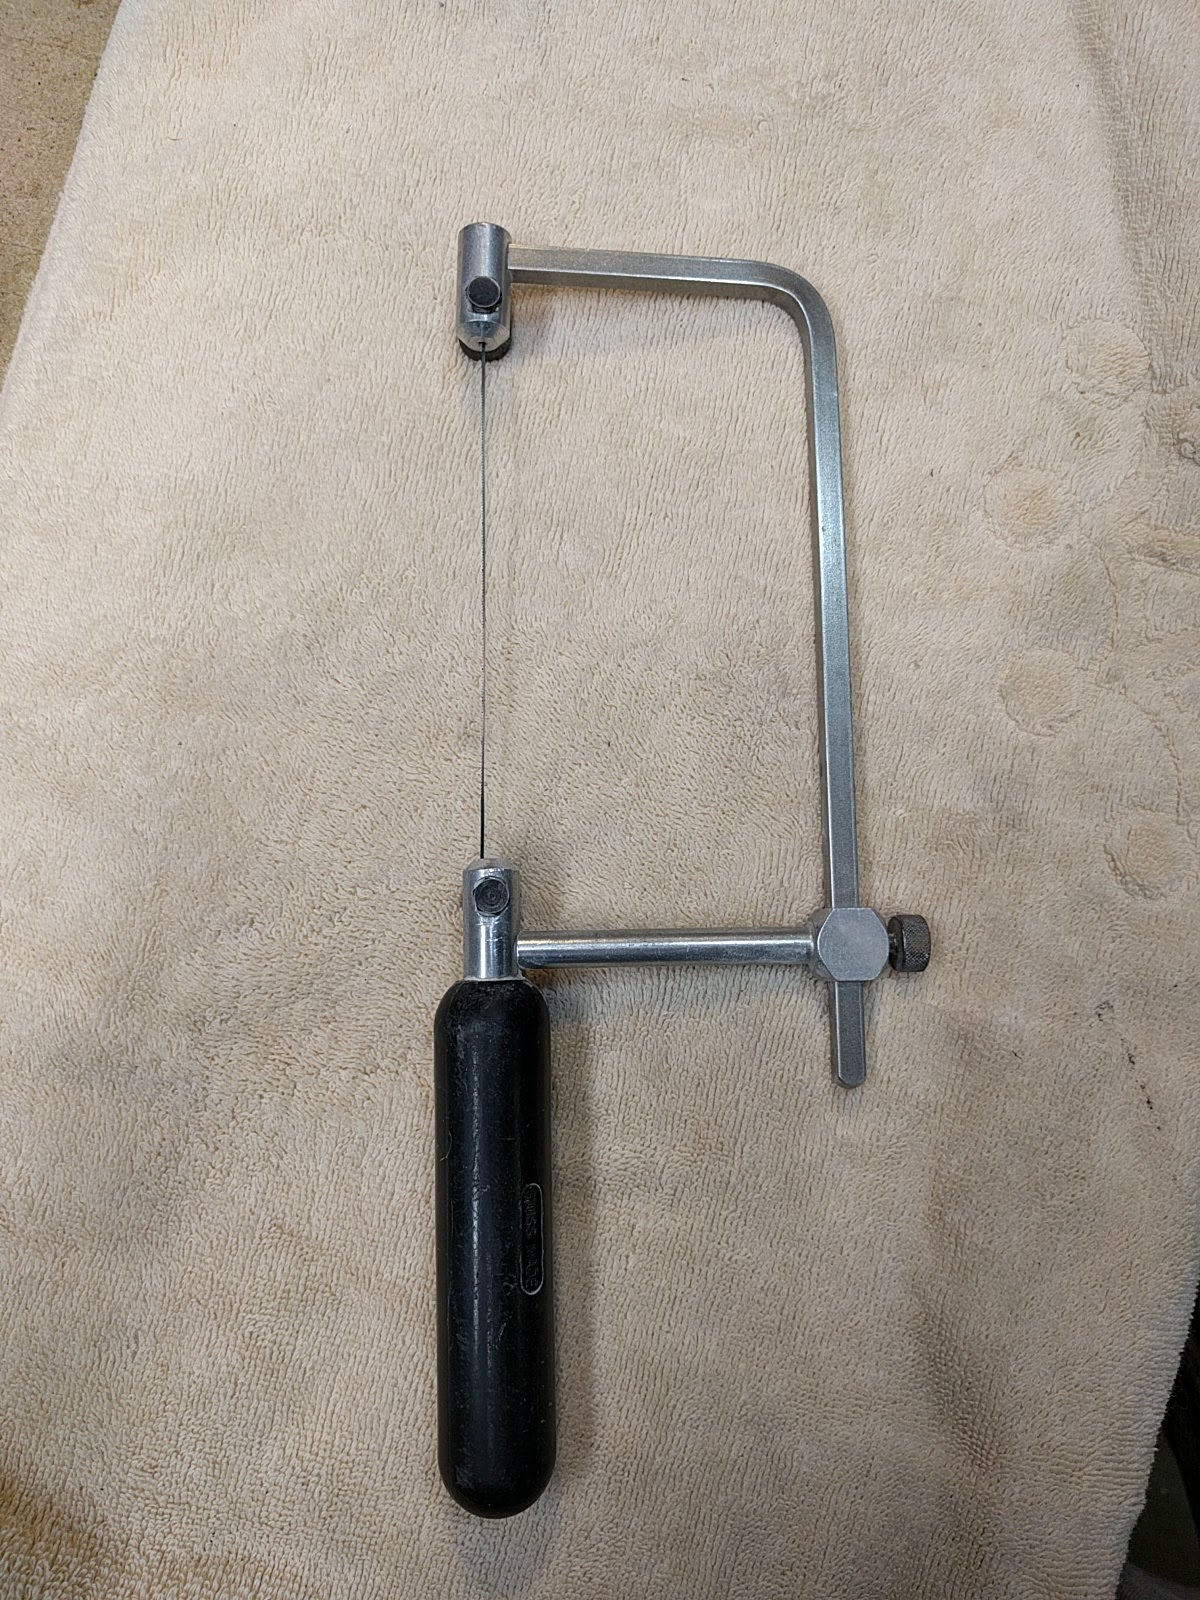
The pearl is cut with a jewelers saw and a fine jewelers blade.  The blades range from pretty fine to really really fine where you can only just barely see the teeth.  The blades wear pretty quickly cutting the somewhat abrasive pearl (they are designed to cut metal) and you break a lot of them, but they are not that expensive.  For these letters I used a moderately fine blade, since some of the letters have fine detail serifs.   As you are cutting you want to go in an order such that you cut the fine delicate detail last to avoid breaking it off handling things while cutting other sides.

Text is interesting in that as readers we are very sensitive to how the letters appear across the ‘page’.  Font designers go to great lengths to make things look right, and the human eye will pick up little inconsistencies.  Because of this I want to make sure that the letters get inlayed aligned exactly correctly.  My solution:  when the letters are cut out I glue them down onto their image on a piece of paper with small drops of water soluble kids glue.

Then I take a small stick, and glue that onto the top of the letters, which are now held in exactly the correct places, with the same kids glue.

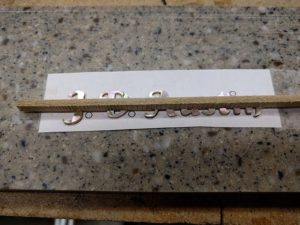
Putting the paper side down on a wet sponge releases the paper without dissolving the glue on the stick, so I get all the letters attached to the stick.  Then I can put this down on the headstock and trace around the letters with a .3 mm pencil, to give me lines to cut out the inlay pockets.

Note: I looked at the above picture, and the leading “J” looked like it was tilted a bit off vertical.  Was it just the camera angle?  I checked the placement of the letters against a printed version, and sure enough the “J” had been glued down just a hair off vertical.  Only a fraction of a millimeter off, but the eye picks this up.  Text is an interesting thing as it relates to human perception.  I corrected the position of the “J” on the stick.

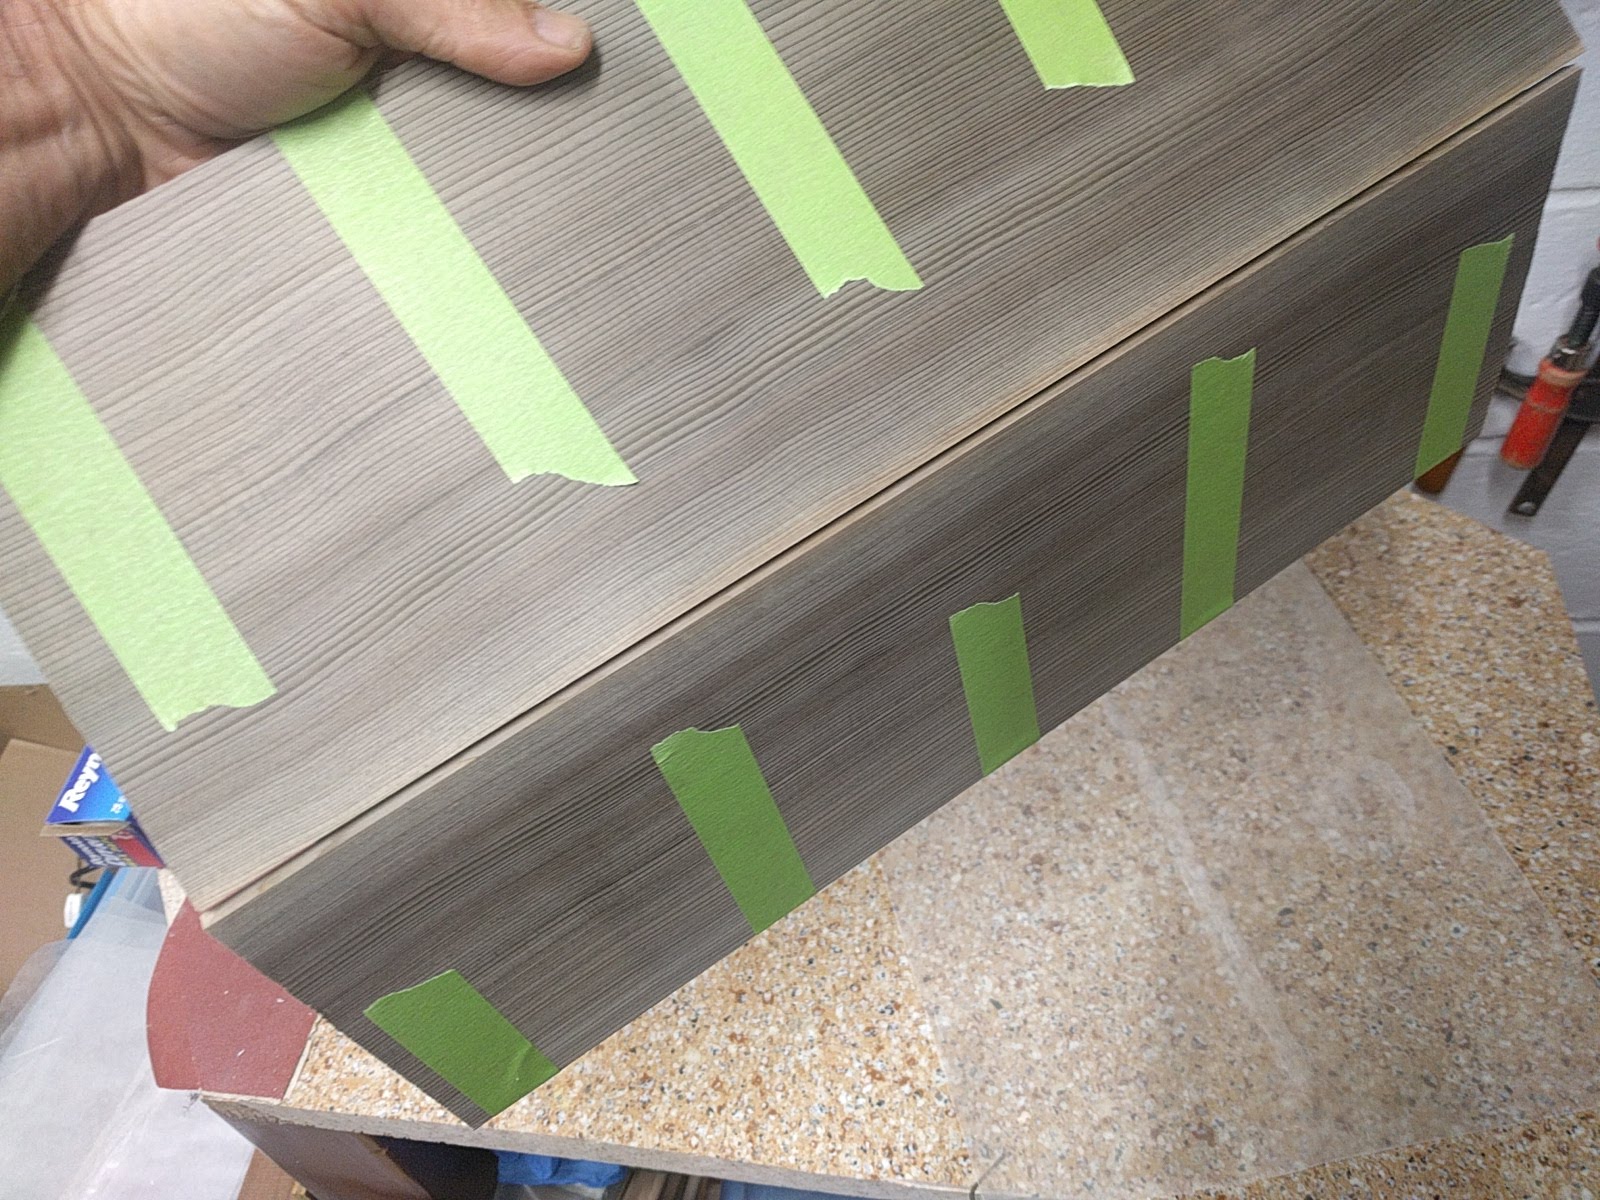
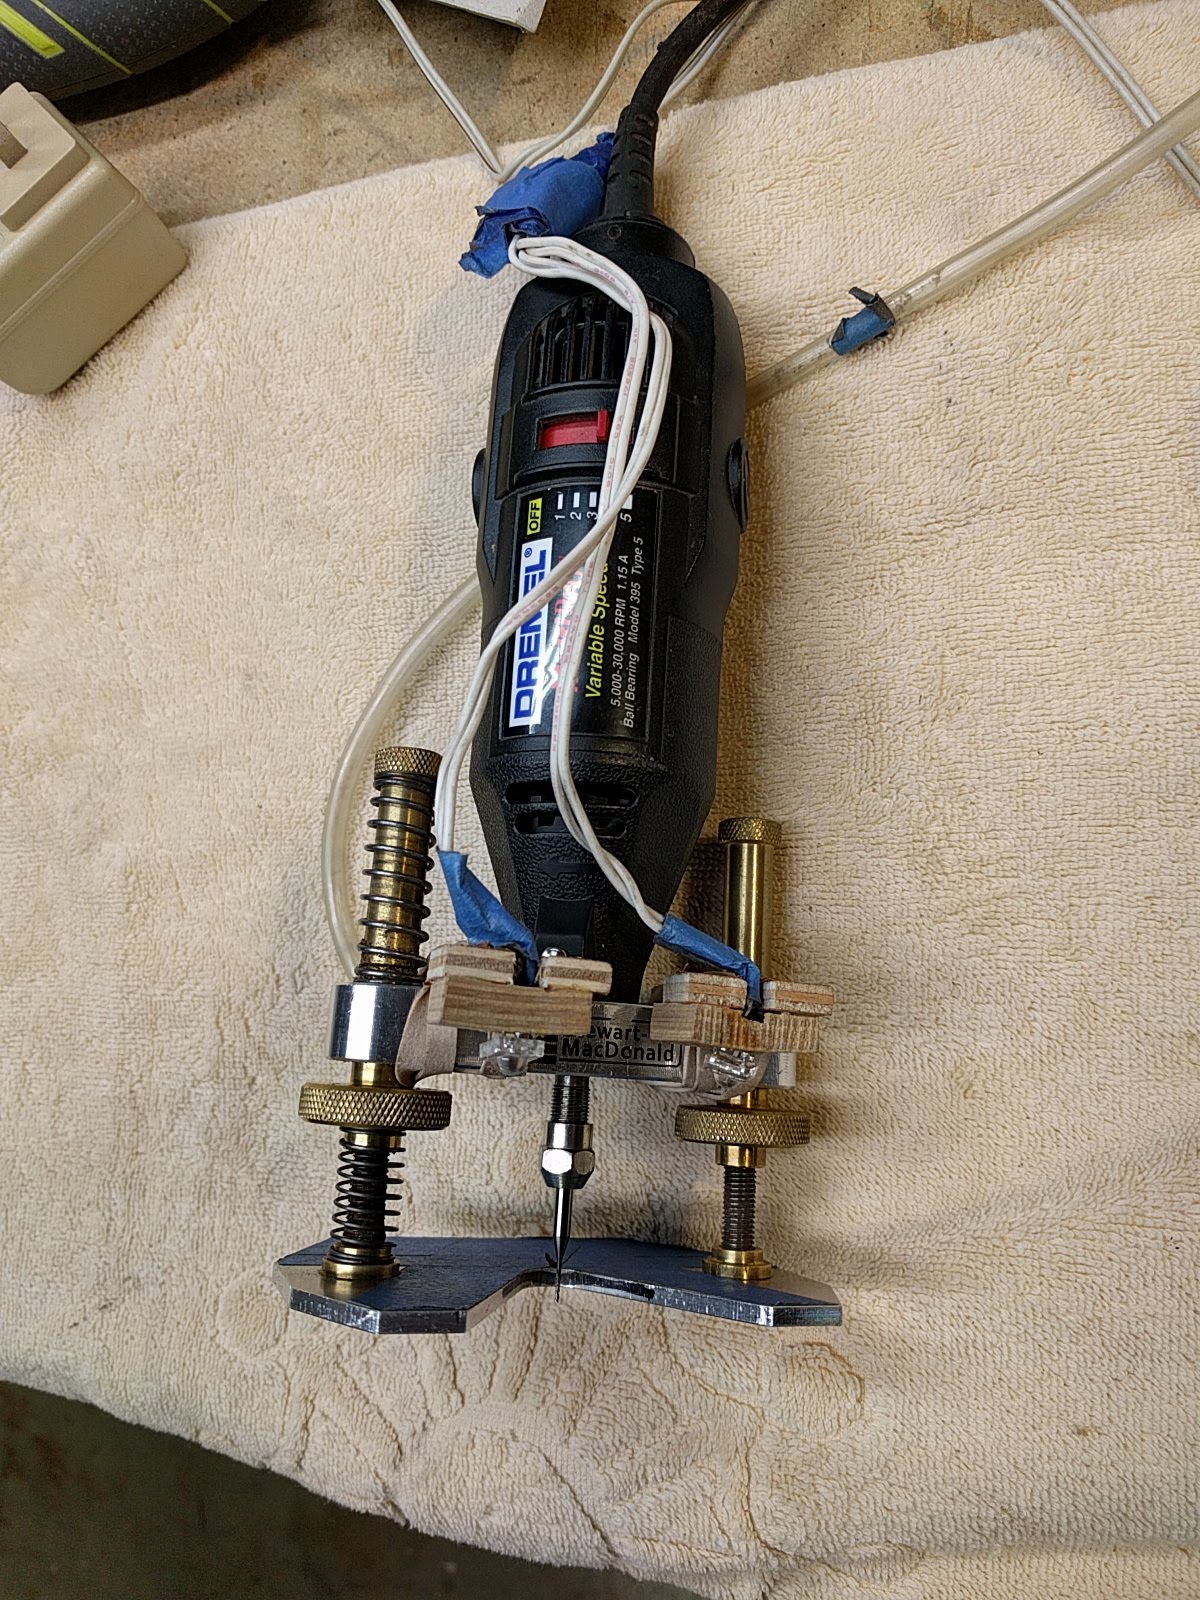
To cut the inlay pockets I use a Dremmel router base from Stewart Mac-Donald to which I have added a couple of little LED lights for better illumination.  Not pretty but works well.  I cut the pockets with a fine carbide bit.  You have to go slowly so as to not break the fine bit, but rosewood cuts much more easily than ebony.  One thing I use which I highly recommend is a foot switch to turn the tool on and off.  I can start and stop the router with my foot, without having to take my hands off of the router.  When you are cutting a narrow area, and want to move the router, being able to pause, hold the tool steady, and turn it off with the foot is very safe and convenient.

Once all the pockets are marked I soak the stick & letters in water a bit to release the kids glue, and then inlay each letter individually.  The pockets are cut out depth-wise so the letters are just a hair above the surface of the headstock, the letters are put in place, and small gaps are filled with some rosewood sawdust, and then the whole thing is flooded with thin CA glue to glue it all down.  Looks pretty ugly at this point.

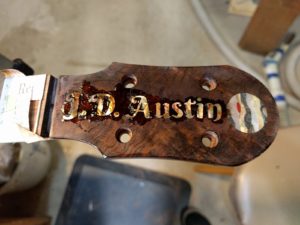
Then you sand off the surface, cutting down through the CA glue, and the pearl that is above the headplate, to reveal (this is always a fun part) the final inlay.

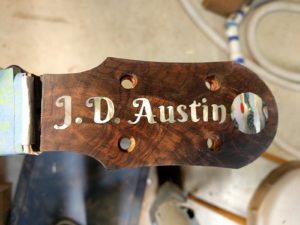
Now I just need to re-finish the headstock.  Hard if not impossible to take a picture that conveys the iridescence of the pearl.  The pink color of the pearl came out looking really nice against the rosewood.

The ‘finishing’ closet

Always an exciting time when the bodies hit the finishing closet and start to get shiny. This is the spare room, can be closed off, and is pretty dust free.  Still a bunch of work to do on the necks, but getting a good finish on the bodies always takes longer.


future idea

I got some spalted tamarind logs from a mango grower I got to know (also have some mango logs he saved for me) and it is pretty spectacular, but (I have not resawn most of it) it is probably going to be a bit too narrow to make a tenor. I’m thinking of trying a 3-piece back, like some older guitars. Something like a piece of curly koa as a center triangle, and black & white spalted tamarind for the other back plates and the sides. Like this:

2’d chances

As I build out the shop here in Florida, I have come across an unexpected benefit of setting up a second shop.  I purposely did not bring down a number of jigs/fixtures that I have made over the years, with the intent of re-making them so that I do not have to carry than back and forth.  In the process of re-making them I have had the chance to incorporate a number of improvements that I have thought of over time.  There always seems to be something more important to do than re-make a jig is basically works, even though there are some aspects which are a bit of a pain, require more setup, and extra clamp here and there, etc.  When you have to make them fresh, there is no excuse not to incorporate evolutionary ideas.  I like my new jigs, and may re-make the ones up north when I get back there.

A milestone – the binding is finished

The binding is finished on all 6 instruments, meaning that it is installed, and things are all sanded down nice and flush so they all can get their first real coat of sealer, and I can get to see how things will really look under the final finish.  Result – I am very well pleased by all 6 instruments.  One tries to pick out binding that will work well with the back and side wood, but until it is all installed, and you get the first coat of finish on it, one never really knows.  Particularly with some new binding.

I got some quilted sapele cut-offs from a place that saws guitar wood that was just big enough for me to turn into binding.  While the ‘quilted’ nature is a bit subtle on the scale of binding I am very pleasantly surprised how well the red-brown color of the sapele goes with the sycamore back and sides.  It is a really nice warm look.  Could easily become one of my favorite bindings for a sycamore instrument, koa being the current top contender, again because of a rich warm brown color.

From left to right the instruments are:

concert (commission)- quilted maple, Pennsylvania red cedar top, black bog oak binding

concert (commission) – ambrosia sycamore, Pennsylvania red cedar top, curly koa binding

tenor (available) – local curly maple, local European spruce top, black bog oak binding

tenor (available) – Pennsylvania black walnut, streaky water-tank redwood top, curly maple binding

tenor (available) – ambrosia sycamore, Pennsylvania red cedar top, quilted sapele binding

concert (available) – koa, Alaskan yellow cedar top, sycamore binding.

I realized that this batch contains two kind of ‘inversely symmetric’ instruments.  There is a sycamore concert with koa binding, and there is a koa concert with sycamore binding.  Did not realize this symmetry until I was sanding the binding.