Mango Man

Mango Man
When we were down at our house in Florida last July, we went to Zill’s mango orchard to get lots of delicious fruit. (July is mango season.  I have 5 young trees planted, three of which bore fruit this year)  He grows all sorts of interesting varieties. In the course of chatting, it came up that I make musical instruments, and I would be interested in getting some mango wood if he ever took down any big trees. Well, it just so happened that he had done just that and he would save the wood until I came down in October.  I brought my chain saw with me when I came down, and today I went over to cut up things. Got some nice quarter-sawn pieces, and one piece from a smaller log that is quite curly. Walter Zill is a wonderful man (and quite a character), saving wood for me and bringing the tractor around to help roll over the log as I cut through it.


It is clear to me now

When doing pearl inlay, on a pattern which is (or should be) dependent on the exact piece of pearl, and the grain of that pearl, I do the following.  I take the paper pattern to Staples, and have a copy made onto transparency.  Now I can align the pattern exactly to the pearl, to get the effect I am looking for.  In this case, I am making a feather for a customer, and wanted to make sure that the top of the feather both fits on the pearl, and that the pearl pattern in the big top piece is nice and dramatic.

Piping pig

This little pig went to market.  This little pig stayed home and played the bagpipes.

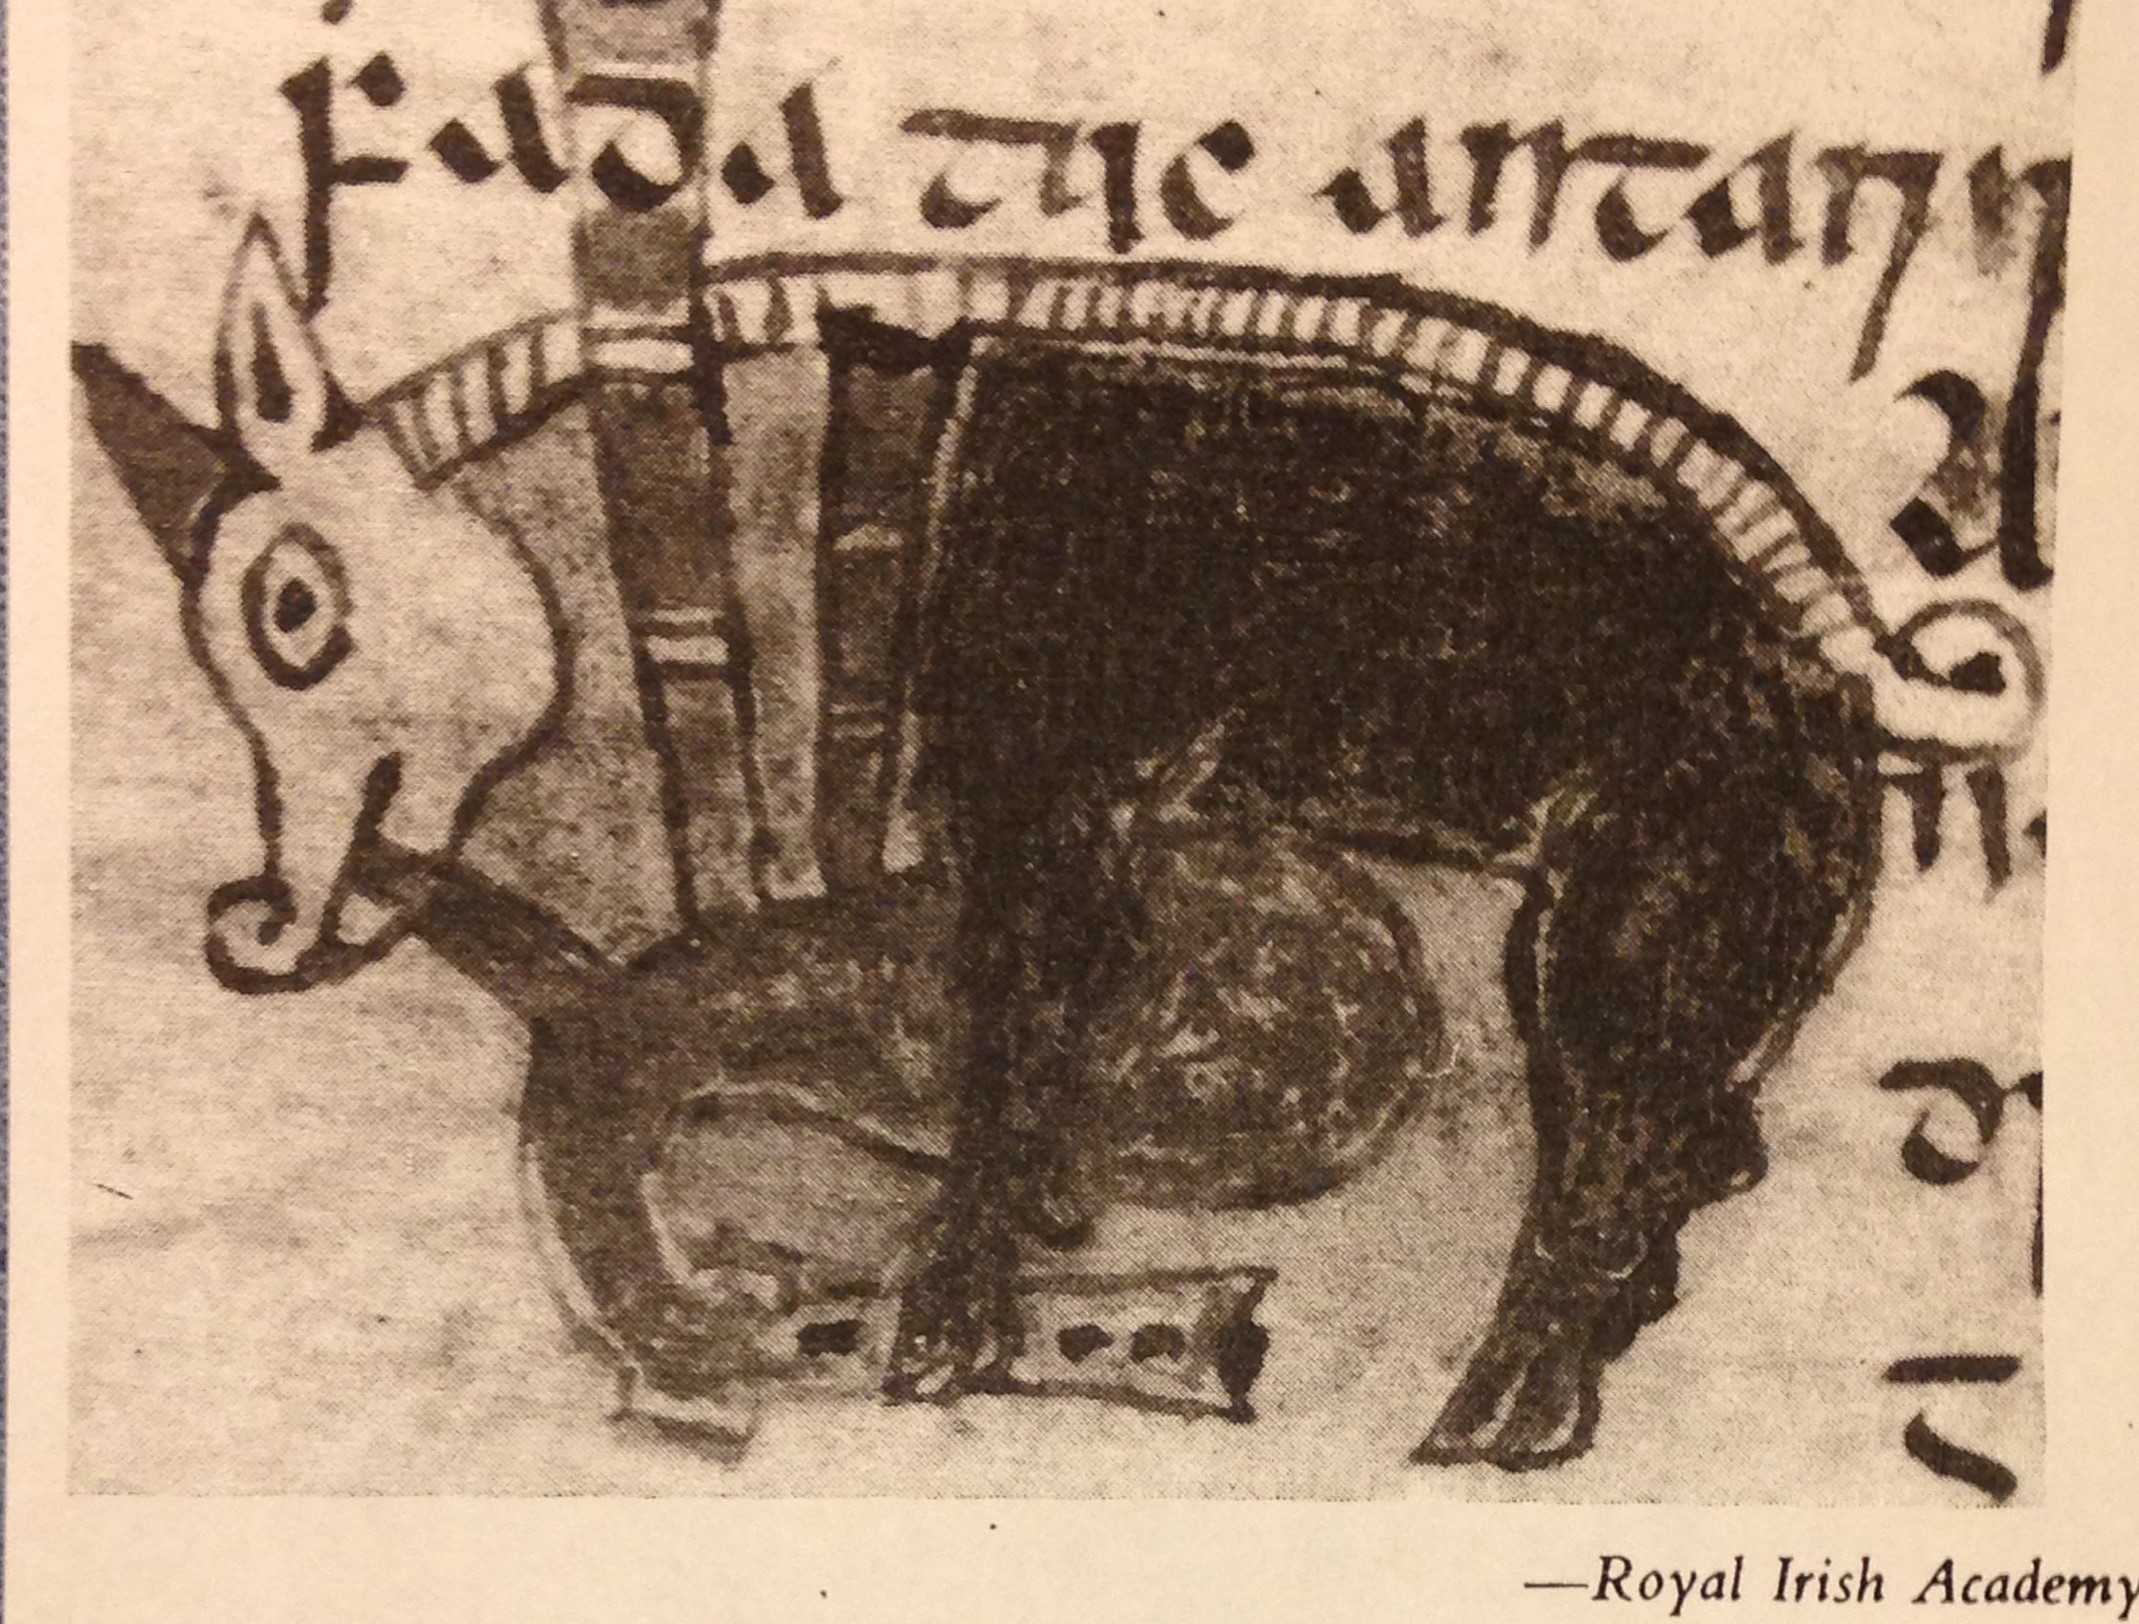
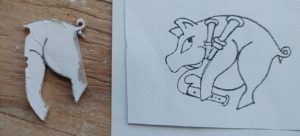
The idea of a pig playing the bagpipes goes way back in time.  Two examples:

The drawing on the right is from the 14’th or 16’th century.

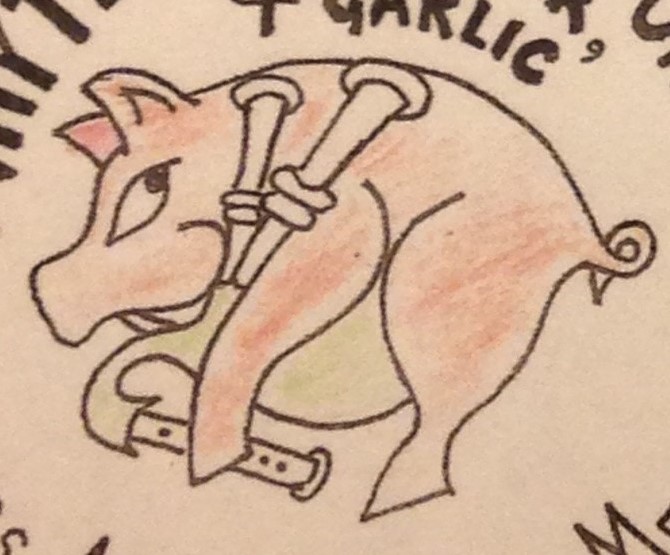
What has all this got to do with ukuleles?  Well, I have a customer who plays the bagpipes, and who has a personal logo (used on jars of chutney he makes for example) of a ‘piping pig’.

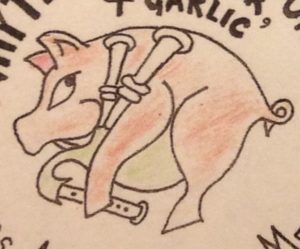
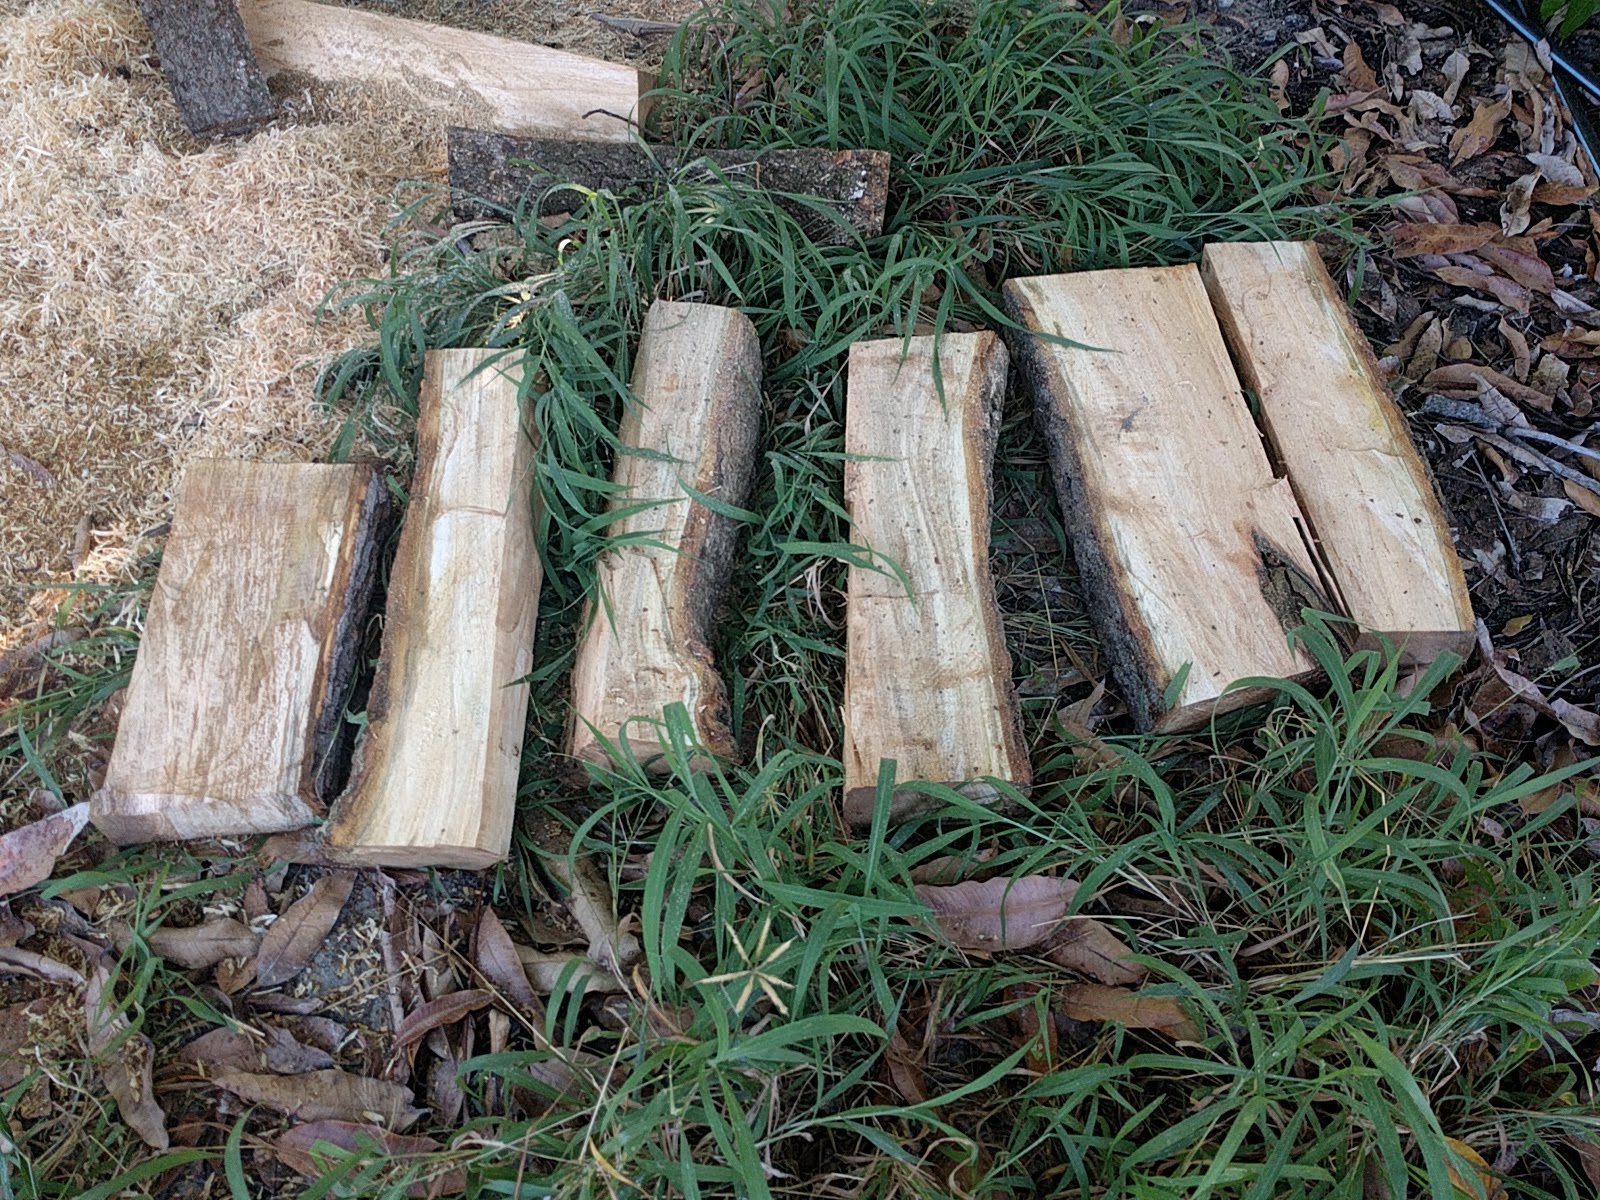
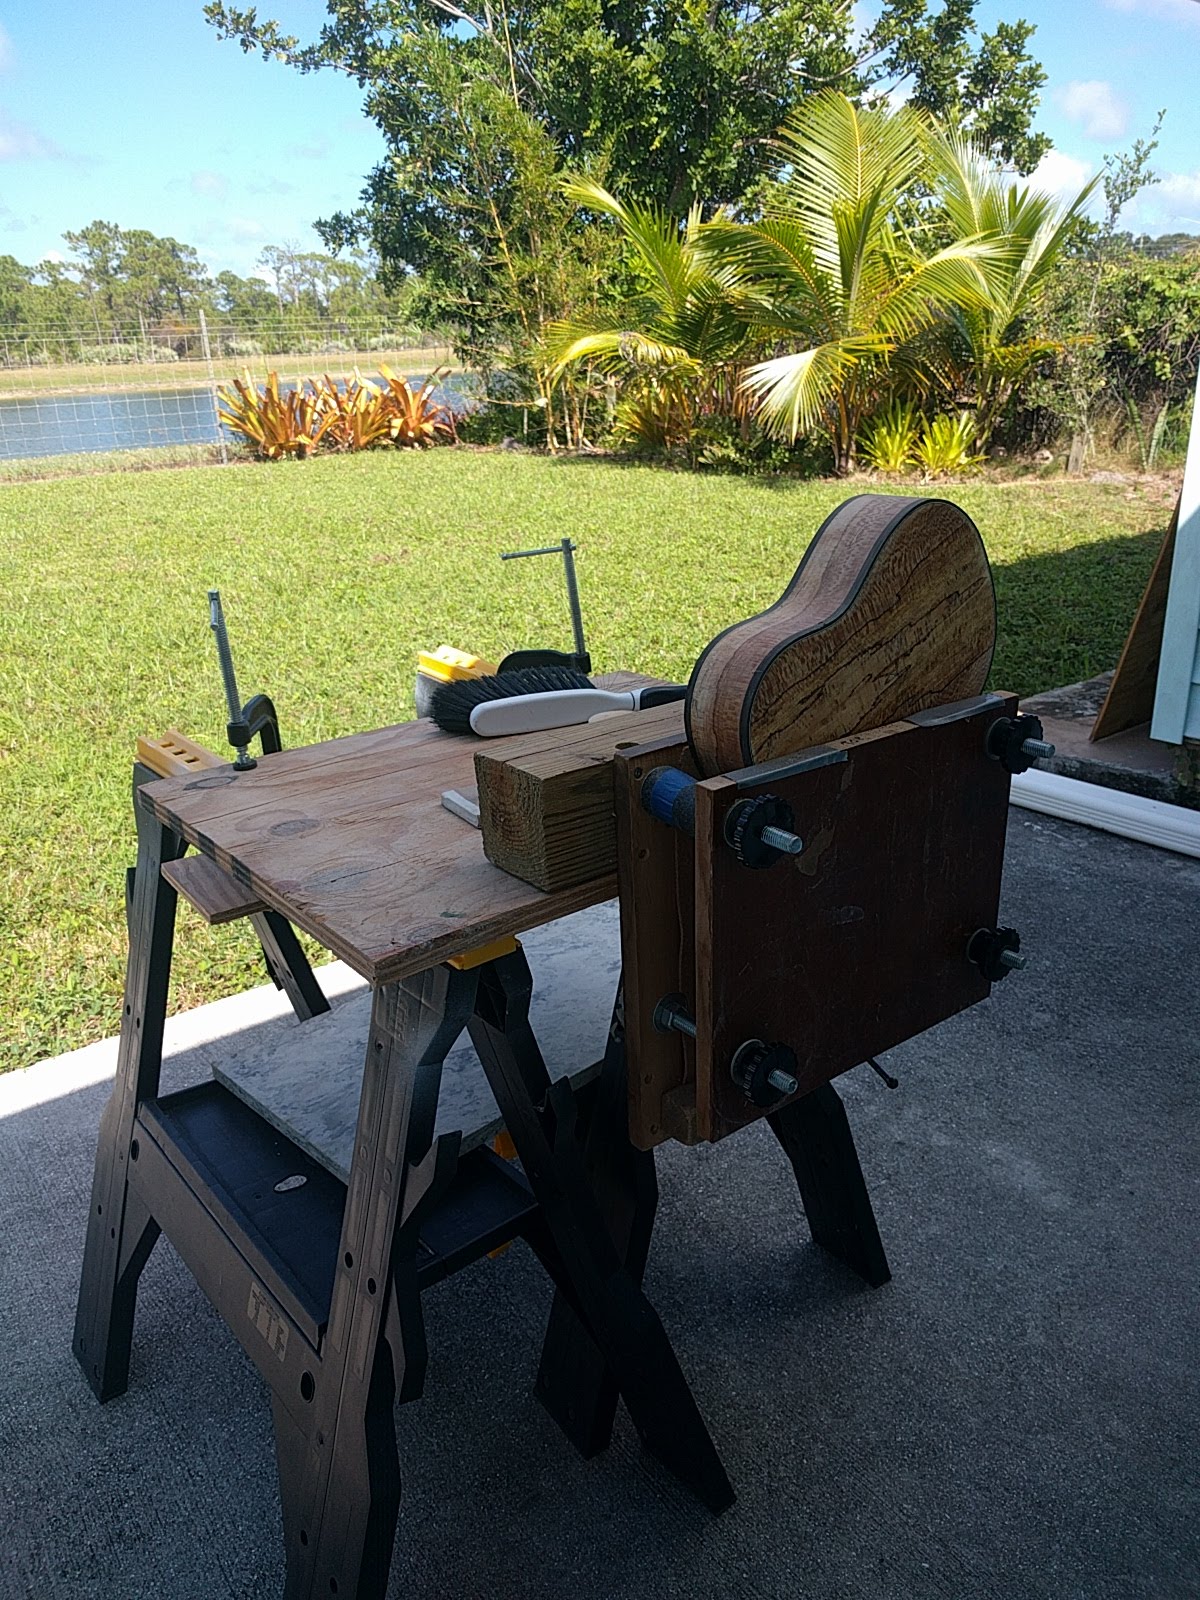
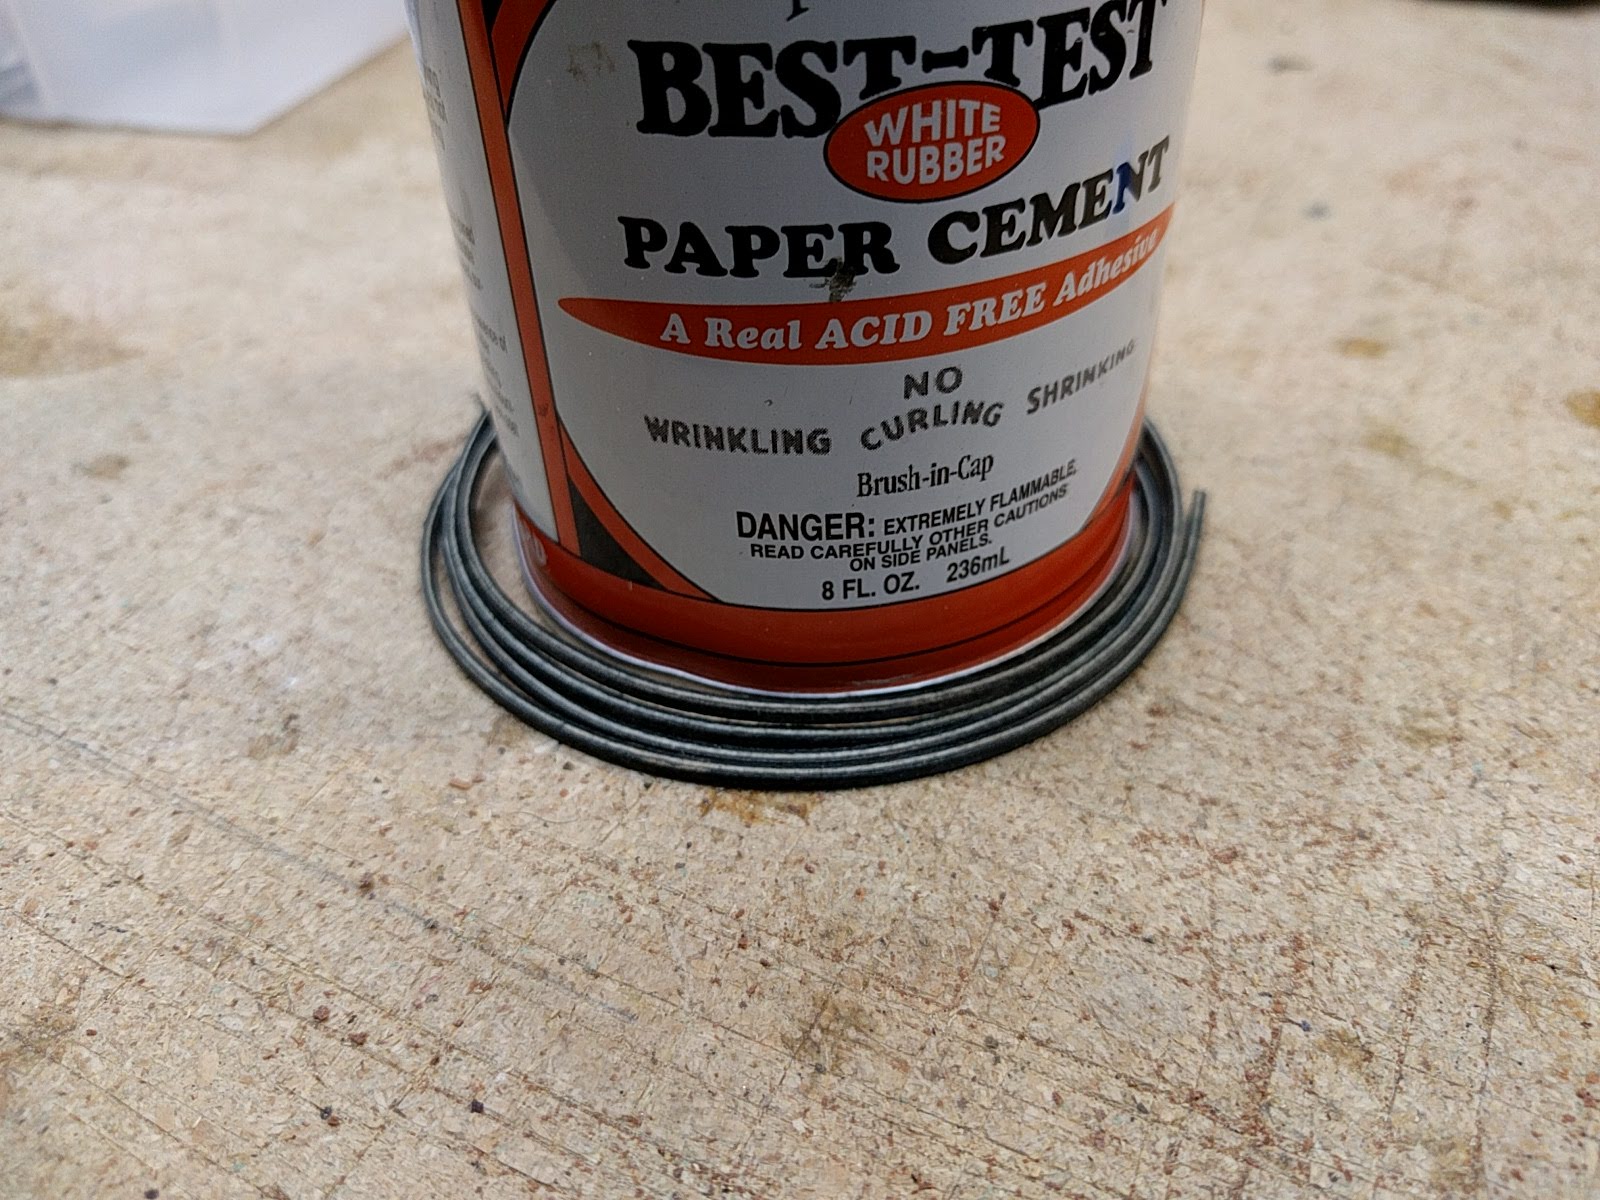
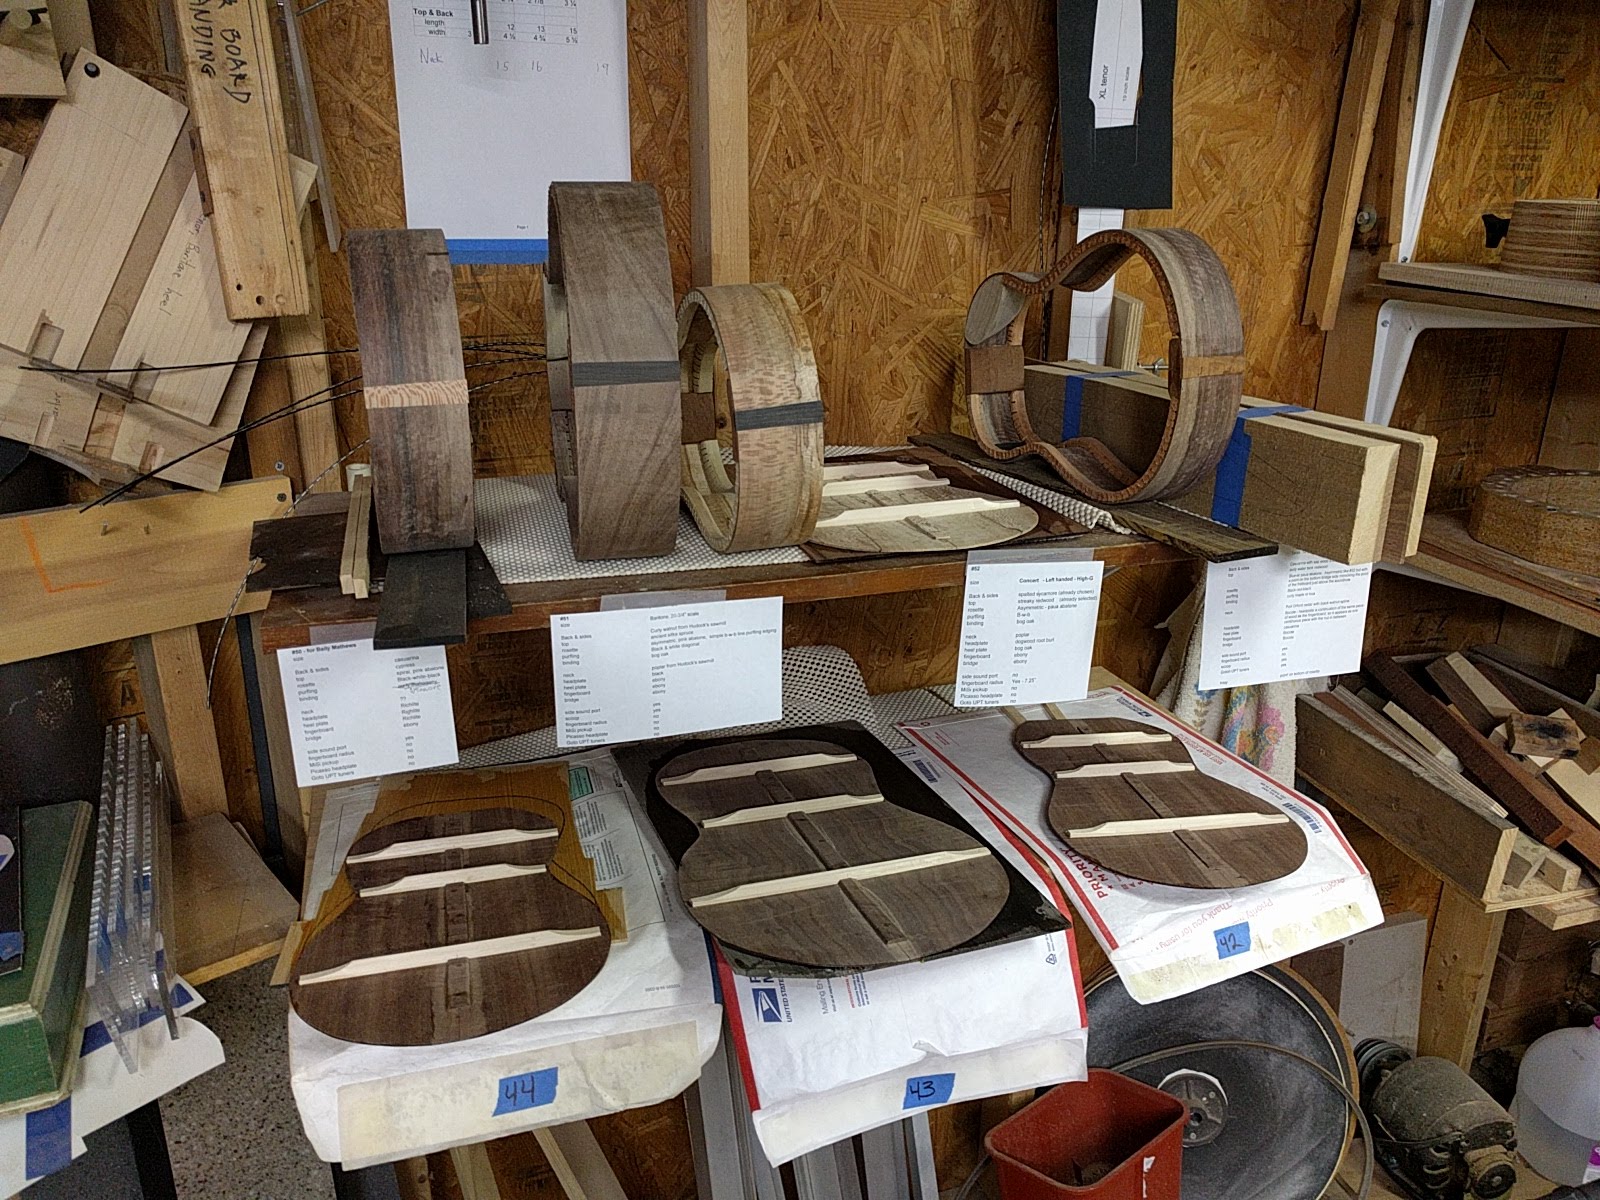
An interesting design, but that was all I thought about it until we got to discussing bagpipes.  He said that the pipes themselves on his were made of ivory.  I remarked that ivory carries a lot of bad stuff with it these days, CITES regulations, public perception, etc.  He said, ‘not a problem, the pipes are made of mastodon ivory, from mastodons that died thousands of years ago’.   The old tusks are dug out of tundra up north.  I realized that I had some pieces of mastodon ivory that I has acquired a number years ago, just because I though it was pretty cool.  So, with this I could do a piping pig inlay, with the pipes made of mastodon ivory, just like the real thing.  That was the clincher.  So, here is a brief description of how I go about producing such an inlay.

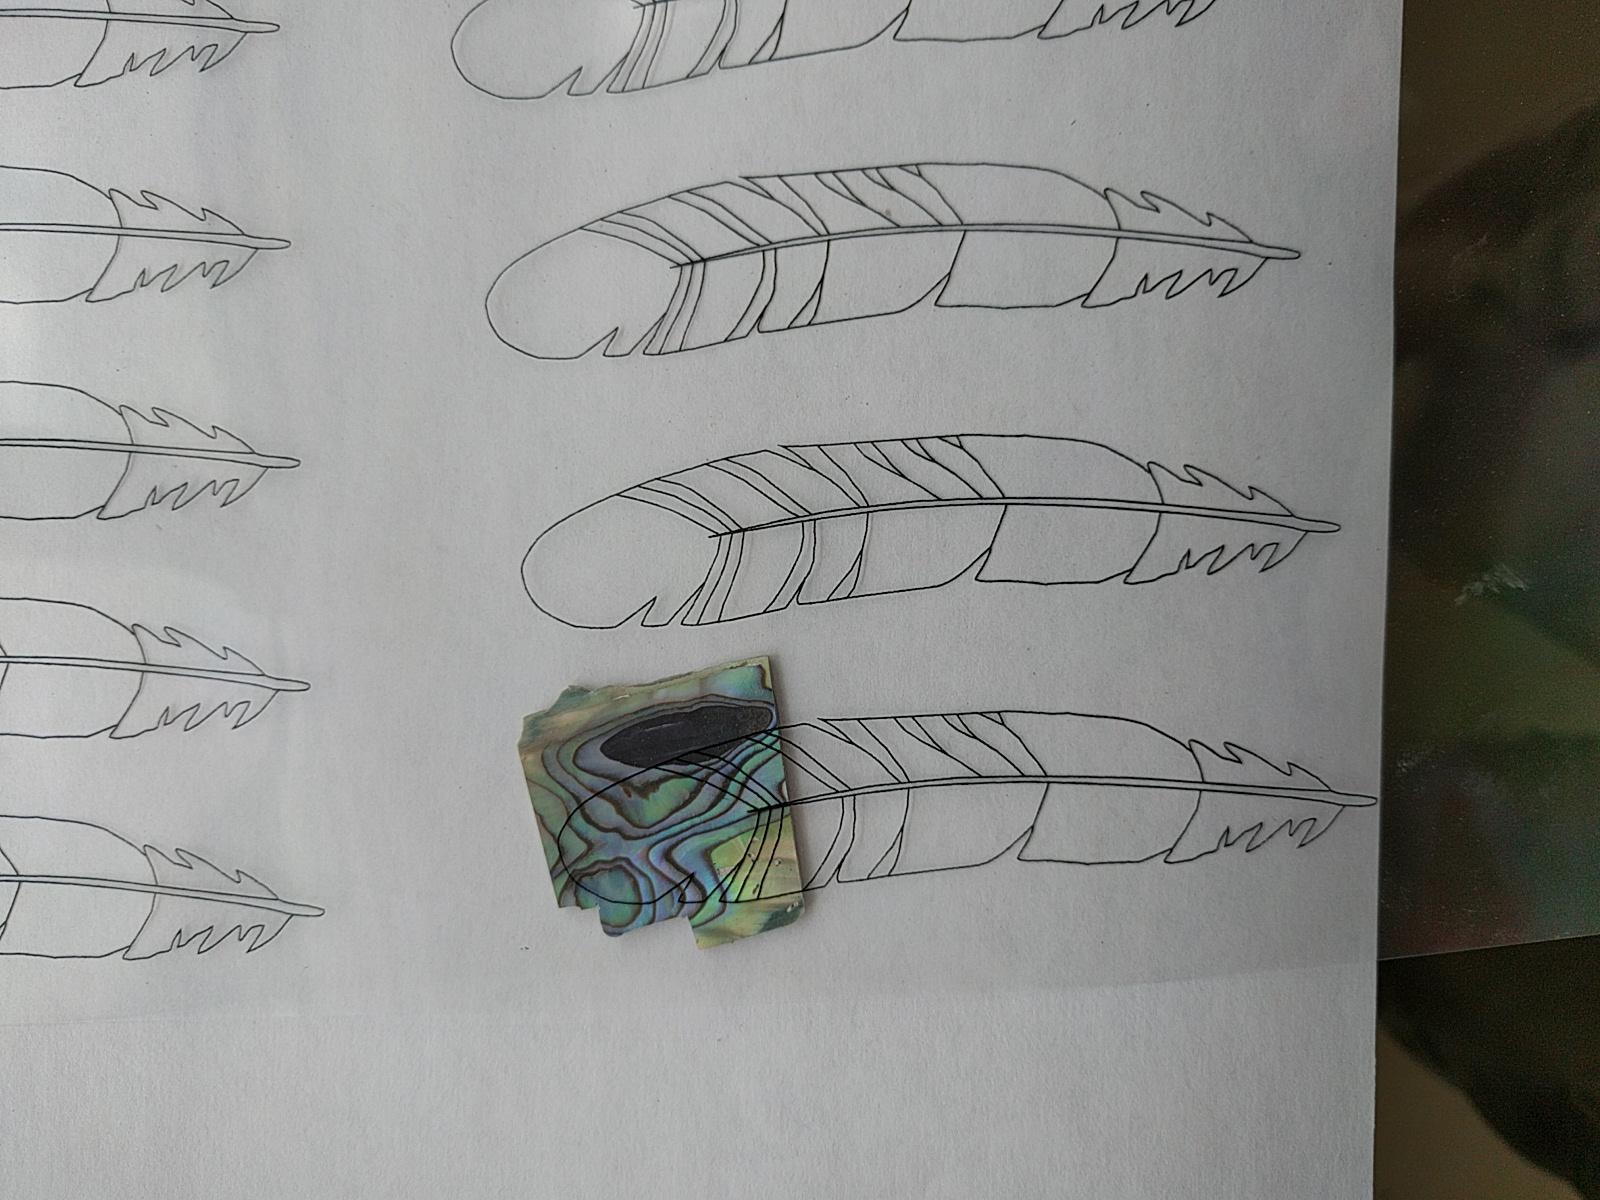
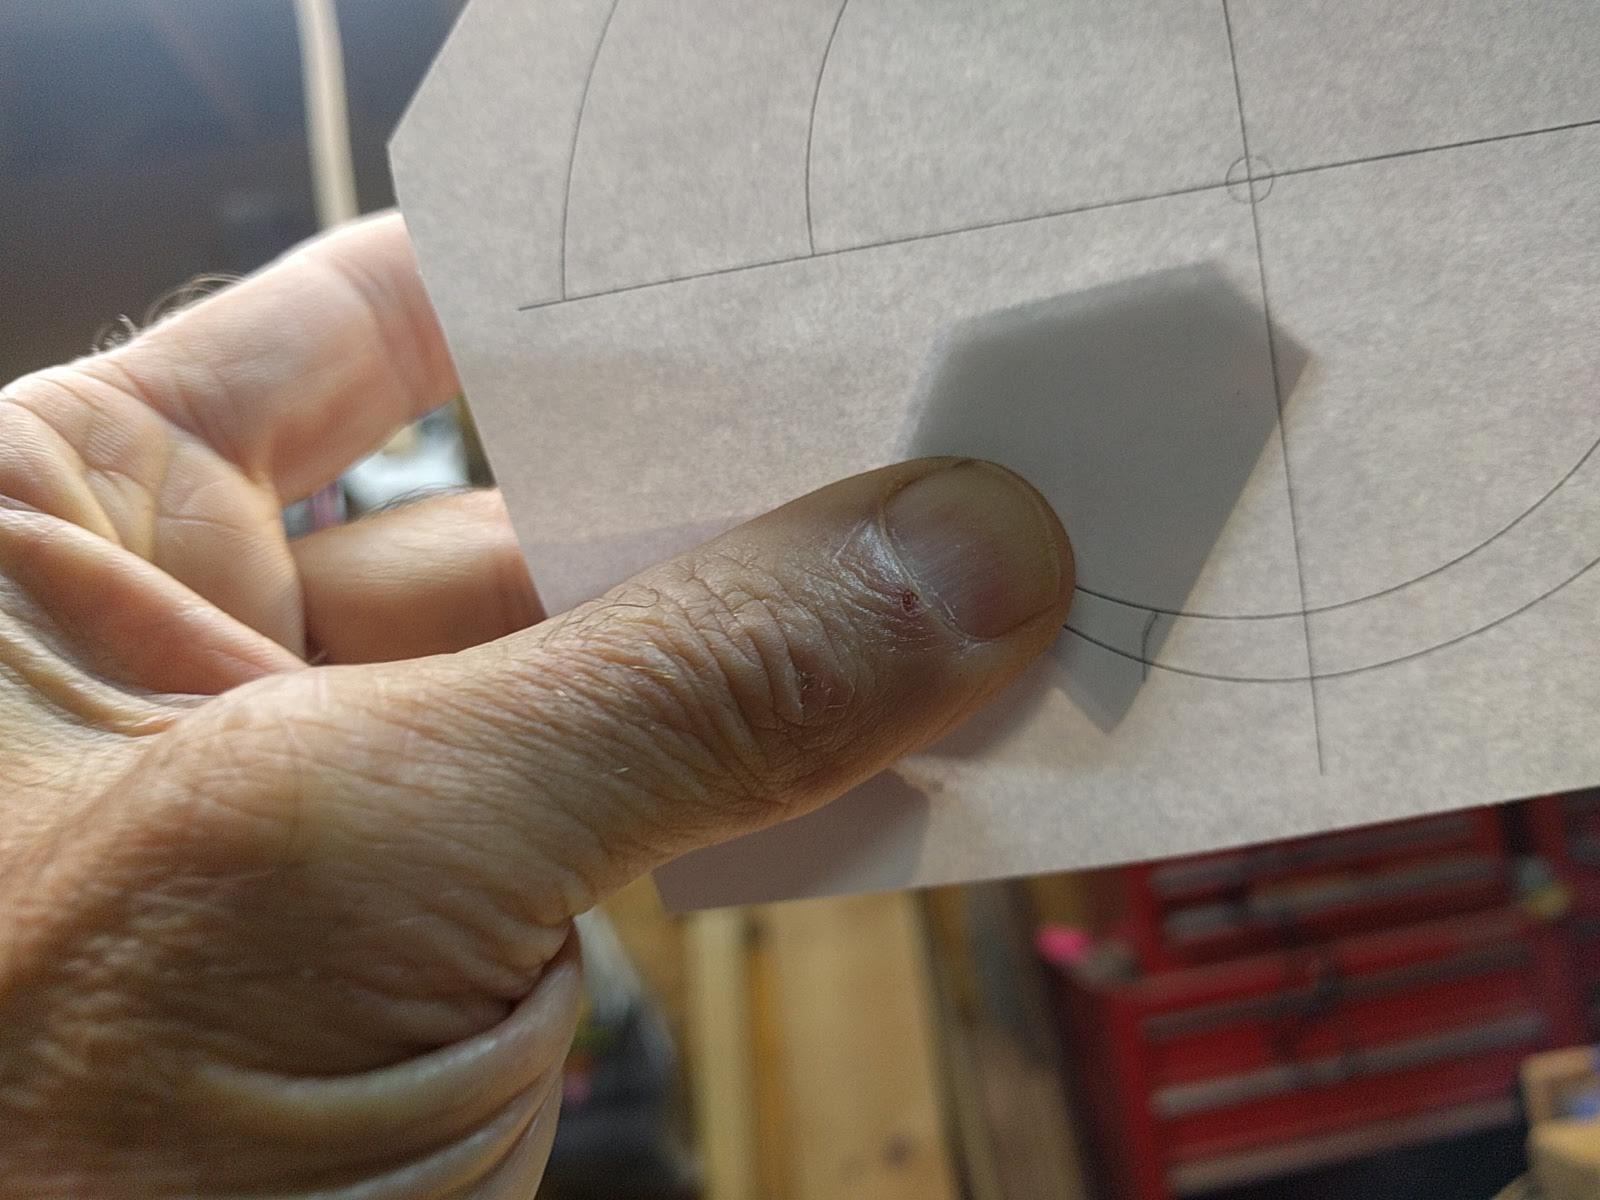
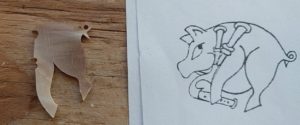
From his drawing, using Corel Draw on the computer I made an full-size outline that I could print out in multiple copies.

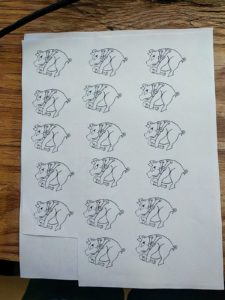
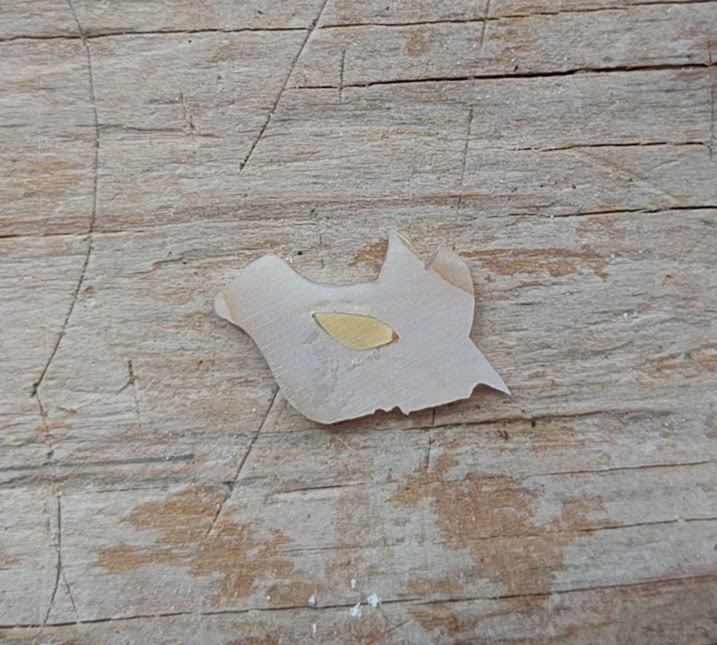
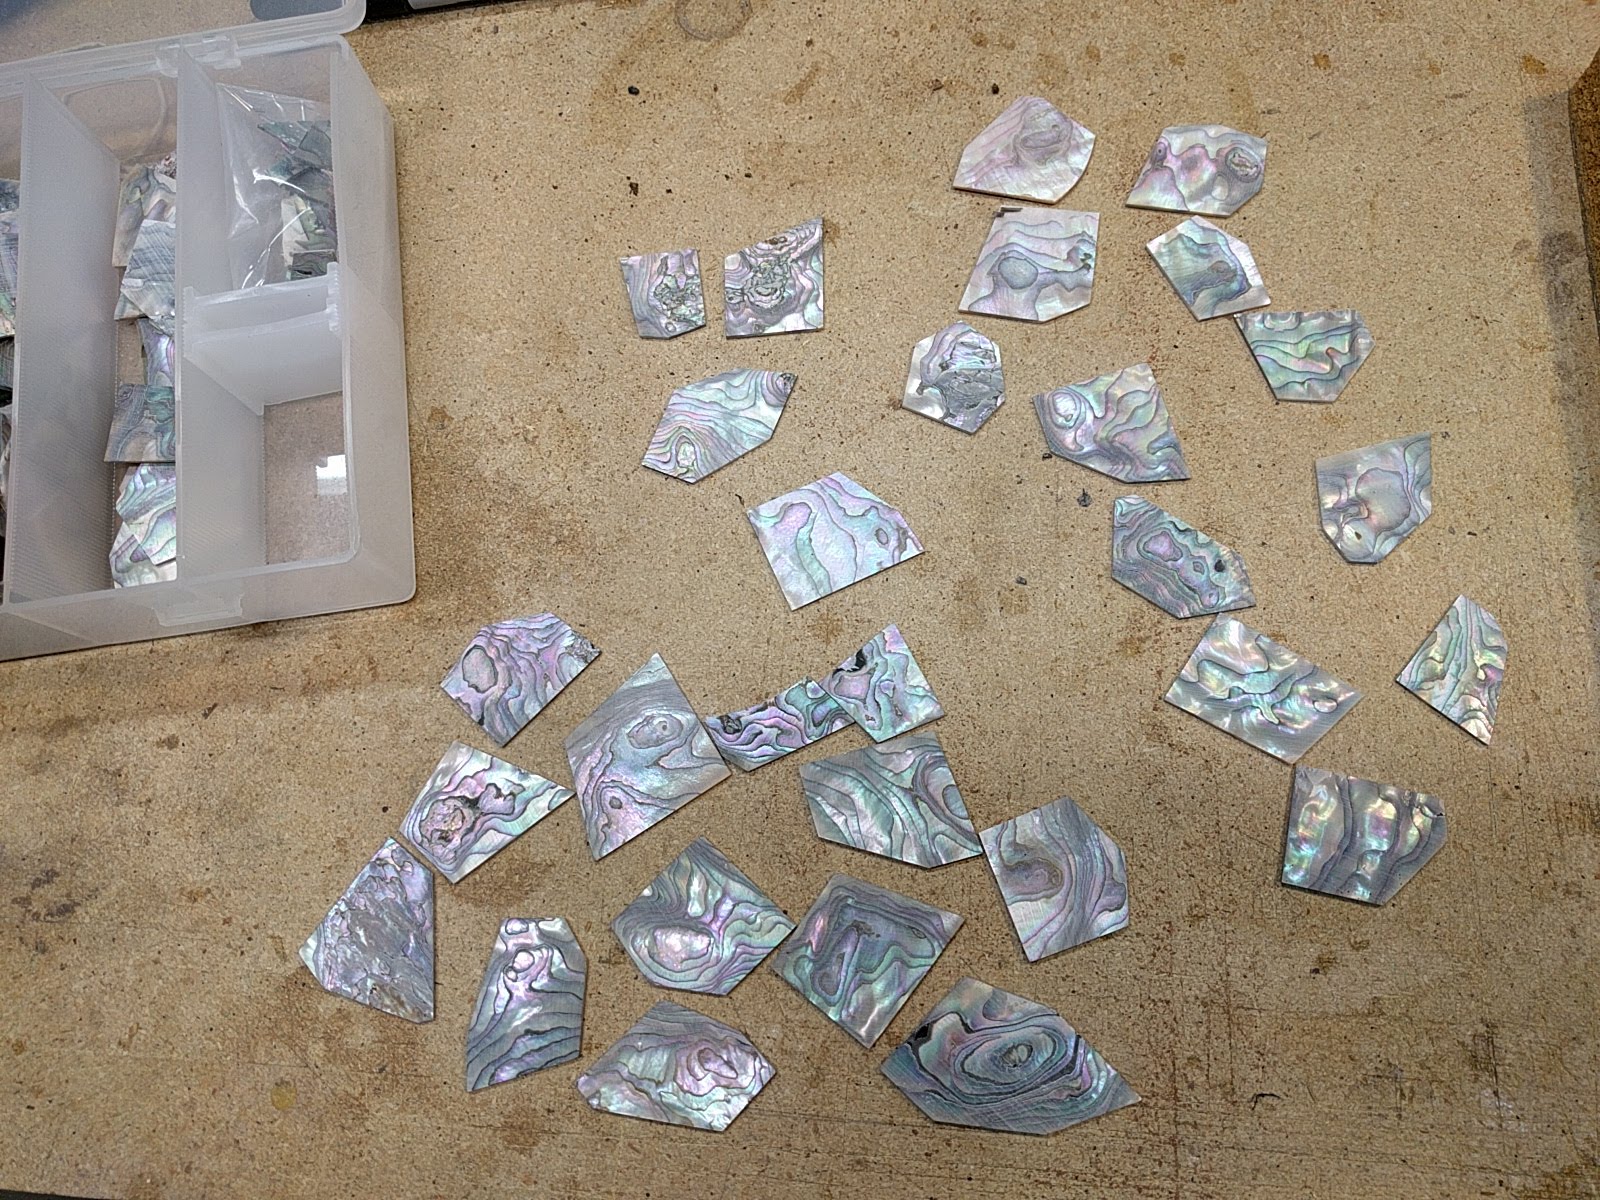
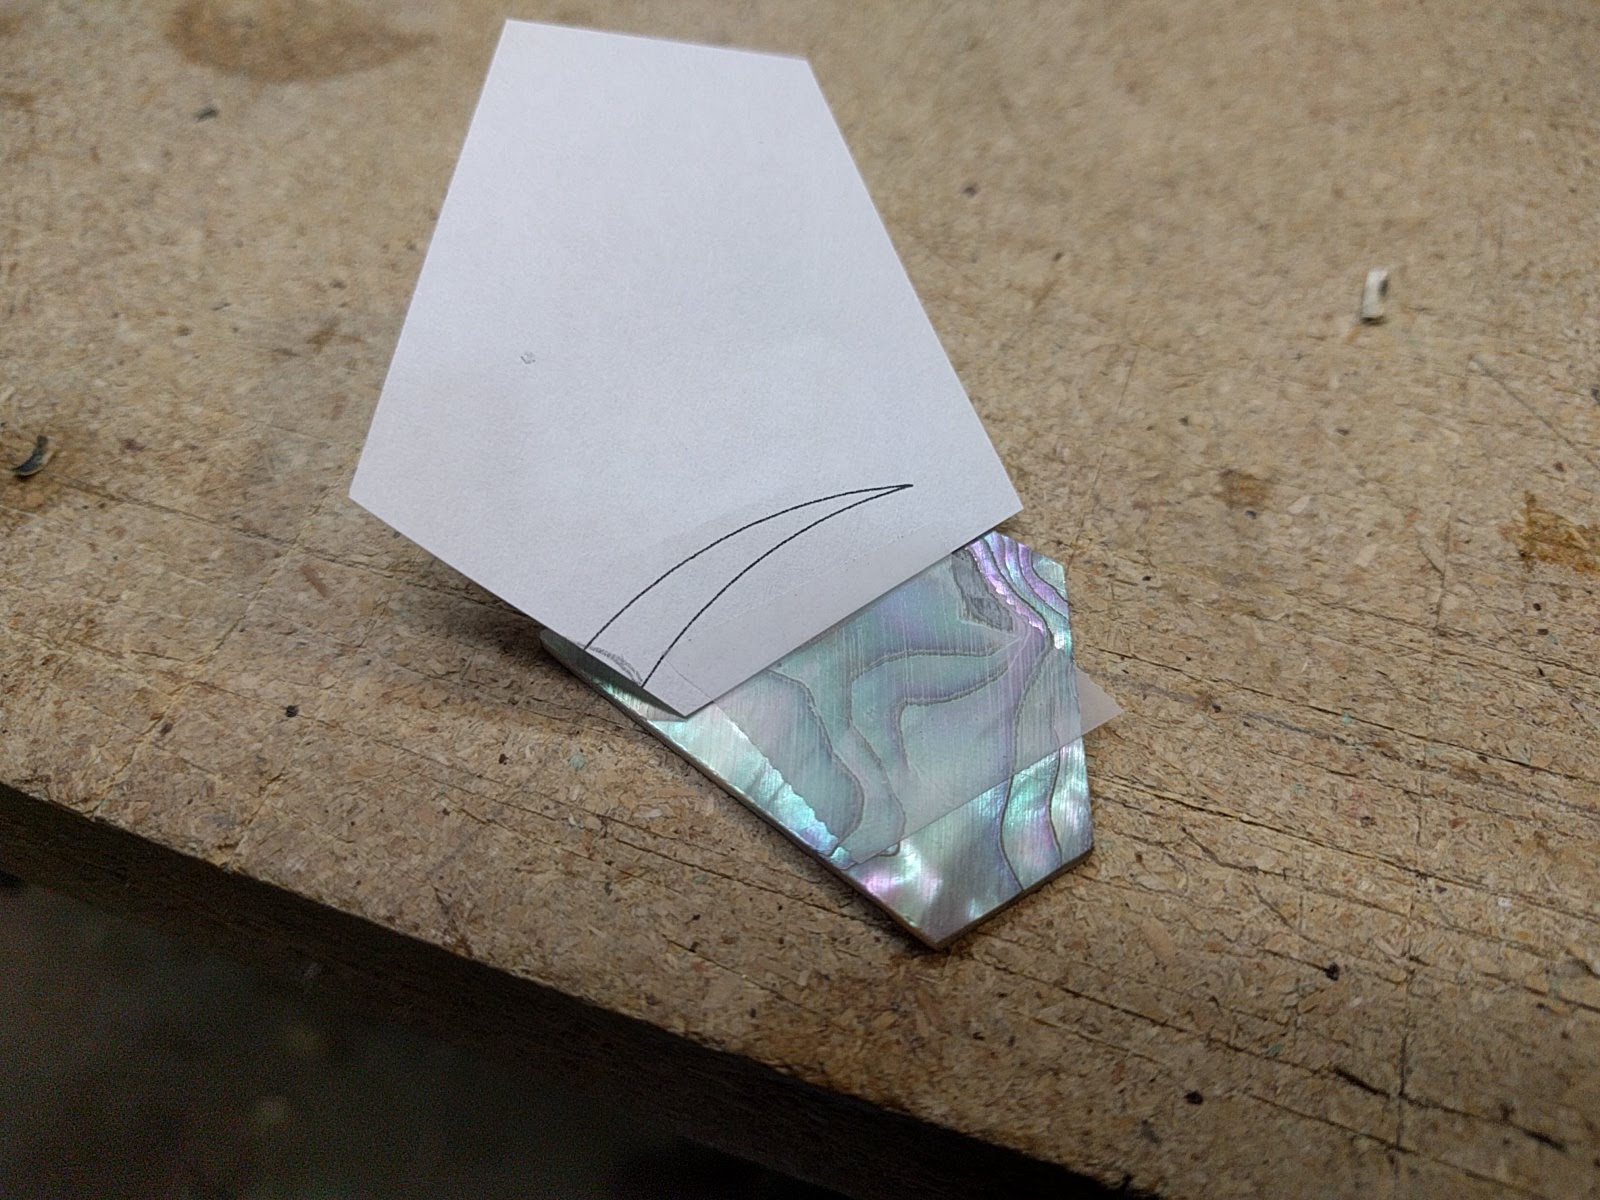
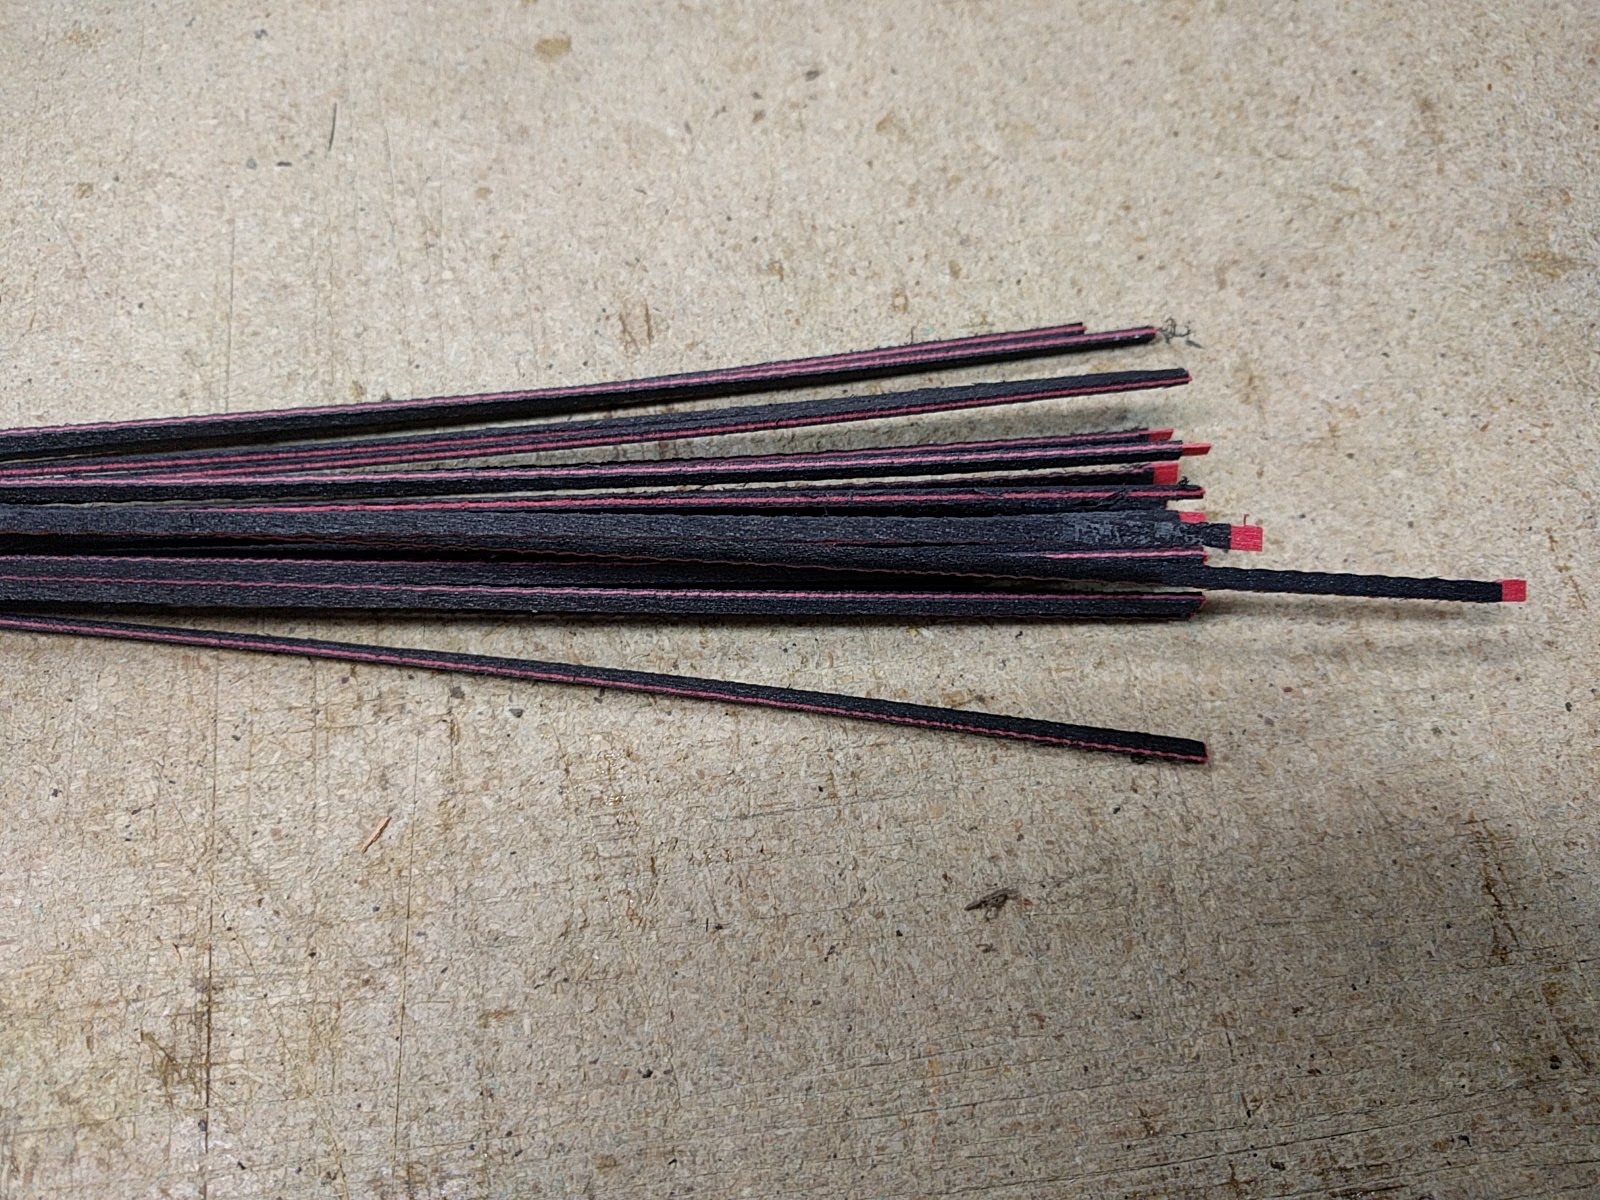
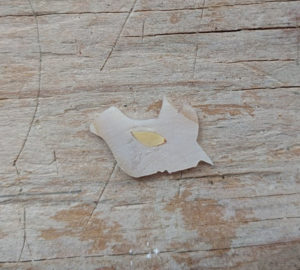
I cut this up into what will be the various pieces of the inlay.  A piece is glued to the pearl (pink in the piggy case) and then the outline is sawn out with a jewelers saw.  Here is a piece partially cut out, with another copy of the image.

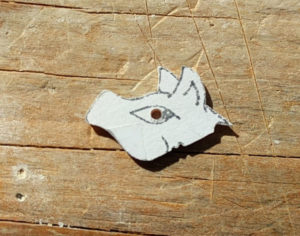
When it is all cut out you peel off the pattern, leaving the cut out pearl

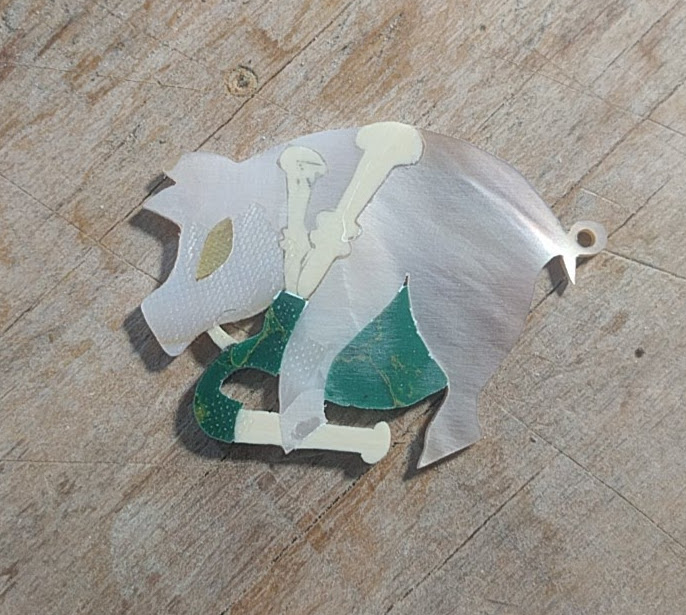
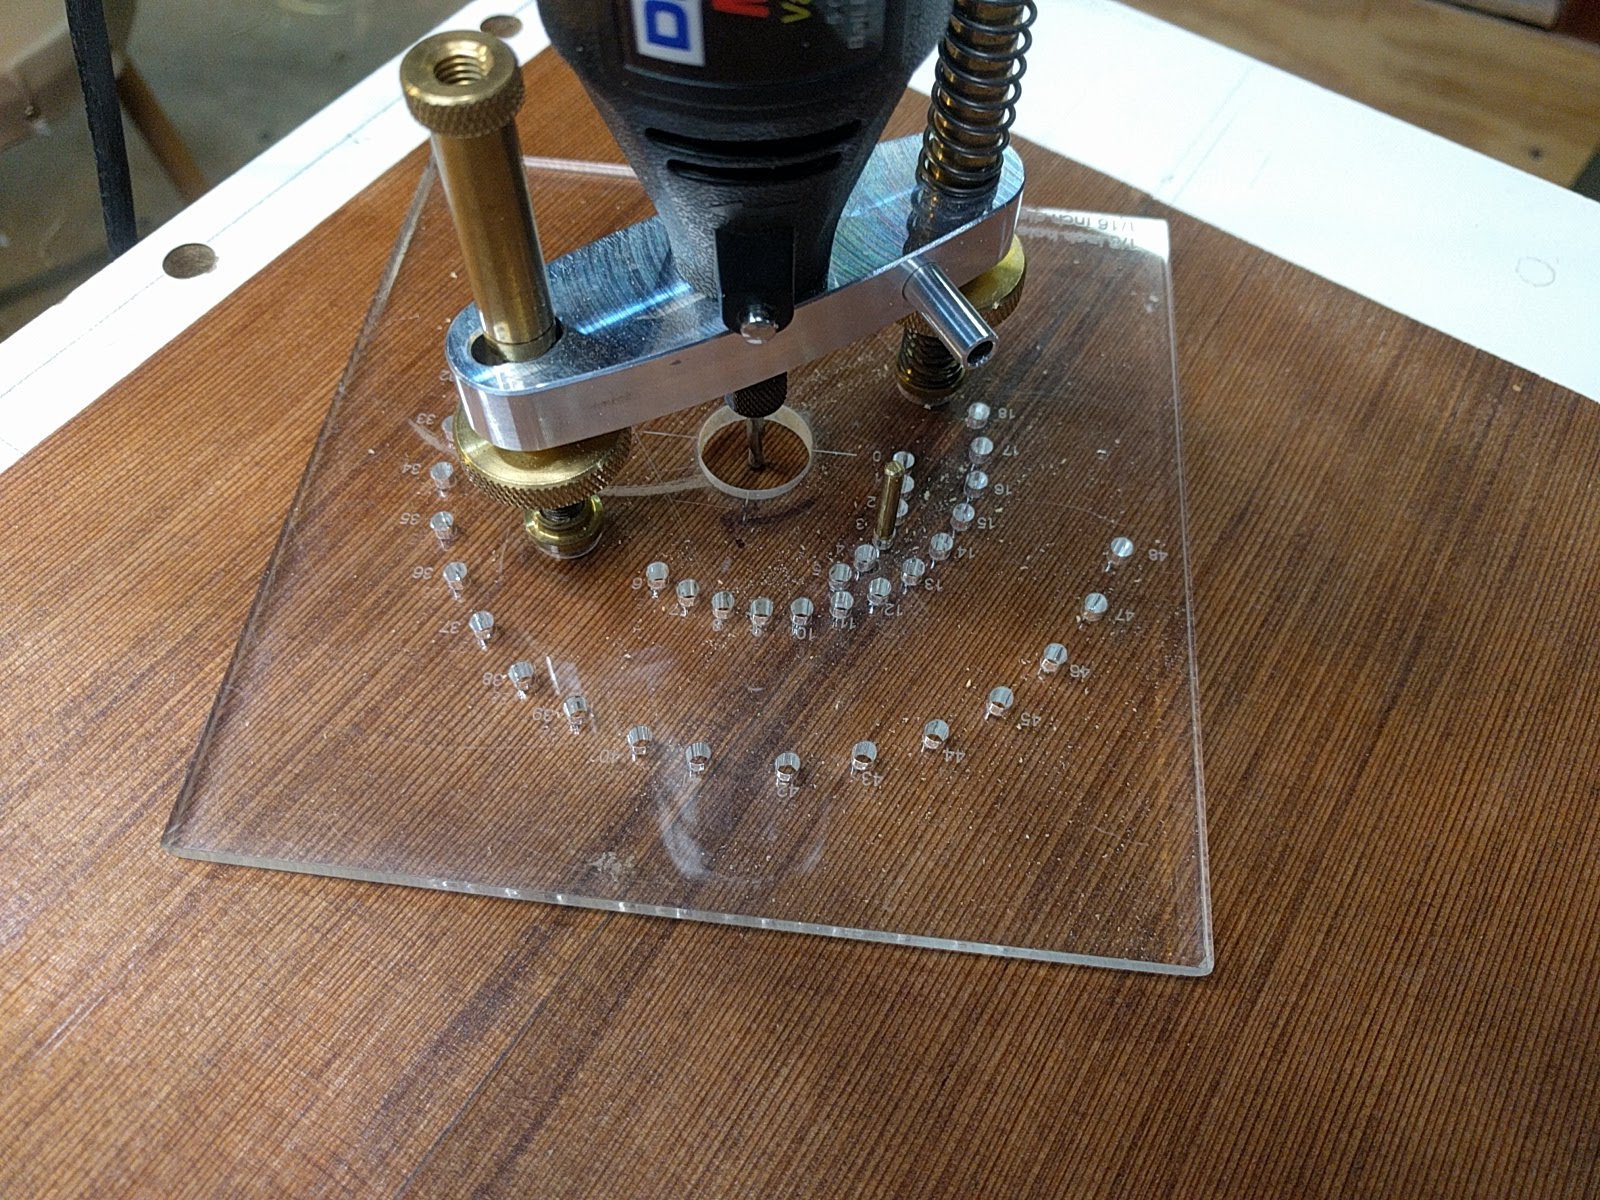
The inside of the curly tail, and the eye on the head are ‘holes’ in the pearl.  To make these I drill a small hole using a Dremmel tool and a small carbide bit.

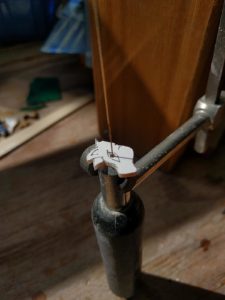
I then thread the sawblade through the hole, and saw out the pattern to size.

For the eye, once the eye hole is sawn out, I then use the hole itself as a pattern to draw the corresponding piece on another piece of pearl, yellow pearl in this case.  The eye is sawn out, a little large, and then the edges are filed so one gets a nice tight fit.  The eye pupil, and a thin black line around the eye will be added by engraving the pearl after the inlay is installed and sanded down flat.  The same is true for other details which are ‘drawn’ in the surface.

Starting from the head, I then cut and fit each piece working towards the tail end.  I have found that it is easier to fit just one side of a piece such as a pipe (which is pretty small) leaving the other side un-cut.  I then glue the one side to the head with CA glue, which gives me a bigger ‘handle’.  I then cut the other side of the pipe.  This process continues.  Cut, fit, glue, cut the other side with the final thing being fitting the tail end already cut out.

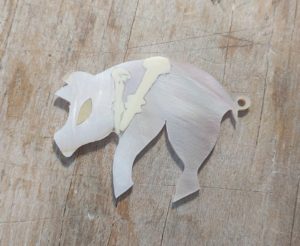
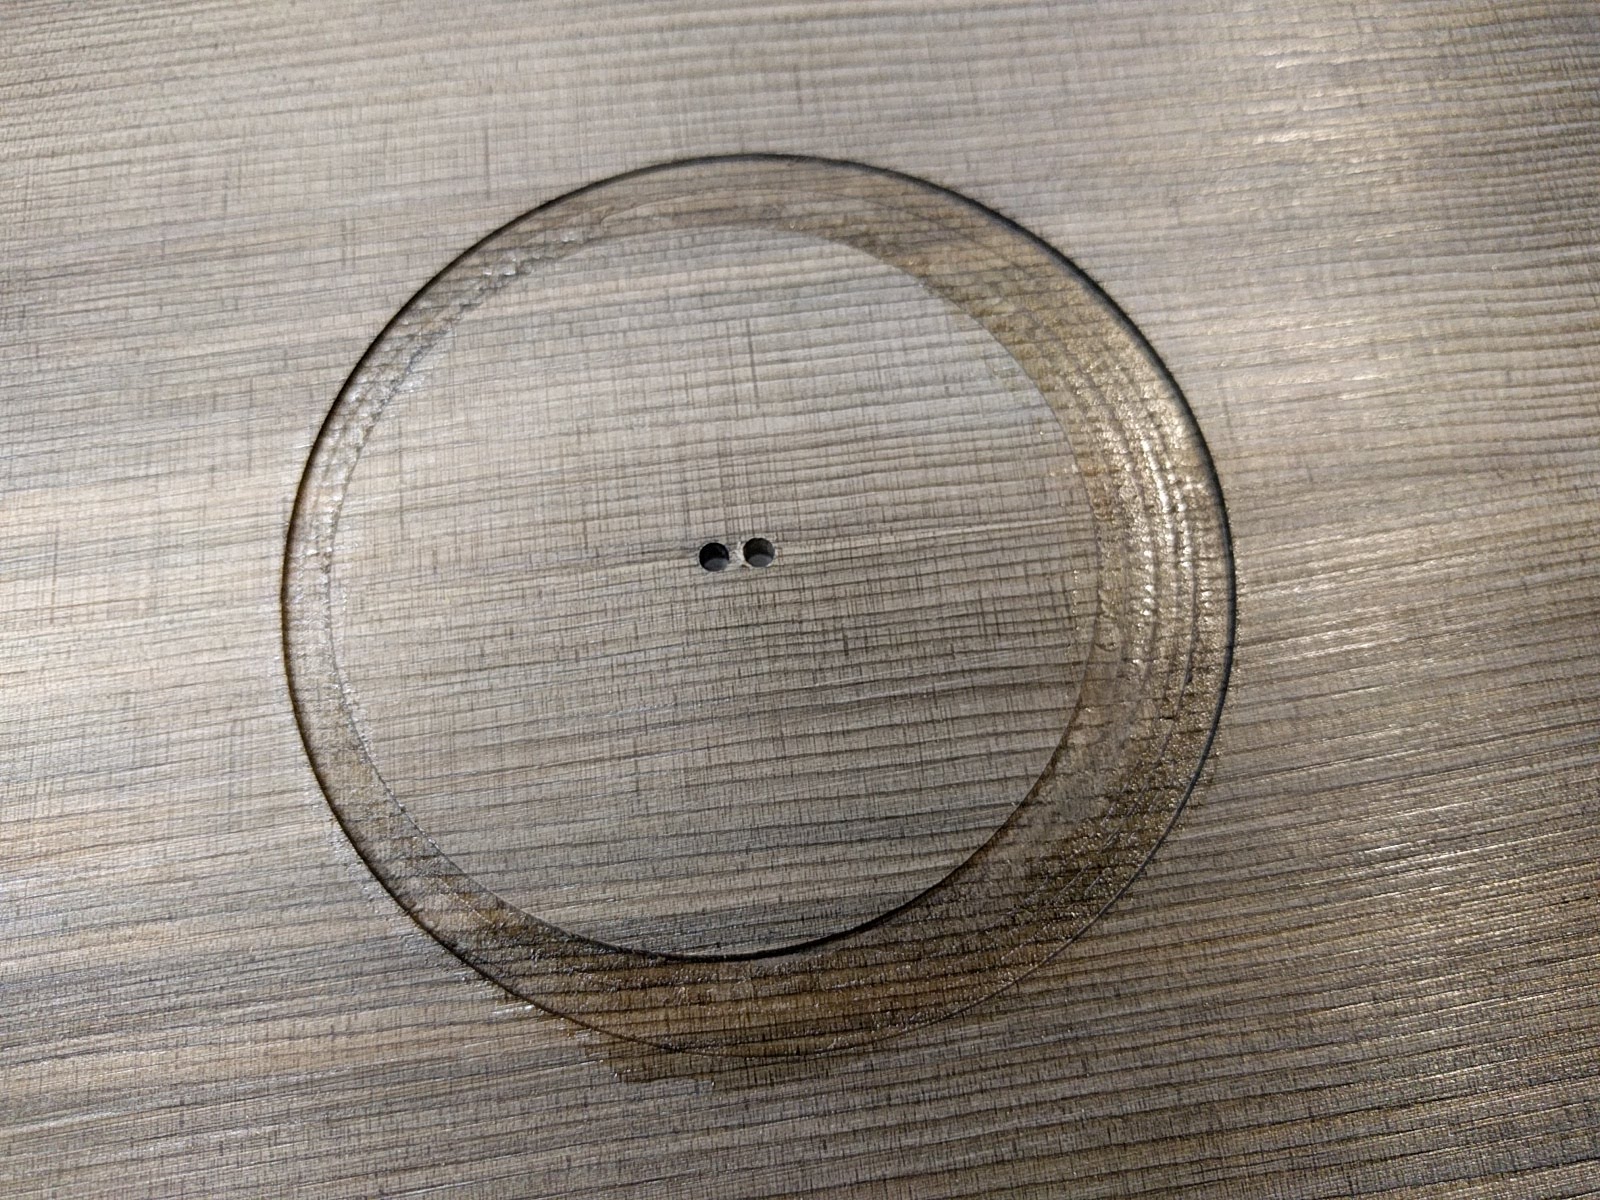
Once the pig is complete I can fit the bagpipe bag, made of green recon stone.  When the bag is done I then cut and fit the pipe the pig is holding, and finally the mouthpiece.

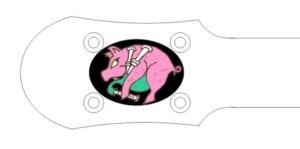
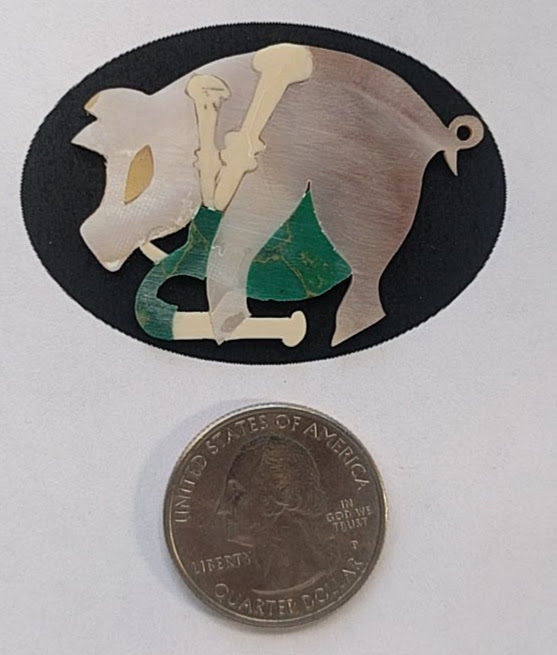
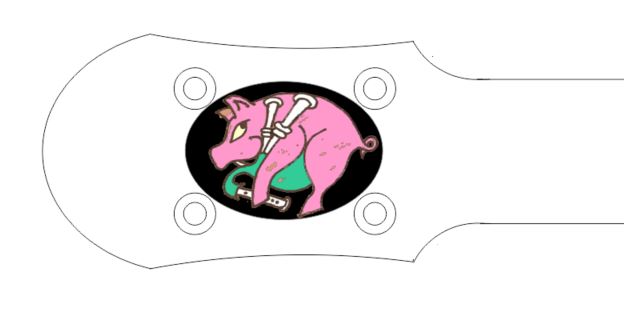
Doing inlay such as this, which has some small complex interior openings is very hard to do into light colored wood.  Doing inlay there is always a little filler around the inlay, and on a lighter wood it is very very hard to make it non-obvious, particularly if you are a stickler for up-close detail.  That is why fancy inlay is often done against a black background.  The black filler blends completely.  The customer really likes wood, and wanted an interesting wood headplate so I was reluctant do an inlay like this because of the filler problem.  I have made, for various people, inlay ‘jewlery’, with things inlayed into ebony ovals.  I realized that I could do the same here, inlay the pig into an ebony oval, and then inlay the whole thing into the fancy wood headplate.  So the final thing will (with the addition of the engraved lines, some cleanup etc.) something like this:

Florida ‘workshop’

I’m down here in Jupiter Florida supervising some renovations on our little house.  I drove down since I will be here for a couple of weeks.  I do not have much workshop space down here but before I left I got all of the bindings installed on the next set of four.  Now comes a whole lot of sanding to level the bindings with the sides and top, and then pore-filling which involves sanding between coats.  So, since sanding does not take much of a workshop, and minimal tools, I brought the 4 bodies down with me, along with my little body holding jig which clamps to the workbench.  I do not have dust collection or central vacuum down here, so I do the sanding outside on a temporary, sawhorse-based ‘workbench’.  Not fancy, and a little warm even in the shade, but the view is good.  You can watch the ospreys fishing in the pond without ever stepping away from the ‘workbench’.

All closed up

Things are moving along, all four bodies closed up.  Of course, this is like building a house.  You think you are making great progress and are nearly done when the framing, walls, and windows are in, but in actuality you are only part way finished.  Still, nice to get a sense of the final look.   From the back: walnut and ancient spruce baritone, casuarina and cypress tenor, casuarina and redwood tenor, spalted sycamore and streaky redwood concert.

wood geeks and big tool lovers

On Friday I went out to Hearne Hardwoods, which is a wood supplier/sawmill about 1.5 hours from Hereford. I have been out there before to get some Port Orford cedar and Spanish Cedar for ukulele building. (Spanish Cedar is not from Spain, and is not a cedar, it is a light mahogany-type wood from central America.) Hearne imports logs from all over the world, and has a huge selection of domestic and imported woods. Want a slab of Bubinga that is 4 feet across, 20 feet long, and 3 inches thick? … just the place. This is a real wood geeks fantasy.

To cut the logs they import (from about 20 countries) they have a huge old bandsaw, that used to be at the Philadelphia Navy Yard cutting wood for battleship and aircraft carrier decks. The saw was patented in 1904. It can cut a 67 inch tall slice, the blade is 6 inches wide, and some 18 feet long. Anyway, they were having their open house days, and I went out to see the mill working, and of course, to browse the cheap cut-off bins. (Got some really nice, perfectly quartersawn, ukulele sized black walnut for $1 a pound, as well as some nice quilted maple and figured sapele off-cuts.) For the demo they were cutting a big local black walnut tree. (Note – black walnut, when it is fresh cut, is kind of greenish. It does not develop the usual walnut purple-brown color until is ages and dries out a bit.)

The slab is cut off, lowered to the out feed bed, and then picked up with a suction attachment on an overhead crane. That is a heavy piece of wood!

Want some nice big-leaf maple burl? How about a whole tree’s worth?

An English brown oak burl, cut at Hearne, made into a table by Mira Nakashima, surrounded by Nakashima chairs in East Indian rosewood.

The founder of Hearns’s favorite wood is Hawaiian Koa. Here is his desk, a giant koa slab. Notice that the floor is also koa, and that is not veneer!

The mill

Coming off you hold the cut slab tight up against the log until the cut is finished, then …

the slab gets lowered onto the out-feed table.

The slab gets picked up with a suction head on an overhead crane.

Stack of 2 inch thick walnut slabs.

round and round we go …

It is rosette time.  I really like mother-of-pearl, and I like the ‘bling’ of a pearl rosette, so that is what I make (except on sopranos for which you can not charge enough to do the pearl work).  Here is a brief history of how I go about making a rosette.

To start with, you get out the pearl stash, decide on what kind of pearl to use, and then go through the stash selecting pieces which closely match in terms of color and texture.  This is always kind of fun. (Did I say that I like pearl?)

To cut the channel into which the pearl will be placed I use a base I designed for the Dremmel router base from Stewart MacDonald.  This base has a series of holes which become pivot points around which one swings the Dremmel router.  The holes are numbered, and are laid out so that one hole cuts a circle that is 1/32 of an inch larger in diameter than the previous hole.  This allows great control over the size of the channel that is cut, and allows exact reproducibility.  Using the #18 hole always cuts exactly the same size circle.   You drill a 1/8 inch hole in the top as the pivot point (or 2 holes 3/16 of an inch apart to make an asymmetric rosette) put the top down on a flat board which also has a 1/8 Inch hole, add a brass 1/8 in pin, and around you go.  The depth of the router is set just a smidge less than the thickness of the pearl, so that he pearl can be sanded flat when everything is installed.

The result, using 2 holes and moving the pivot pin between cutting the inner circle and the outer circle, and a bit of cleanup, is an asymmetric rosette channel.

I take measurements of the inside and outside diameters, and the width of the purfling to be used, and then using a drawing program can create an exact pattern for the pearl to be cut.  I just print this out.  Remember, the holes in the router base make things exactly reproducible, so for a given rosette and purfling I only need to this drawing once and can use it unchanged every time to cut this sized rosette.

The pufling is pre-bent to go around the perimeters of the rosette.  I find that with the standard black-white-black purfling I can wet it a little bit, wrap it around my rubber cement can, let it dry and I am good to go.

To cut the pearl itself I start with the paper pattern, select a piece of pearl based on color and grain, and then holding the pattern and pearl up to the light I can position things so that I waste as little as possible.  (This is for a spiral rosette). I make a pencil line where the edge is, and cut out the piece of paper.

I then take a small piece of scotch tape and tape one side of the paper to the pearl, to form a little hinge.

Using this hinge I can bend the paper pattern back, rubber cement the pearl and paper, let them dry and them hing the paper down to stick the pattern in the exact right spot.  The pearl is cut with a jewelers saw, on a small platform with a hole in it through which one saws in an up-and-down motion.  The sawblades go from fine to a hair so thin one can just barely see the teeth.  For cutting rosettes, which does not involve a great deal of detail, I can use a ‘moderate’ thickness blade.

So you cut out a piece, maybe do a bit of filing so that it goes in the rosette channel, between the inner and out purfling, and put it in channel.  Then you simply continue the process with the rest of the paper pattern, trying to match pearl color and grain as you go.  When all the pearl is in place you flood the rosette with thin CA glue which wicks in and seals everything together.  When the CA is hard the surface is sanded off to level the pearl with the top.  The result is, rosettes:

Clockwise from the top – redwood concert top & asymmetric rosette in paua abalone, cypress tenor top (this is going to be a ‘Florida’ tenor) & spiral rosette in pink abalone, baritone ancient sitka spruce top & asymmetric rosette in pink abalone, tenor redwood top with asymmetric rosette and lower point (suggested by the customer) in paua abalone.

A happy coincidence

I was in down-town, near Waikiki and I decided to ask Google if there where any ukulele things nearby. Turned out that 2 short blocks away was the Koaloha ‘factory’ and showroom. Koaloha is one of the big three ukulele makers in Hawaii. So, of course, I walked over.

Had a nice time looking at their instruments, talking the the guy in the showroom, seeing how Koaloha instruments are made (rather differently from other instruments), etc. It came out that I was a builder, which helped take the conversation to the next level about how things are done. In the middle of this, out from the back came the guy who founded Koaloha, “Pops”. I was introduced, and we got to talking. He is very interested in how I do my finish with TruOil because of some side projects he is working on. We talked wood (I’m going to send him some Port Orford cedar and redwood) and we generally had a great time. Got a behind the scenes look at the shop, he showed off his fret slotting machine which he built, etc. He went upstairs and brought down two latest instruments which he says are the best sounding he has ever built (and he claims to have built 15,000 ukuleles). He had a fantastic local artist decorate these ‘pineapple’ shaped ukuleles with pineapple, via incredible wood burning. I was invited back the next time I’m in town, and he was particularly interested in seeing and more importantly hearing my instruments. I got to be friends with one of the ukulele greats, and what with wood and finish we will have some on-going contacts.

Where is all began

Sides all bent and put together, end grafts installed, kerfed lining installed, side sound ports done, supports for scoops installed, new supply of black-red-black purfling made, tops glued together,

so now it is time for a bit of vacation.  I’m out in Hawaii, the birthplace of the ukulele, for two weeks visiting my parents, who have lived here for over 30 years.  So not much ukulele building work going to be happening, except for some thinking and maybe a little design stuff.  Might do some tours of the local ukulele builders however, and go to a big ukulele store up on the north shore.  The view from my parents:

Not just any port in a storm

A side sound port is a popular new addition to the acoustic instrument making business.  I was initially somewhat skeptical, but after I built my first one I was sold.  It seems to really increase the overall sound and, as one of its popular benefits, it directs more sound up to the player.  Many instruments now come with side sound ports, but many of them seem to be just a hole in the side, which has always seemed rather ‘unfinished’ to me.  I really prefer having lines of purfling/binding around the edges of the sound port.  Makes things look much more finished I think.  I have been working on the best ways to add these purfling lines, and here is my current process.

The first step is to glue in a piece of veneer wood, with the grain cross-wise to the grain of the side, to strengthen the side since one is going to cut a hole in it.  The veneer bends easily around the curve of the side since the grain is along the axis of the bend.  The only issue is clamping the veneer in place while gluing.  To do this I made an inside caul, sanding the block until it fit the curve of the side (different ones for concert, tenor, and baritone).  To make the outside caul I used the trick of a blob of bondo auto-body putty, with a piece of wax paper, and you just push the inside caul into the blob to get a perfect match.  I lined the inside caul with a bit of cork to take up any slight irregularities.

I also started gluing the veneer to the side before I glue in the kerfed linings.  This lets the veneer run the full width of the side for strength, and is much easier to clamp and glue.  In fact, I have started doing the entire side sound port before gluing in the kerfed linings, makes triming the inside much easier.

To cut the hole I made an oval pattern which then clamps onto the side of the instrument.

A while back I took a metal machining course and made a base for the Stewart Macdonald dremmel router that takes standard router template bushings.  These are available in a number of incremental sizes, so I can determine the size of the oval hole cut by choosing the appropriate bushing.

To start the hole I cut out the middle with a forstner drill bit.  Then I can use the dremmel to route out the remainder, leaving a nice oval hole, with the sides parallel in an up-and-down direction.

To line the hole I glue in layers of veneer, such as I use to make up purfling.  This instrument is getting the classic black-white-black look.  The two inner layers are thinner veneer, and the outside layer is a thick black veneer to give a ‘stronger’ edge.  I cut stripes of veneer and then bend them on a hot pipe into little circles, ready to be stuffed into the hole.

To glue the veneers around the edge of the hole I use thin CA glue (cyanoacrylate, aka super glue).  This wicks easily into the joint, and I can spray on a little accelerator and keep working with no breaks to let the glue dry.  The veneer is glued in separate layers.  I start with a spot on the edge opposite the joint, glue a little bit, move around, press things tight, glue a bit more …   I can generally press the veneer tight to the edge of the hole with a finger, protected by a rubber glove and a piece of a Teflon baking mat to which CA glue will not stick.

For areas where things need a bit more pressure, particularly with the last veneer which is quite a bit thicker and stiffer, I made a set of small wedges that can be pushed in to apply a lot of pressure, right where one wants it.

The question then becomes, how to deal with the joint in the veneer.  It is very difficult to make a butt joint that fits tight since it is hard to cut the veneer to just the right length as it is being stretched around the hole.  To solve this problem I taper the ends of one side of the veneer with a sharp exacto and just let the other end lap over.  When the glue hardens (almost instantly) I just trim the excess flat to keep the veneer width.  An invisible joint, and no measuring or ‘fitting’ required.  It is like this:

When you are done with the final layer one simply sands the edges flush and same on the inside.