A very useful little tool

I have found a very useful little tool for carving neck heels. In the past I have used various things for this operation, including rasps, chisels, drawknives, and knives. I wanted something that would easily carve around the curve of the heel, and to which you could apply enough controlled force to cut through the end-grain. A drawknife worked somewhat as two handles allowed the use of some force with control. However the drawknife I have is big enough that it did not ‘turn the corner’ well.

I found this little drawknife that is thin, narrow, and slightly flexible. The narrow blade allows it to easily ‘turn the corner’ and the curved blade, flexibility, and of course two handles give a great deal of control. Really nice for heel carving.

The old fashioned way of doing it, but new to me.

To glue the two halves of the top or back together the edges must be perfectly straight and flat. This is called ‘jointing’ the edge. I have been using a system using a router and a straight edge, with final truing with sandpaper stuck to a machined flat metal bar. Works OK, but takes a little while.
The traditional way of doing this was to use a ‘jointer’ plane, which is a long flat plane used to get the edge straight and flat. Doing thin top and back wood one would lay the plane on it side on the bench, with the wood also lying flat supported on what is called a ‘shooting board’. Then the very sharp plane is run along the edge of the wood to ‘joint’ it.
I was recently riding around and passed a woodworker who was selling off some of his surplus tools. One was a 22 inch jointer plane that looked to be in very good condition. I got it for a very reasonable price. I had to re-grind and sharpen the blade but that is all that was needed.
Rather than set up a shooting board, which I found rather awkward with a larger piece of wood I decided to clamp the plane upside down in the vise and clamp on an aluminum bar as a right-angle fence. With this setup I can get a good grip on the wood, press it against the fence and push it across the plane. Works well. I can quickly and easily achieve a perfectly jointed edge.

Laminated braces

When you saw brace wood out of a board the wood fibers can (often) not run parallel to the faces of the brace. This is called ‘runout’. Under stress a brace with runout will tend to crack along the wood fiber lines, which are across the brace. If one looks at guitar repair videos where braces are being fixed, the crack is almost always across the brace, due to runout.

I have some nice sitka spruce boards which are nicely quartersawn which means that the growth rings are up and down in the board, ‘vertical grained’ which is what one wants for a brace. However, a little experiment demonstrated that the wood fibers did not run parallel to the face of the board.

As a way to make a stiffer, more stable brace I decided to saw this up into thinner strips and then laminate them together, alternating direction, to eliminate the runout problem. At the same time I decided to laminate them with a 15 foot radius curve which is what I use for back braces. That way I do not have to further process the brace to add the curved face.
I made a simple gluing block and laminated with a pre-catalyzed modified dry powder urea glue. This glue dries very hard, and once set is impassible to soften with water or heat. The perfect stuff for laminations that one never wants to take apart. I glued up some sections and then sawed the sections into brace stock. They held the 15 food radius well and seem very stiff which is good.

A design change

A little while back I built an octave mandolin. I built what is called a ‘flat top’ mandolin (as opposed to a carved top like a violin) though the top and back are not flat. Both the top and the back have a 15 foot radius. I have 15′ radius dishes from building ukuleles (the backs) so I was familiar with the radius of the plates.
I merged a couple of different plans, and settled on an X braced top. (I build ukuleles with X braced tops.) The plans also had an X braced back, so I did an X brace on the back as well.
On the next set of ukulele builds (tenors) I decided to try an X braced back with a single cross brace in the upper bout. It worked out really well. I think that the X holds the radius dome of the back better than the previously used 3 cross braces. I radiused the braces individually, glued the X together, and then re-sanded the entire X in the radius dish. With the X I could place the center of the dome exactly where I wanted it, and I was not relying on the radius profile of the sides to establish the top-to-bottom radius to match the side-to-side radius imparted by cross braces.
I also think that an X braced back puts less strain on the instrument with humidity changes. With a cross brace the back wood is expanding/contracting across the length of the brace. But the brace does not get much longer/shorter with humidity changes since wood does not change much in length. This always has bothered me. The back wood is expanding/contracting and trying to break free of the brace. With an X brace the stress should be less because the X is at 45 degrees to the direction of wood movement so there should be less movement per-unit-length of the brace. The X brace is longer so the wood movement is spread out over a longer distance.
I see no reason to go back to cross braced backs, at least on tenor or baritone sized instruments.

Something rather different

A little while back I wanted to do something different. Being a fan of Celtic music, I decided to build an octave mandolin. An octave mandolin is like a regular mandolin, 4 pairs of strings, only it is tuned a full octave lower. The Irish Bouzouki is an octave mandolin. I built what is called a ‘flat top’ mandolin (as opposed to a carved top like a violin) though the top and back are not flat. Both the top and the back have a 15 foot radius.
This was also a chance for a bit of experimentation. I laminated the walnut sides. Three pieces of 1/16” walnut veneer, pre-bent on a hot pipe, and then laminated together using the octave mandolin form I made. They came out great, very stiff and accurate in shape with no spring-back. (You can never have too many clamps!)

The top is Alaskan yellow cedar with an X braced system that is the merging of a couple of different plans. I also did a ‘Picasso’ rosette, gold mini-guitar tuners and frets.

The instrument came out really well. Lovely to look at (I really like that teardrop shape) and it is really loud and has sustain that goes on forever. I had a chance to show it to a Celtic band and the bagpipe player said he likes mine better than the commercial octave mandolin his band-mate was playing.  You can see the instrument here, look under “Ukuleles – Gallery”  (where else to put pictures?)


“If the neck fits …”

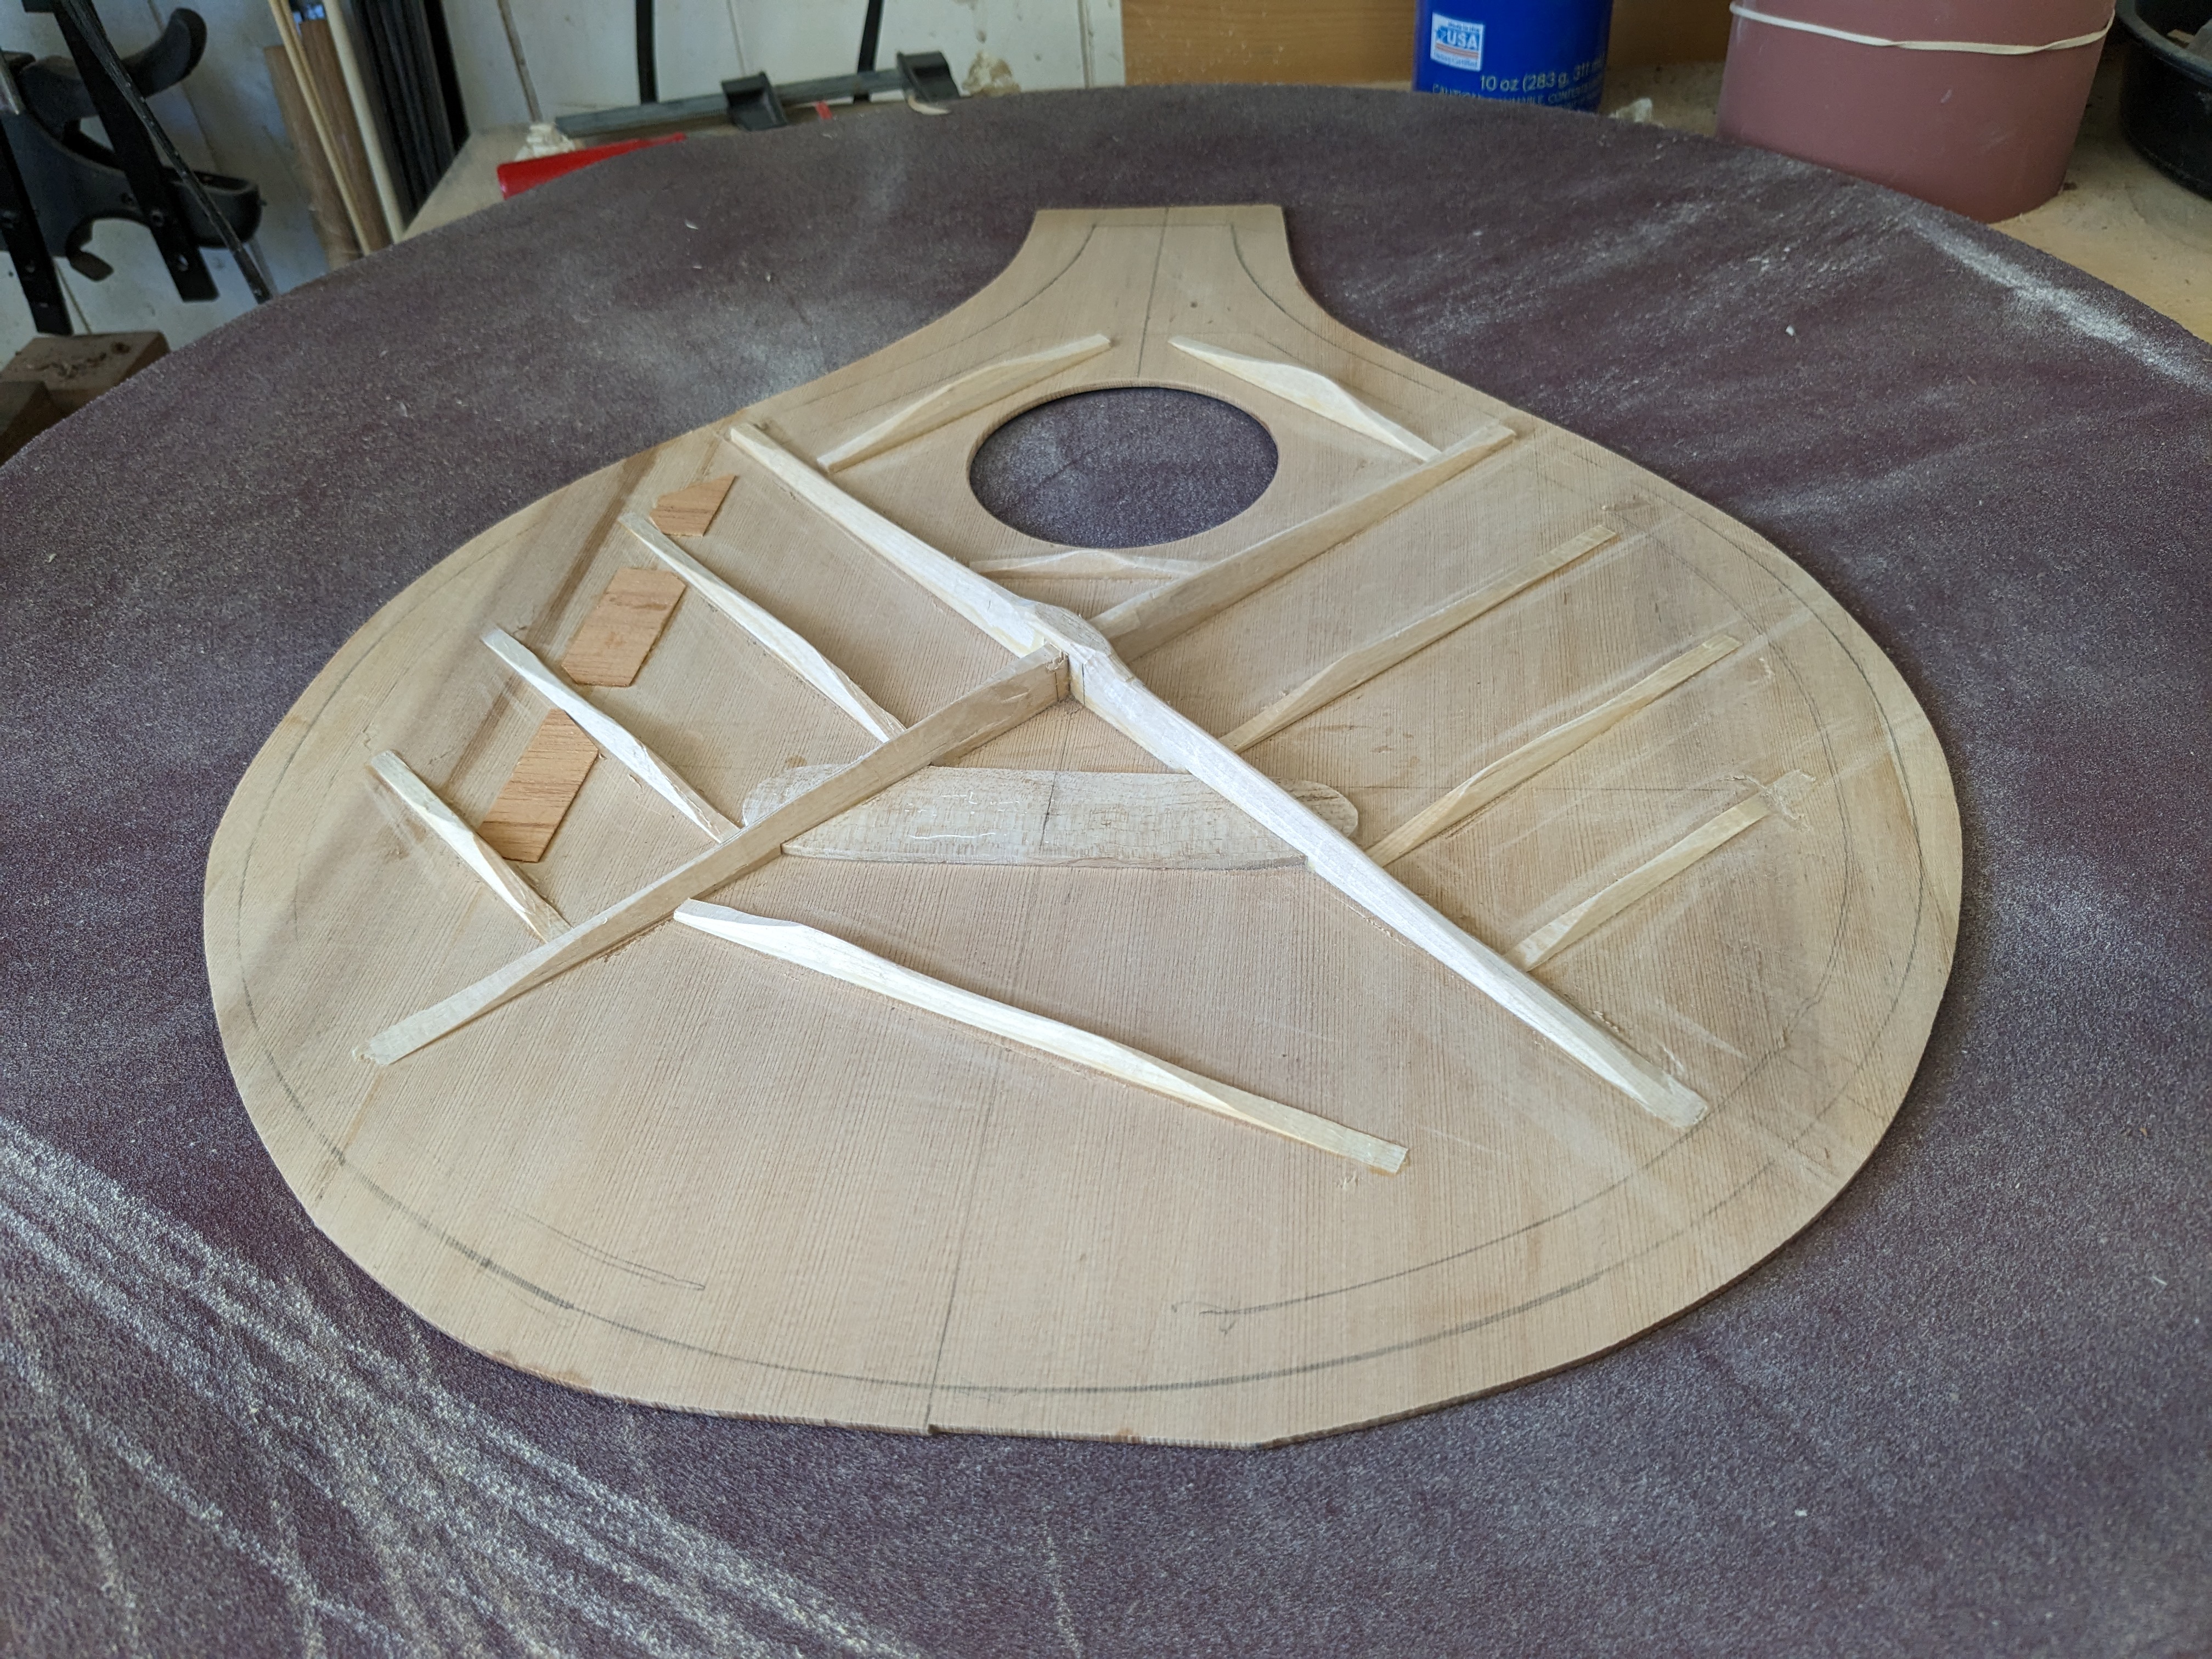
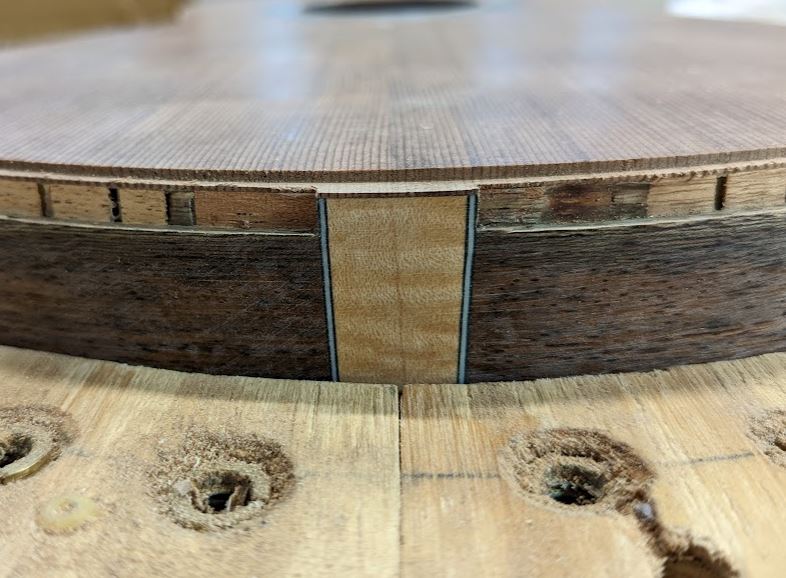
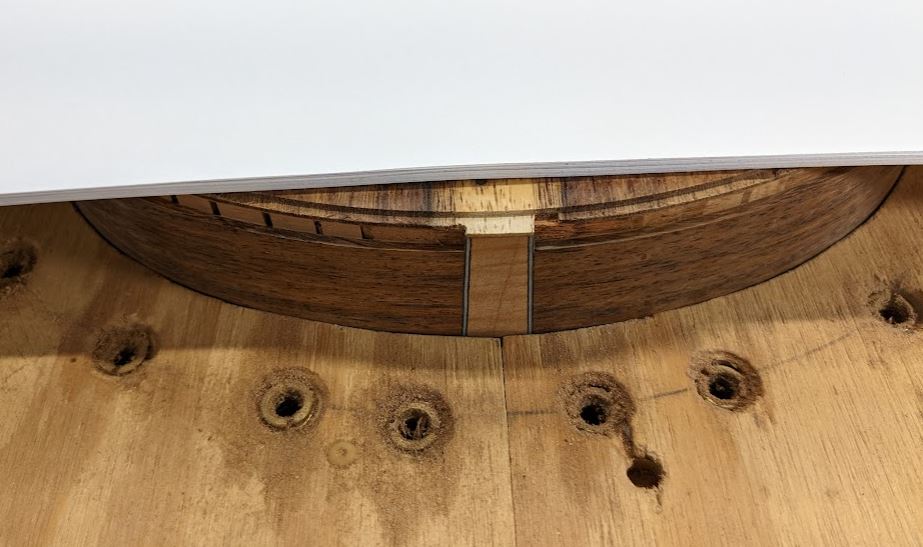
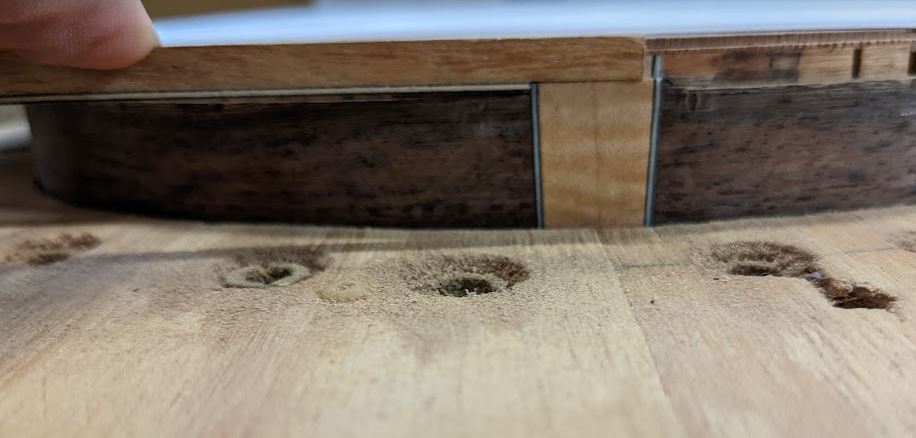
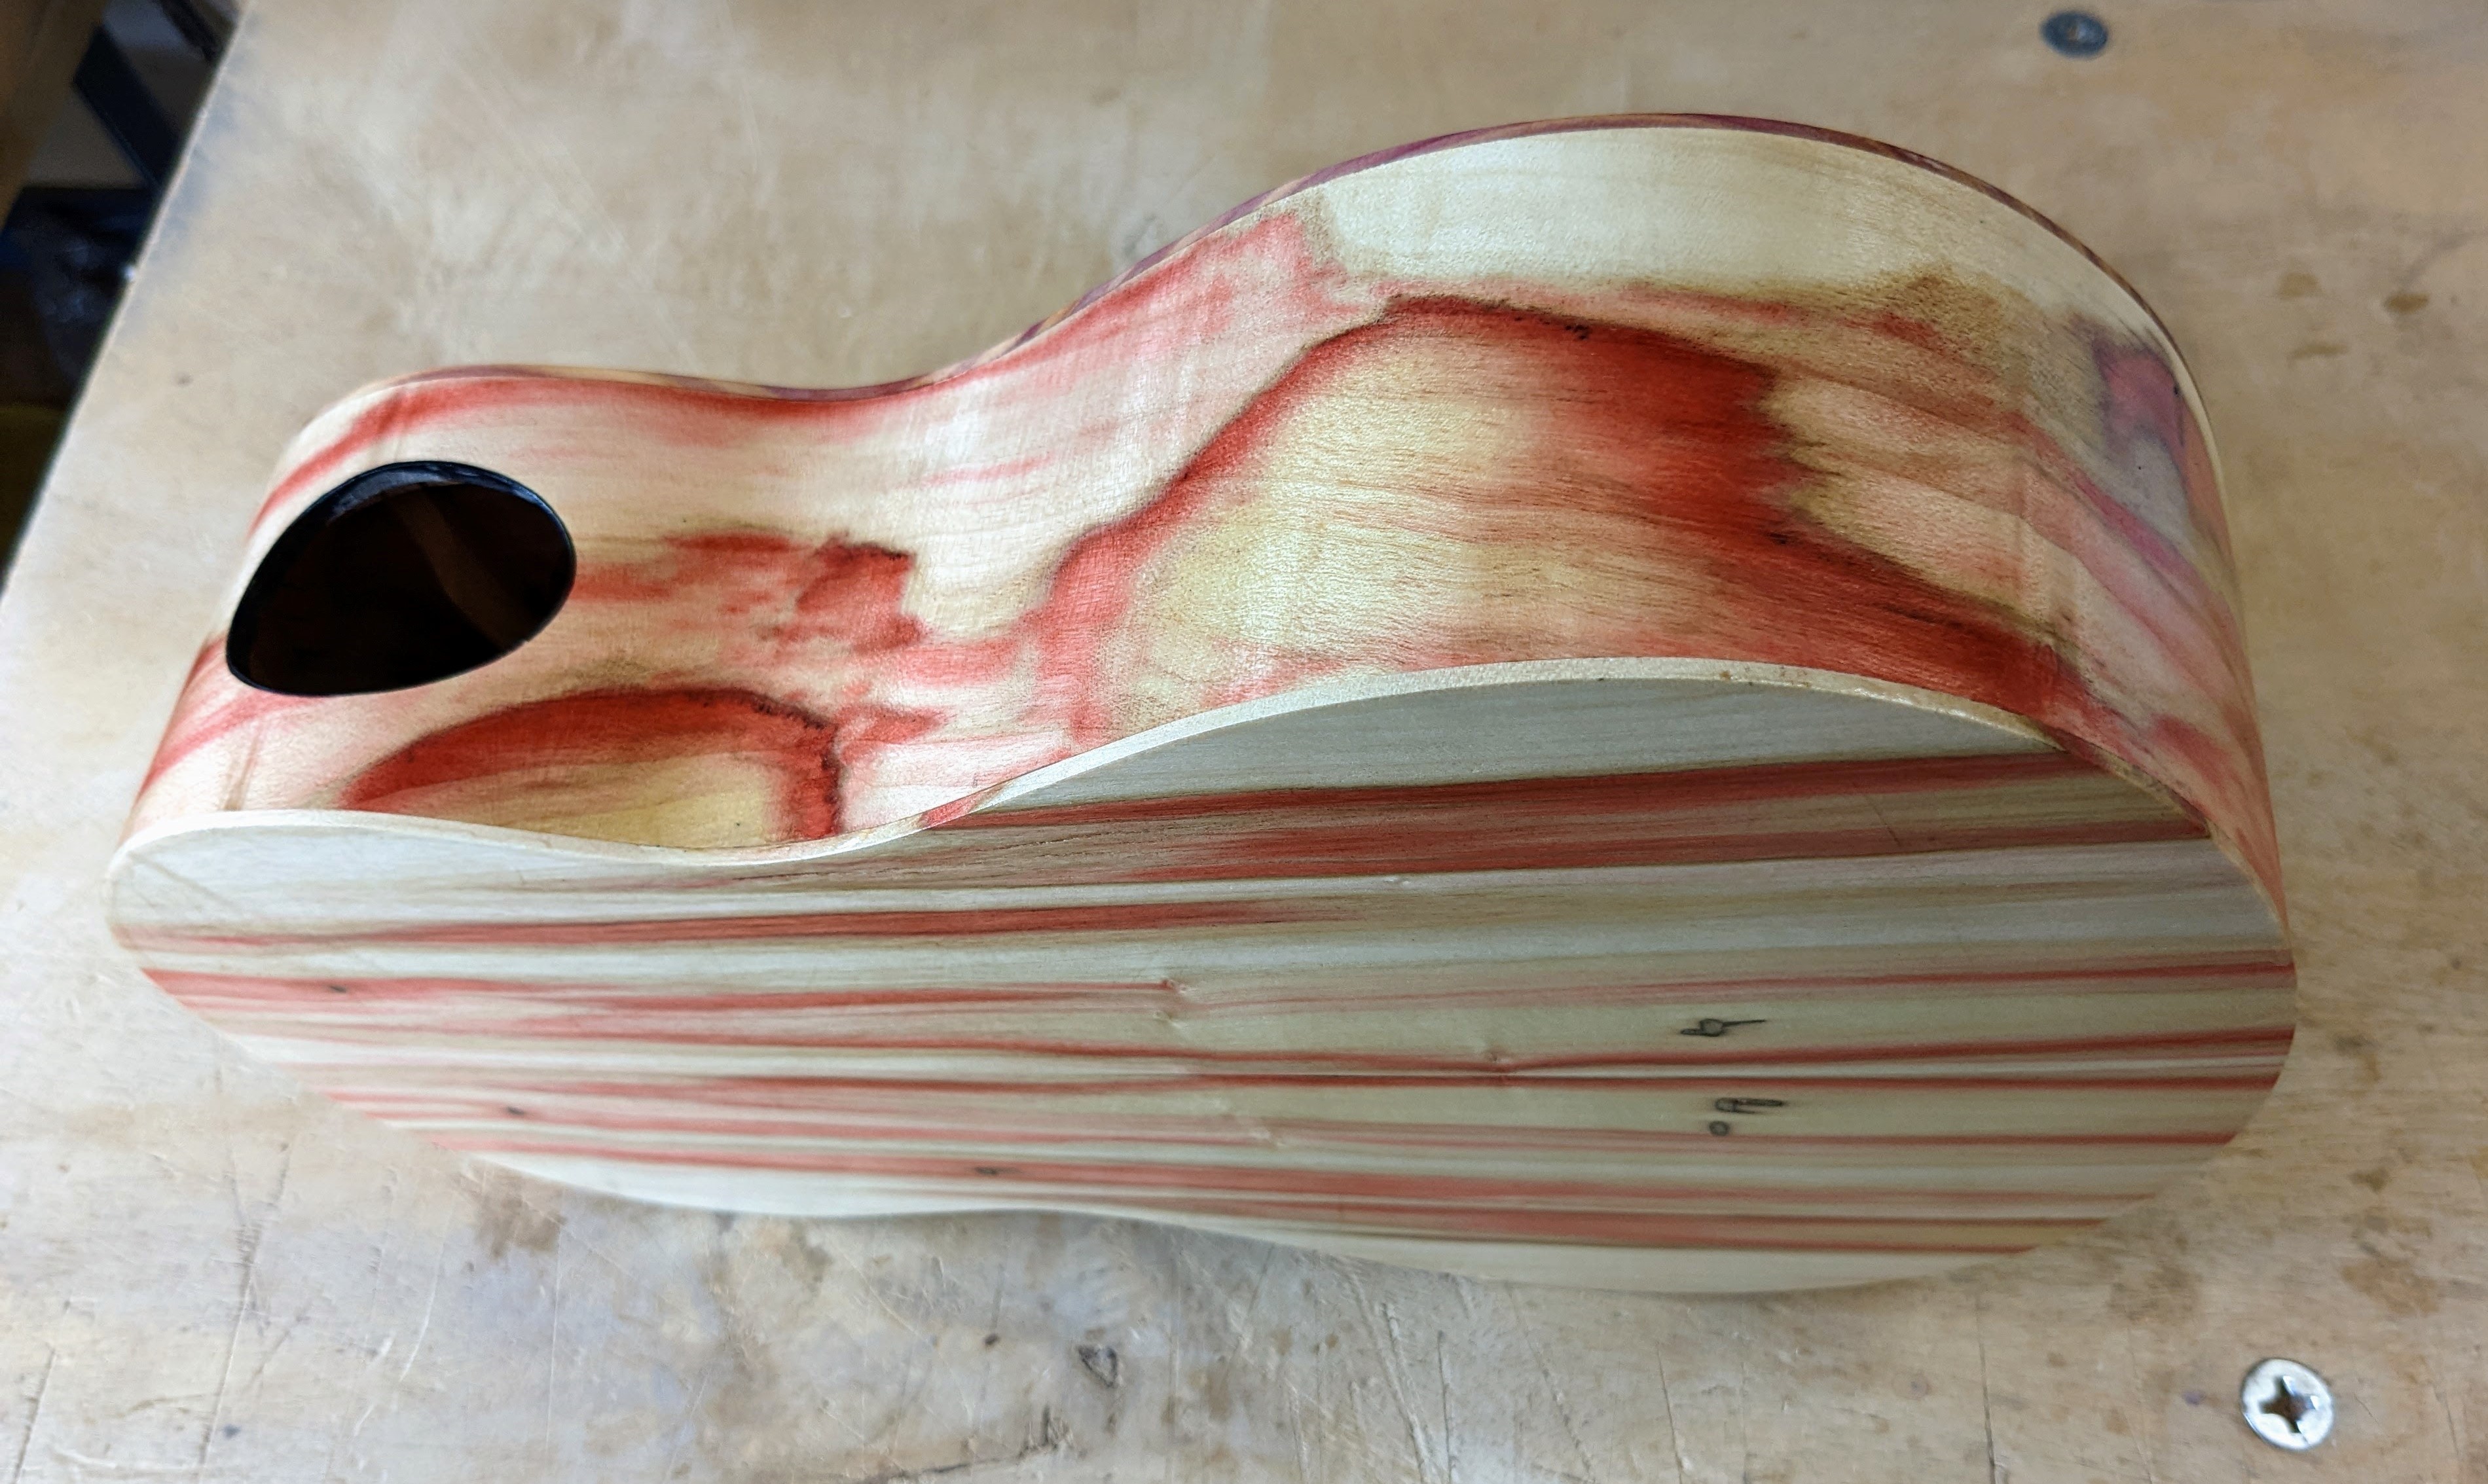
I use a bolt-on style of neck attachment. It allows easy neck removal if something needs to be fixed and is easier (in my opinion) to construct. I used to make instruments with the body flat where the neck meets the body so that one could get a good fit by having the base of the neck equally flat. With the system outlined below ‘flat’ is not necessary and I have changed my body design so that the neck attachment area is curved to echo the lower bout. I like the curved look much better.

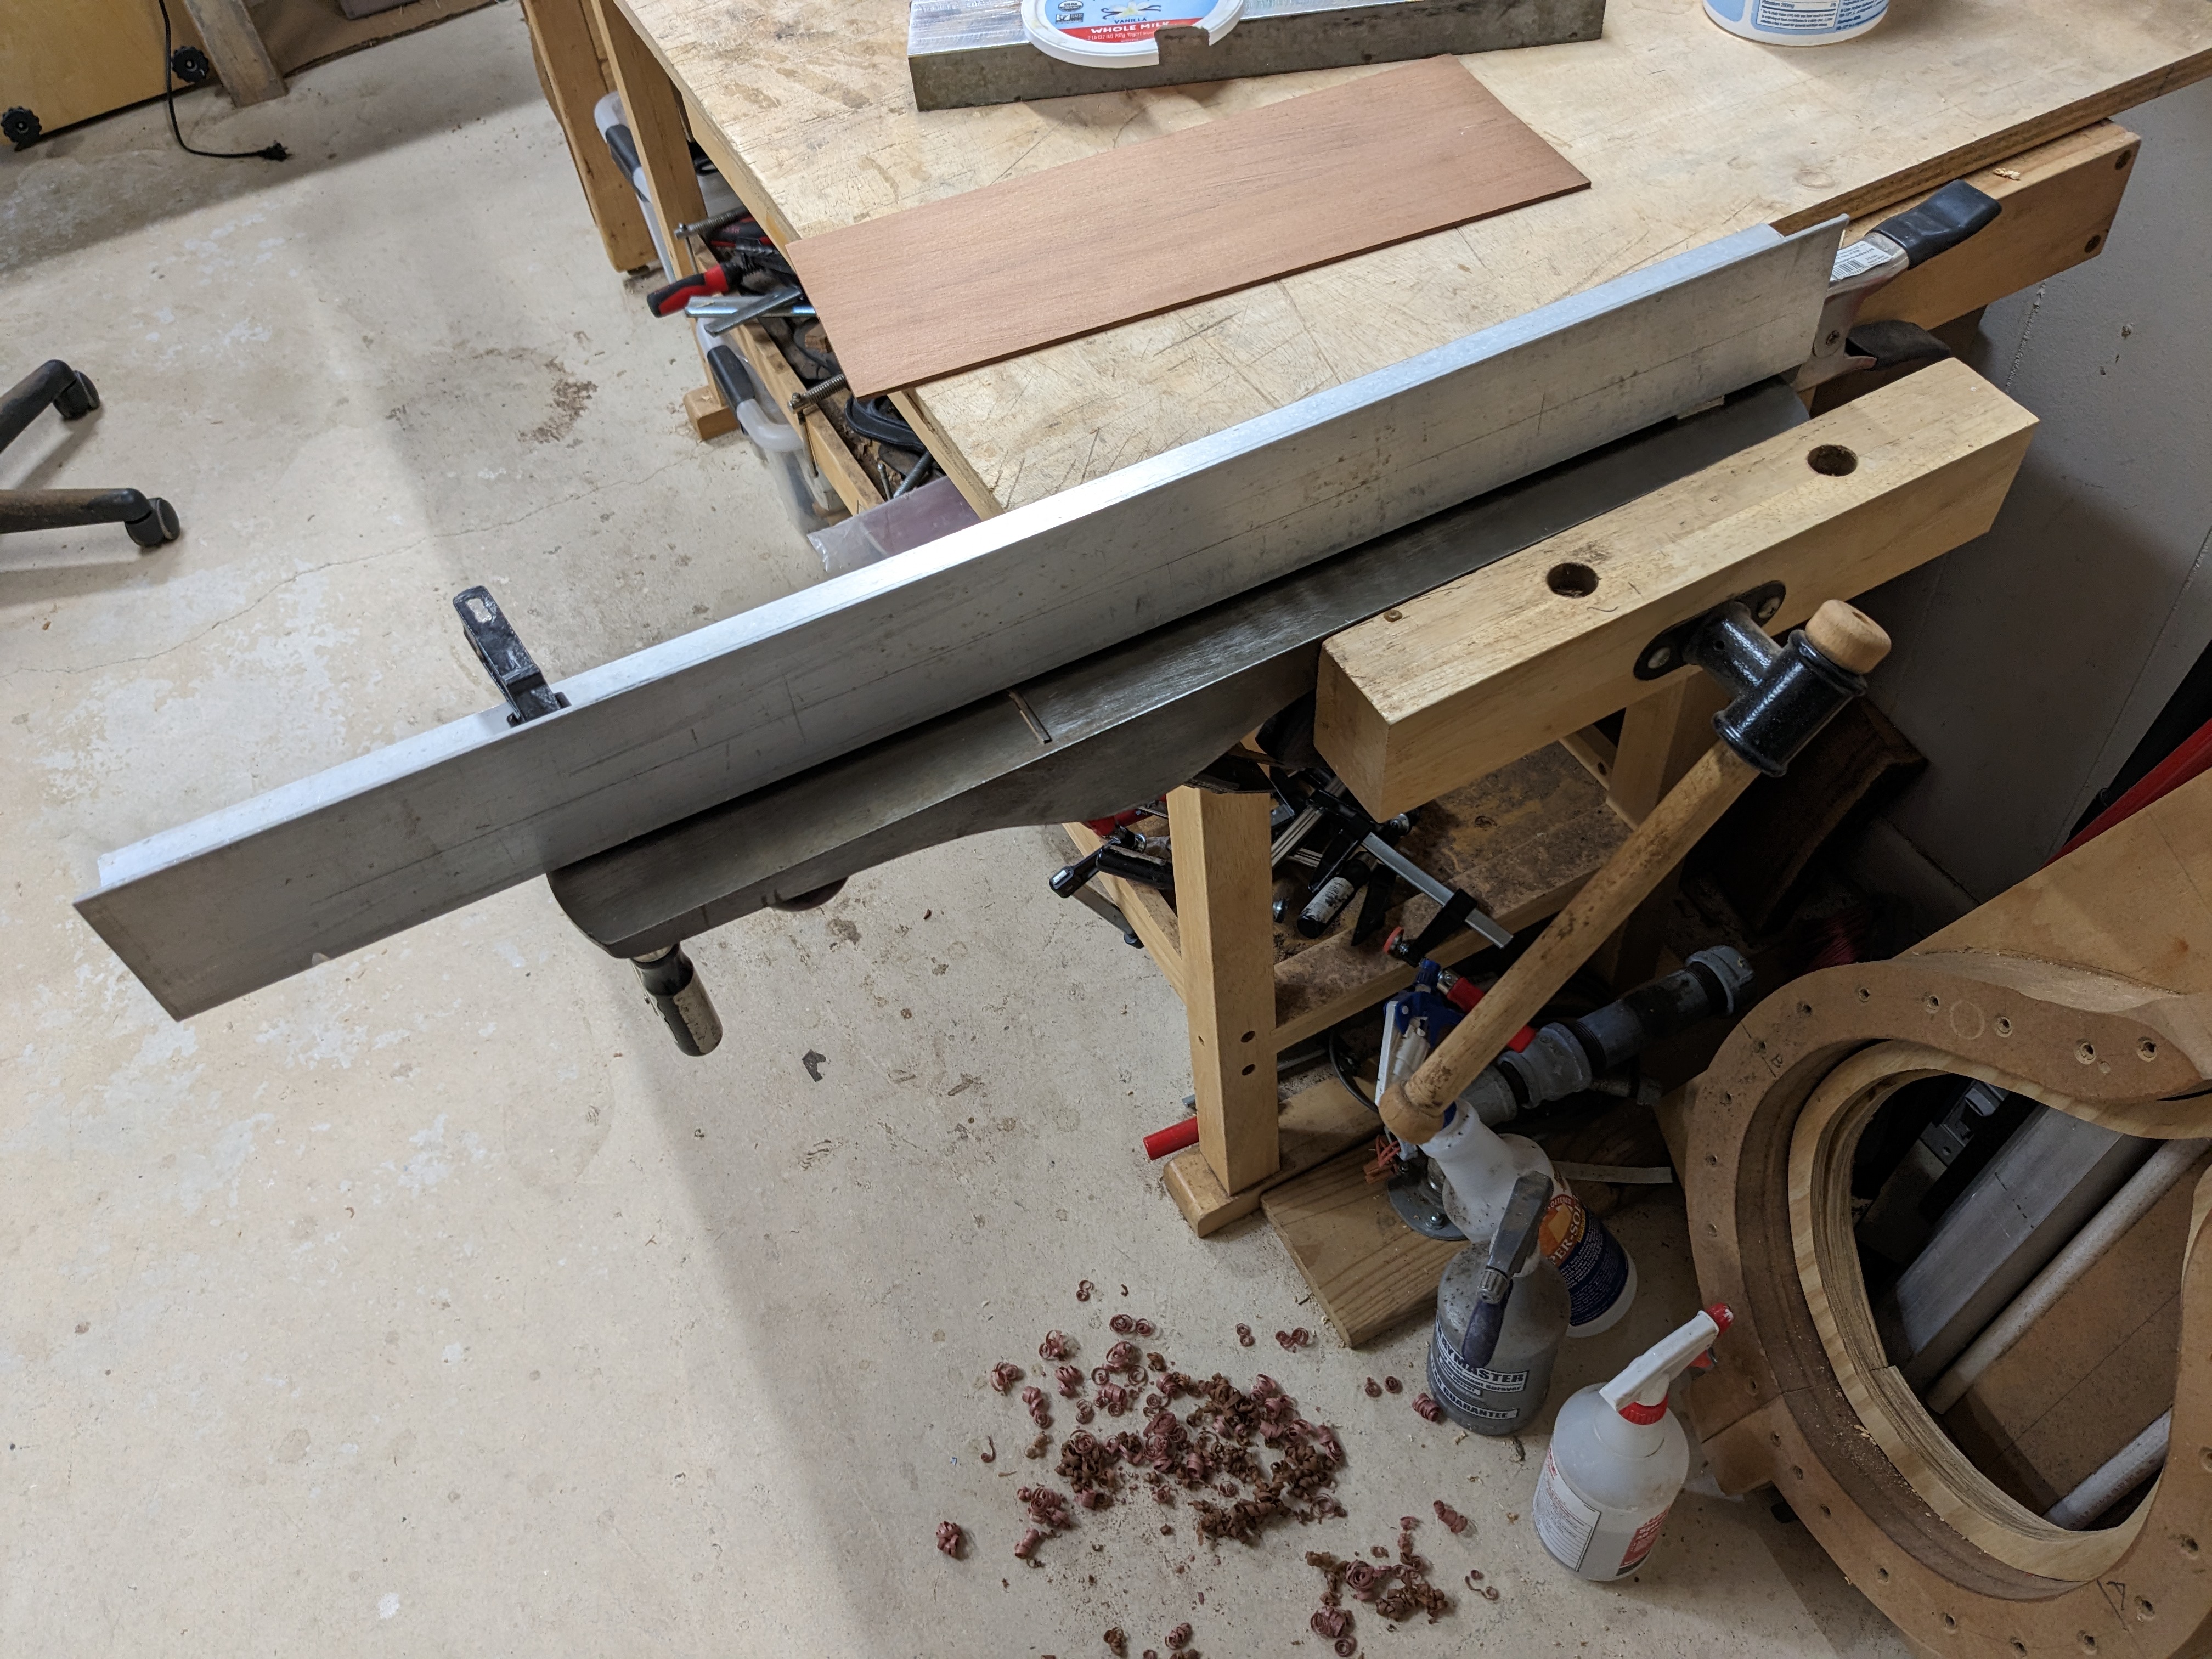
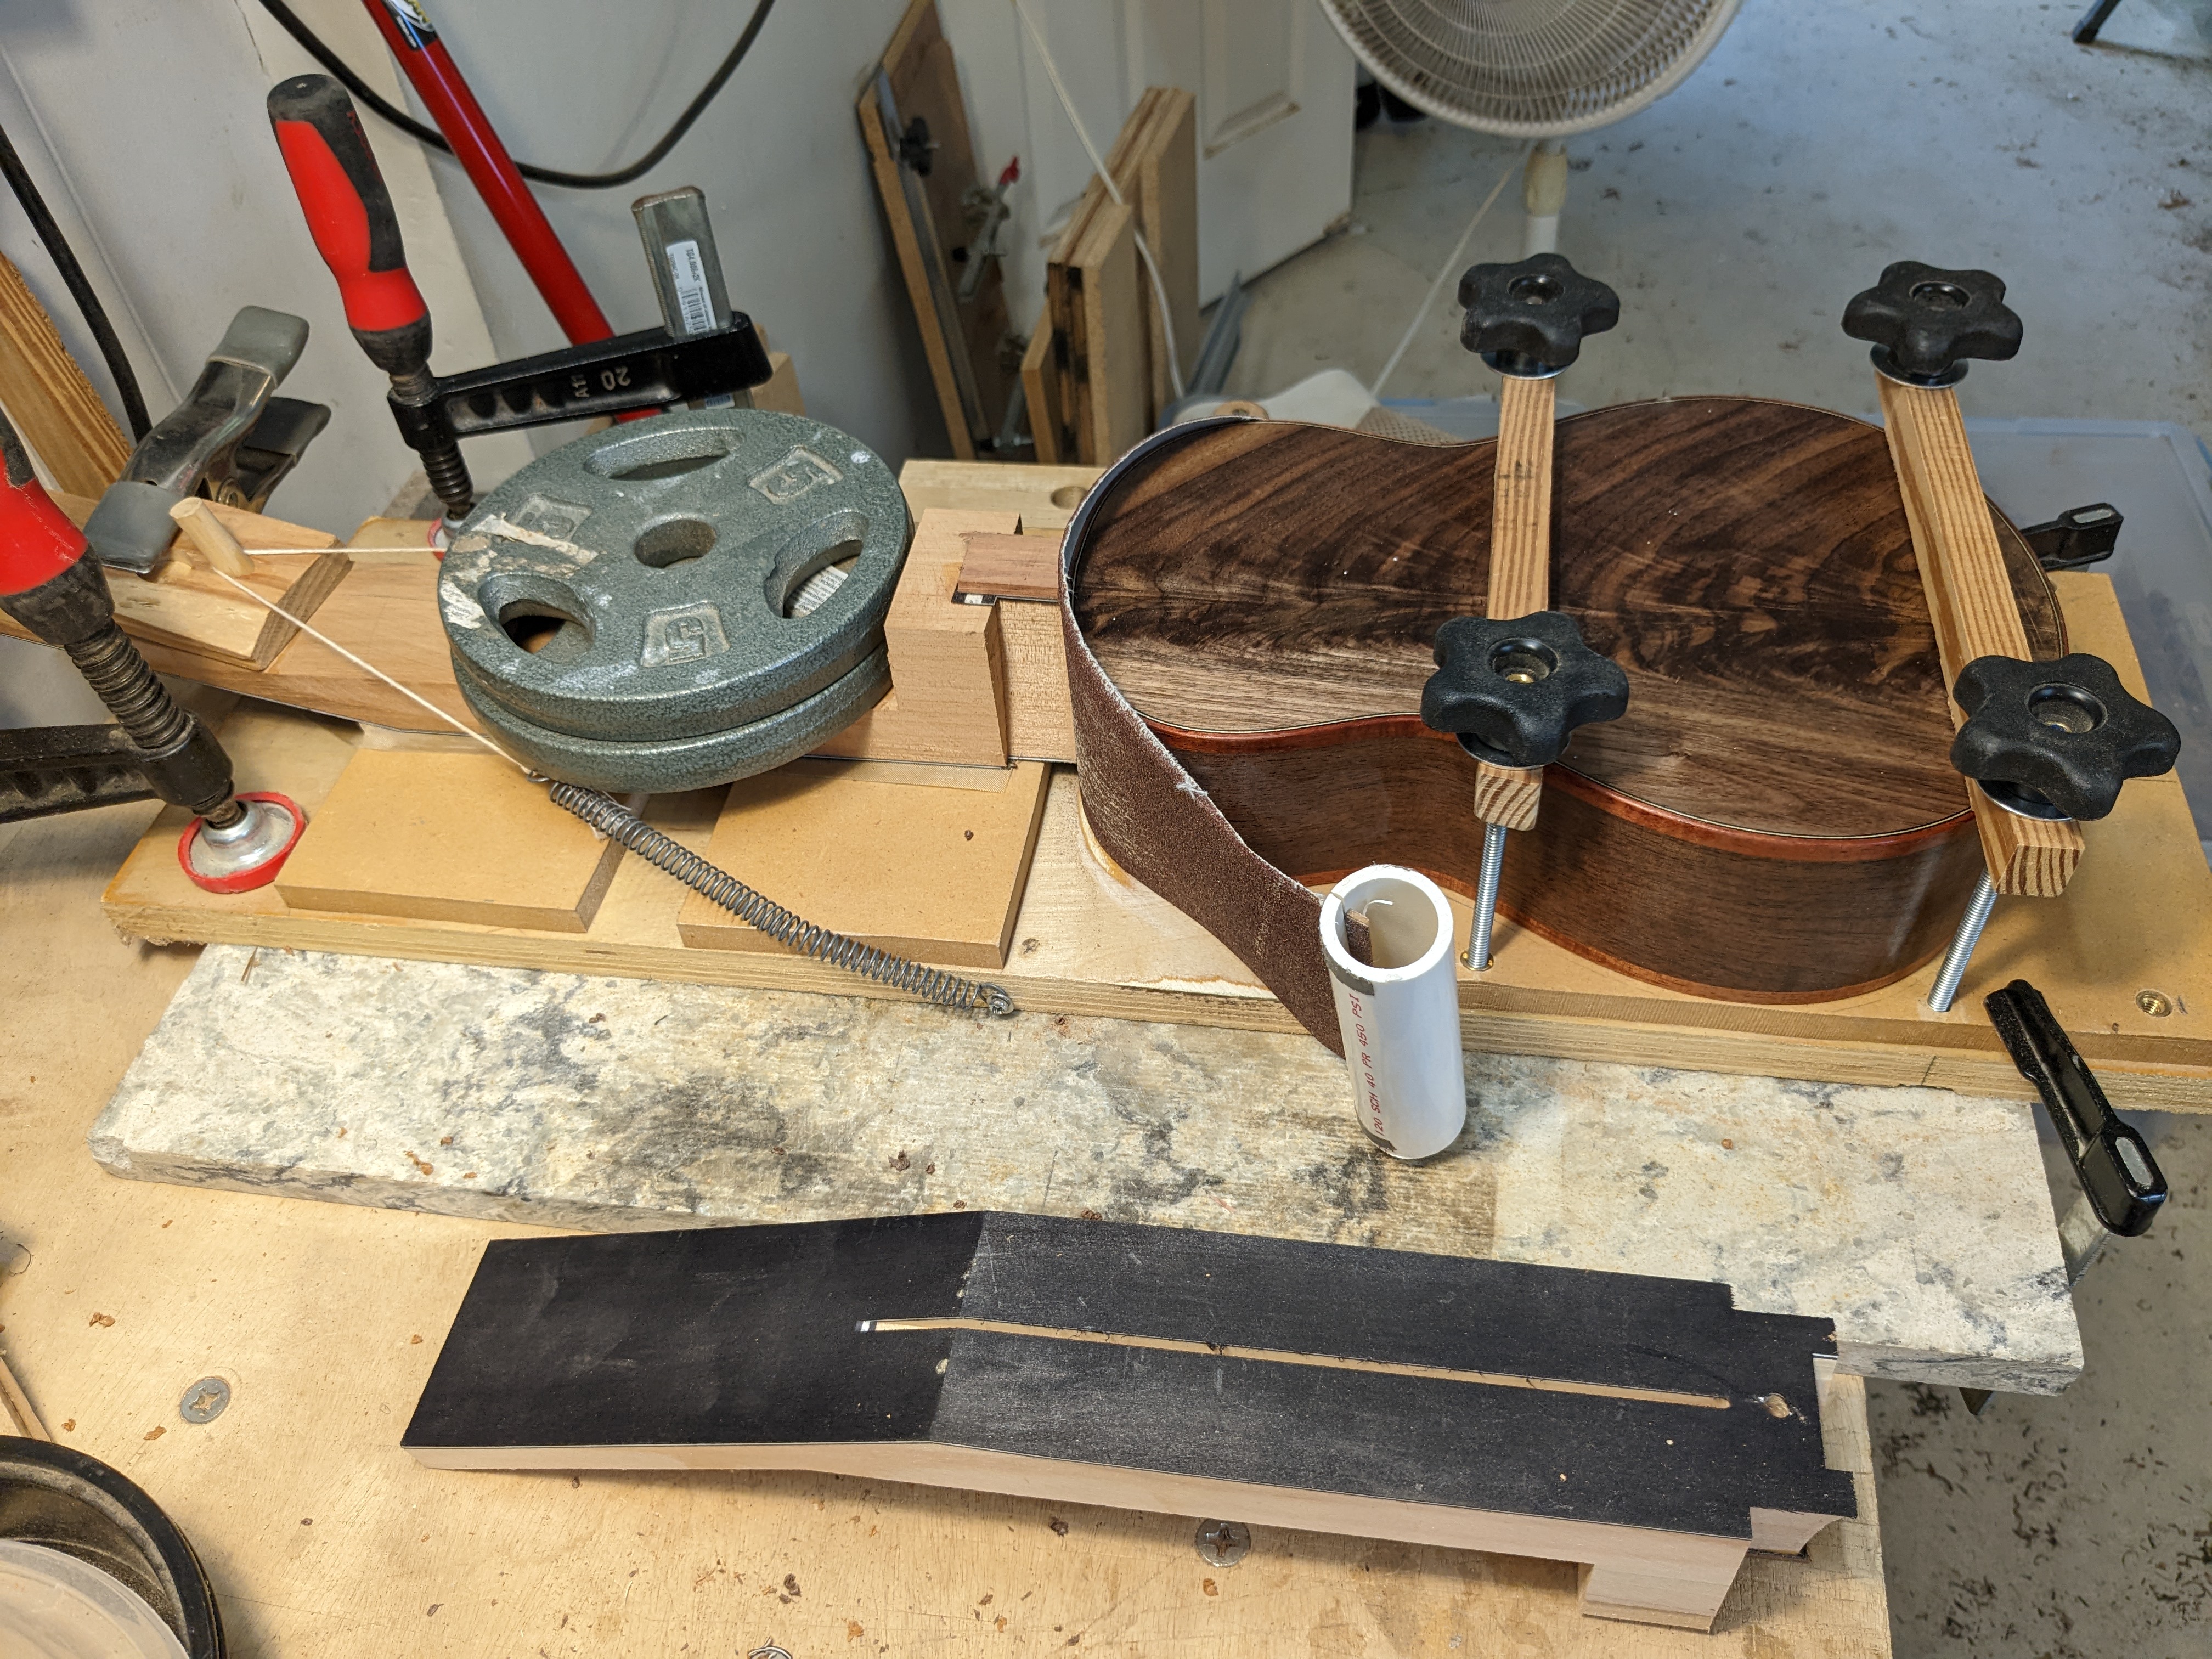
To fit a neck to the body I made this jig, which kind of looks like some sort of medieval torture device. It is a flat MDF base, which I clamp to a chunk of marble counter top to insure flatness. There is a center line drawn down the length of the jig, clamps to hold the body on the center line, and brass pins to align the neck. The neck at this stage has a channel routed that will eventually have a carbon fiber beam inserted but for now the channel provides a sliding alignment channel.

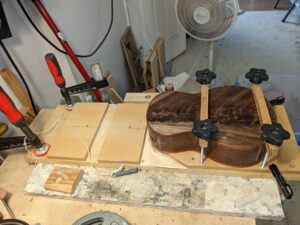
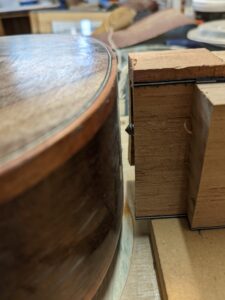
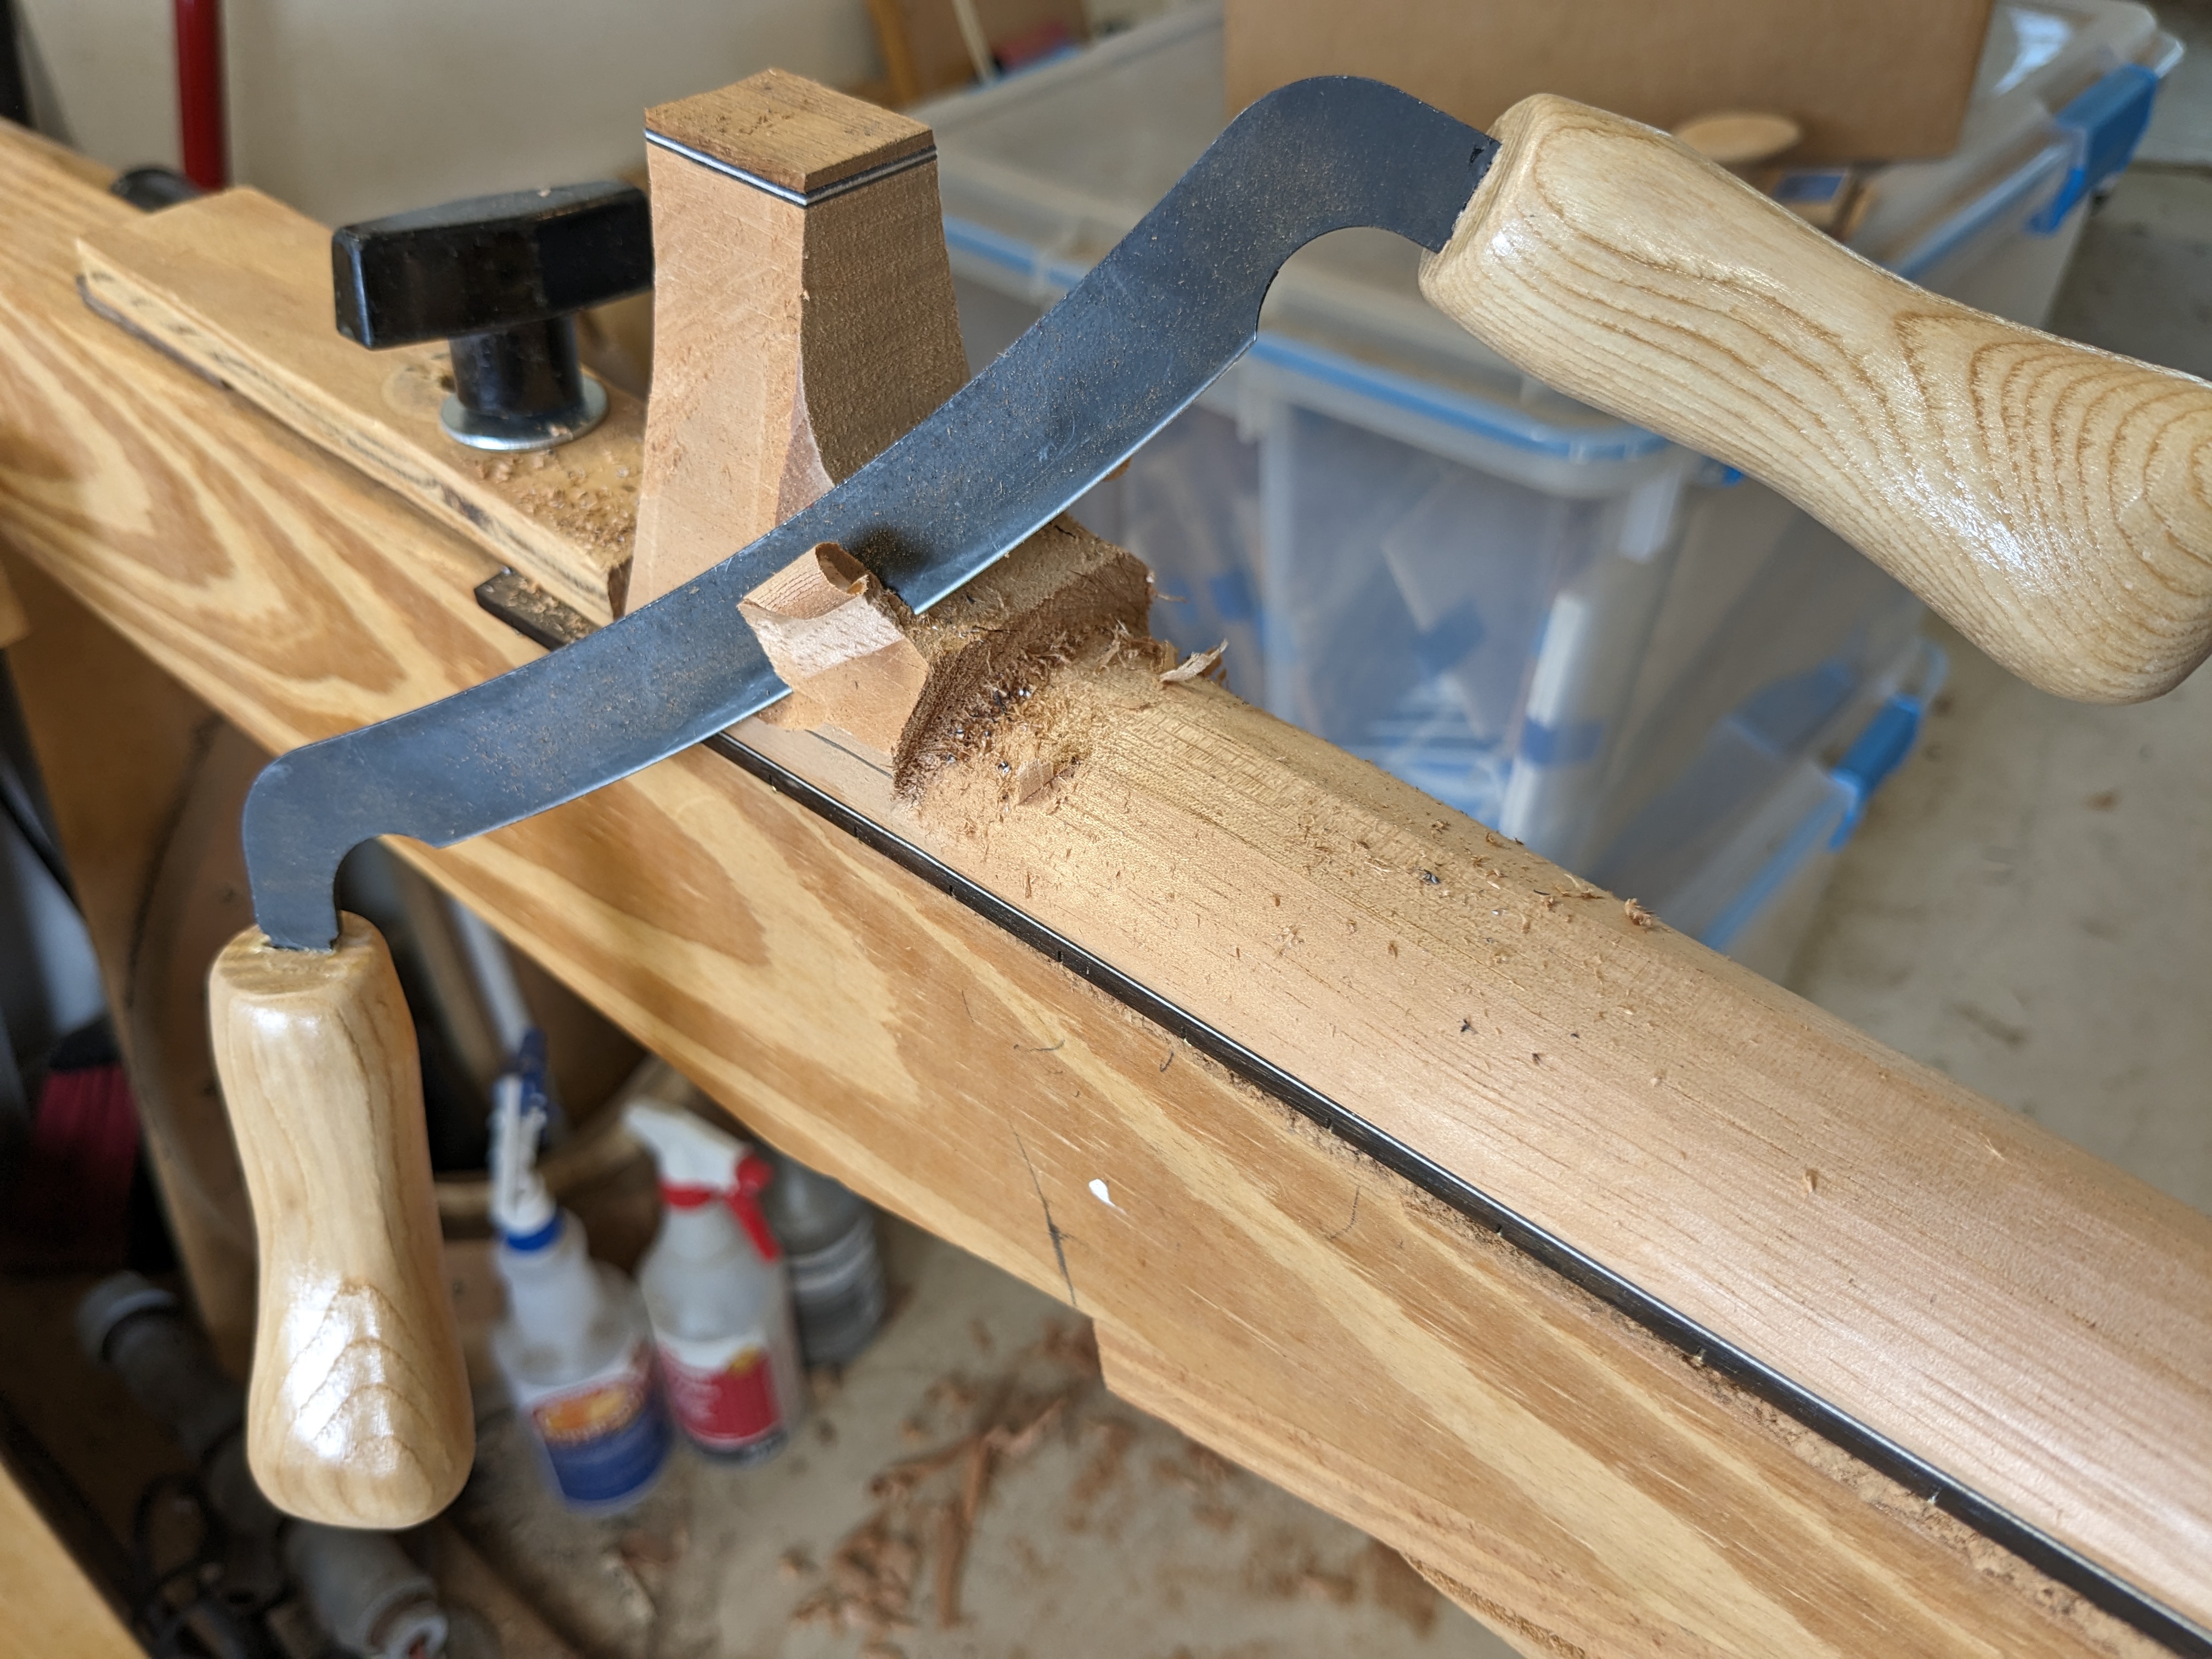
The neck is placed on the brass pins, a spring and loop of string is used to pull the neck against the body, and some weights are placed on top of the neck to stabilize it. Then a strip of sandpaper (a belt-sander belt cut open with PVC handles) is inserted. The sandpaper is worked back and forth vigorously. (One of the few aerobic exercise parts of ukulele building.) Since the back of the sandpaper is running against the body the neck gets sanded so it exactly matches the body shape, regardless of the exact curve of the body.

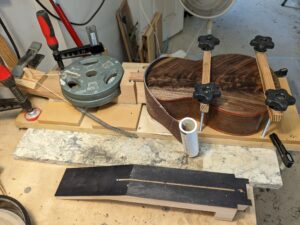
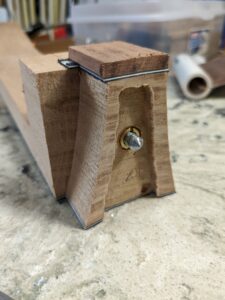
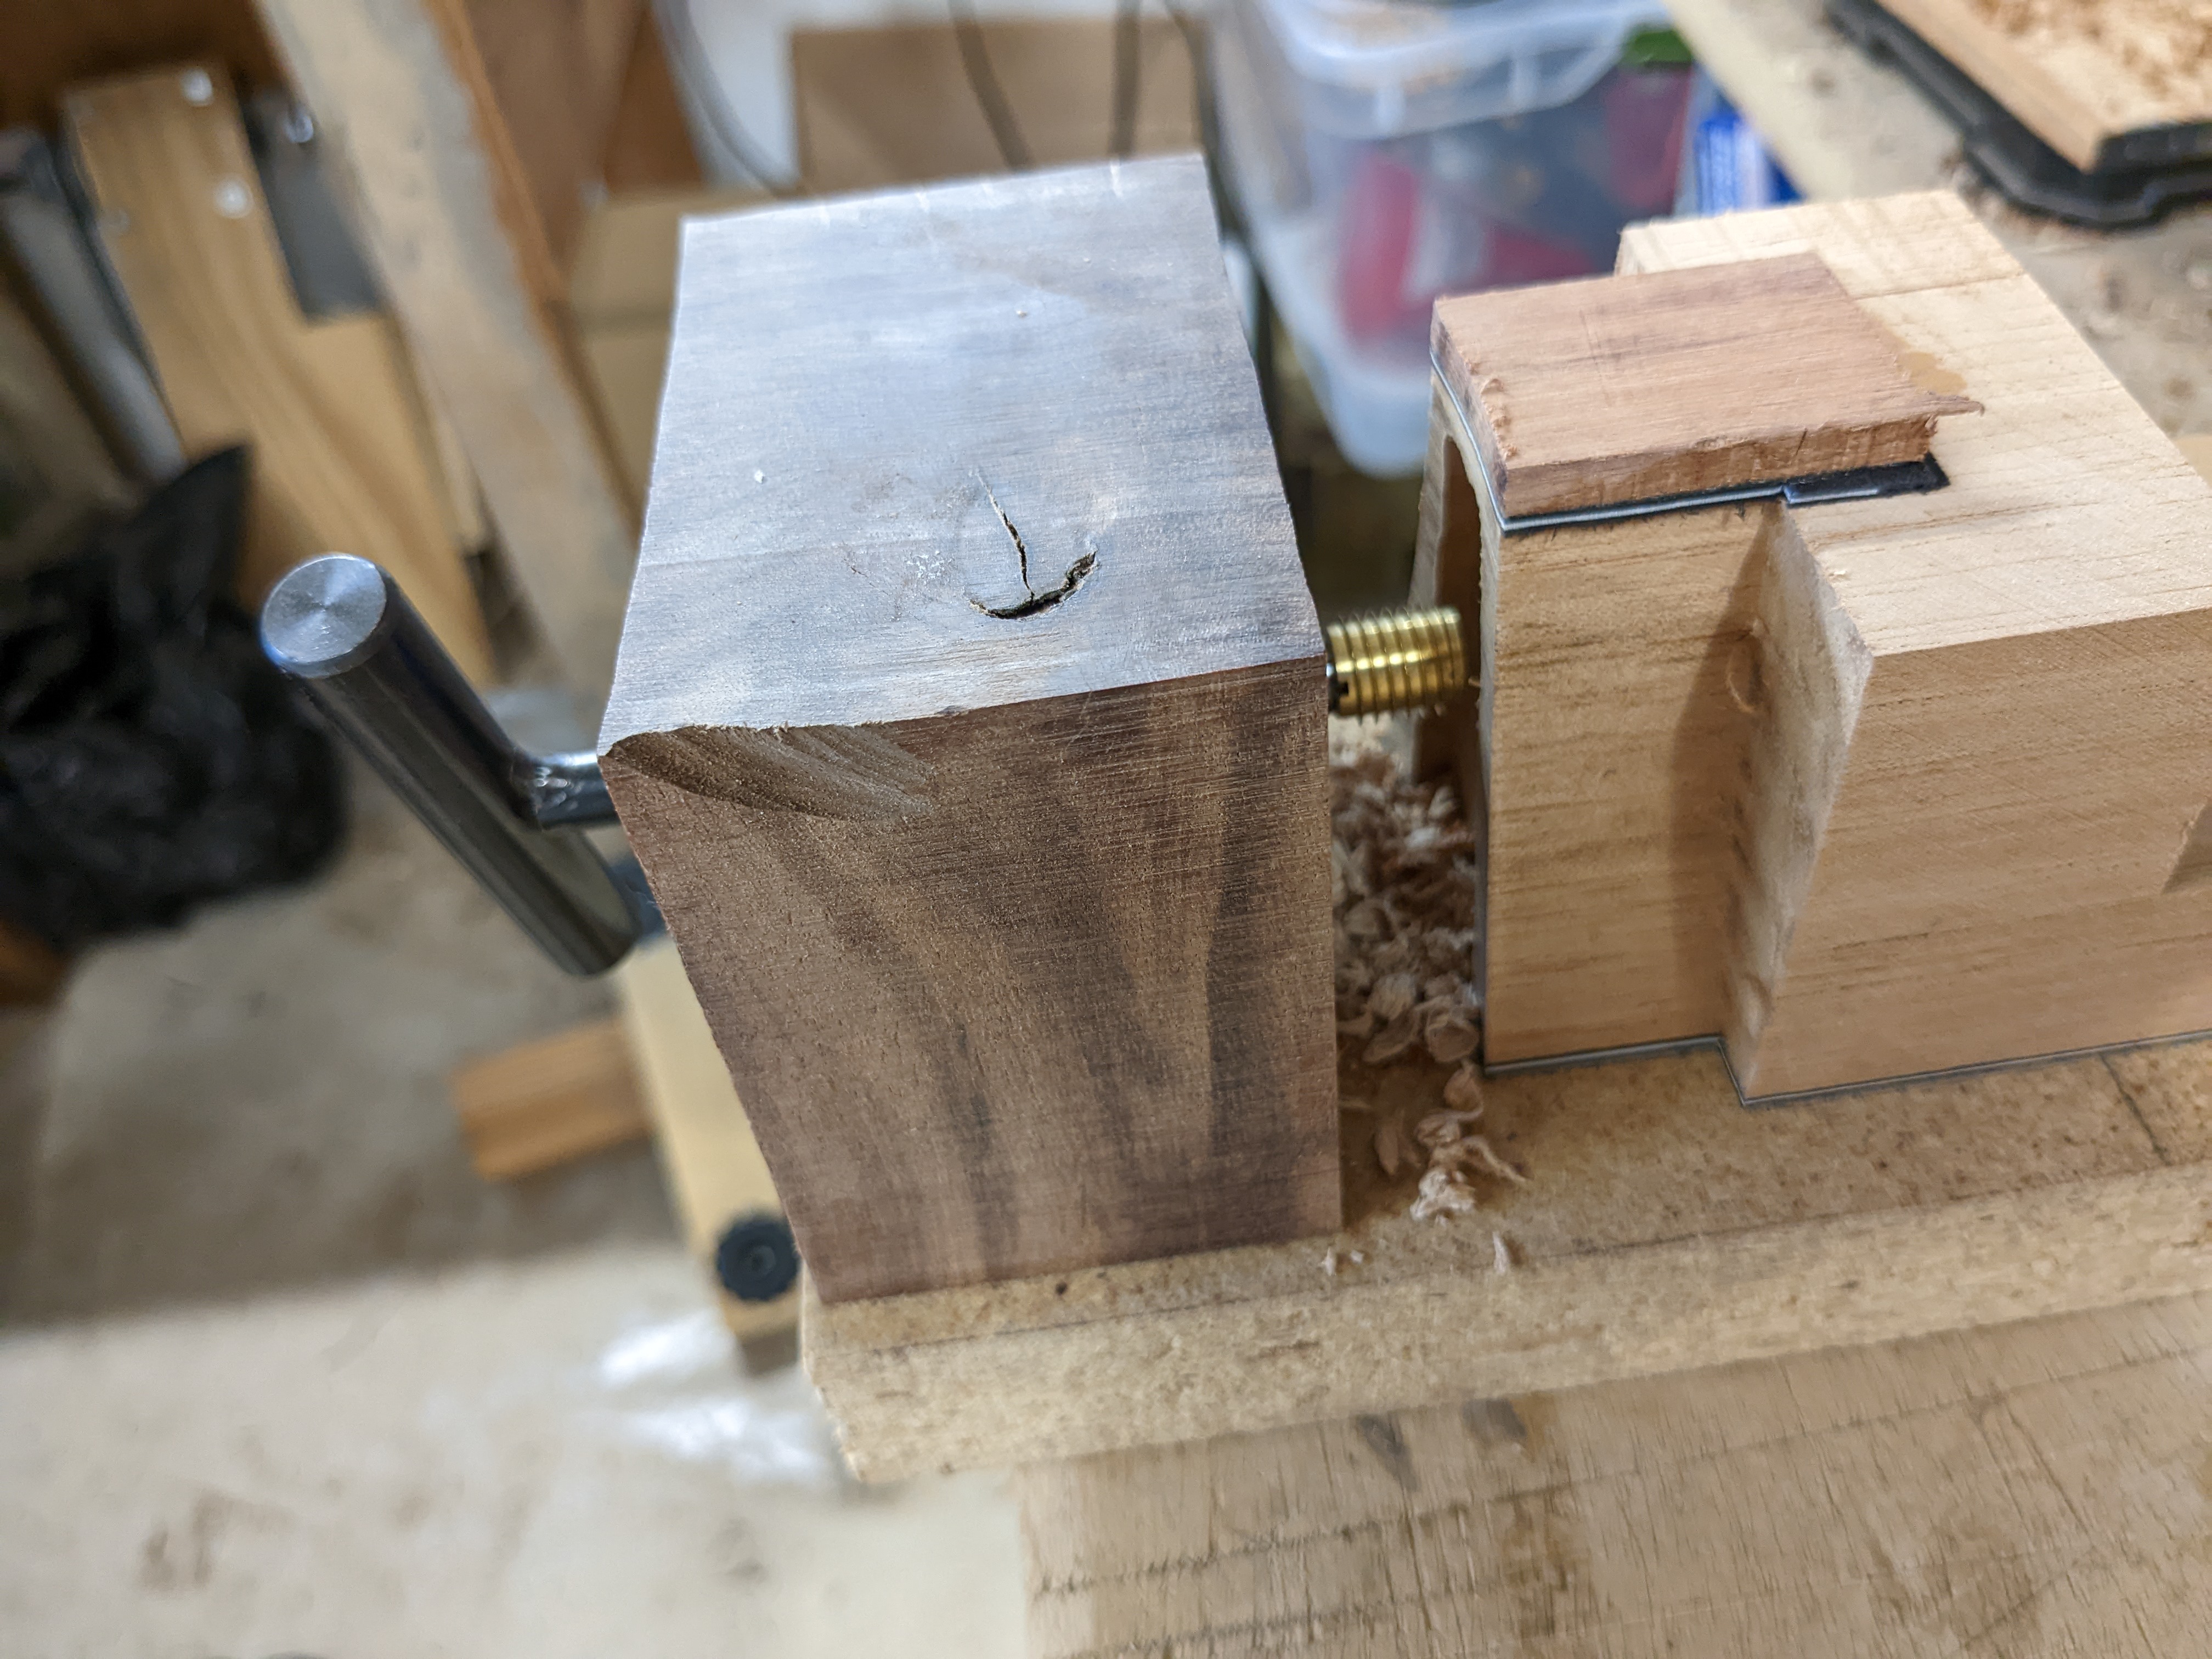
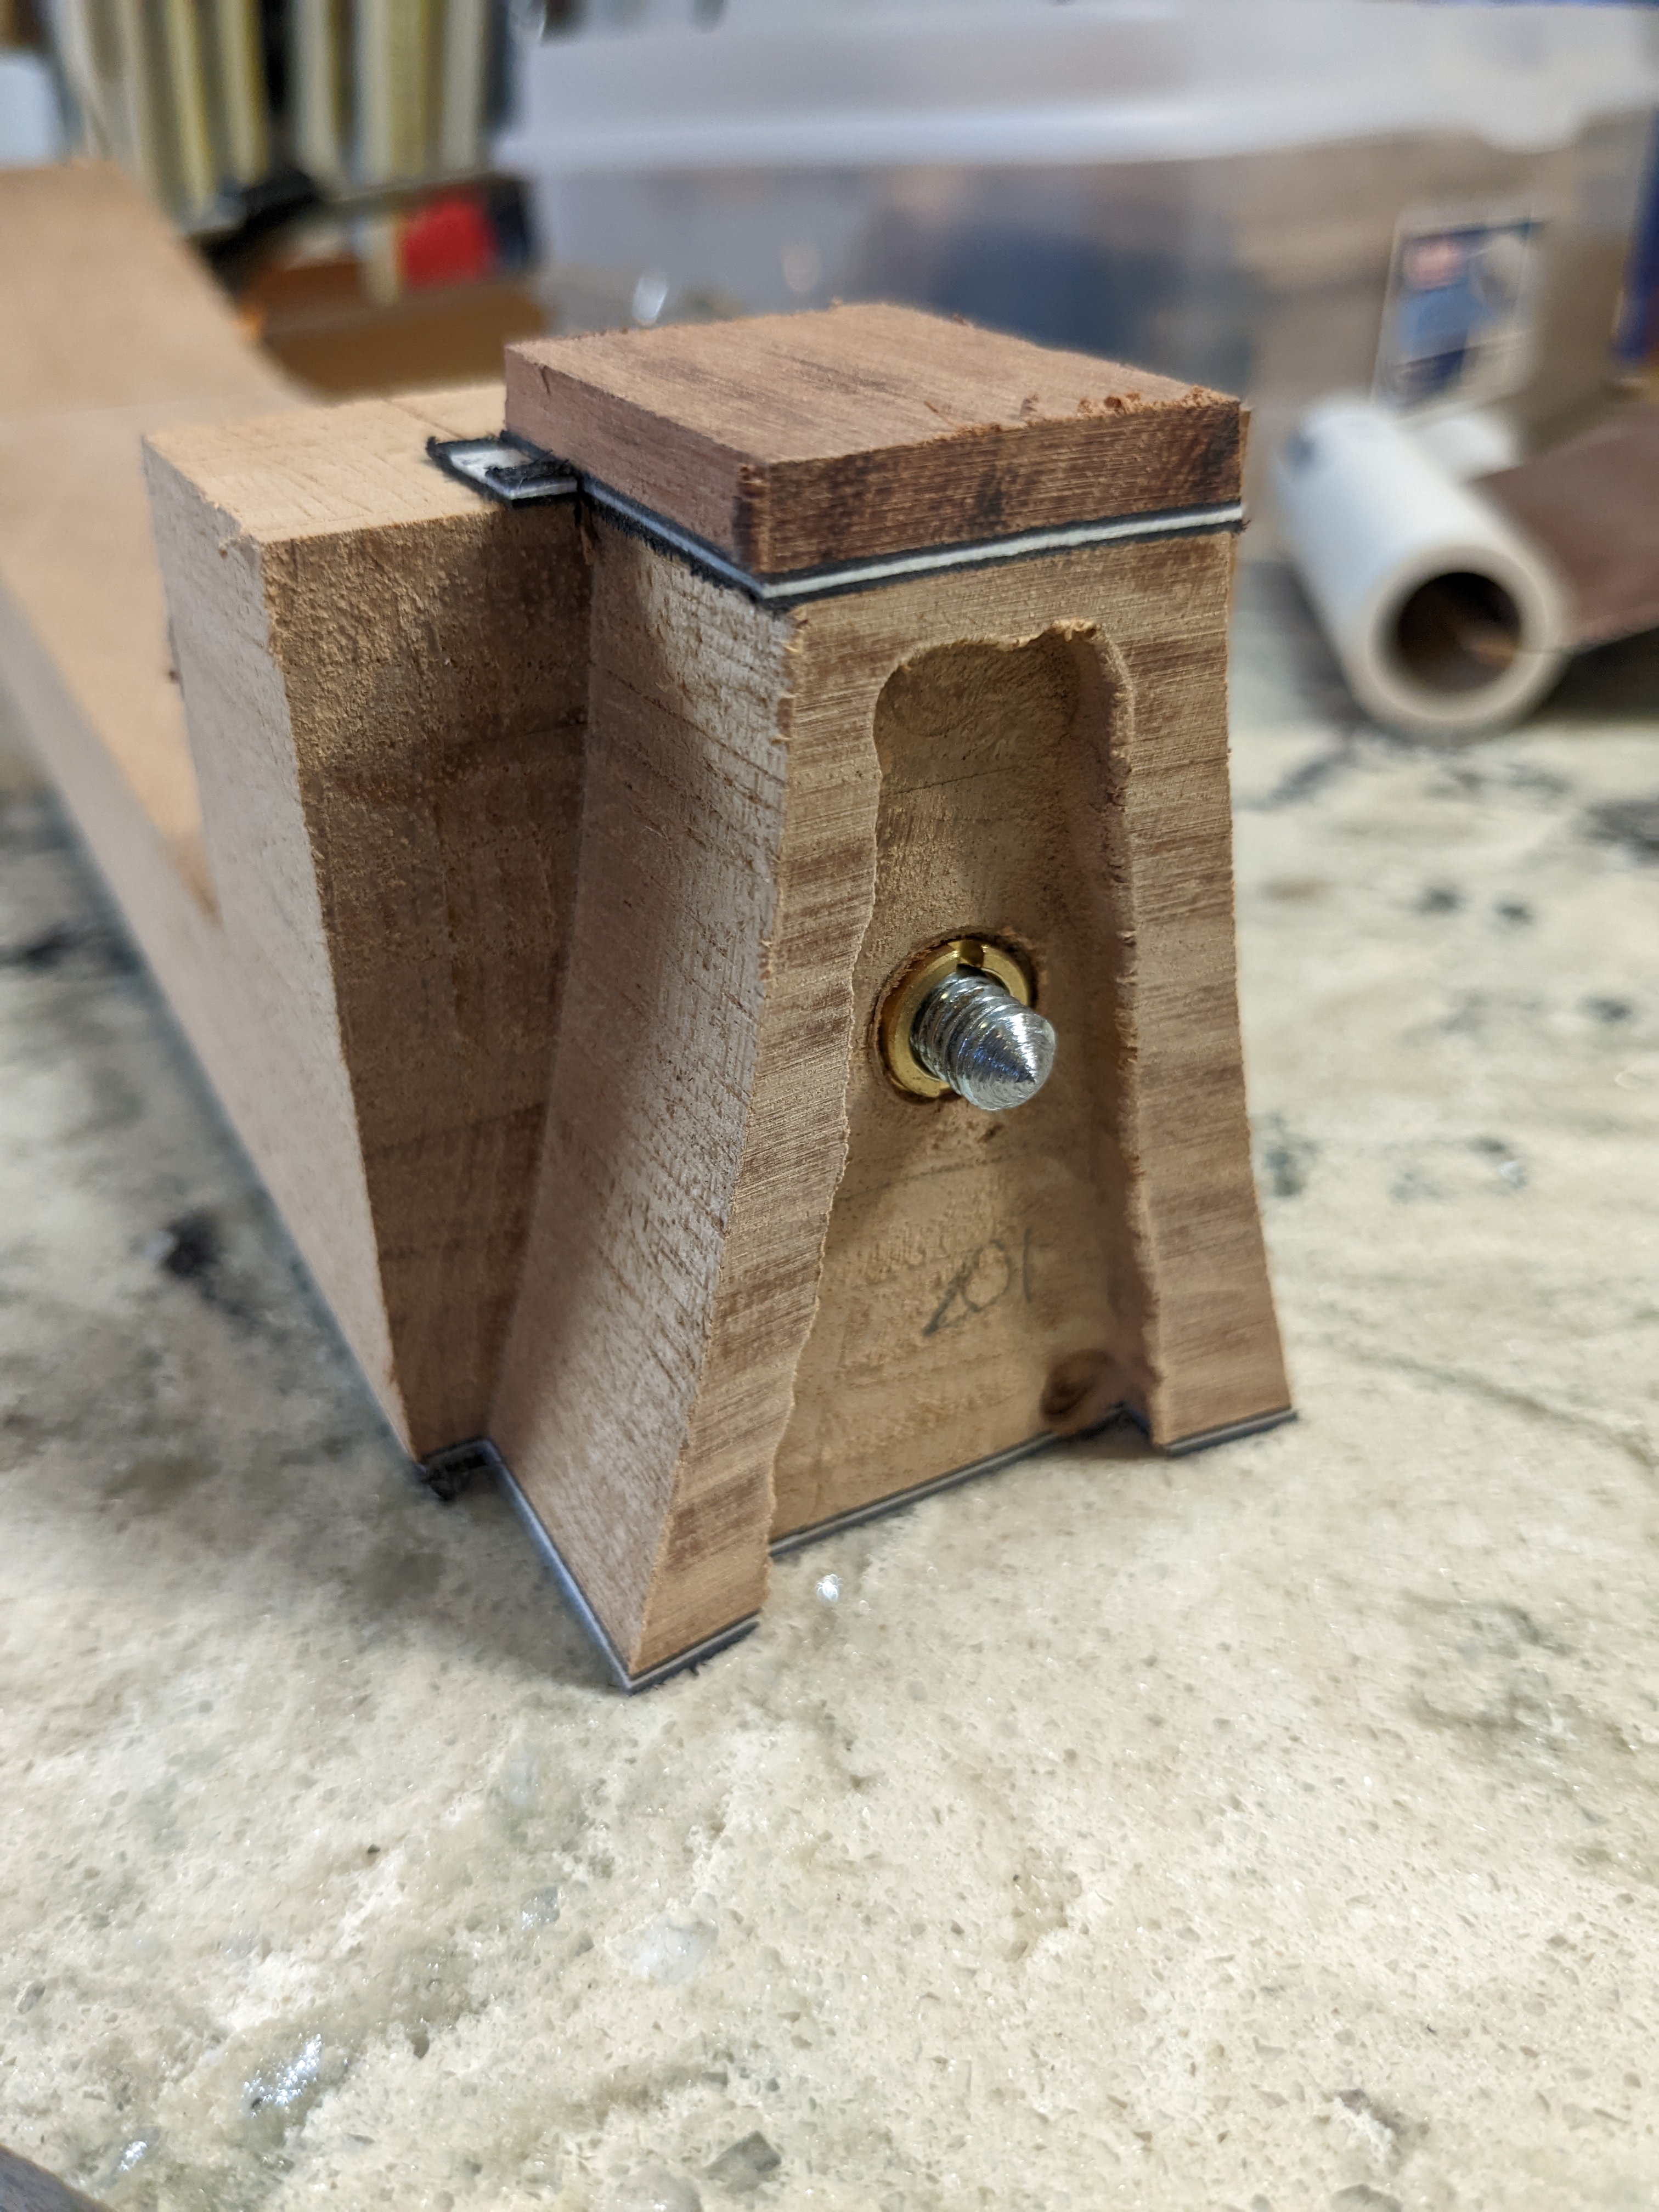
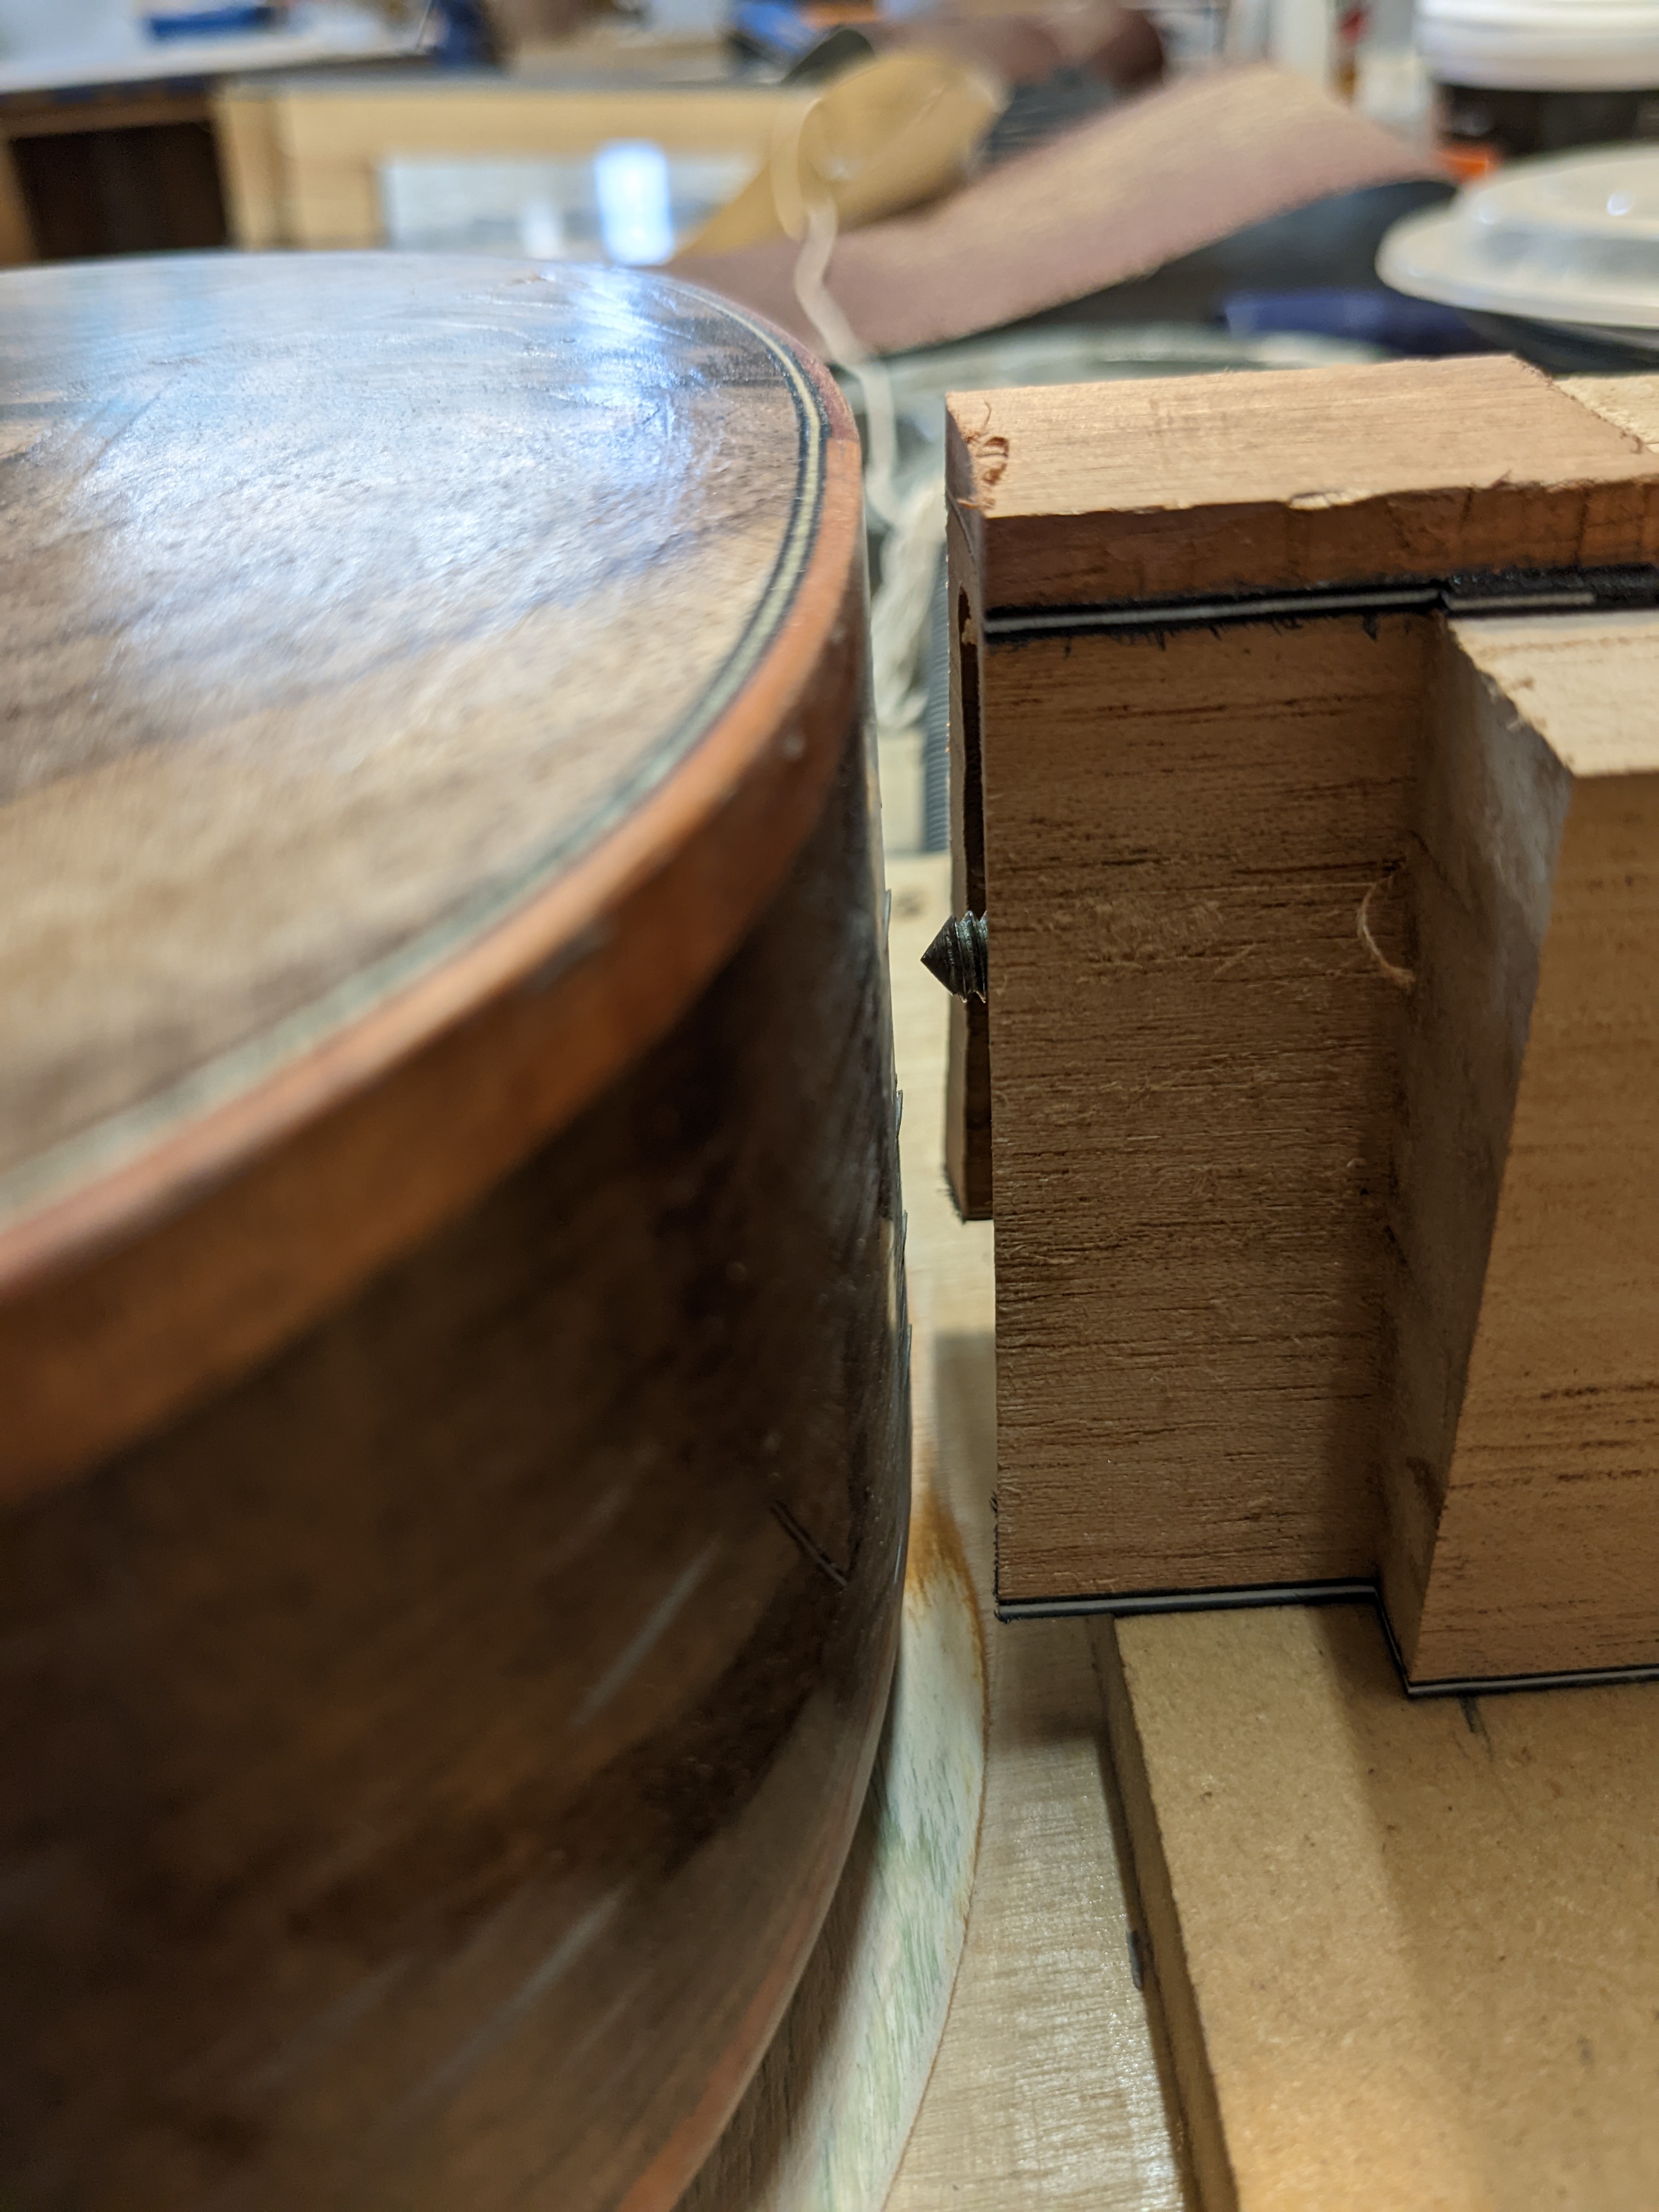
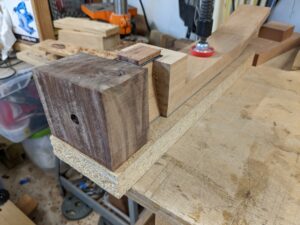
When the neck is fitted to the body it goes over to another jig, also with brass pins that fit into the carbon fiber channel, to drill the hole for the brass insert into which the attachment bolt will thread. This jig is used to both drill the hole and then to actually thread in the brass insert so it goes in aligned perfectly. There is an oak dowel extending vertically through the neck so the brass insert is threaded into oak cross-grain, not just into the end-grain of the neck which would be much weaker.

With the brass insert in place a small center-point is threaded in. With the neck back on the sanding jig (body was not moved) the exact location of the bolt-hole can be marked by sliding the neck against the body so the center-point leaves a mark.


router depth ‘adjustment’

I am learning to do side purfling. This purfling, at the bottom of the binding, gets mitered to matching purfling on either side of the end graft. There are a number of ways to do this, but this is how I do it at the moment.

The end graft is installed with purfling along the sides before the binding channels are cut. When the binding channels are cut they are cut just shy of the end graft. The remaining binding channel wood up to the end graft purfling is cut out with a sharp chisel.

Now the issue is how to cut the end graft to the correct length so that the binding will go ‘over’ it with the end graft purfling mitered to the binding purfling. I wanted to trim the excess off the top of the end graft with the same router/bearing setup that cut the binding channel. I have read about using sheets of the same veneer that makes up the side purfling as a spacer to lift the router up so it cuts off the top of the end graft to the height of the side purfling. I came up with an easier/better idea. I just put a stack of copy paper on top of the instrument to space the router up.

With this I can easily lower the router by the thickness of a sheet of paper just by removing a sheet of paper allowing me to sneak up on the correct depth. Very easy and very accurate.

In progress

Here are three (out of 4) that are in progress.  The red streaked one is ‘box elder’ which gets these red streaks naturally.  The other two are crotch figure black walnut, one bookmatched and the other a one-piece back.  The walnut ones get the redwood tops with the heart abalone rosettes in the previous blog entry.

heart abalone rosette

‘heart’ abalone pearl is where the muscle of the abalone was directly attached to the shell. It is very fine grained and kind of ‘bubbly’ looking, rather than broadly pearly. I normally did not use the heart paua abalone for much, it was kind of waste from the regular paua abalone pearl. I had a customer a while back who, after looking through my pearl types, wanted a heart paua abalone pearl rosette in a Port Orford cedar top. Well, that rosette came out really well, so …
I decided to do one again, this time in a redwood top. It really makes an interesting rosette.
Another rosette in ‘heart’ abalone pearl.
Since the last one came out so well, I decided to do its sibling in heart abalone also, but this time it is in pink abalone ((Haliotis corrugata) instead of paua abalone (Haliotis iris).

Ready. get ‘set’, go …

I generally build things in sets of 4, as that is what fits on the bench, and one minimizes the amount of shuffling of jigs, fixtures, etc. when build a couple of the same size.  (The last set of 4 had one of each size, soprano, concert, tenor, baritone, and there was much shuffling of things.  They were all commissions.  Here is the last set:)

The next set includes a much ‘wilder’ set of things.  I’m getting around to building #100 (tenor), which will have some extensive inlay and has Florida rosewood back and sides, I have a commission (customer is not afraid!) for a concert out of box elder which has this bright red staining, and I got some really neat quarter-sawn crotch black walnut which should make some pretty spectacular instruments.  One has single piece back and one has a bookmatched back.  If you are looking for a ‘pair’ these tenors will be interesting siblings.