Search Results for: Radius

#83 double back

This is one of the “three tenors” made as a bit of a sound experiment.  There is a more detailed write-up in the blog.  This instrument has a double back.  There is an inner back (spruce) separated from the real back by 1/2 and inch of airspace.  The theory is that the inner back prevents damping of vibration of the real back when held against the body.  It also is supposed to provide an extra resonate chamber.  This instrument is the loudest of the three, while maintaining a warm sound (the redwood top uses my standard bracing) and very good sustain.

Top is water-tank redwood, back and sides are Pennsylvania curly maple.  Black-red-black purfling, rosewood binding, asymmetric rosette in pink abalone pearl.  The neck is Pennsylvania poplar, fingerboard is casuarina (a very hard but invasive tree I cut in south Florida).  Fingerboard has a 10″ radius.   The headplaate is what I call a ‘Picasso’ headplate, made of all those little bits of wood I could not bear to throw out.  Side sound port, black Corian nut, bone saddle.  Currently is is strung low-G but can easily be changed to high-G because I use a zero-fret, so no need to cut nut slot depths.  $975

One man’s trash is another man’s treasure

Last spring, on trash day, I found a potters wheel that someone had put out on the curb. (Since I was a professional potter many many years ago I knew just what it was.) A heavy, well made unit. I picked it up with a couple of thoughts in mind.
1) I mounted a grinding wheel flat and this allowed me to flatten abalone I cut from shells as part of making inlay material. I could do it with a small stream of water so the pearl stays cool and there is no dust.
2) A pretty critical step in the build process is sanding the rims (sides) so that the top edges are flat and the back edges have a 15-foot radius. I have made some powered contraptions to do this, but they were not entirely satisfactory. So, I mounted the sanding disk (flat on one side, 15-foot radius on the other) to the potters wheel. Reasonable speed and lots of torque. Put the rims in the mould, hold it on the sanding disk, and the job is easily done.
3) I mounted a bit if heavy leather. With a little buffing compound I get a power strop to quickly get those chisel edges really polished and really sharp.

#74 Parlor Guitar

Cocobolo back and sides, Port Orford cedar top, Spanish cedar neck, white curly koa binding, black & white diagonal purfling, asymmetric rosette in green heart abalone pearl, Richlite fingerboard and bridge, curly koa headplate.  Great sounding and much louder than one might expect from a smaller bodied instrument.  Scale length is 20.75 inches, strung with Savarez high-tension classical guitar strings.

Normally the wood I use makes no difference in the price, since most of the wood started with a me and a chain saw and a tree.  I was given this cocobolo (a central American rosewood) as a scrap from a woodworker who built a dining room table out of a big magnificent slab. There was just enough width and length to make a couple of parlor guitars.  I will never have this wood again, and cocobolo has become very expensive, so I need to charge a bit of a ‘wood premium’

Parlor Guitar $825
Options
side sound port $75
radiused fingerboard $75
wood premium $150
instrument total $1,125


matchmaker

When using the radiused end-blocks (previous post) one needs a matching concave caul on the other side for clamping purposes. Easy way to make the matching cauls: auto body bondo on a scrap of wood, wax paper, and just press the radiused end block into the bondo. Wait for it to harden (only a few minutes), saw off the squeeze out, and there you have perfect matching cauls.

New forms

I have spent a number of days re-making bending and building forms. Why? I changed the body shape slightly. I used to have the neck area, where the neck attaches, flat. Originally this made the neck easier to fit, but with new jigs and techniques having a rounded neck area is just as easy as flat, and I like the look of a more rounded instrument.

Radiused end blocks. To go along with the rounder instrument outline, I have made the head and tail block areas of known radii, so I can cut blocks of just the right radius. Since I have the jig out, may as well make a bunch in different woods. I like to use darker blocks with darker sides/back and lighter colored blocks with lighter colored sides/back. This collection should last me a while! Because of the difference radii across the different instrument sizes I stacked them where they will go so I could make an evenly distributed bunch.

end blocks

There are two end blocks in an instrument, one for where the neck attaches (the head block) and one at the bottom of the instrument, the tail block.  These are there to provide gluing surface to join the sides, and (for the head block) provide support for neck attachment.  I used to have the head block as flat, as early on this made fitting the neck easier.  However, with the way I do things now having the head block be flat is not required.  I much prefer that the overall shape of the instrument, both the head and the tail, be rounded/curved.  I re-did my instrument outline, and the forms used to build the instruments last fall.  As part of this I made sure that the curves for both the head and tail area, at least where the sides attach, are circular, with a known radius.  Of course, the radius varies between the head and tail, and varies with the size of the instrument.  I have the radius noted on all the templates for the instruments.

I make up the blocks a standard size, and then cut the radius using a small jig and the disk sander.  The jig consists of an arm with holes for different radii and a clamp on one end to clamp the end block.

This arm fits over a pin on a base board, which is clamped to the table of the disk sander.  Swinging the arm quickly sands a perfect radius on the block.

The result is a smooth, accurate, repeatable radiused block.  I make them up for the different radii I use for different instruments, in different woods, since I like dark colored blocks for dark sides/back and light colored blocks for light colored sides/back.

#73 Mango and Eastern Aromatic Cedar

This was built as a bit of an experiment in a couple of directions.  It has an arm bevel and has a new finish.  The arm bevel is to make playing more comfortable, and the new finish is harder and more durable than what I was using, and as a added bonus has a wonderful silky feel even on a gloss instrument.

The aromatic Eastern Red cedar (Juniperus virginiana) is also new for me.  I rarely see it big enough to make ukuleles, but as I was driving along I saw a line of them that were taken down next to the road.  They were about the biggest I have seen, and had been trimmed of lower branches quite a while ago (being along the road) so the wood was pretty knot free, which is a bit unusual for aromatic cedar.  The landowner said ‘Help yourself, the power company took them down’.  The wood is a bright purple-pink when fresh cut but ages to a warm caramel brown pretty quickly.  It turns out to be nice and light but still quite stiff.  A good top wood that I would place between the warmth and ‘thickness’ of redwood and the brightness of spruce.  Really nice all-around sound.

The mango I cut from some tress taken down by a mango grower friend in Boynton Beach Florida.

Black bog oak binding (2000-4000 years old), black-white-black-white purfling, casuarina fingerboard (with a 10 inch radius) and bridge (a Florida invasive species), dogwood root burl headplate, asymmetric rosette in red abalone pearl (Haliotis rufescens)

Nothing to fret about

Time to do the frets.  I fret after the fingerboard is glued onto the neck because it gives me one last chance to make sure the neck/fingerboard in its nearly final configuration is flat.  I fret before the final shaping of the neck.  I used to do frets after the neck was shaped and always managed to put some little dents in the neck which then needed to be sanded out.  The fretting operation as I do it is as follows.

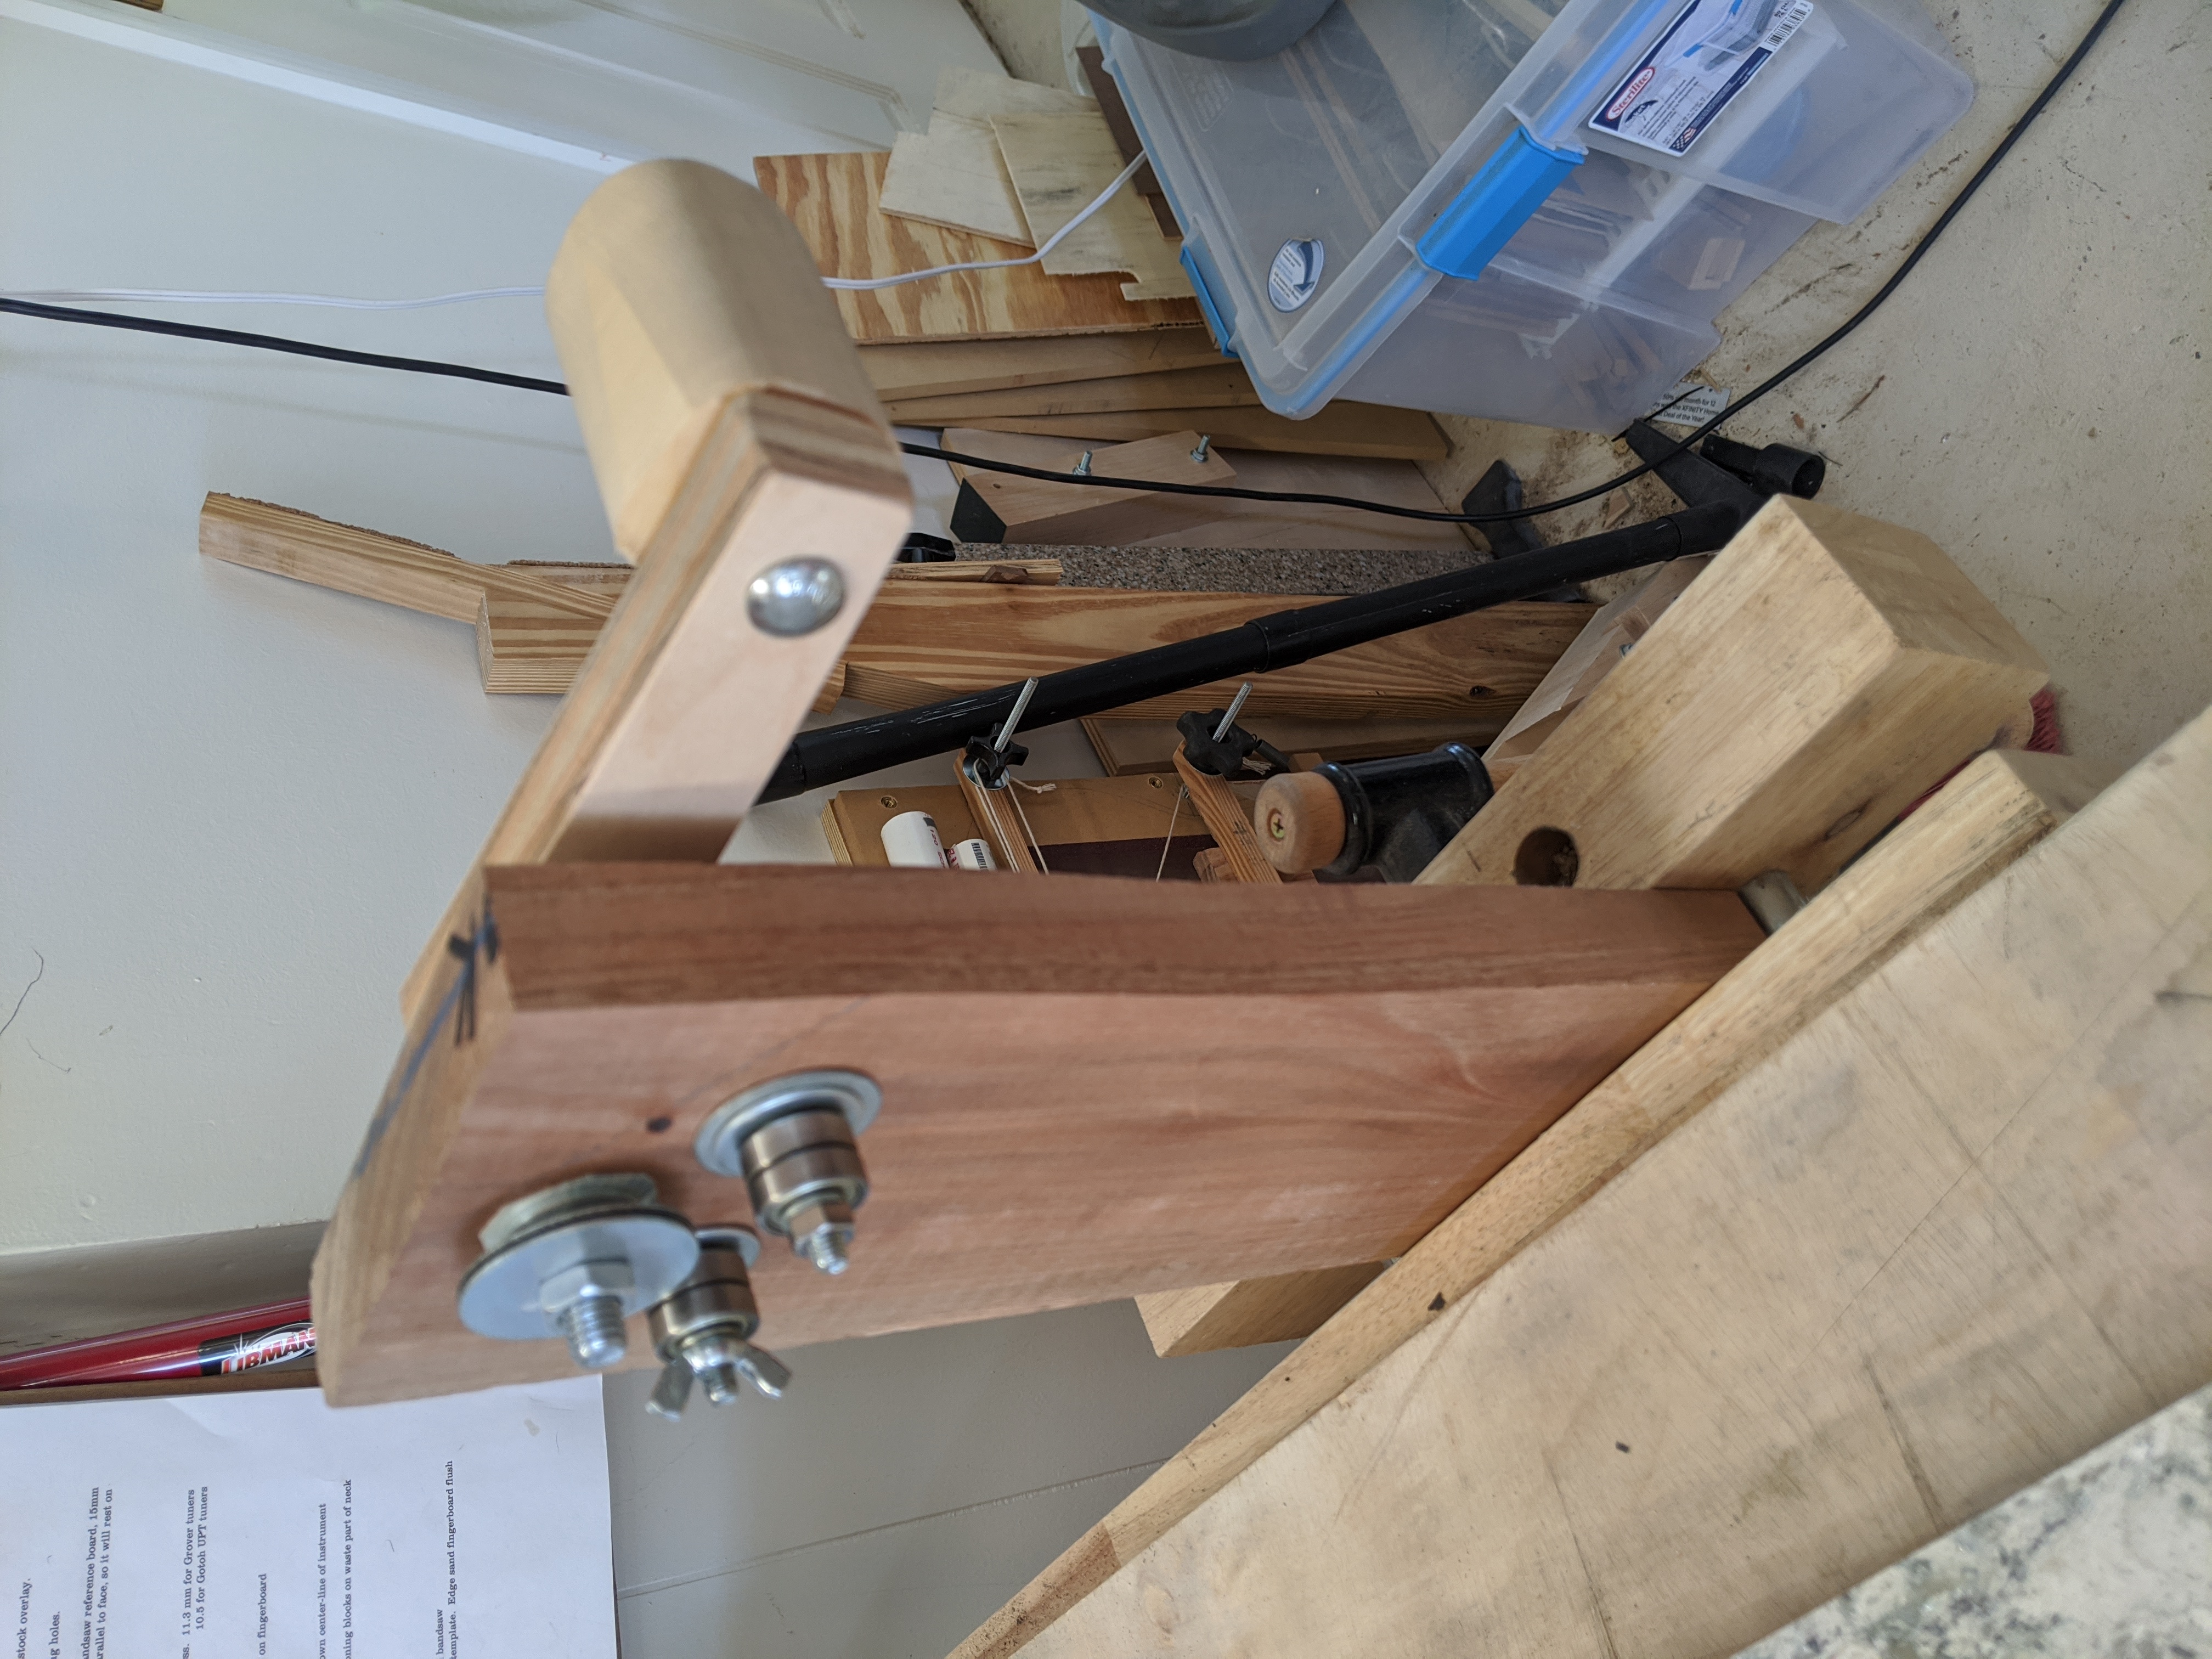
If I am doing a radiused fretboard I first radius the fret wire with a home-made fret bending tool.  By adjusting the position of one of the bearing clusters I can vary the amount of bend to match the particular radius.

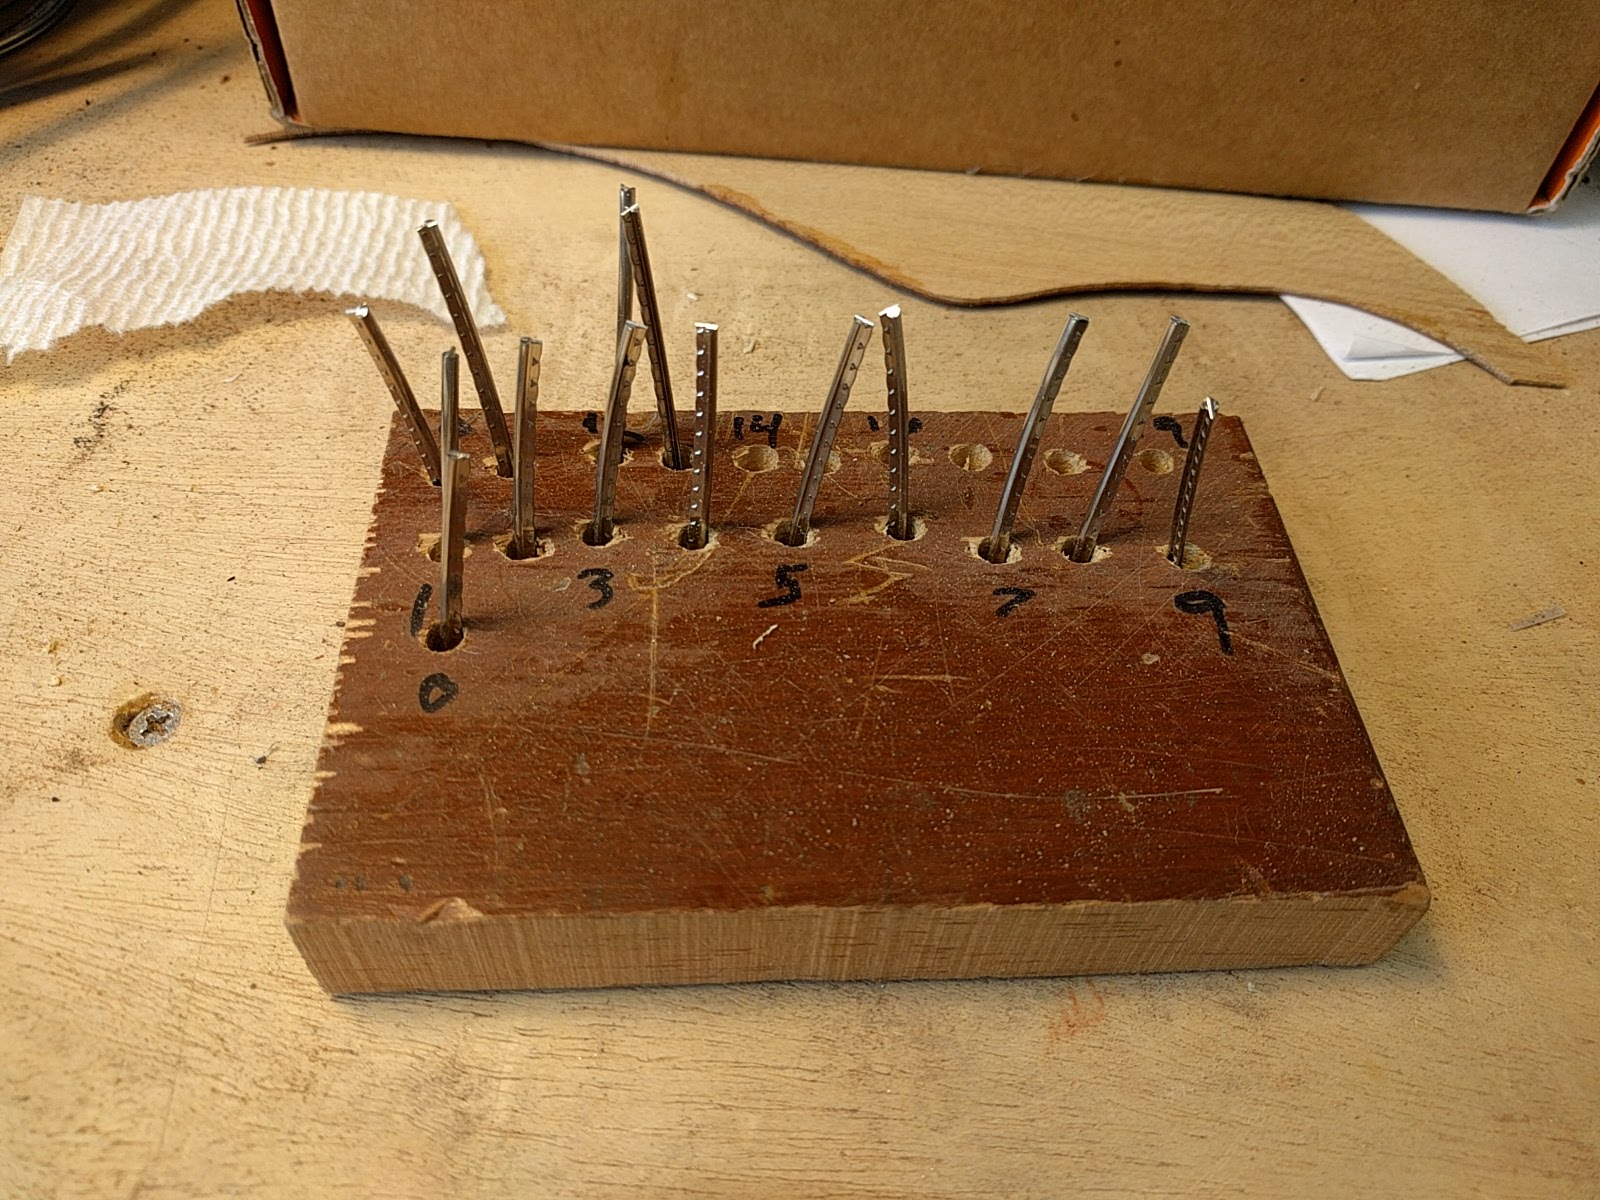
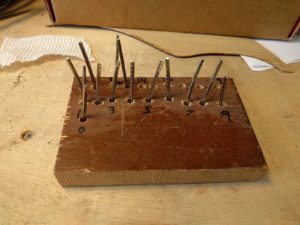
Once the fretwire is bent (if necessary) I cut it to the rough length of each of the fret slots with nippers, and stack the pieces in a set of numbered holes in a little block.

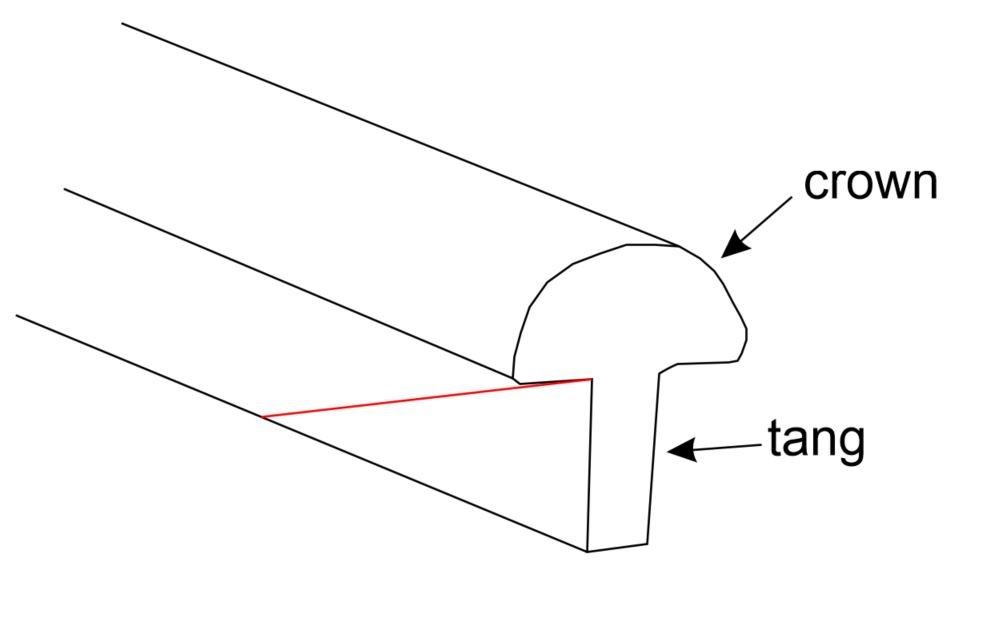
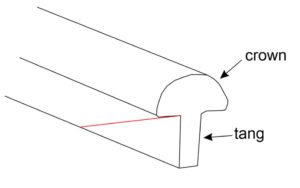
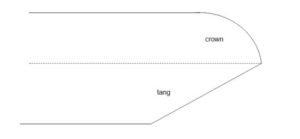
I started out in instrument making building banjos with bound fretboards.  When doing a bound fretboard you must finish the end of the fret before inserting it into the fretboard.  Even with non-bound ukulele fretboards I like the results of finishing the end of the fret before it is inserted.  I can easily get a nice round polished end, with no chance of damaging the fretboard which might happen if the end of the fret is finished after the fret is inserted.  So I cut the fretwire to fret lengths, and then file the ends.  The filing takes three steps.  First the end is filed square, then the tang is filed back at a 45 degree angle.  Cutting the back angle means that the tang is not visible from the side of the fretboard, and the tang will never stick out making sharp edges if/when the fretboard shrinks.  The back cut is in red.  The length is checked to make sure it is just a hair shorter than the fret slot so that the fret does not protrude beyond the end of the fretboard.

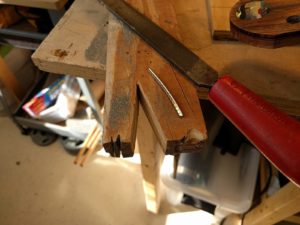
When filing the fret is supported by slots cut in the end of a little cut-off board clamped to the bench.

Finally I file the crown to round the end and then polish the end with 600 grit paper followed by 1000 grit.

The fretboard is prepared by taking a 4 corner file and running it along the fret slot so that a little bevel is created along the top edge.  This is because the fretwire is not exactly square where the tang meats the crown.  A little bevel of the top edge of the fret slot lets the fret seat flush on the fretboard much more easily.

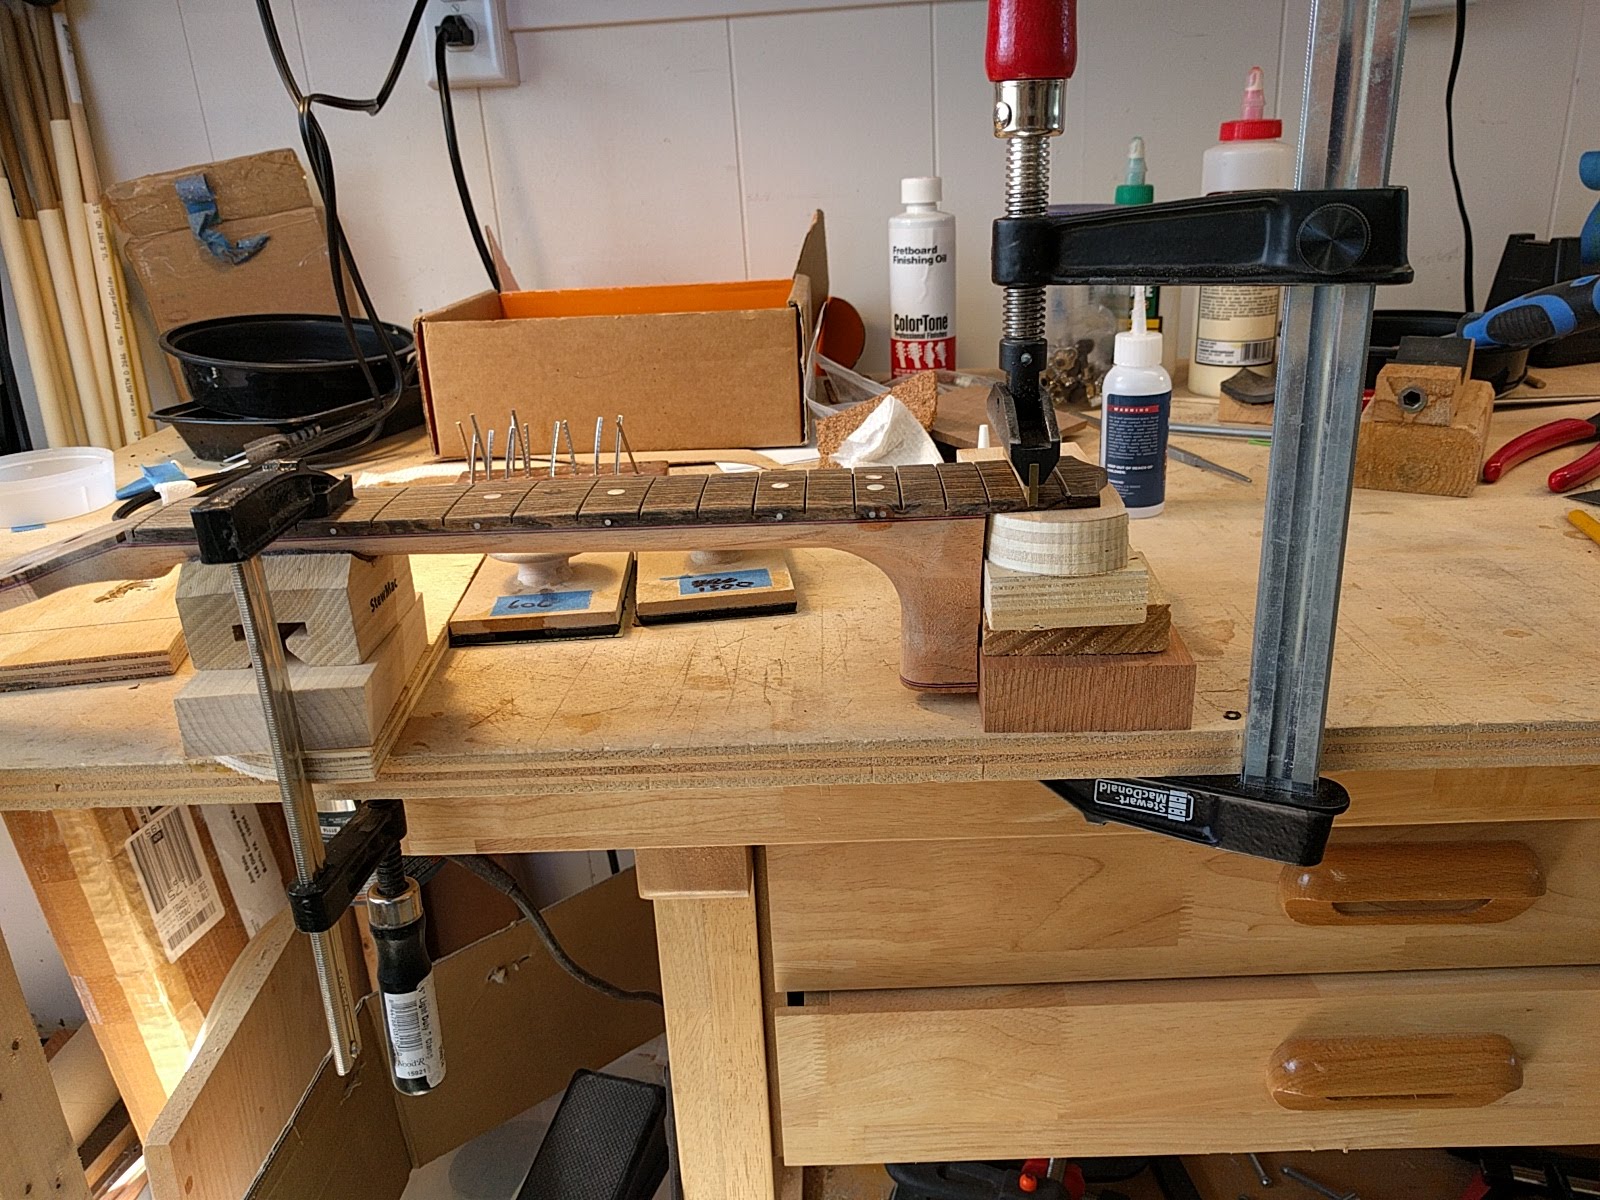
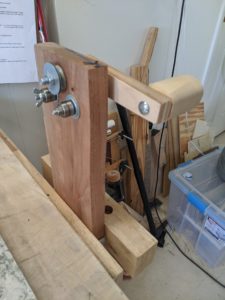
I press the frets into the slots using the fret press clamp from Stew Mac.  However, rather than using the cauls that come with the fret press clamp to support the neck when fretting I find that I get much better control by clamping against the bench.  Also, rather than just pressing the fret into the slot, which can take a lot of pressure, I have found that by tapping the edges of the metal caul that holds the radiused brass insert the fret seats much more easily.

I also run a bead of medium viscosity CA glue into each fret slot using a fine pipette tip on the glue bottle before inserting the fret.  This is to make sure that the fret is well seated in the fretboard, and that it stays seated over time.  The glue has a few minutes to harden while I file and polish the ends of the next fret.

#69 – curly walnut & redwood baritone

As I was building this instrument, any time I did anything with the body, like sand it, it just boomed with sound.  I was very excited to put strings on it.  It has exceeded my expectations.  It is so loud and rich and thick and warm sounding I find it just amazing.  I am not a player but I really like keeping this around to kind of noodle around on just to hear the sound.  I am putting this out there, but I am not quite ready to sell it yet.

Back and sides are Pennsylvania curly walnut, top is water-tank redwood.  Koa binding, black-red-black purfling, asymmetric rosette in pink abalone pearl, bocote fingerboard, bridge, and headplate.  Fingerboard has a 10 inch radius.  Spanish cedar neck with gold plated tuners.

#68 – spalted tamarind & spruce concert

The back and sides are spalted tamarind. This is from a tree that was planted, and then taken down many years later because it got too big by a mango grower in Boynton Beach Florida. I went down to get some mango wood from old trees he was replacing, and there was this log sitting off to the side. This is one of the first two instruments I have built out of this wood which even spalted is quite hard. It bends well, finished well, sounds great, and certainly looks spectacular. This is paired with a spruce top.

Fingerboard and bridge are black Richlite. Fingerboard has a 10 inch radius. Spiral rosette in pink abalone pearl, Pennsylvania poplar neck, spalted tamarind headplate, black bog oak (2000-4000 years old) binding, black-white-black-white purfling.