Search Results for: Radius

#63 – redwood burl

This is an “all redwood” ukulele (at least in looks).  I got some pretty cool redwood burl and laminated it over Pennsylvania black locust (Robinia pseudoacacia) which I have heard from several people in the know is one of the best local tonewoods.  I have heard it called the “rosewood of the east”.  This is paired with a curly redwood top, koa headplate, black-red-black purfling, casuarina fingerboard with a 10″ radius and man-made opal dots, koa binding, poplar neck and asymmetric rosette in pink abalone pearl.  A great sounding instrument that is also a real looker.

Better faster bridges

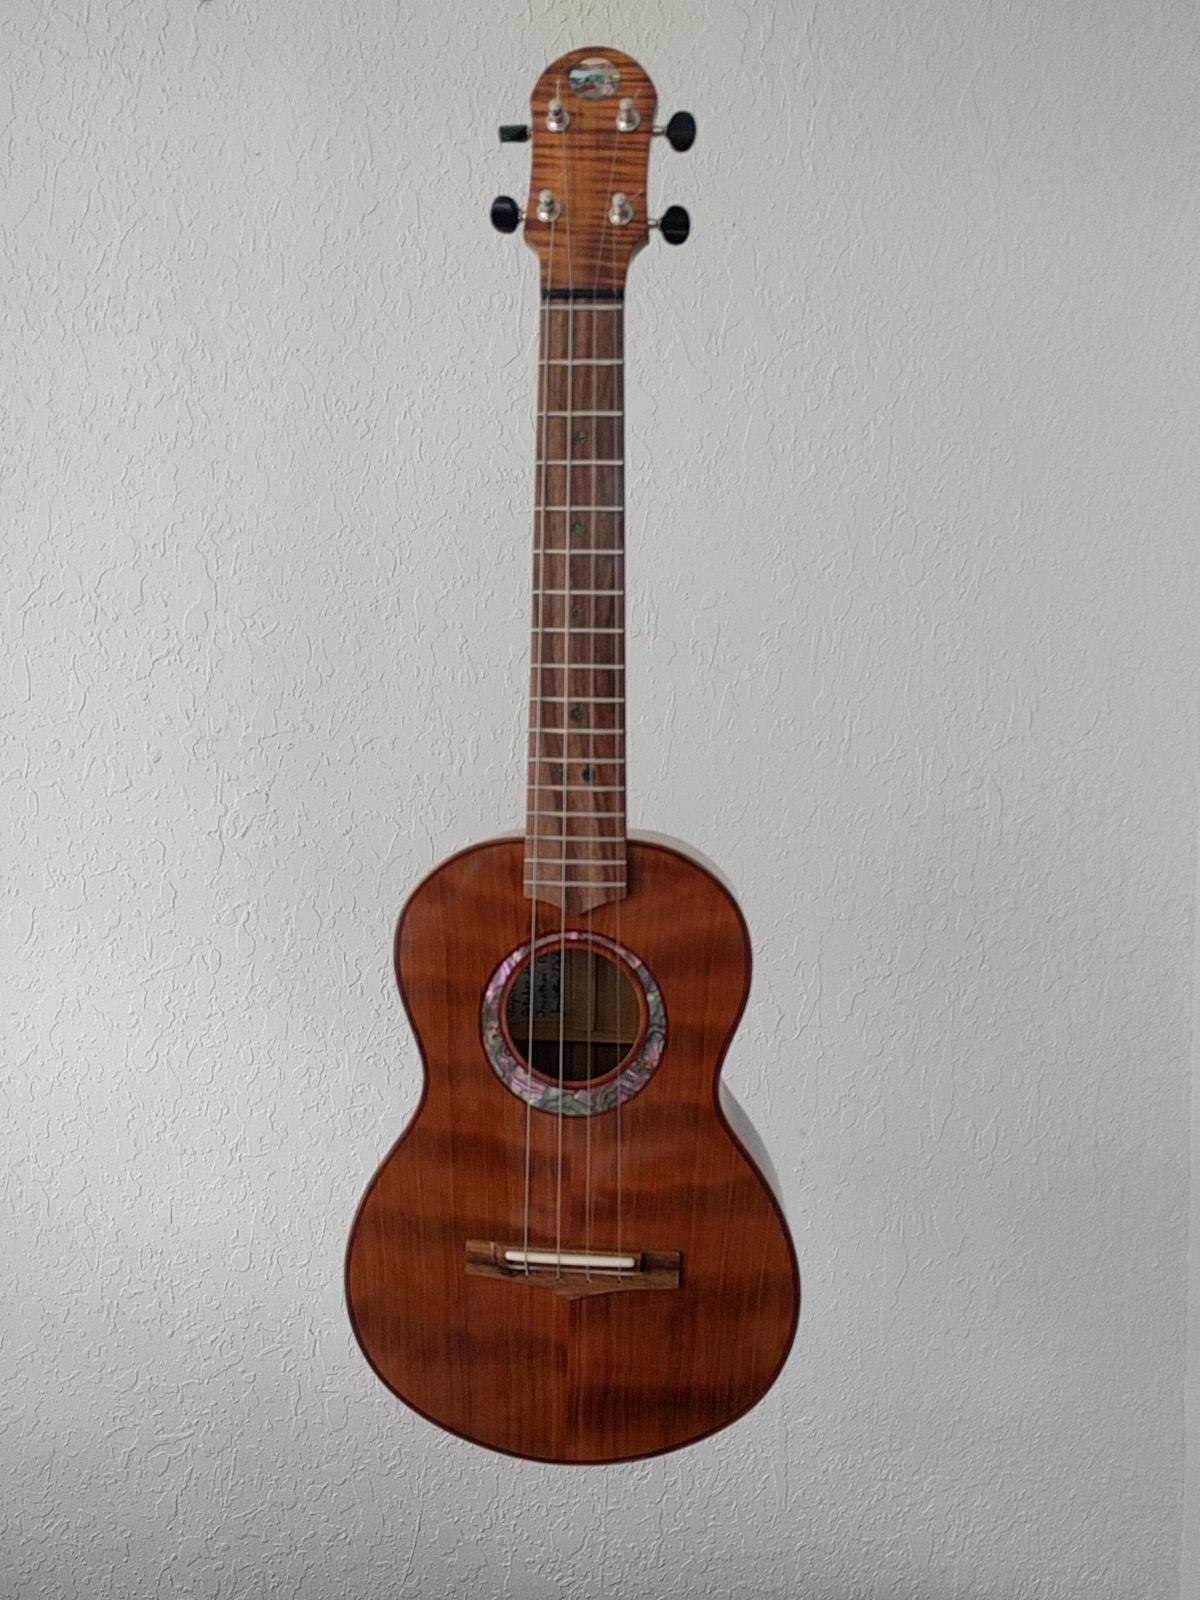
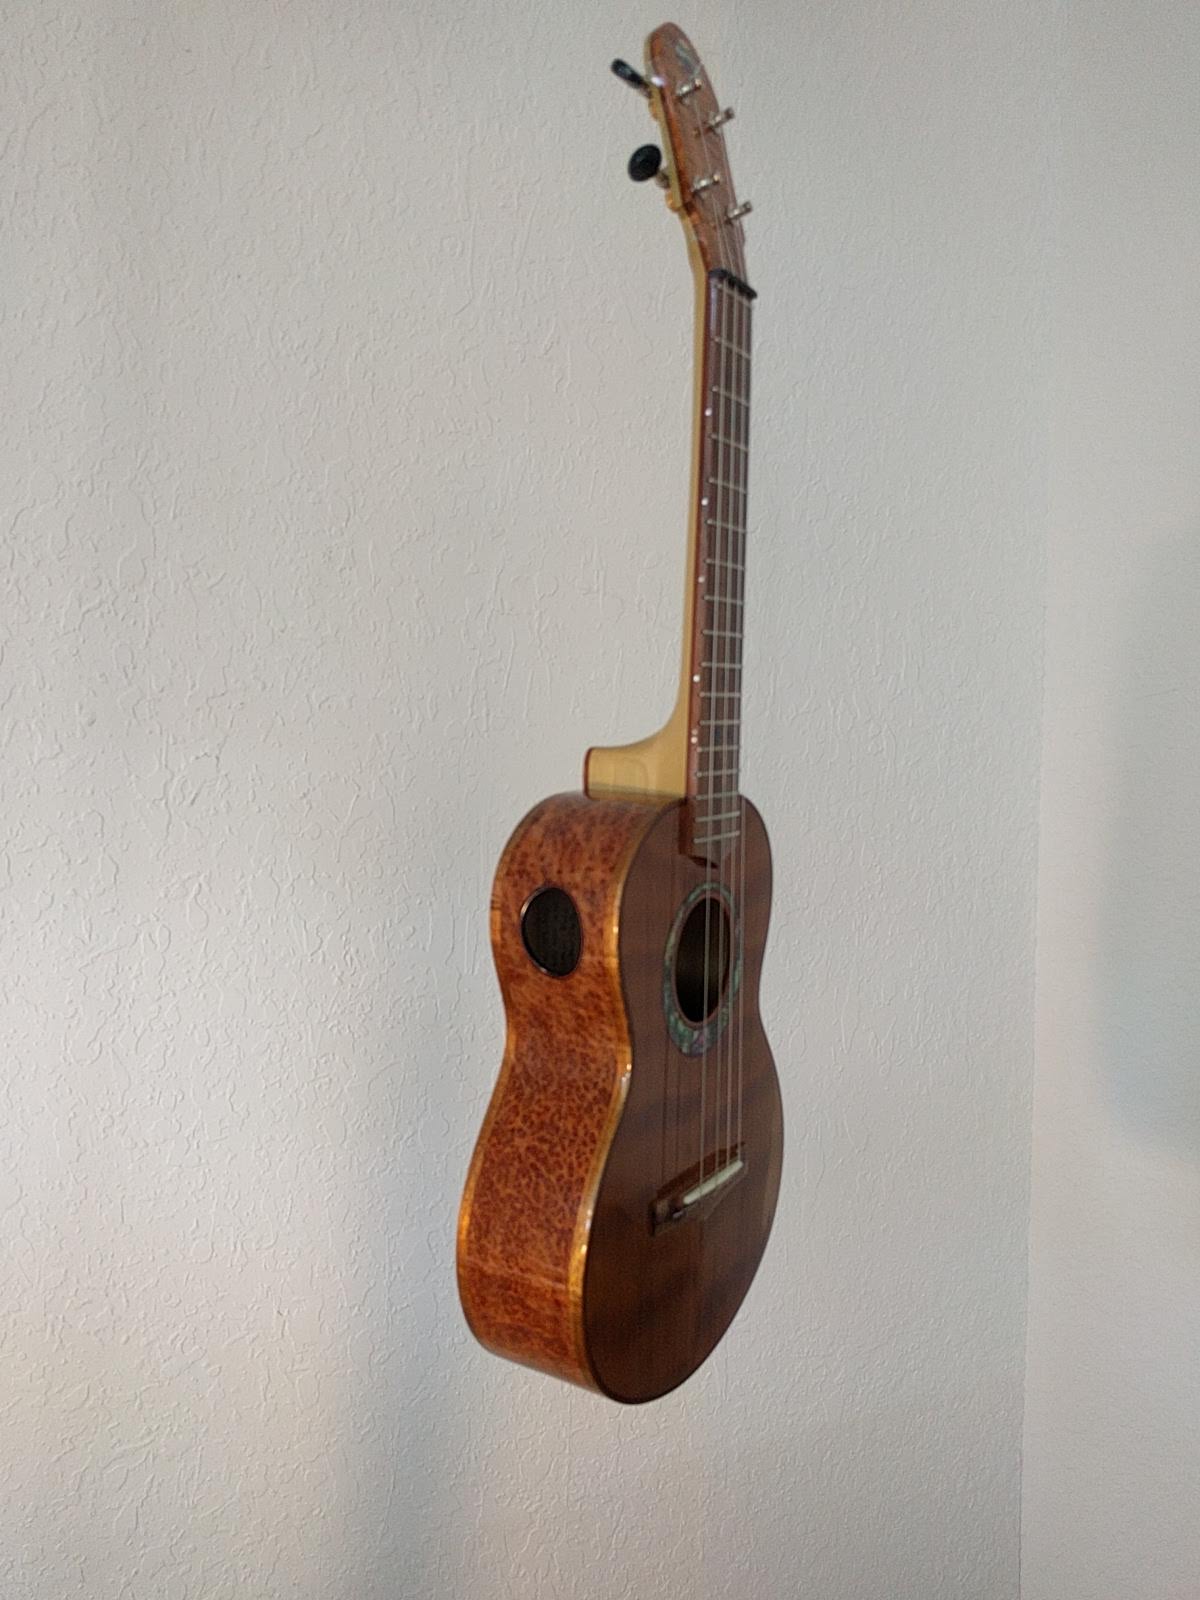
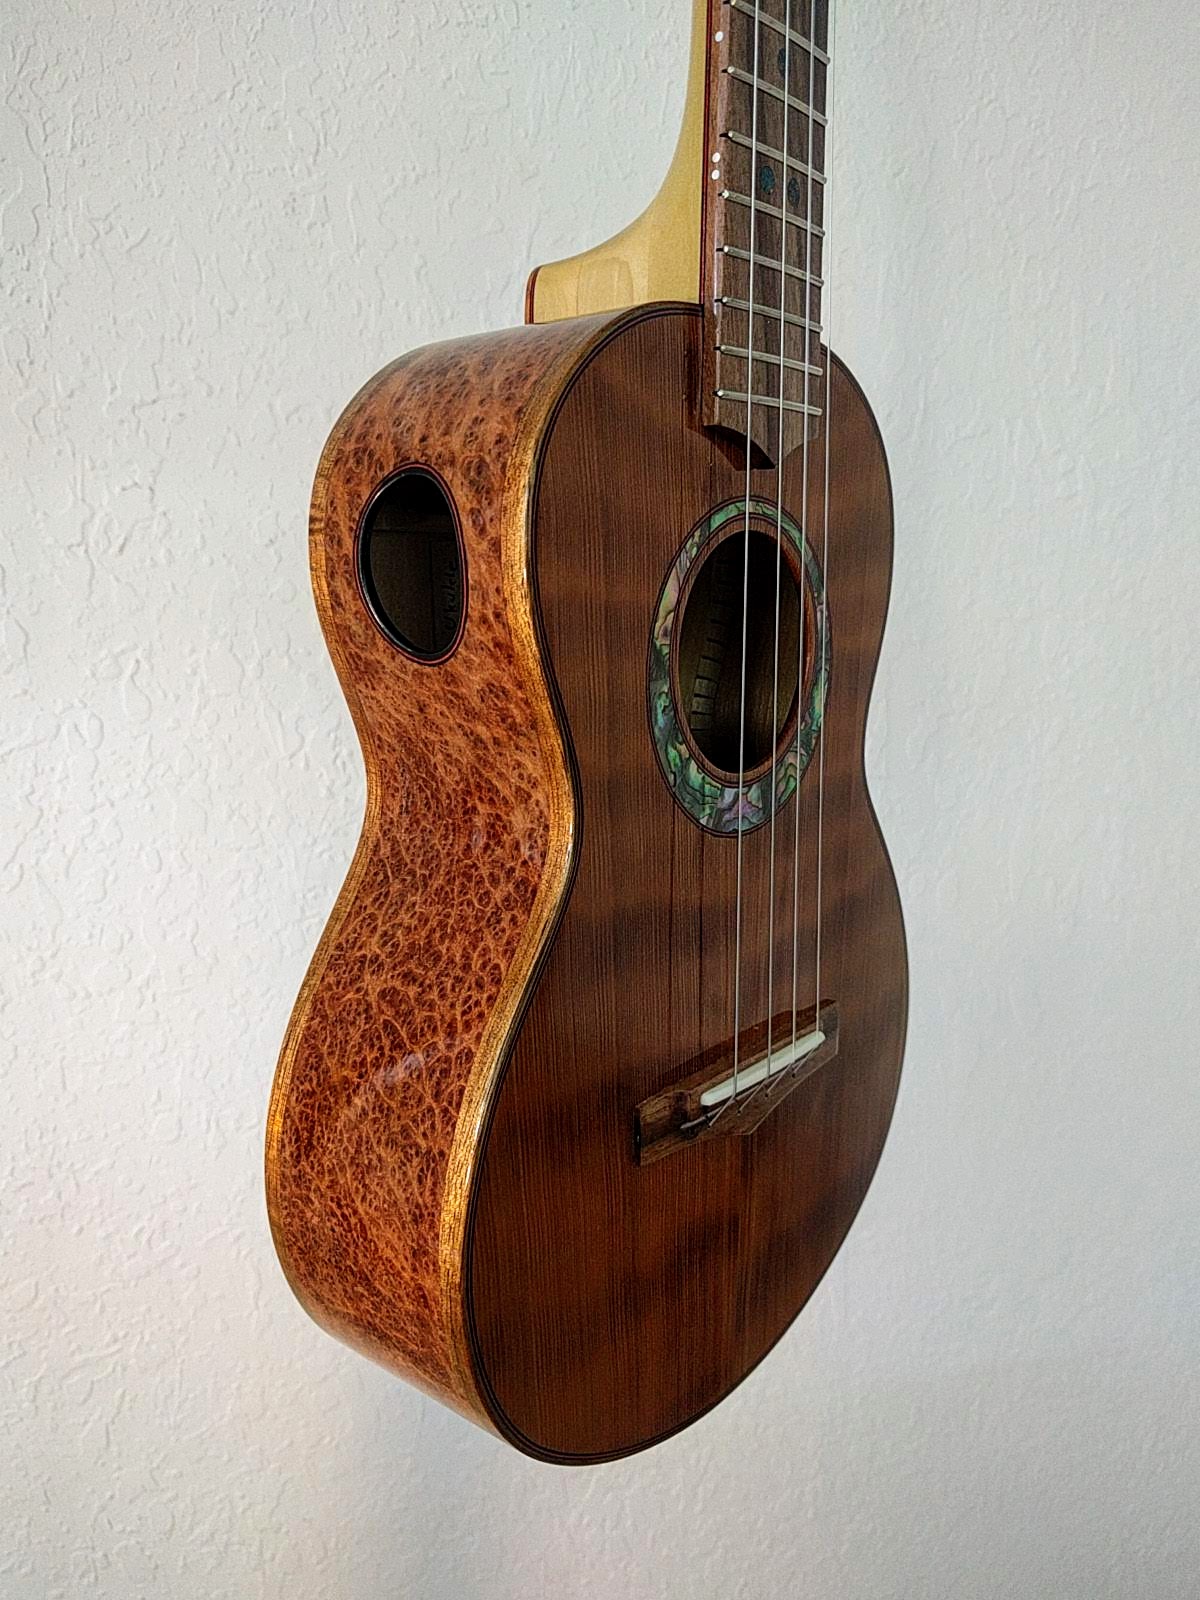
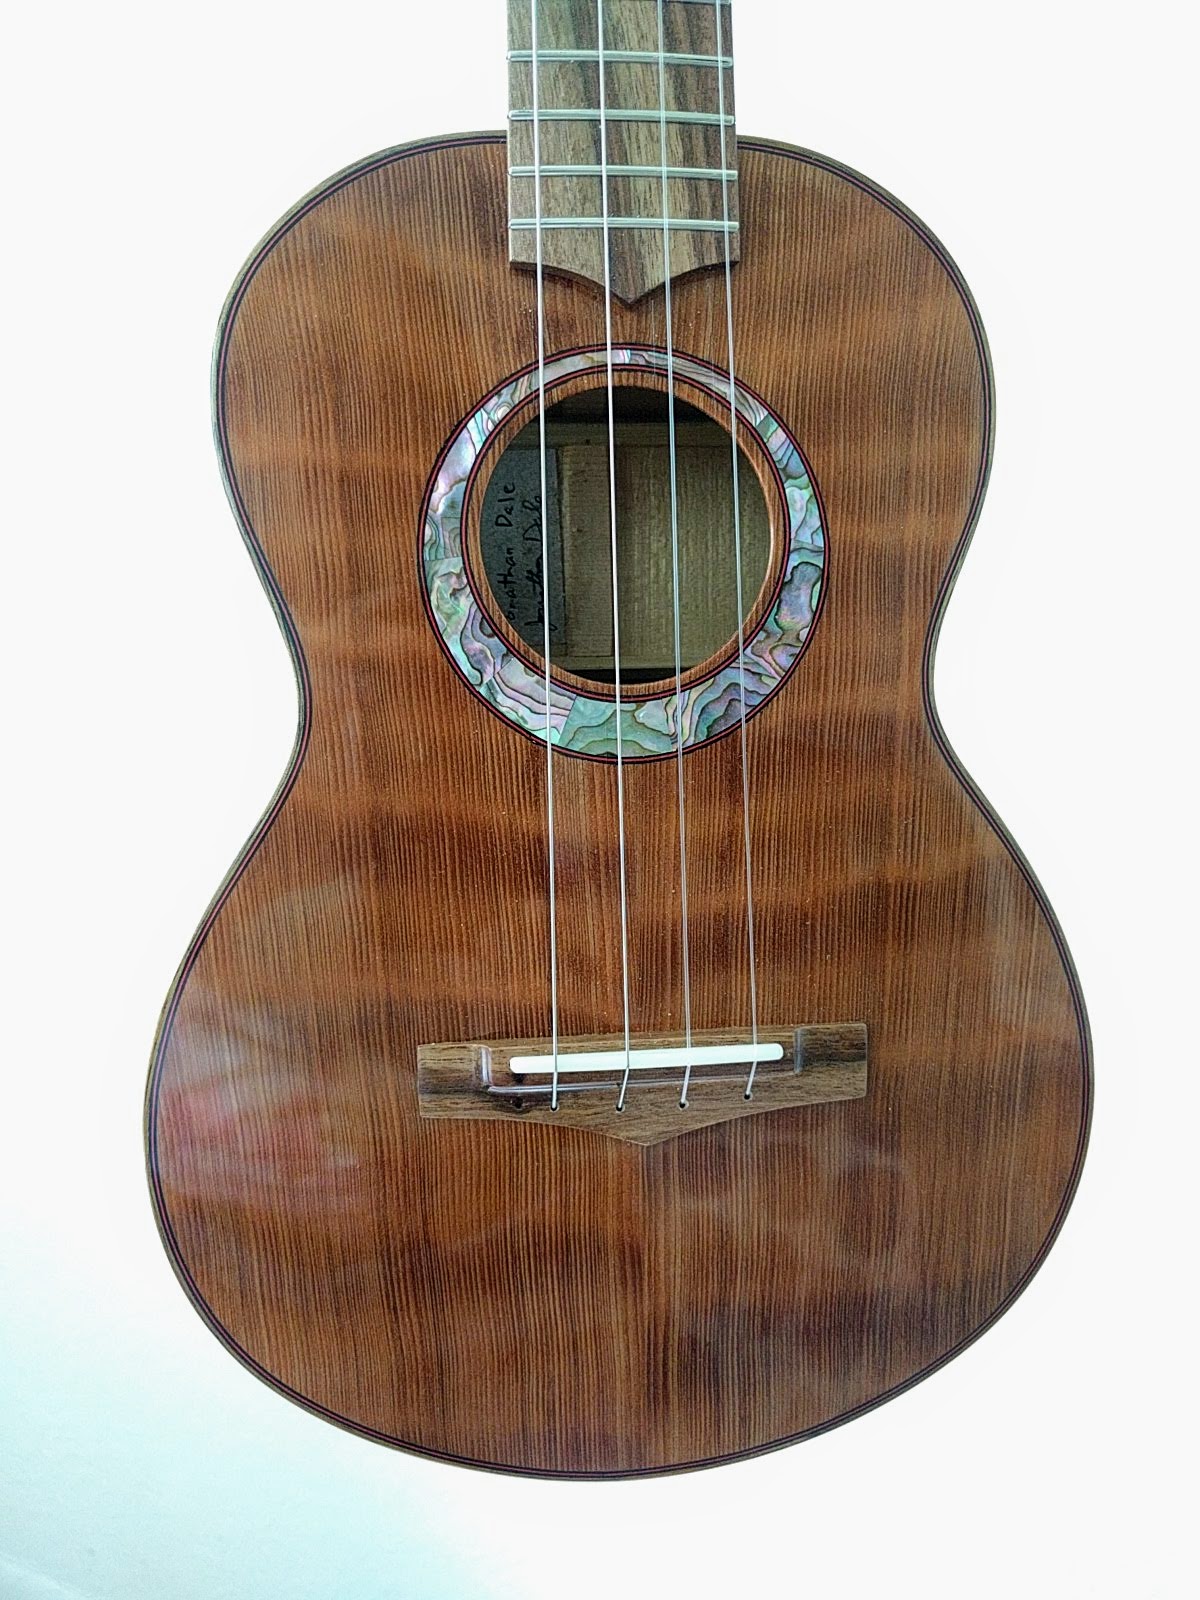
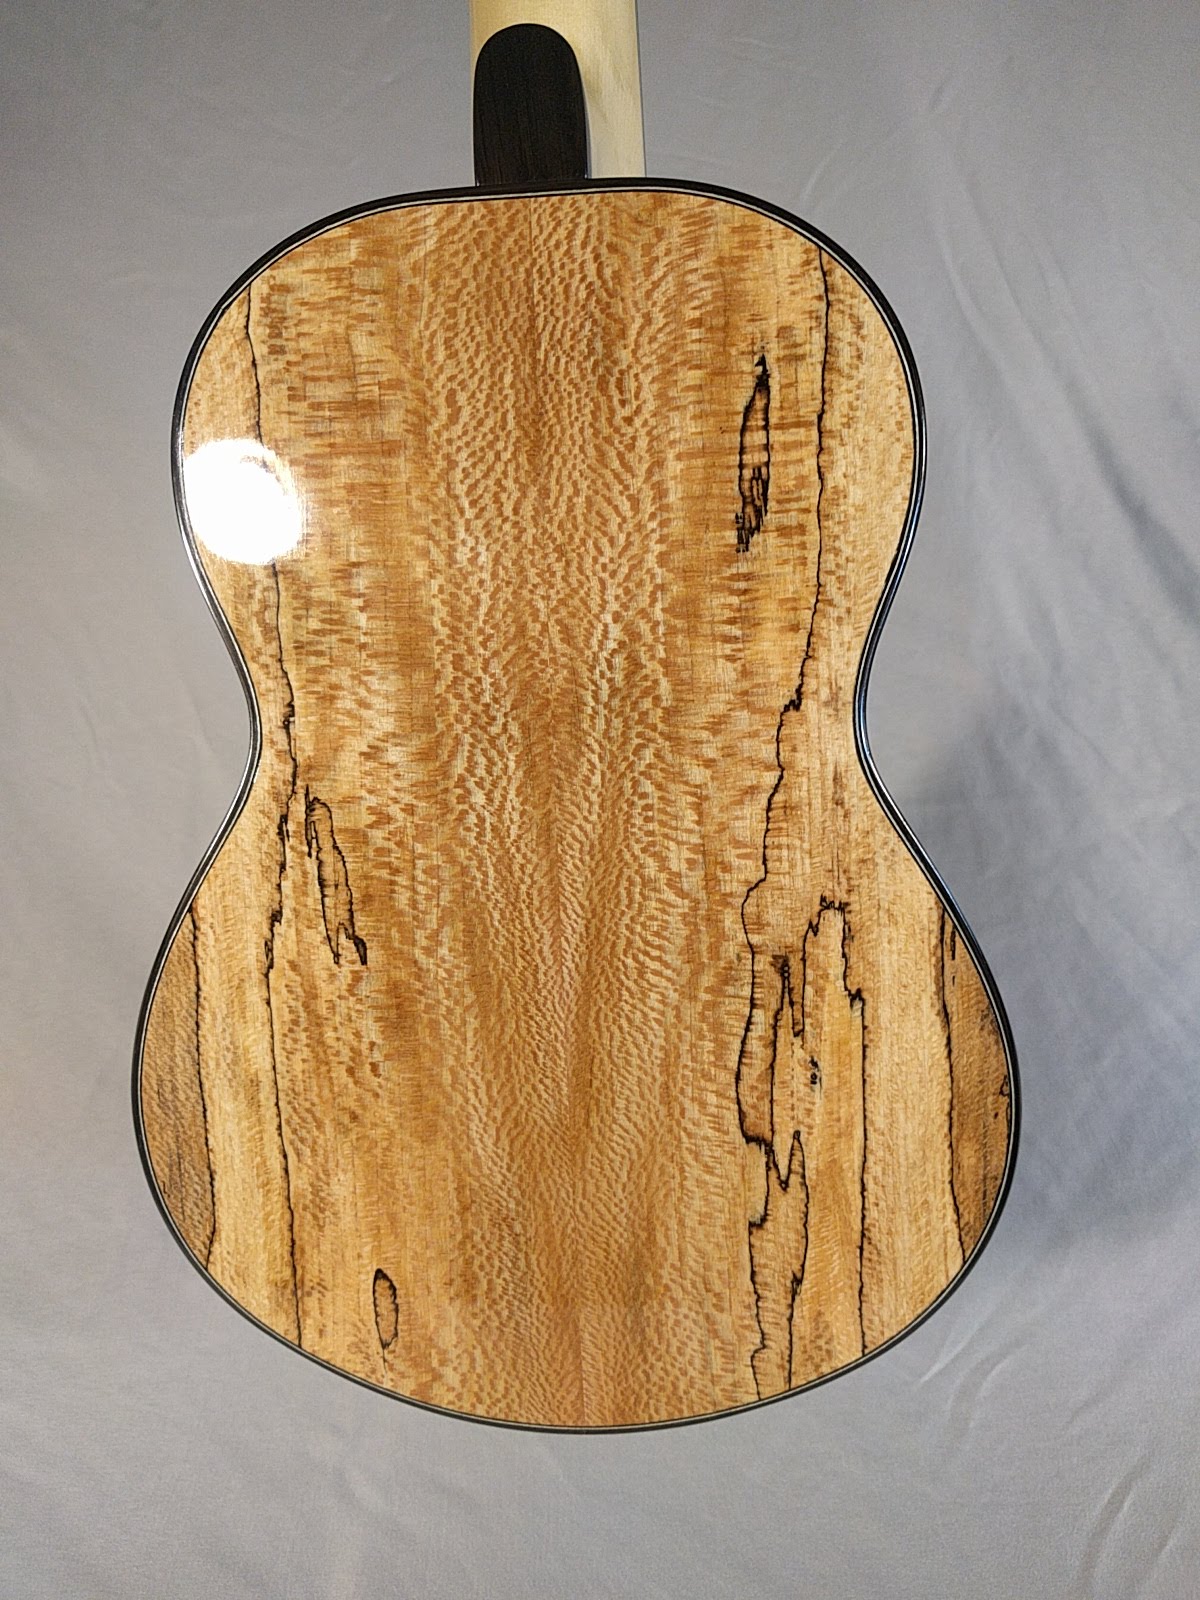
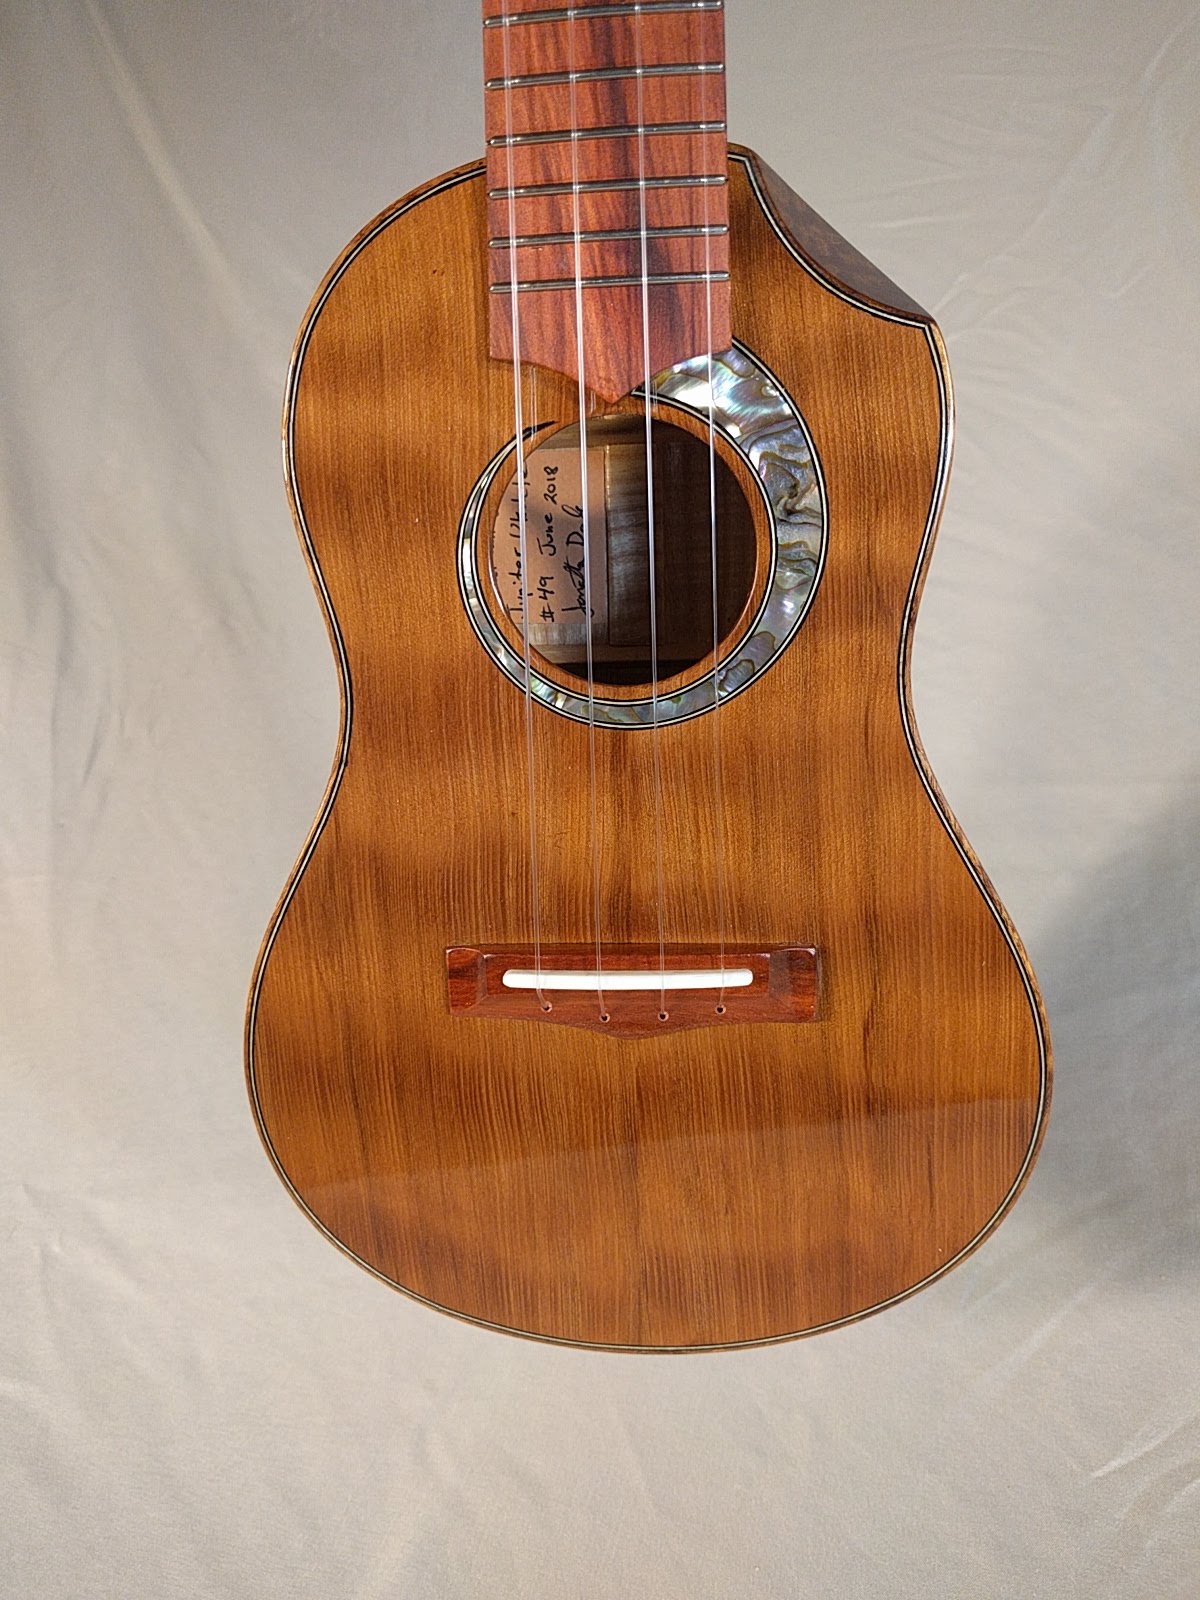
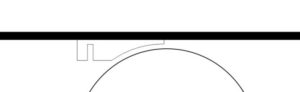
I am believer that the lighter the bridge, the better, since a string does not have to move as big piece of wood to make the soundboard underneath vibrate.  For this reason I have been making my bridges with a negative curve away from the saddle to minimize the amount of wood, while still maintaining enough strength to support the saddle.  I used to do this on the spindle sander by sticking the bridge to a backing board with double-stick tape, and running this along a fence to sand away the wood and leave the negative curve.

The problems with this are that I had to change the drum size to a smaller drum to get a tighter curve, which requires resetting the fence.  The bridge would have to be re-positioned and the process repeated to get the curve on the wings of the bridge.  Also, the smaller drums because they are not moving sandpaper past the wood as fast did not sand fast and tended to burn the wood.  The was particularly problematic on hard wood like Casuarina (which seems rather resistant to abrasion in general).   Overall it used to take me about an hour to shape a bridge on the sander.   So….I came up with a better idea …

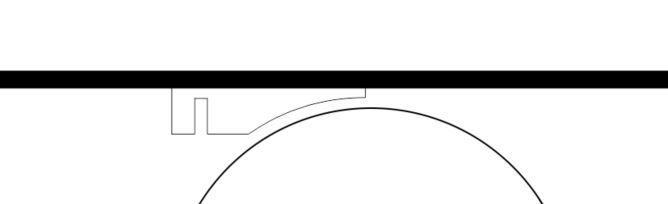
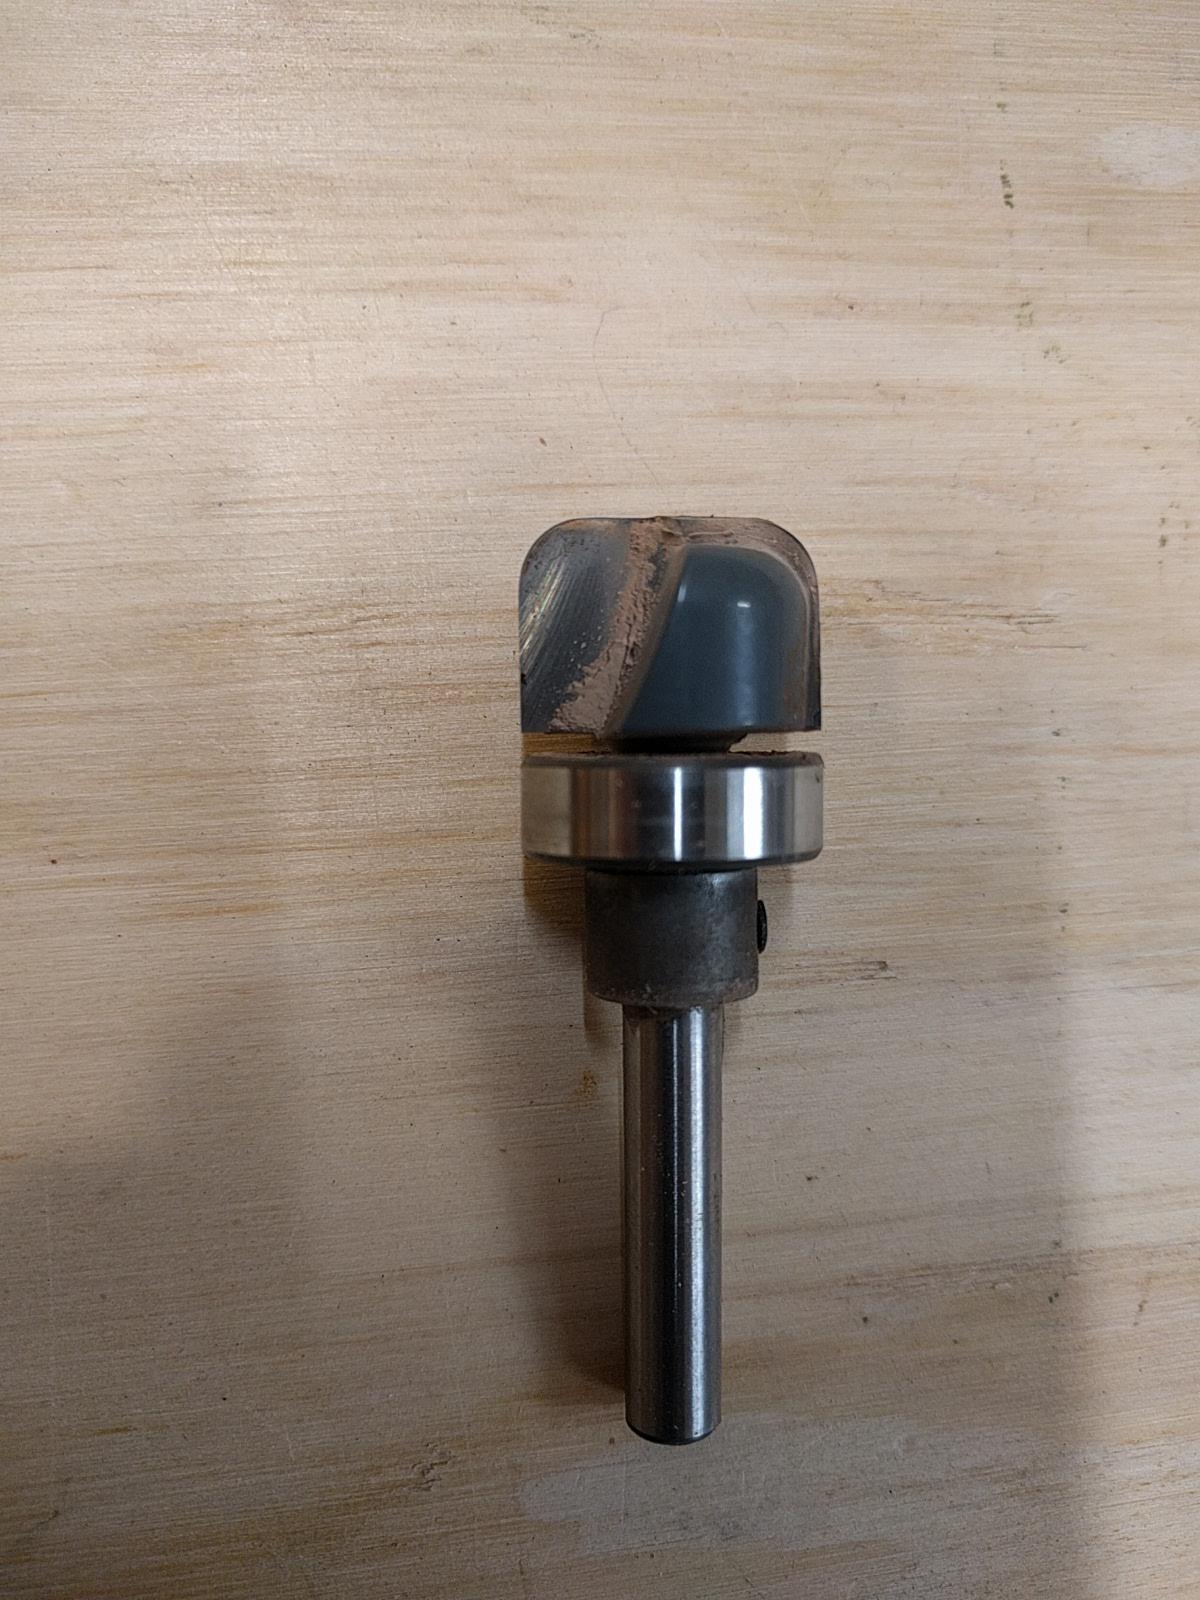
I was leafing through a tool catalogue and found these router bits that are designed to shape shallow bowls.  They come with a top bearing designed to follow a pattern, and cut a flat bottomed hole with a curved edge.

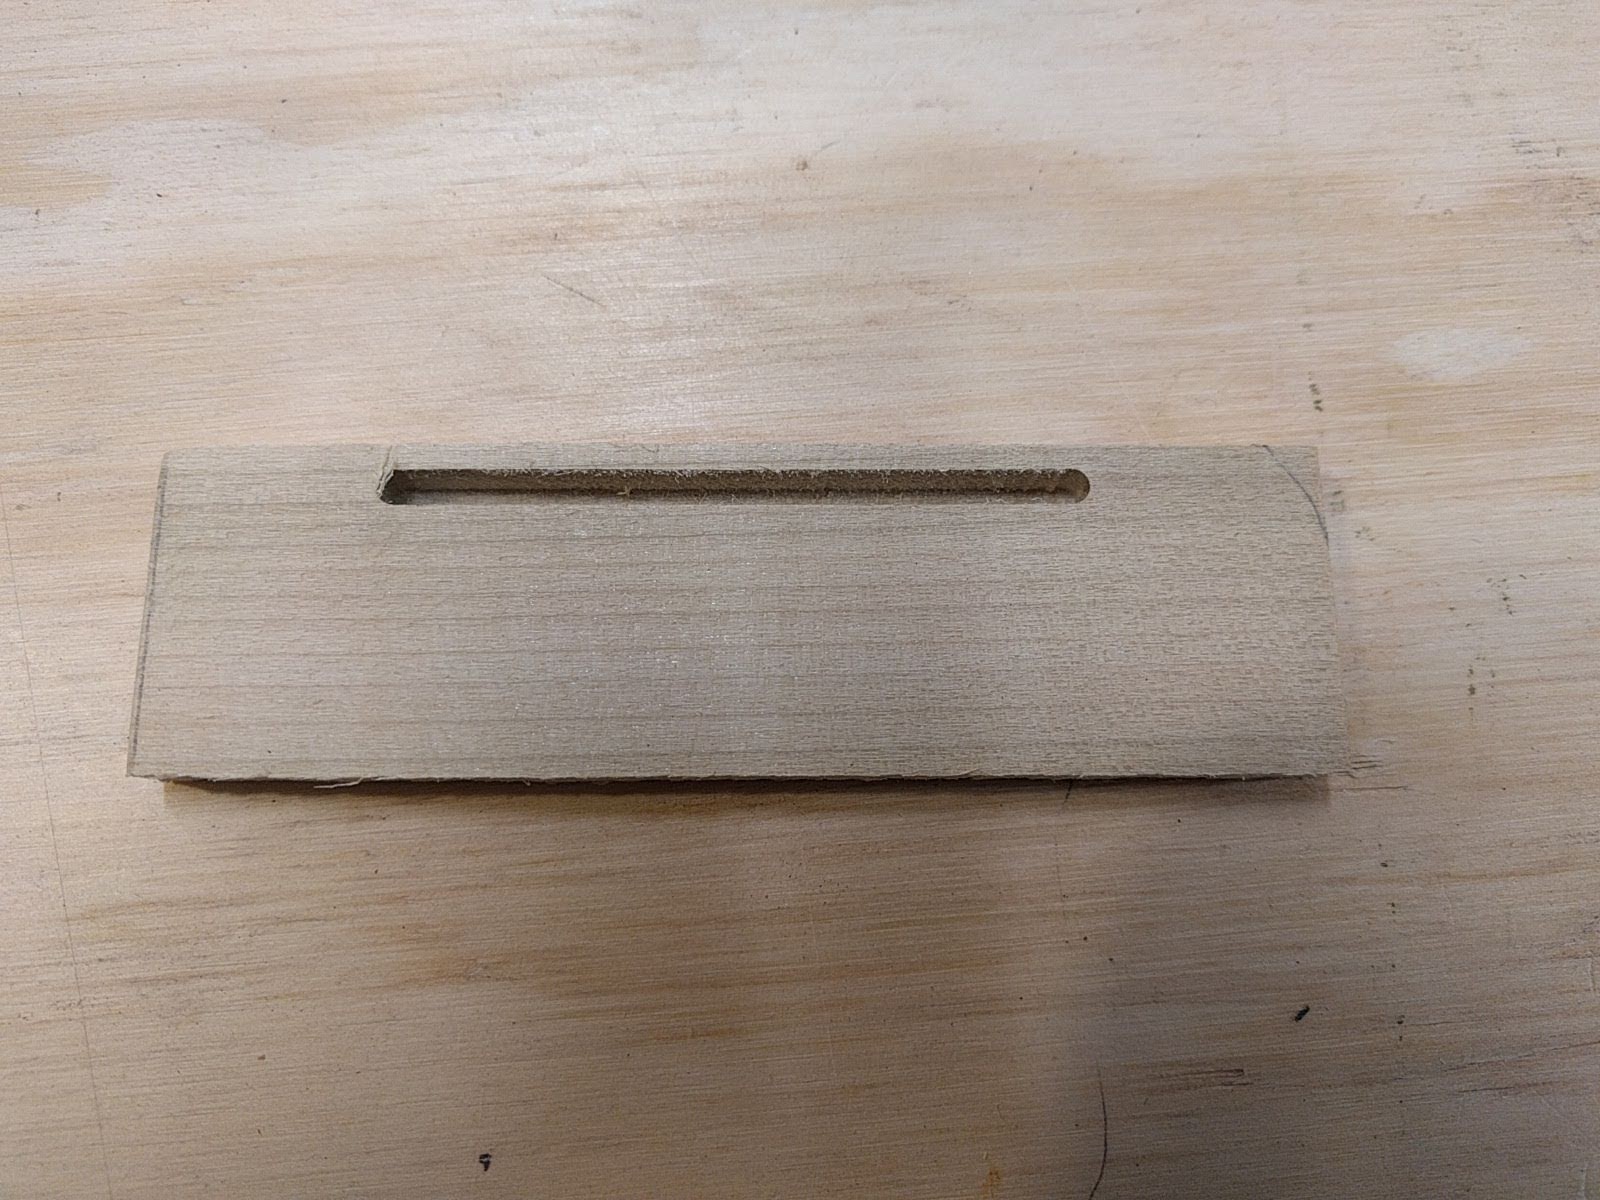
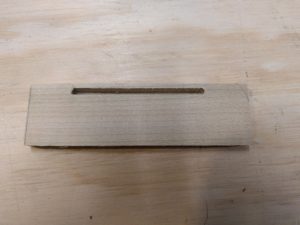
The first step in making a bridge has always been to route the channel for the saddle.  This is done on the router table, with a spiral bit and a fence.

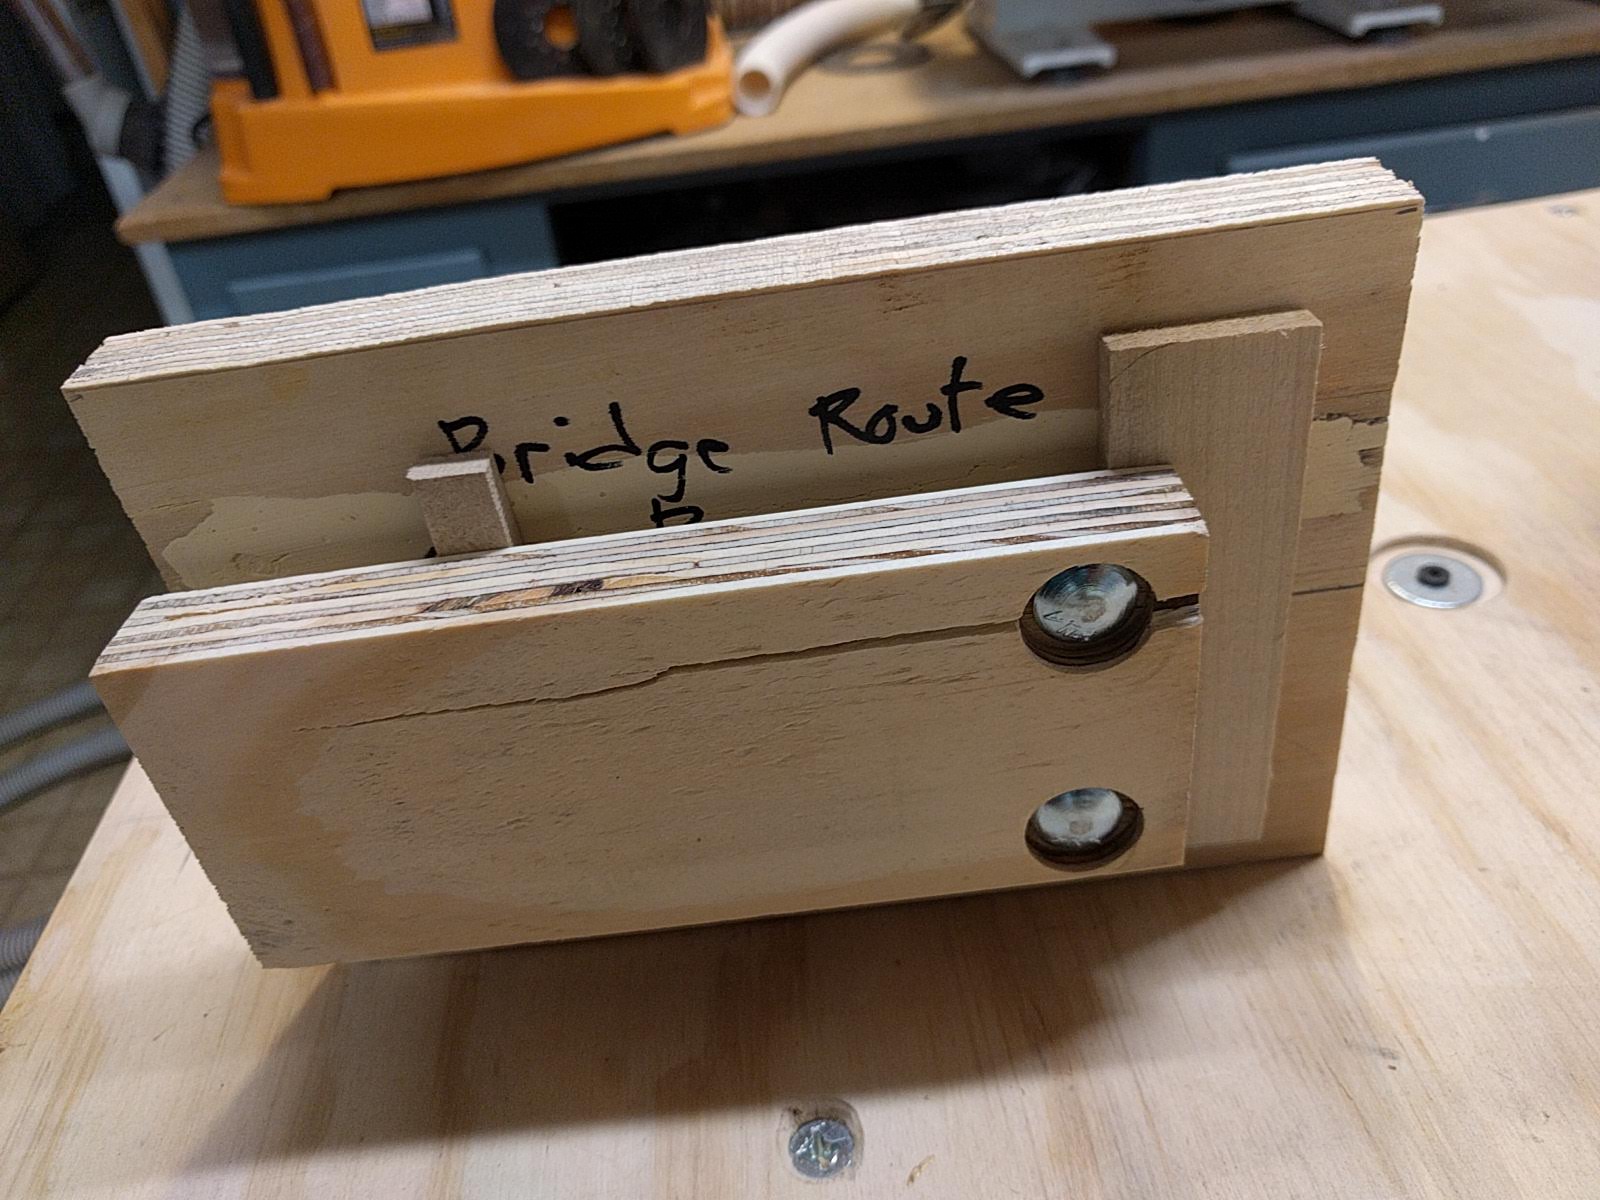
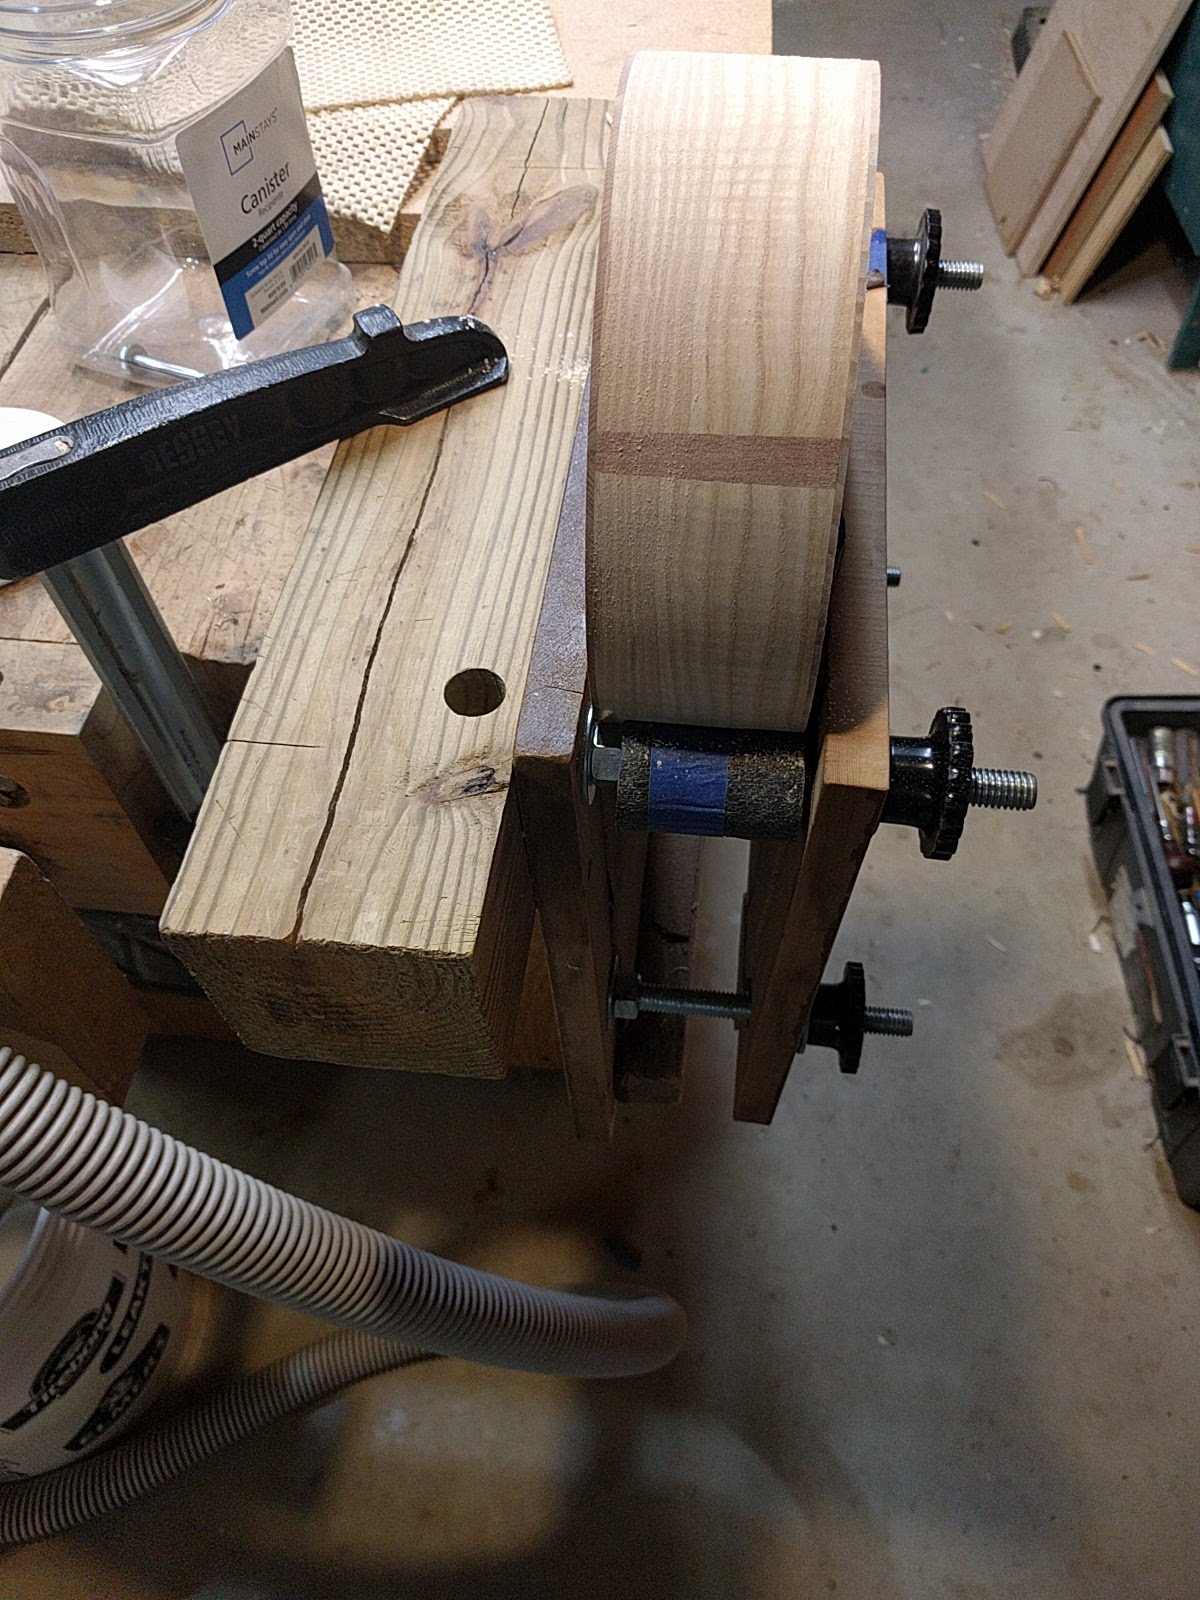
I made up a pattern which is the eventual top of the bridge, and inserted brass registration pins to align the saddle slot exactly.  There is a spacer on the pattern that matches the general thickness of the bridge.  There are also through bolts which will be used with a backing plate to clamp the bridge into the jig.

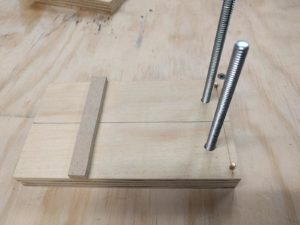
In use the bridge is inserted over the brass pins, and the backing plate tightened with the wing-nuts, firmly holding the bridge in place, up against the backing board.

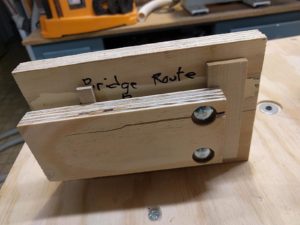
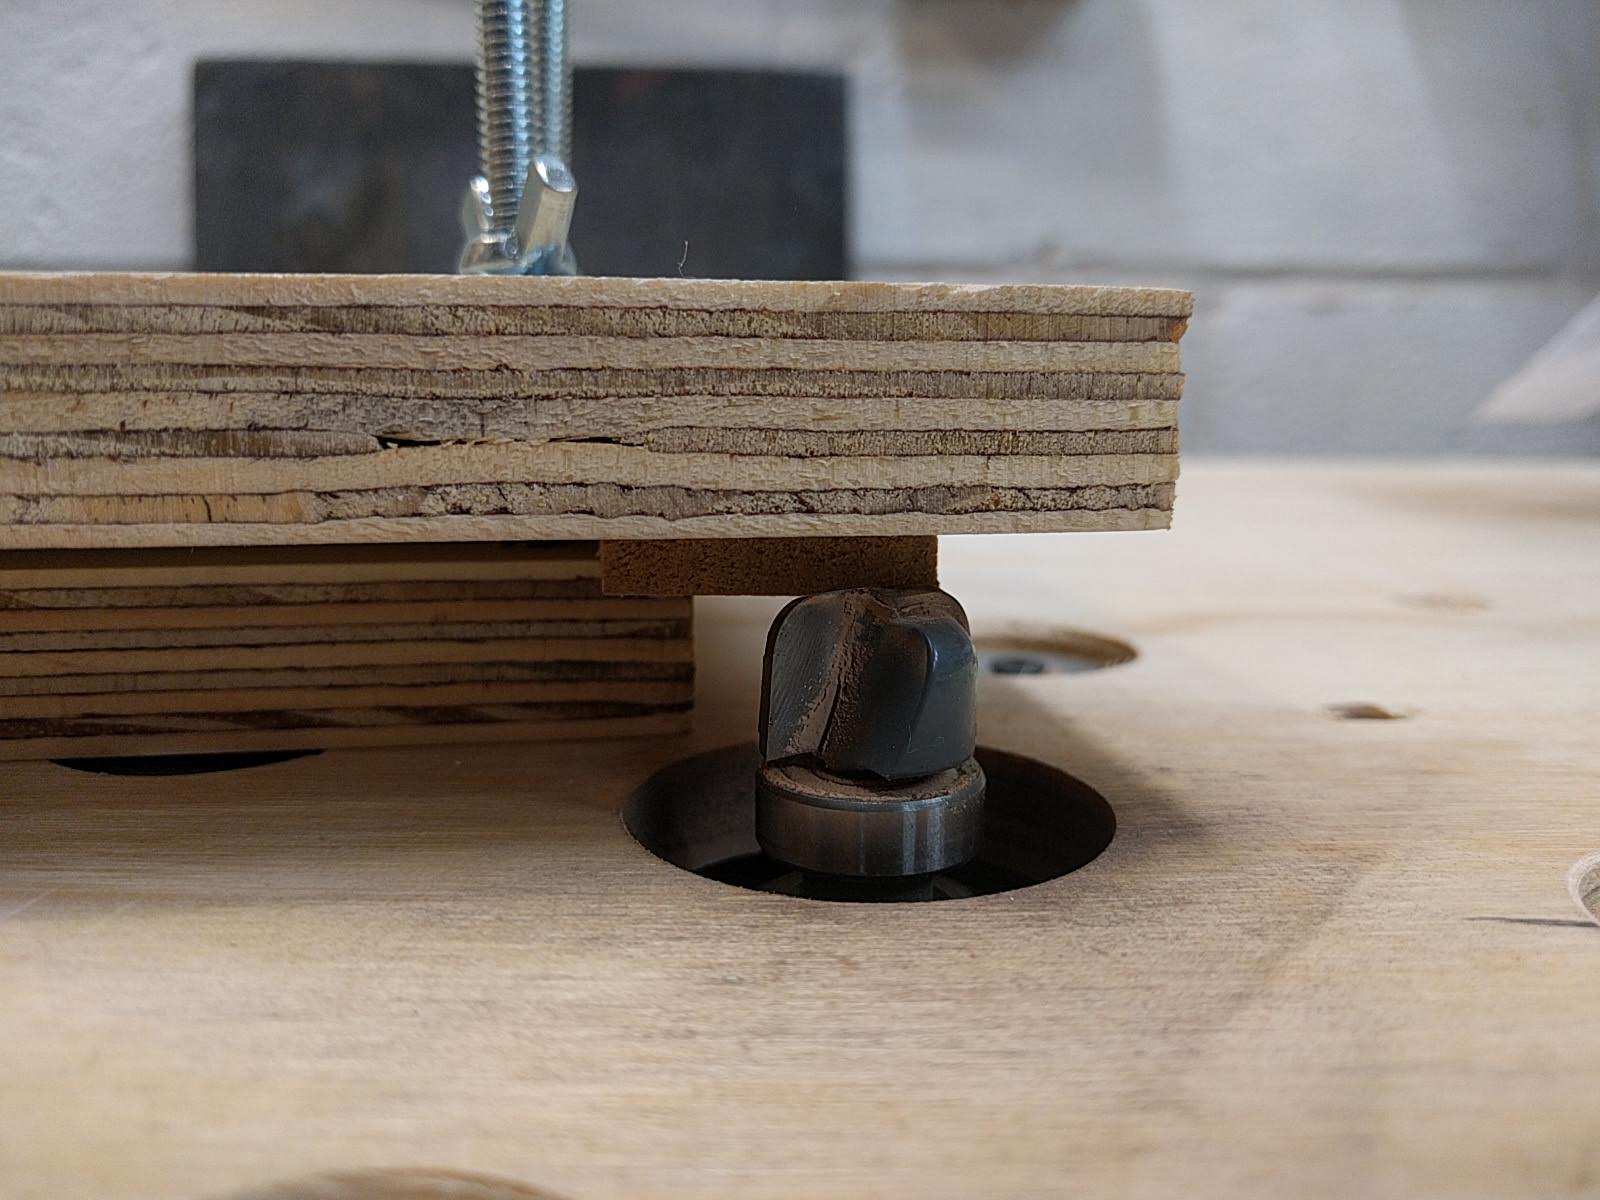
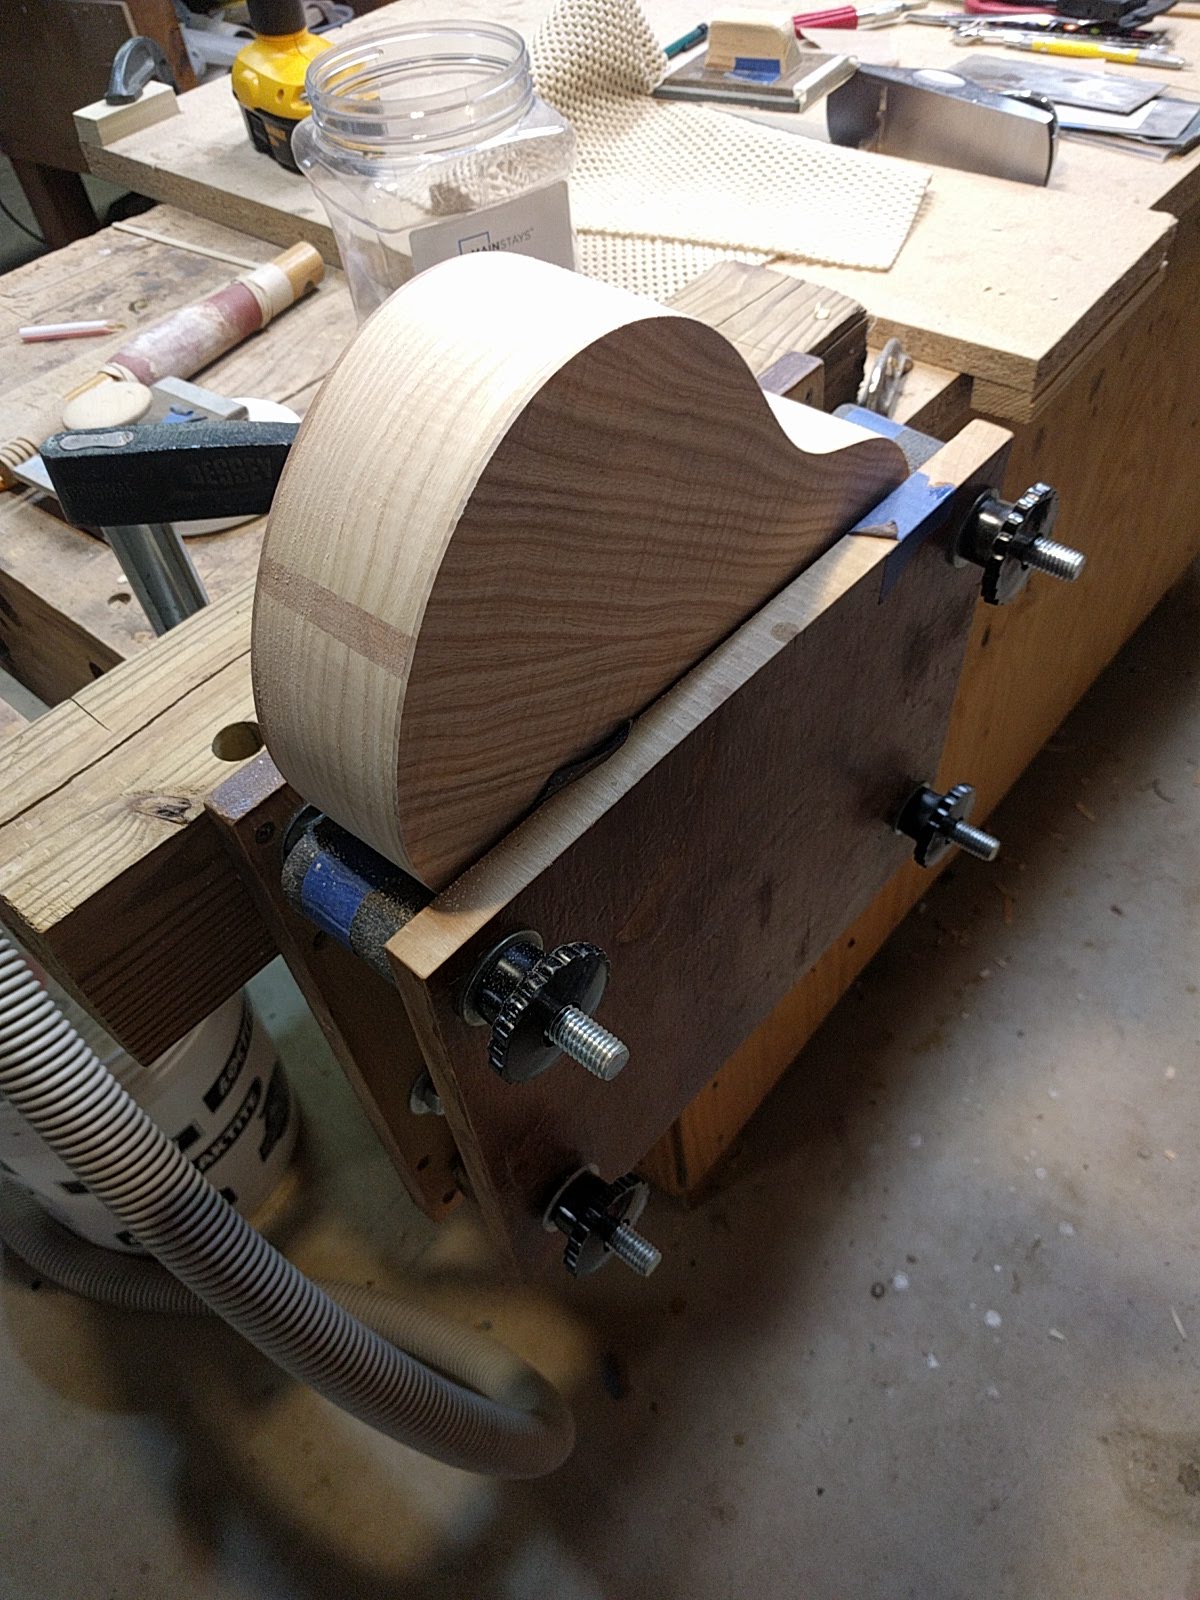
Then it is just a matter of going the the router table, setting the height of the bowl-cutting router bit so the bearing follows the template and all but a little of the bridge is cut away.  Once you get the router height set you can cut a bunch of bridges without adjusting anything.

Less than a minute of slow multi-pass routing and one has a shaped bridge, no burn marks, and a very tight radius which further minimizes the amount of wood/weight in the bridge.

I have made up patterns for different sized bridges (concert, tenor, etc.) all of which fit the same backing plate.  I can make 4 bridges in a fraction of the time it used to take me to make one, and the results are better.  A classic win-win.

Pricing

April 2019

My standard prices are listed below.  The choice of wood makes no difference in the price, since most of my wood comes from my labor and a chain saw, so it is all the same.  I’m not using any real rare tropical wood.

Standard Prices
parlor guitar $825
baritone $800
tenor $775
concert $750
soprano $700
Options
side sound port $75
radiused fingerboard $75
Picasso headplate $50
MiSi pickup $120
Goto UPT planetary tuners $69
scoop $125
arm bevel $100
case (my cost, no markup) $35
shipping (estimate only) $50

work progresses

At the stage of gluing braces on tops and backs.  Shelf put up to hold 6 ukuleles in progress.  End grafts all done.  The new radius dishes put in-service.  The new ‘go-bar bench’ works well.

#48 dogs

This is a custom for a client who has three beloved dogs.  We did dog prints up the fingerboard, the dogs names around the sound hole, and images of the three dogs (taken from photos) with their respective color colors, and using pearl that is as close the the dog as possible.  A hound dog, a Lhasa Apso, and a golden retriever.

The ukulele has a curly redwood top, spalted sycamore back and sides, side sound port, 2000 year old bog oak binding, Richlite fingerboard with a 7.25 inch radius, Richlite headplate, ebony bridge, Alaskan yellow cedar neck, black-white-black binding, black Corian nut, bone saddle, and Gotoh UPT planetary tuners.


#49 – Concert in curly ash and redwood

This concert was built to pull together a number of the ‘latest’ things, and as a bit of an experiment of some build techniques.  The back and sides are curly ash, and the top is curly redwood.  It has a ‘scoop’ to make playing up the fingerboard easier, a side sound port, a radiused fingerboard with a pretty strong 7.25 inch radius, my new spiral rosette, and my new ‘Picasso’ headplate which is made from all those little pieces of neat wood I could not bear to throw in the wood stove.  As part of the experiment I have it strung low-G and it sounds really good for a smaller instrument, with lots of sustain, and a pretty good base response.

Fingerboard and bridge are Redheart, neck is Alaskan yellow cedar, black-white-black puurfling, curly mahogany binding.

Low-G concert

I really prefer a low-G sound where the 4’th string is the low string, as opposed to the more traditional tuning where the 4’th string is an octave higher.  I think that with a small bodied instrument like the ukulele, anything one can do to bring out those warm lower notes should be attempted.  All concert sized ukuleles I have seen (or heard of) have always been high-G instruments.  However, I met a woman last winter who tunes her concert low-G.  “Oh really!” says I.  So I asked her what kind of strings she uses for this low-G concert.  She like Living Waters low-G concert strings, so I ordered a couple of sets direct from the maker in the UK.

They sound very nice.  I am pleased.  I am also quite pleased with this instrument.  I built it as a sort of demo piece of a number of new things like a ‘scoop’, the new spiral rosette, a ‘Picasso’ headplate, side sound port, and 7 1/4″ radiused fingerboard.  Sounds great.  Great sustain and volume (particularly for a concert sized instrument) and that low-G really adds a nice balance I think.

Metalwork

It is fretting time.  I buy fretwire in straight pieces, and then cooked up a little fret bender to bend it into the proper fingerboard radius.  Unlike many builders I cut and finish the ends of my frets before they are installed.  I can get a nice rounded fret end with a nice polish. since I am doing it off the instrument.  The frets are cut to rough length, then the ends are filed square and to the exact length. A few swipes of the file to start rounding the fret end, and then a finish rounding/polish on a fine polishing wheel.  I do things to all the frets in stages (cut to rough length, filed to final length, round and polish), stacking them up in a little numbered board.

One thing I have done for a while is when I am filing the frets to length I back bevel the fret tang (the part that goes down in the fret slot to hold the fret in place).  I do this because as fingerboards age they tend to shrink a bit while the fret does not.  This can leave those ends of the tangs sticking out the side of the fingerboard, which is not pleasant on the hands and requires some repair shop work to make things smooth again.  With the back bevel, the fret tangs will never stick out.

I also think it makes a neater final look on the edge of the fingerboard with no tangs showing.

A milestone

The bodies are in the finishing closet.  I use the closet in my son’s old bedroom to apply the finish, which is hand rubbed on.   Out of the way and I can shut the door which means that it is pretty free of flying dust.  To get here there were a number of coats of CA glue I use as filler, with a lot of sanding in between coats.  The weather has been nice the last couple of days so I have done all of the sanding outside with a fan behind me to blow the dust out into the yard.  Final sanding is with 400 grit paper.  One is “chasing the shine” left from the CA glue to make sure that all of the pores are filled and all areas are sanded.  Even without any finish they look pretty good.

Of course, get the first layer of real finish on them and things really begin to look good, and the look of the various woods really begin to ‘pop’

Doing the finish on the bodies will take a number of days because there are many coats, and necessary drying time so that the finish can harden before sanding between coats.  In the meantime work is progressing on the necks.  The necks have all had their bolt-on neck hardware installed, they have been fitted to their respective bodies, and rough profiled.  The fingerboards have all been cut to shape, those that get a radius have been radiused, and the fret slots are cut.

The headplates get glued on the necks and then there will be a little pause in the woodwork while some inlay gets done on the headplates and fingerboards.  I’m also taking a little vacation from June 28 – July 10 so the only thing going on will be finish hardening.


shellac and sanding

The builds are getting to the point where the ‘boxes’ are getting closed up.  Before I glue on the backs I shellac the inside of the instrument.  Not necessarily traditional, but I started doing it some time ago, and have since found that some luthiers who are much better than me also shellac the inside.  From my wood upbringing I was always taught that one must finish both sides of a piece of wood to balance things.  For an instrument, a coat of shellac should slow down moisture transpiration, which means that changes in humidity around the instrument will not result in as quick expansion/contraction of the wood, which should increase the stability of the instrument.  The inside of the back is also shellaced, all except where it will be glued down.

Once the back is glued on, I sand the sides to get them nice and flat and to make the edges of the top and back flush with the sides.   I do this before doing the binding since when the binding channel is cut the router bearing is traveling along the side, so if the side is a little out-of-whack the binding channel will be a little out-of-whack.   To sand the sides (and do other operations) I use a bit of a bench-side clamp I made out of some boards, bolts, and knobs.  I bring it out and clamp it to the bench when I need it, and otherwise it does not take up bench space.  The inside of the ‘jaws’ are cork lined, with one side being just a cork perimeter to allow clamping of the radiused back.  Makes work on those pesky curved sides very easy and stable.