I’ve got your back(s)

Here are the backs for the next set.  From left to right: tenor in sycamore and PA red cedar, tenor in curly black walnut and redwood, concert in spalted mango and Port Orford cedar, tenor in spalted tamarind, and baritone in curly black walnut and redwood.

Better faster bridges

I am believer that the lighter the bridge, the better, since a string does not have to move as big piece of wood to make the soundboard underneath vibrate.  For this reason I have been making my bridges with a negative curve away from the saddle to minimize the amount of wood, while still maintaining enough strength to support the saddle.  I used to do this on the spindle sander by sticking the bridge to a backing board with double-stick tape, and running this along a fence to sand away the wood and leave the negative curve.

The problems with this are that I had to change the drum size to a smaller drum to get a tighter curve, which requires resetting the fence.  The bridge would have to be re-positioned and the process repeated to get the curve on the wings of the bridge.  Also, the smaller drums because they are not moving sandpaper past the wood as fast did not sand fast and tended to burn the wood.  The was particularly problematic on hard wood like Casuarina (which seems rather resistant to abrasion in general).   Overall it used to take me about an hour to shape a bridge on the sander.   So….I came up with a better idea …

I was leafing through a tool catalogue and found these router bits that are designed to shape shallow bowls.  They come with a top bearing designed to follow a pattern, and cut a flat bottomed hole with a curved edge.

The first step in making a bridge has always been to route the channel for the saddle.  This is done on the router table, with a spiral bit and a fence.

I made up a pattern which is the eventual top of the bridge, and inserted brass registration pins to align the saddle slot exactly.  There is a spacer on the pattern that matches the general thickness of the bridge.  There are also through bolts which will be used with a backing plate to clamp the bridge into the jig.

In use the bridge is inserted over the brass pins, and the backing plate tightened with the wing-nuts, firmly holding the bridge in place, up against the backing board.

Then it is just a matter of going the the router table, setting the height of the bowl-cutting router bit so the bearing follows the template and all but a little of the bridge is cut away.  Once you get the router height set you can cut a bunch of bridges without adjusting anything.

Less than a minute of slow multi-pass routing and one has a shaped bridge, no burn marks, and a very tight radius which further minimizes the amount of wood/weight in the bridge.

I have made up patterns for different sized bridges (concert, tenor, etc.) all of which fit the same backing plate.  I can make 4 bridges in a fraction of the time it used to take me to make one, and the results are better.  A classic win-win.

carbon fiber

As insurance against neck warping I put a 1/8 inch x 3/8 inch carbon fiber beam down the center of the neck, under the fingerboard.  I route a 1/8 inch slot down the center of the neck early on, and this slot becomes the reference center for all subsequent operations, with 1/8 inch brass pins on jigs so that the neck aligns exactly and repeatedly.  Much easier and more accurate than making one edge or the other of the neck the reference.  When the neck operations that require the center reference are finished I put in the carbon fiber beam.

The carbon fiber is cut at an angle so it extends all the way into the headstock, reinforcing the joint/angle between the neck and the headstock, a traditionally weak area.

On a Guilele, which has 6 guitar-type strings, I put in 2 carbon fiber beams, and just make some small center routes for the jigs to center on.

Most people seem to use epoxy to glue in the carbon fiber.  I have found however that since the carbon fiber is a tight press-fit into the slot, most of the epoxy squeezes out and makes rather much of a mess, both during gluing and clean-up afterwards.  I simply press the carbon fiber beam home, which takes a bit of tapping with a hammer.  It seats just below the surface of the neck.  I then just flood the channel with thin CA glue which wicks into any tiny space or seam and glues things in nicely.  Quick, and there is no squeeze-out or mess.

making progress ….

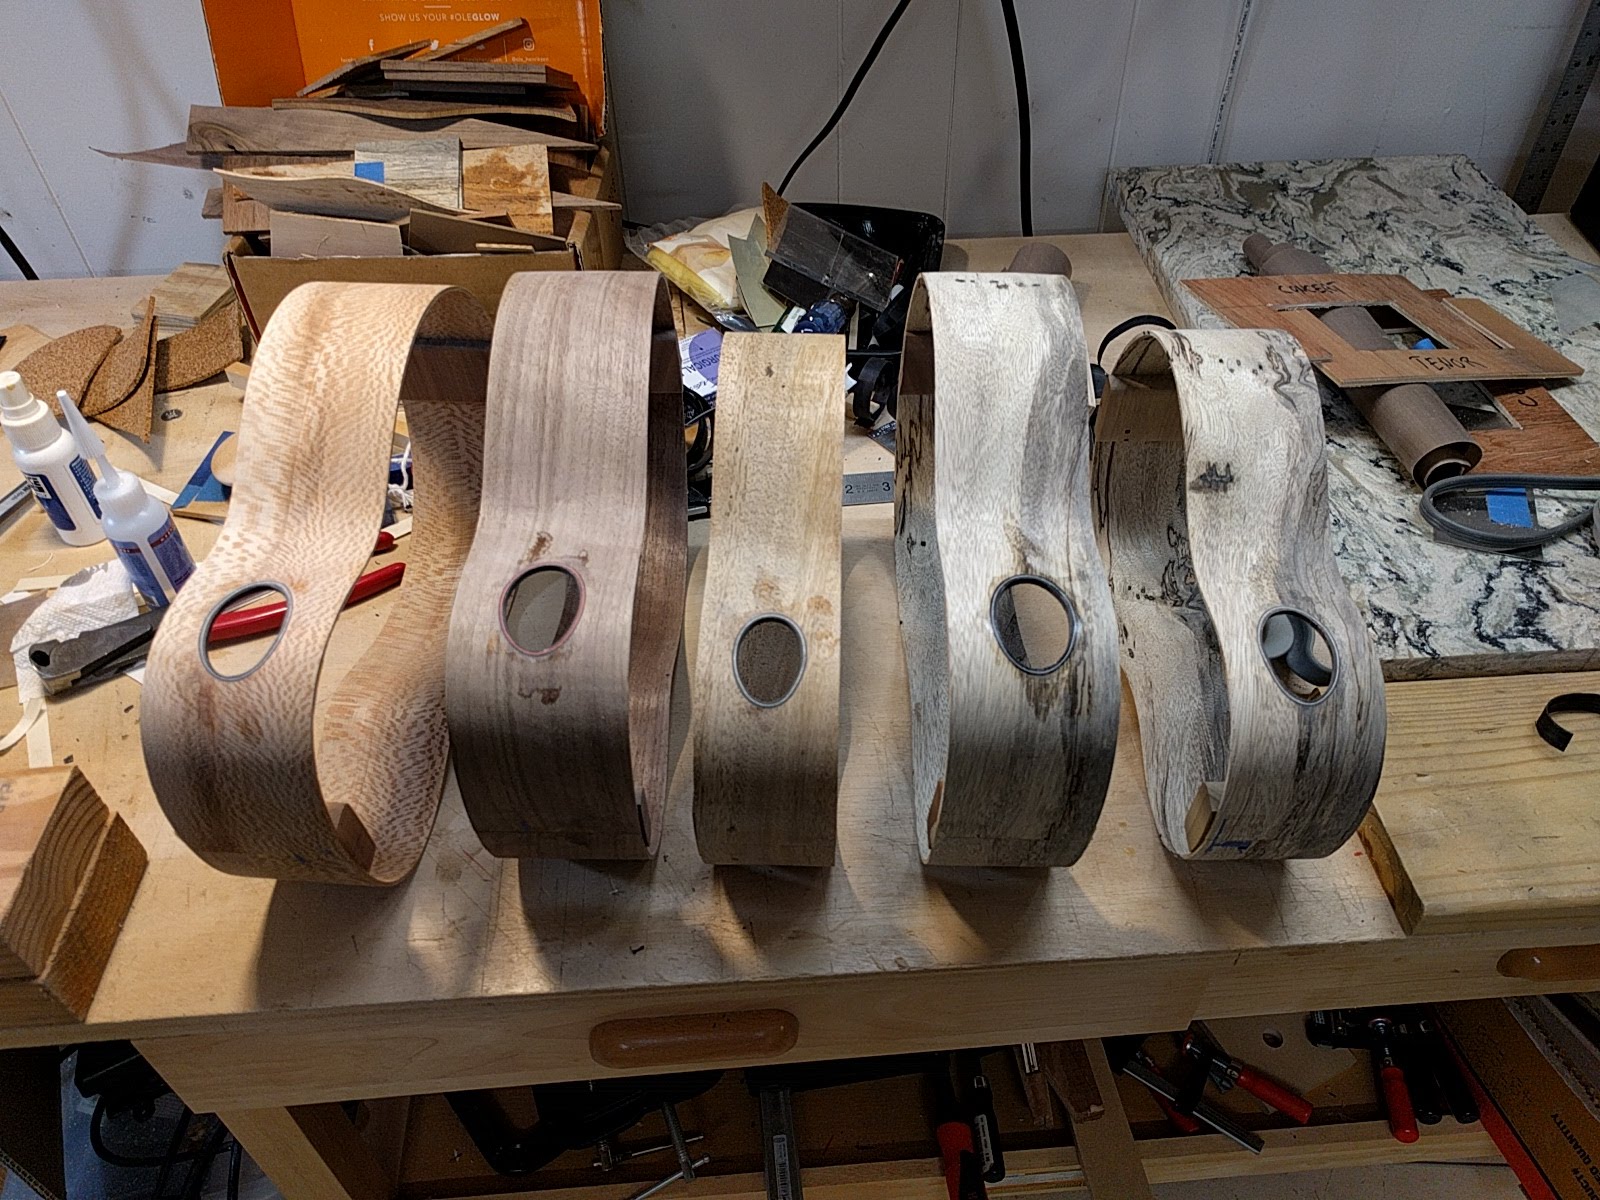
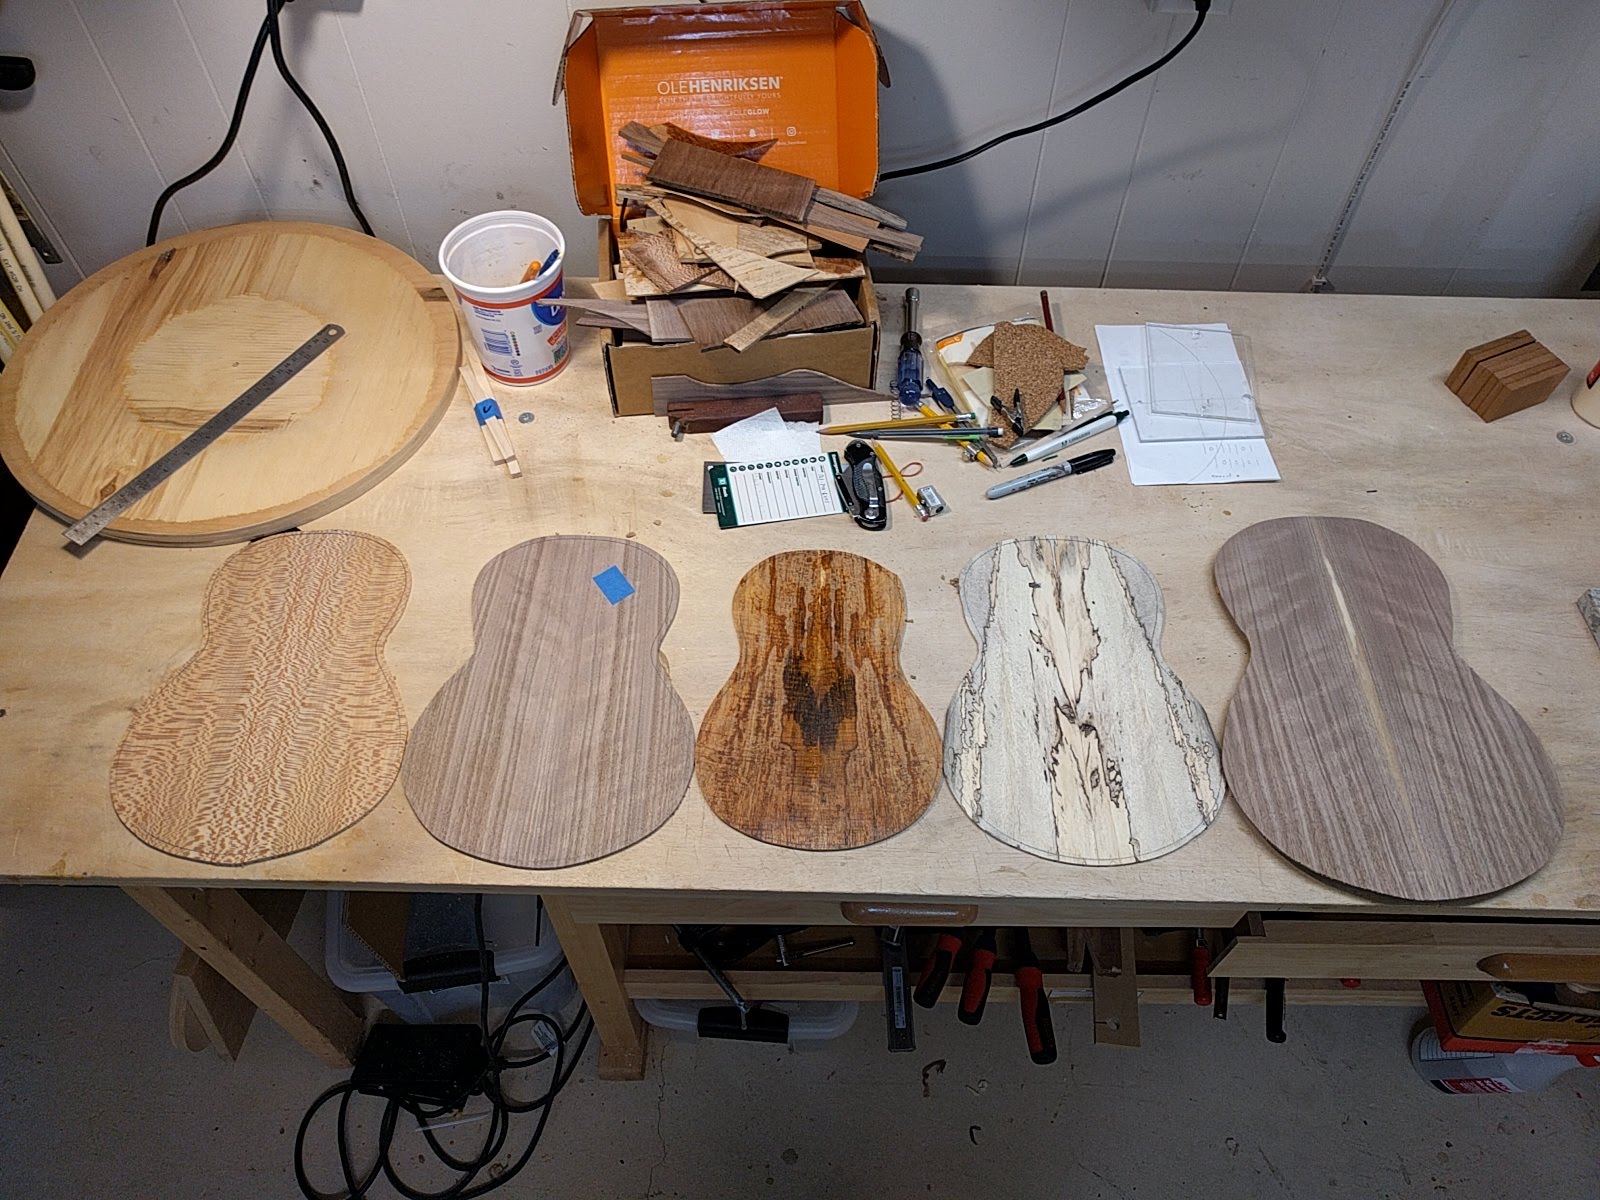
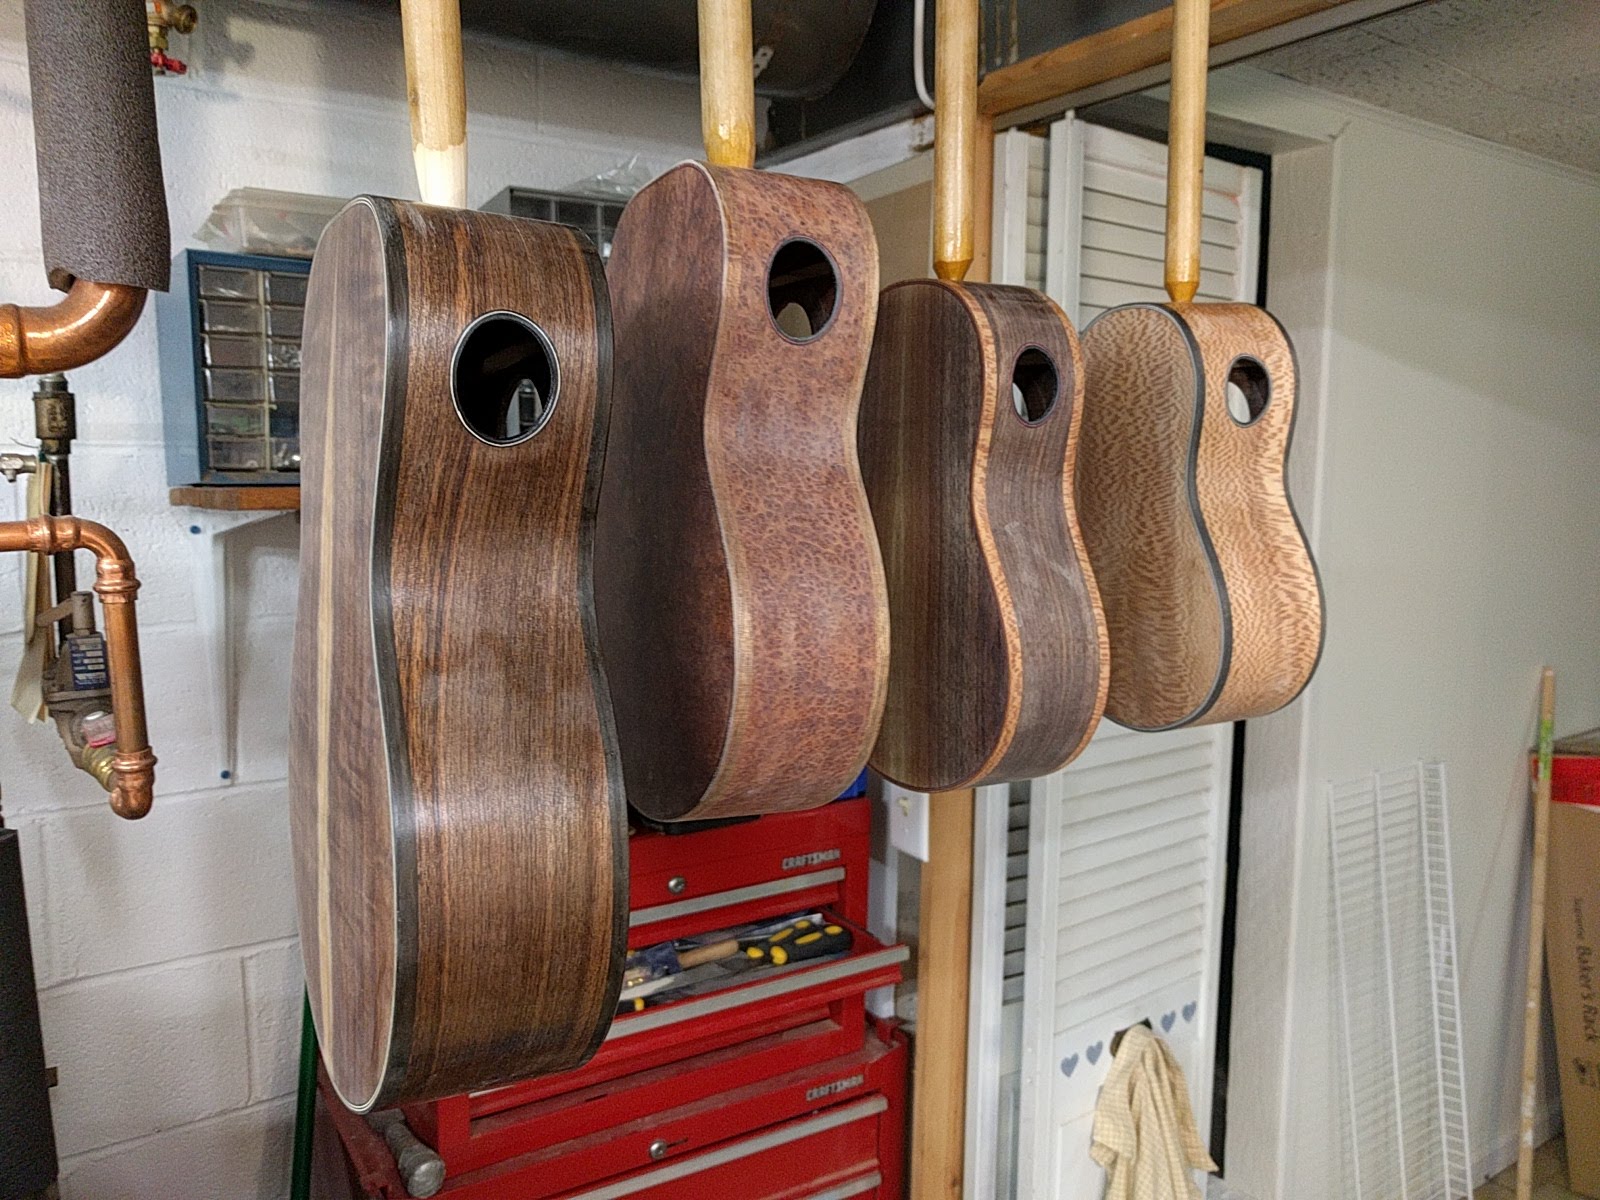
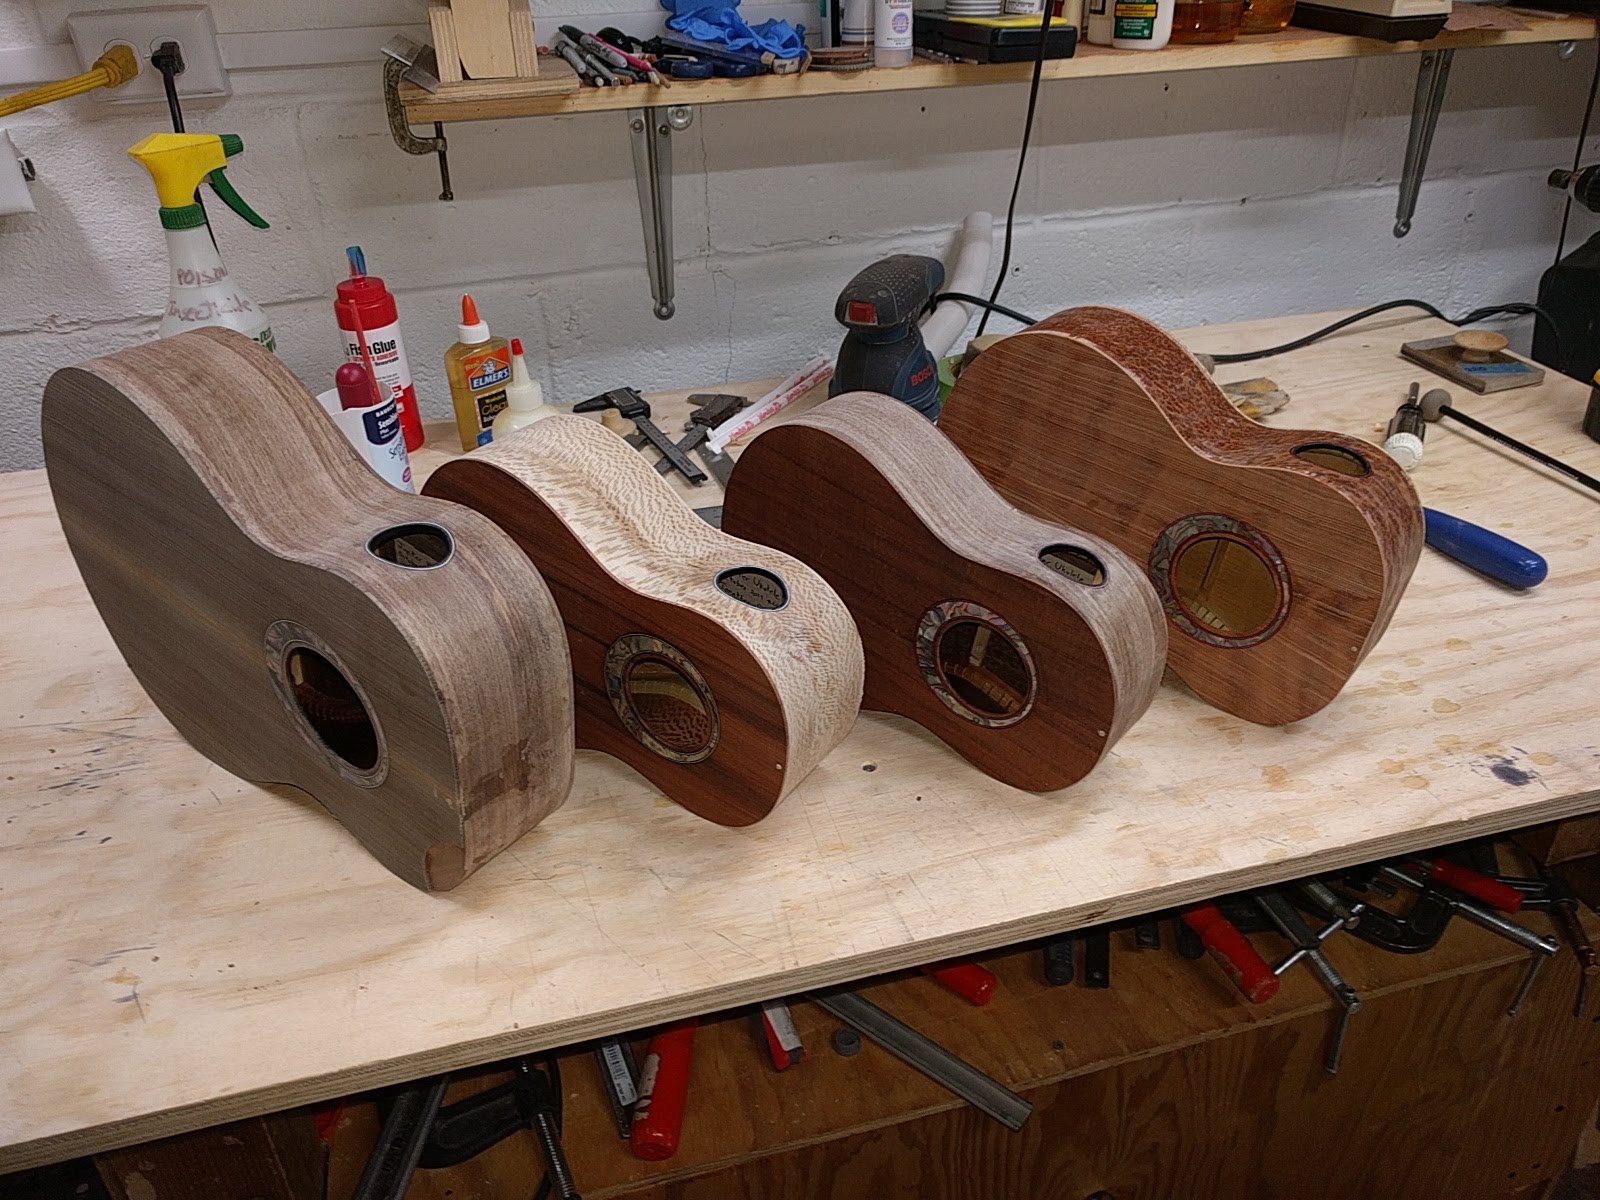
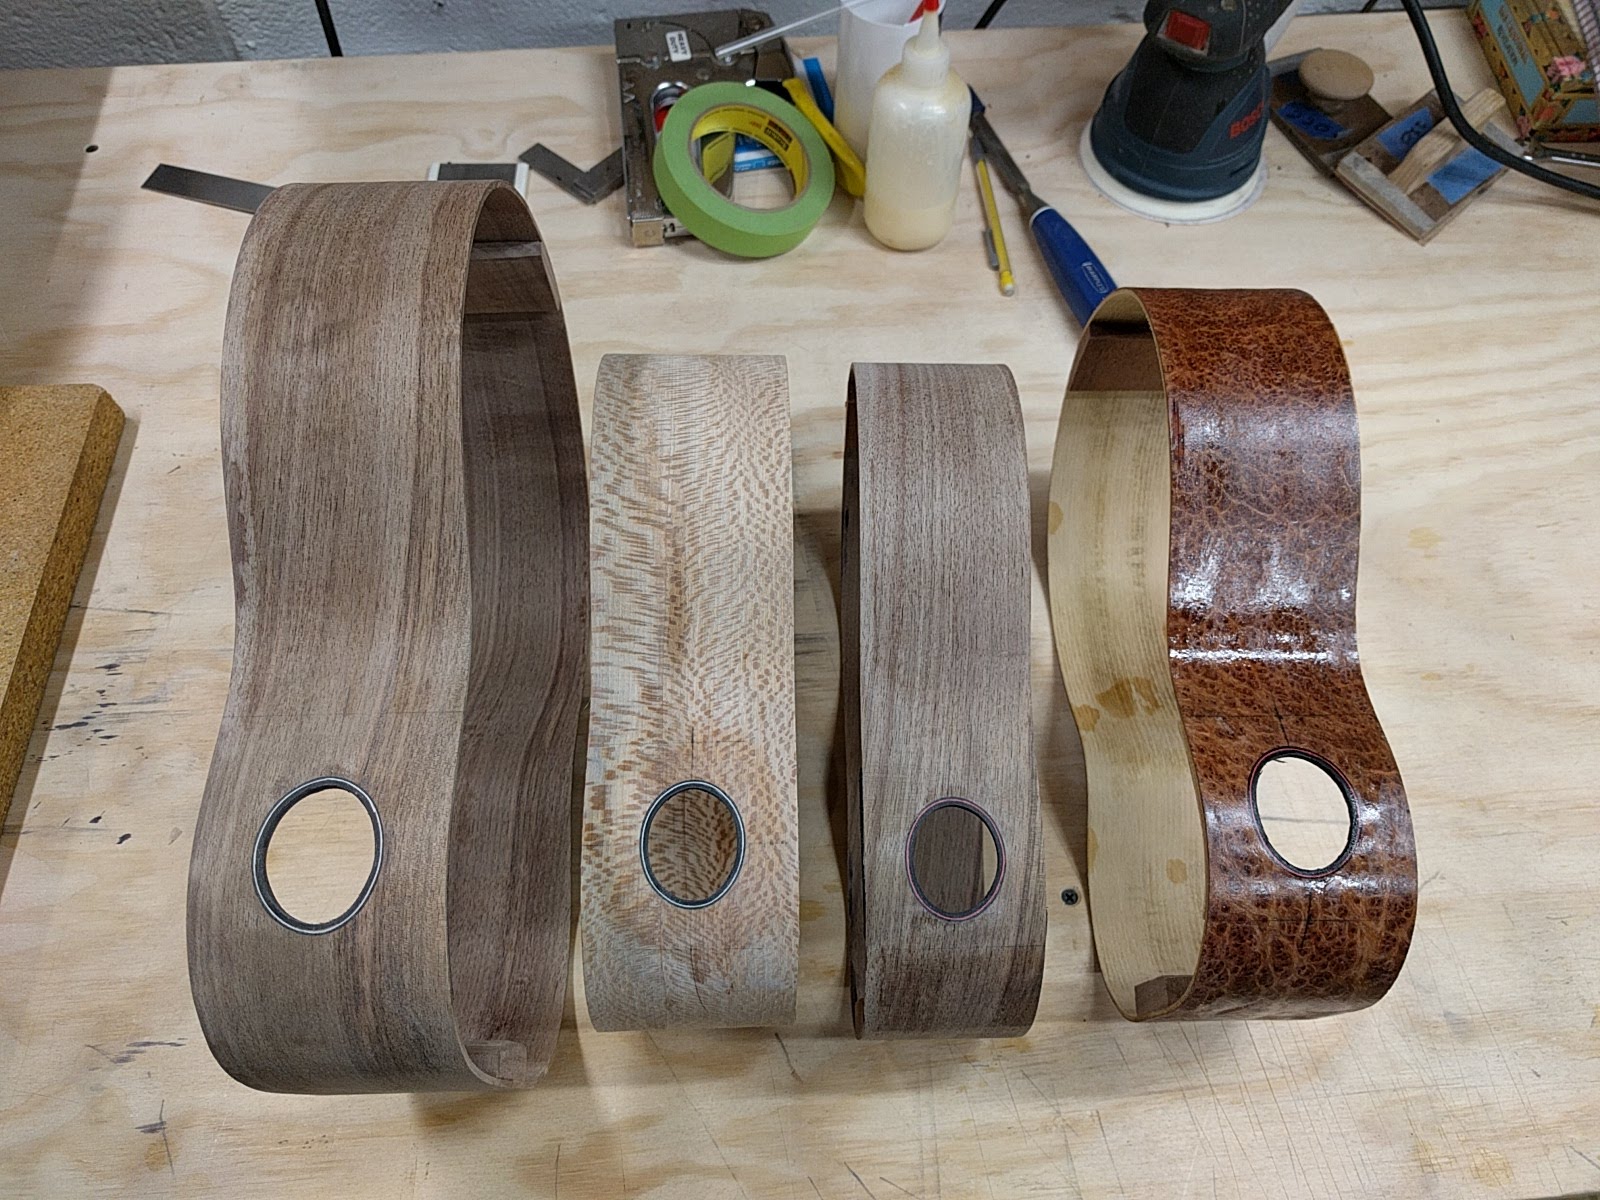
The bodies are completed, with binding, and sanding, and sanding, and sealer, and sanding and sealer, and … you get the picture.

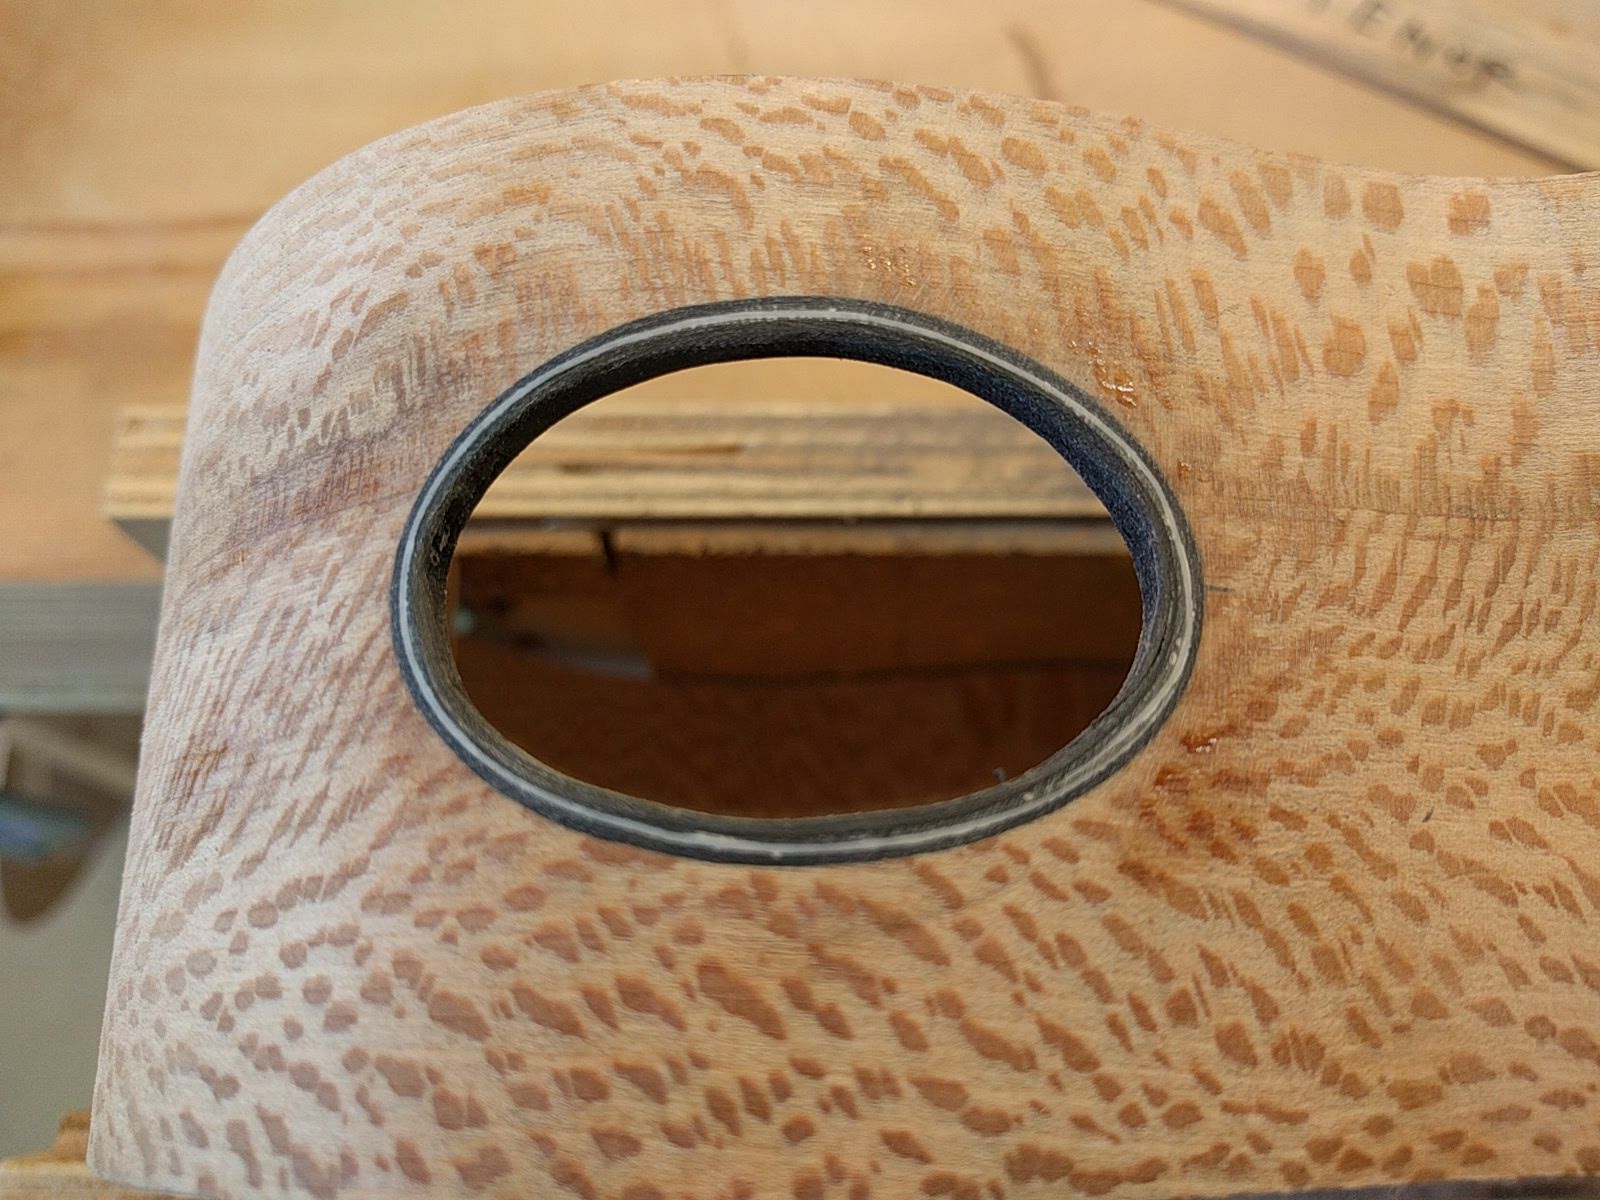
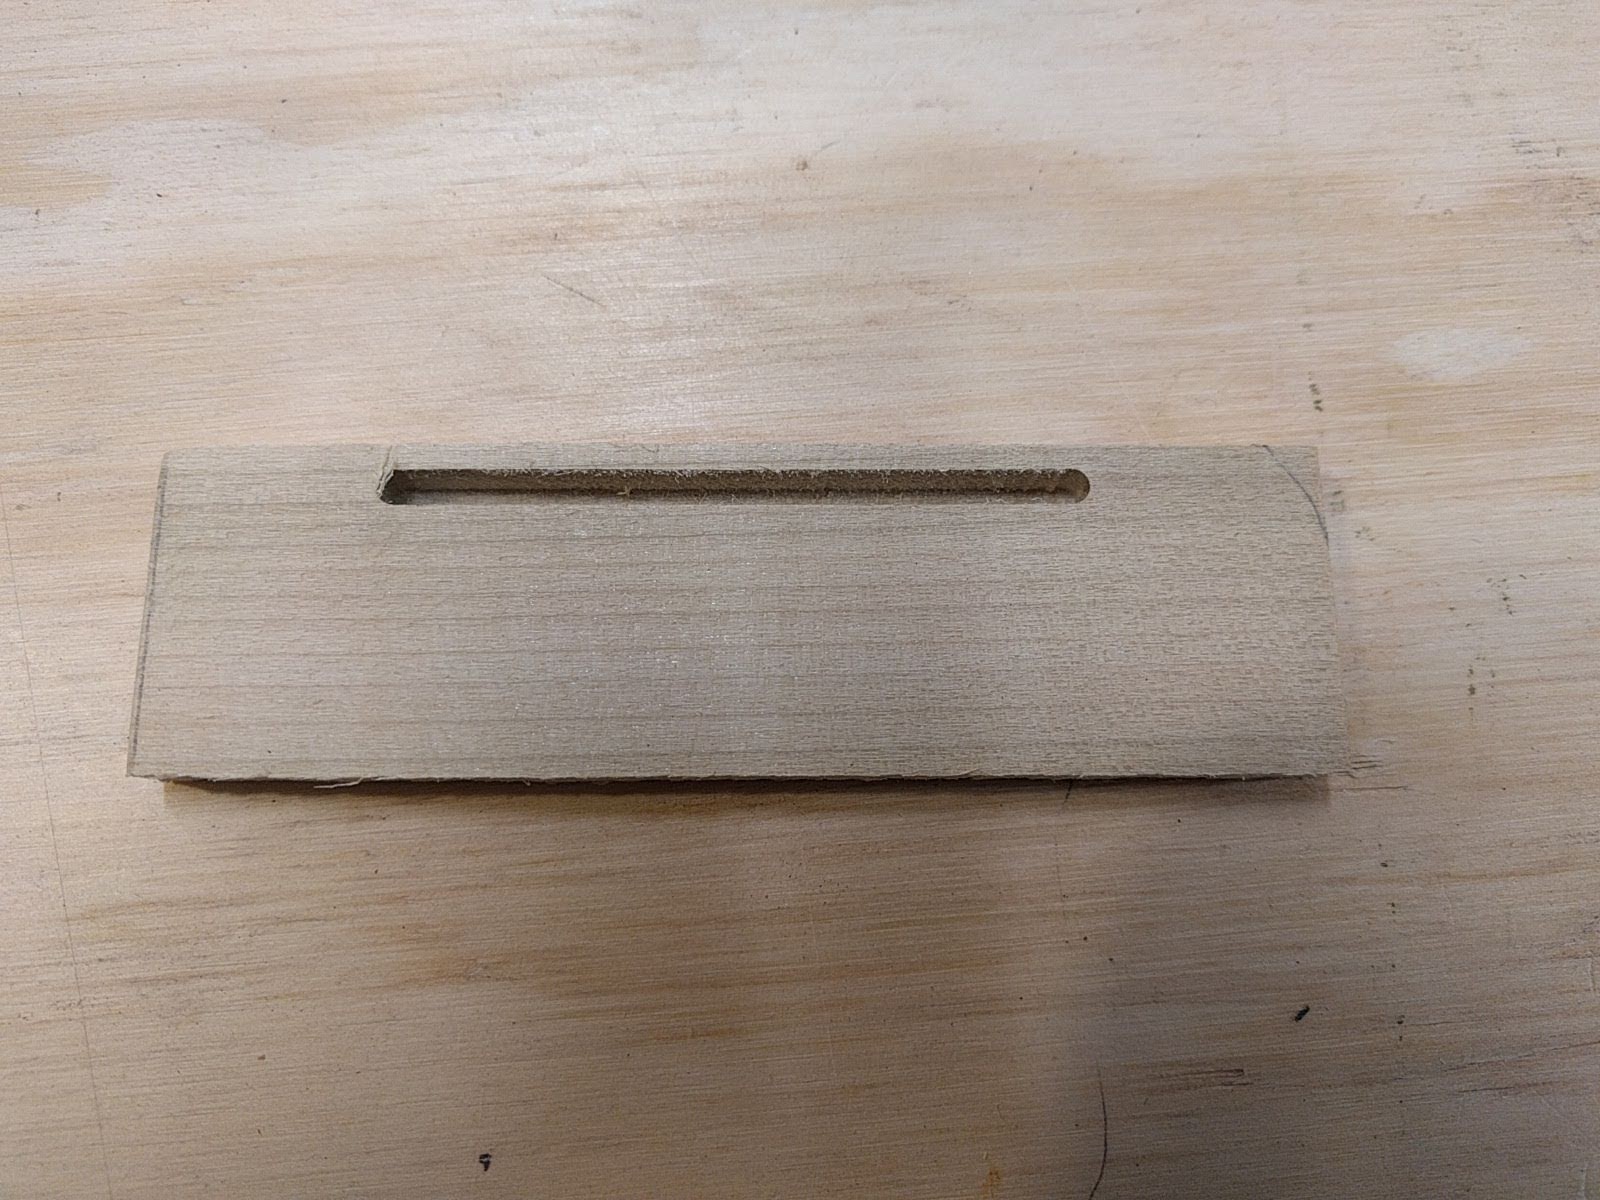
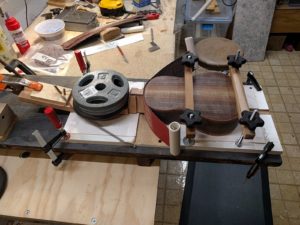
The one remaining step before the bodies can go to the finishing closet is to fit the neck heel to the body.  To get neck to fit up against the contours of the body I have made a jig that clamps the body down along a center line, and then has a sliding setup for the neck, using the slot that will hold the carbon fiber reinforcing bar up the center of the neck as a center reference.  The slot is 1/8 inch wide so I fit it over a set of 1/8 inch brass pins.  The neck is pulled into the body with a spring and held down with some barbell weights.  Then a piece of sandpaper is run between the body and the neck, with the sanding side towards the neck.  The sandpaper is pulled back and forth sanding the neck end so it exactly matches the body.  A bit of work/exercise but rather simple in concept.

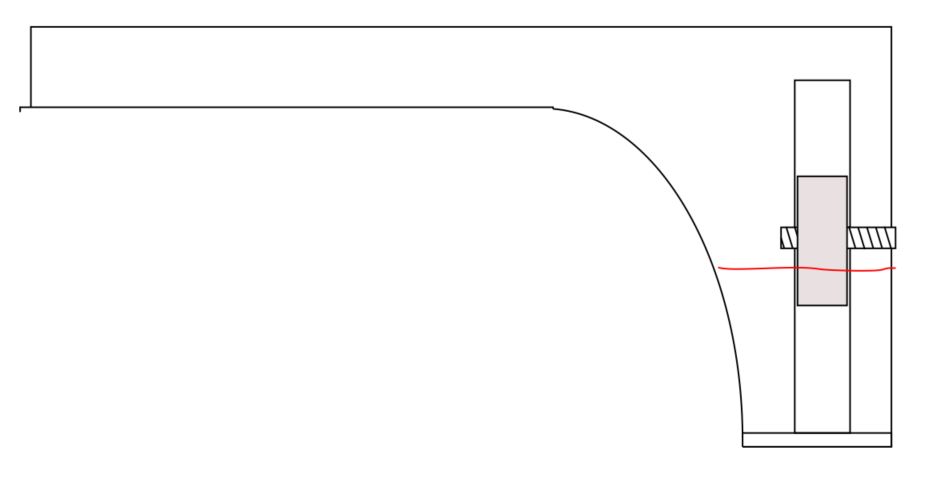
I use a bolt-on neck.  My old design used a barrel bolt, which is a round steel dowel with a threaded hole.

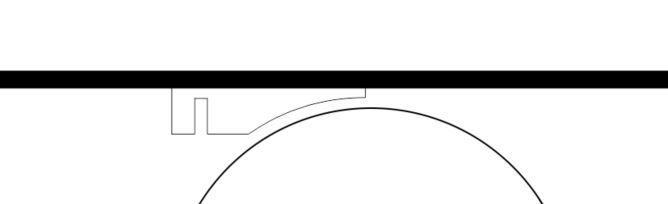
A hole was drilled up through the heel to hold the barrel bolt, and the threaded part came through the body into the neck.

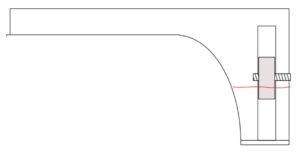
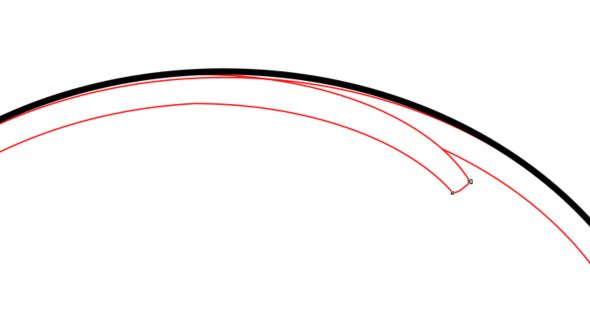
This design had a weakness, which showed up twice.  Since there is a hole up through the heel, and the heel is not very big, there is relatively little wood in the middle of the heel.  Add to this the fact that the wood grain is running straight through the heel and you get a weak area and the heel cracks along the red line.  Once this happened in shipping (they must have dropped the instrument from quite a height onto a concrete floor or something) and the other time the instrument was accidentally kicked off a stand on stage.  In any case, I have re-designed how I do the bolt on.

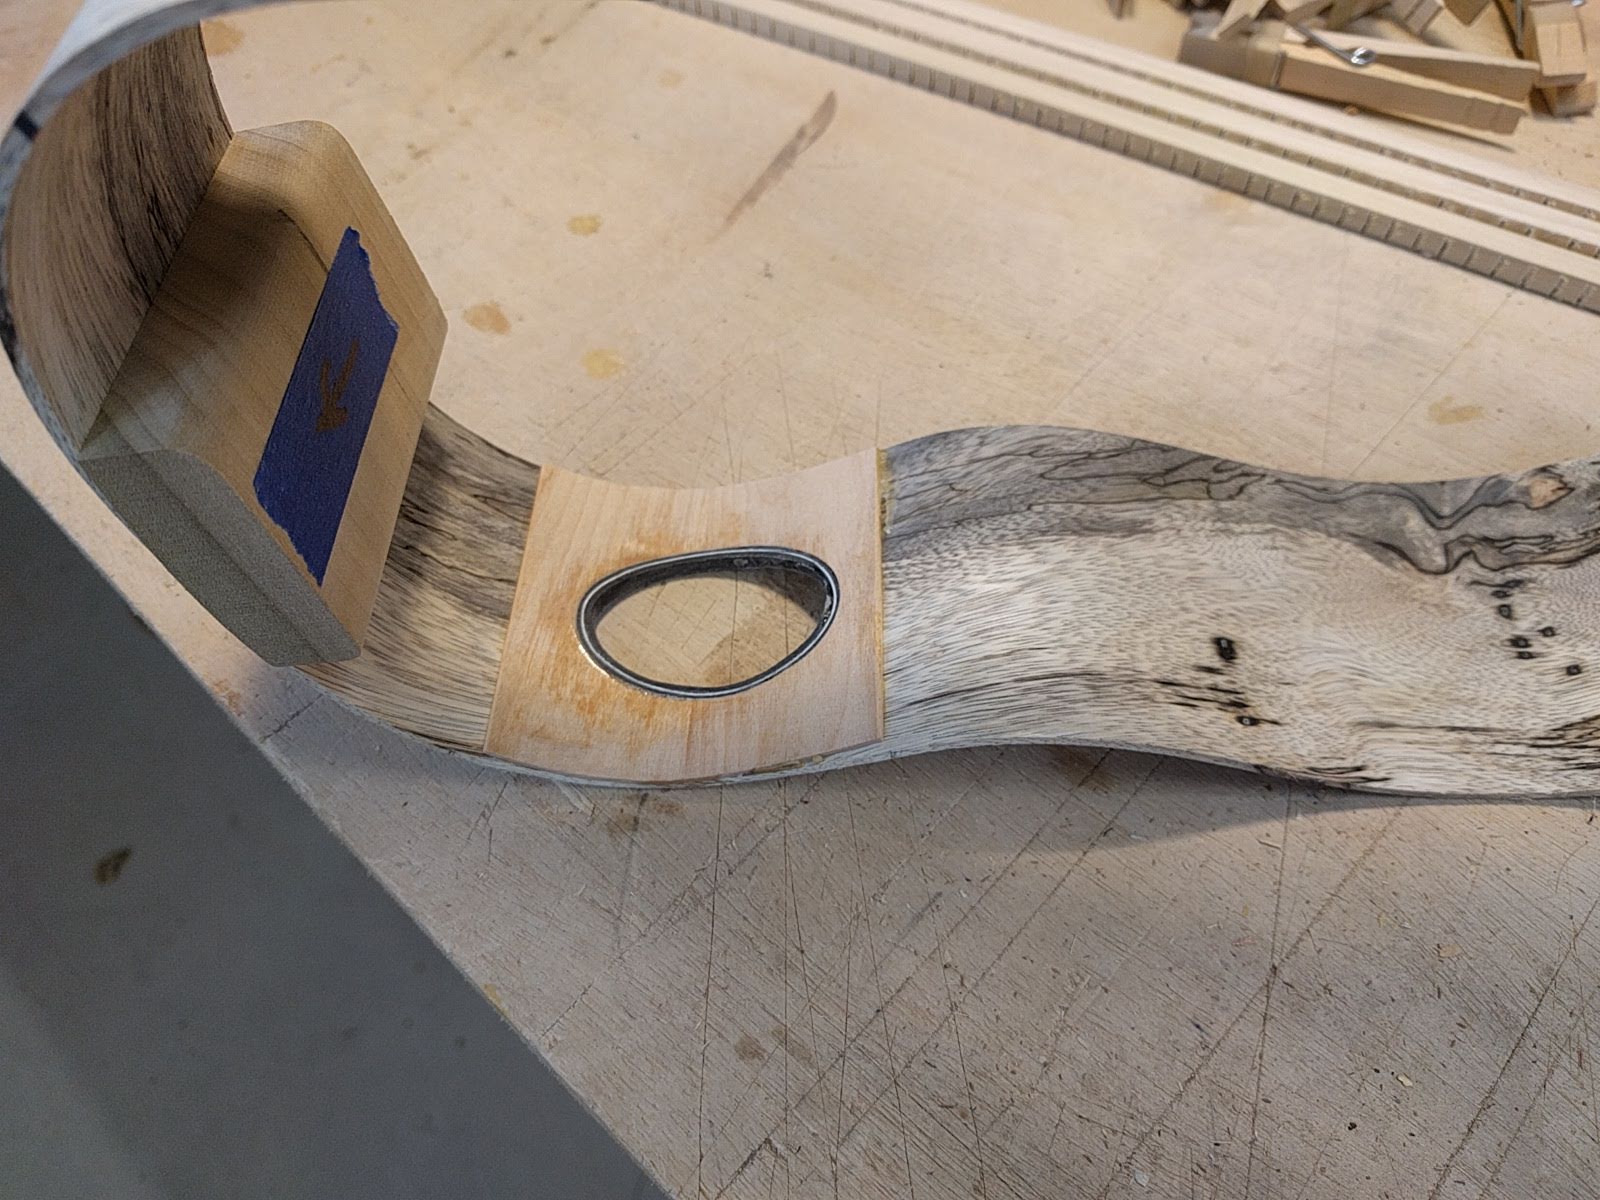
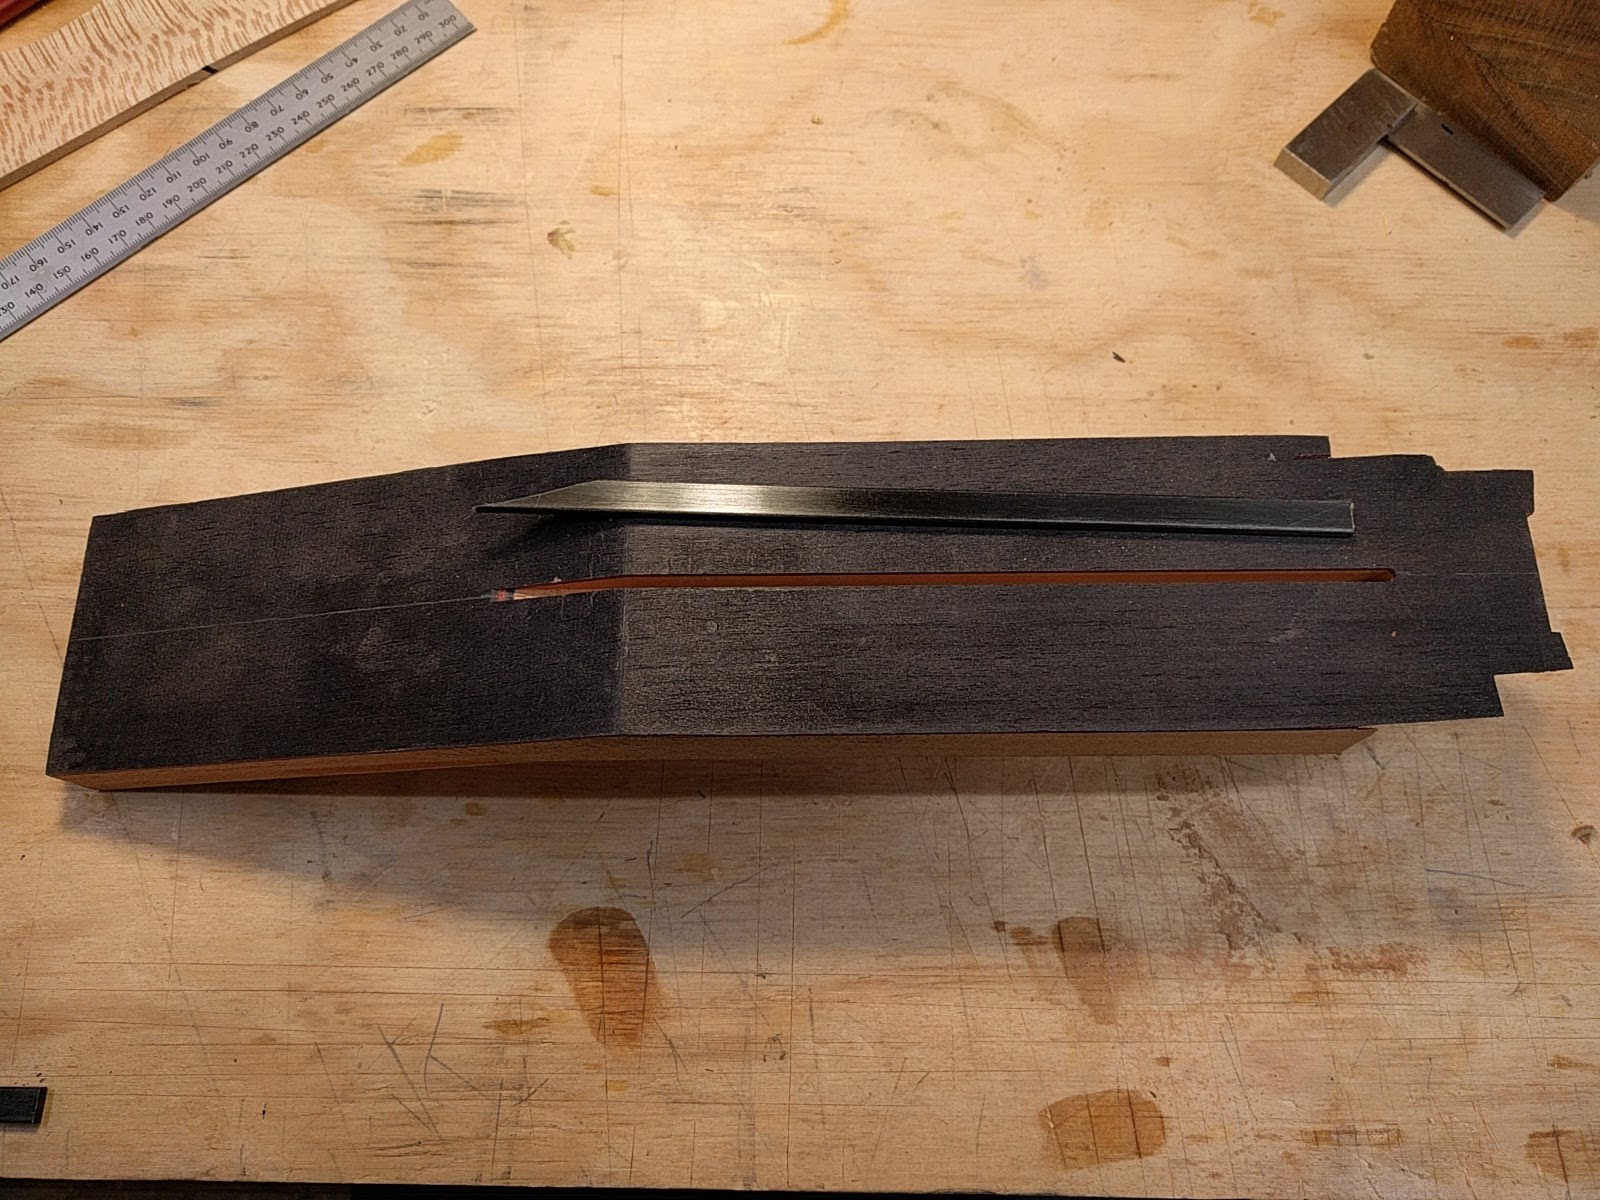
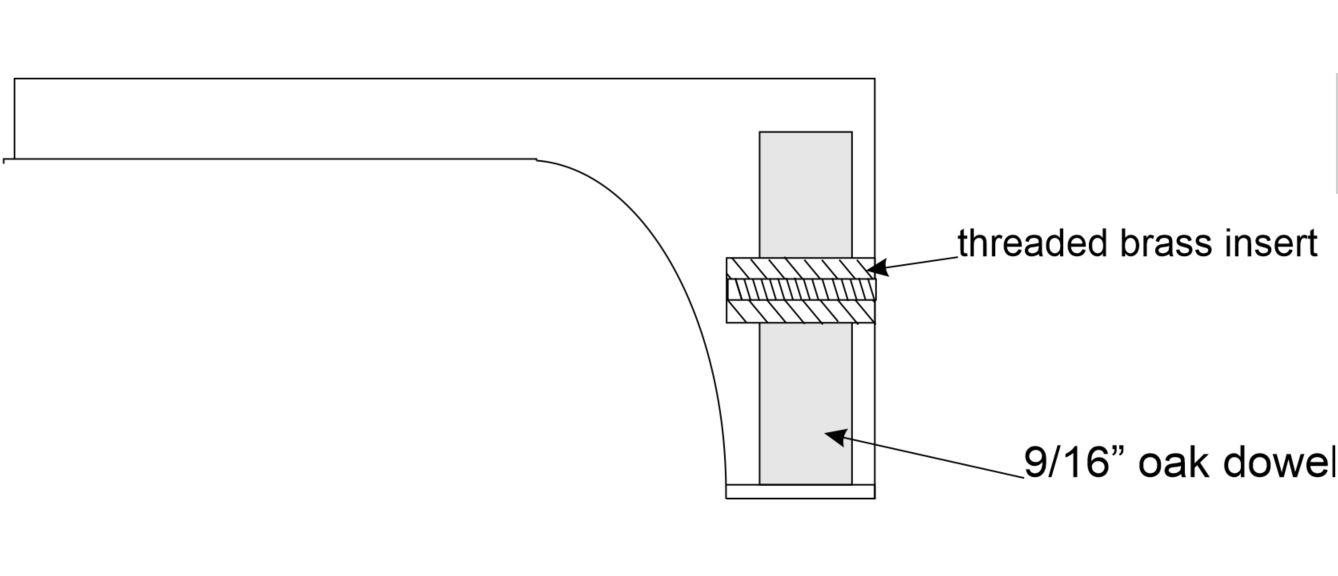
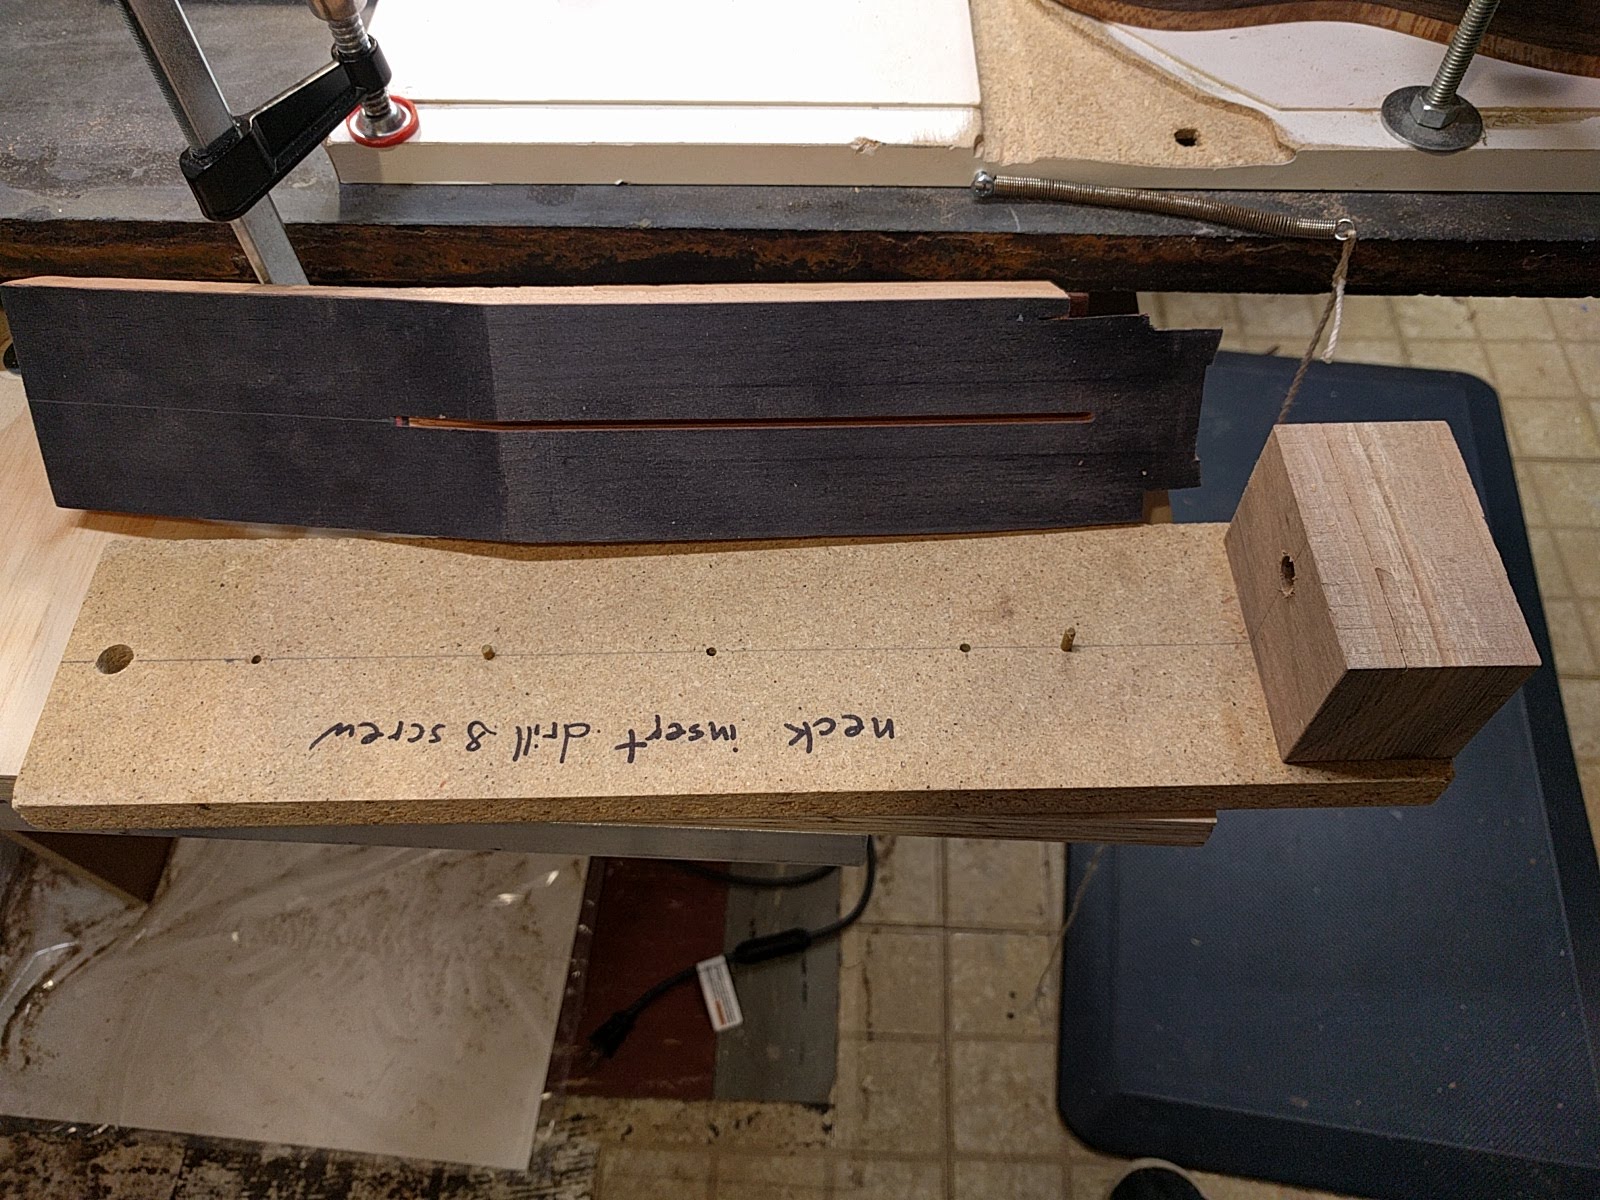
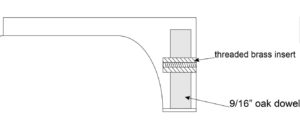
The new design uses a threaded brass insert.  I glue an oak dowel up through the neck heel so that the threaded insert is gripping the side-grain of the oak dowel, and the oak dowel grain is running cross-wise to the grain in the neck itself making this much stronger.

As a test I made up a sample neck, bolted it to a simulated end-block, and dropped a 3 pound sledge hammer some feet onto the outer end of the neck.  It just bounced off, no damage at all.

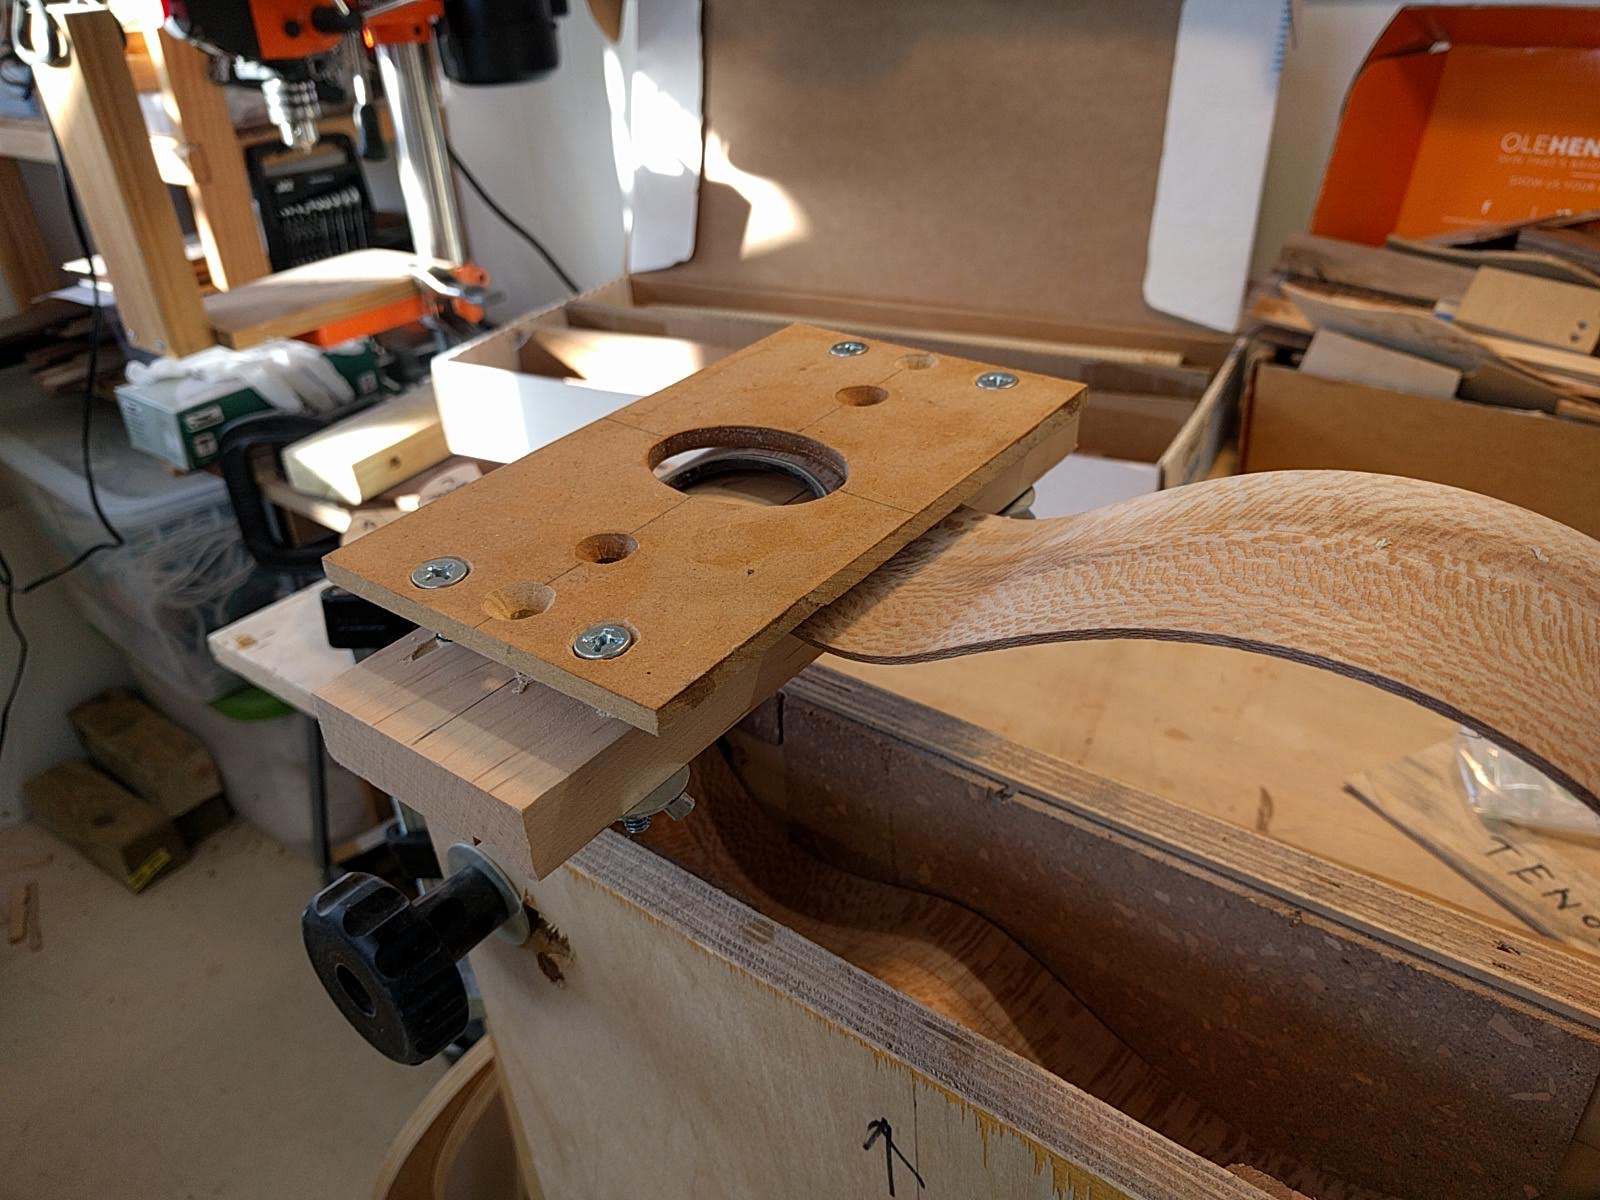
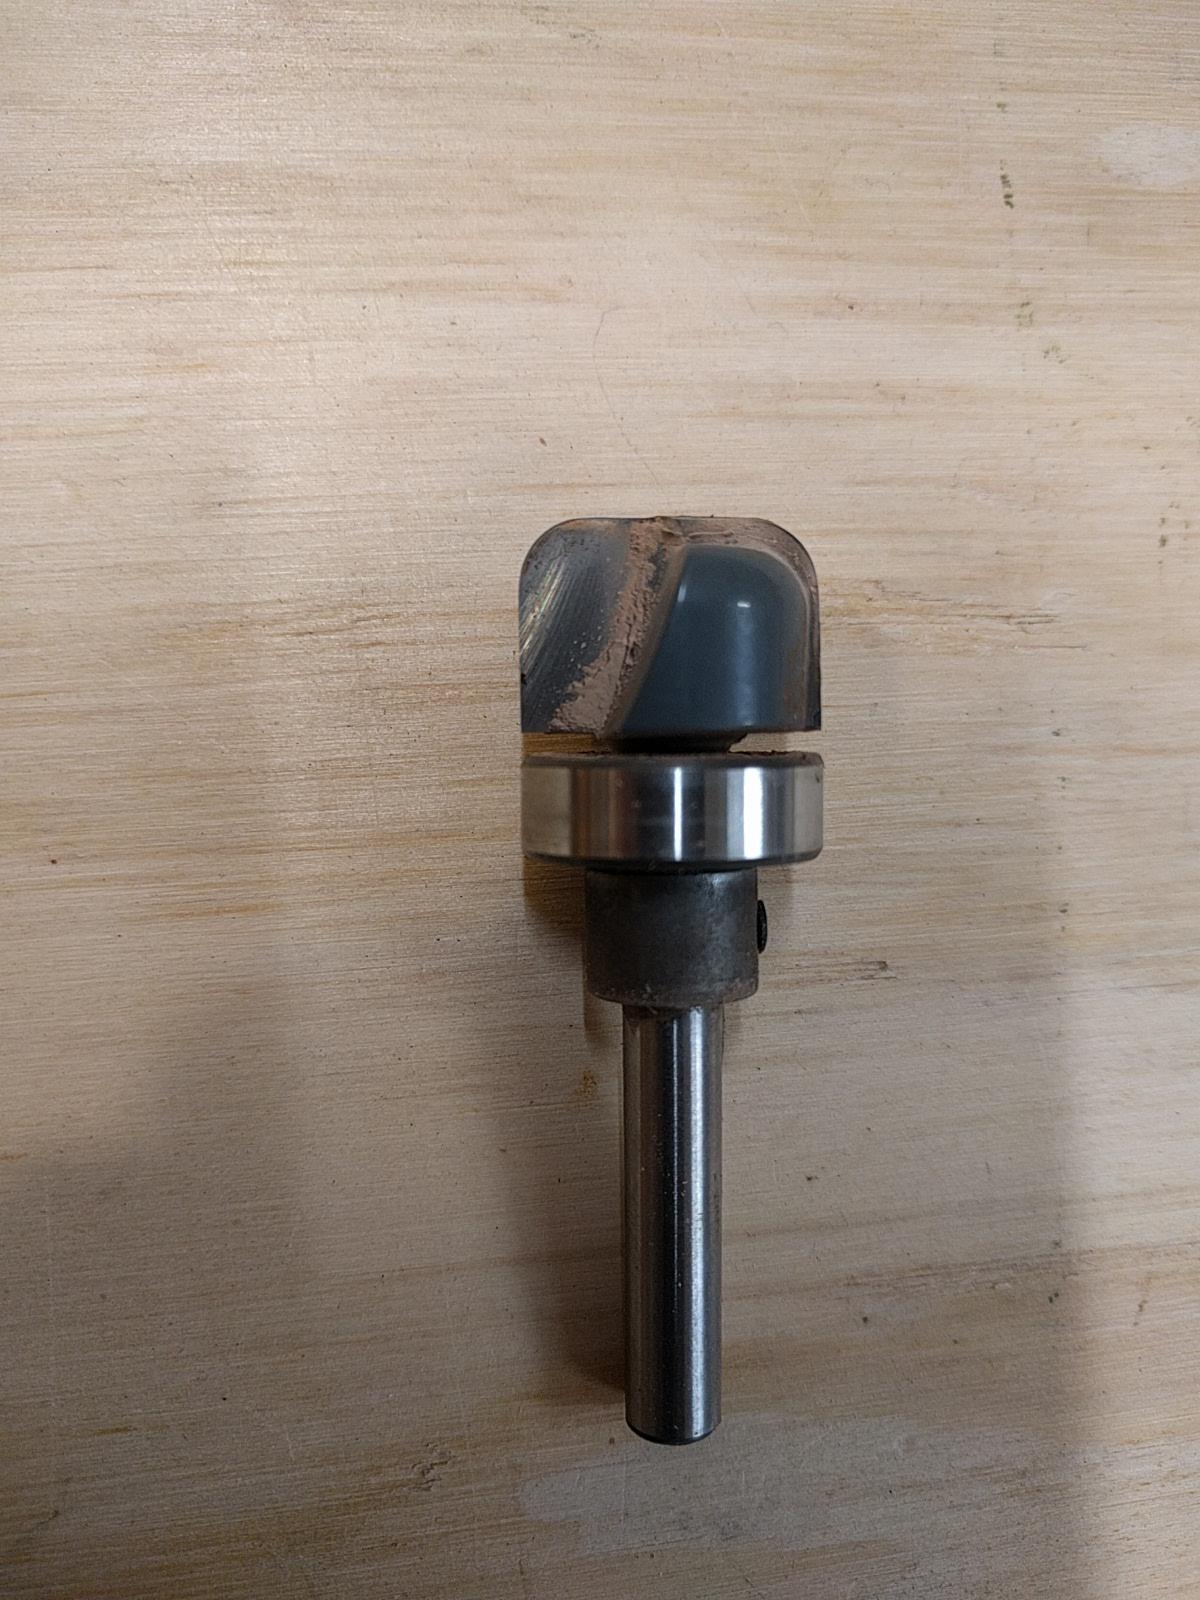
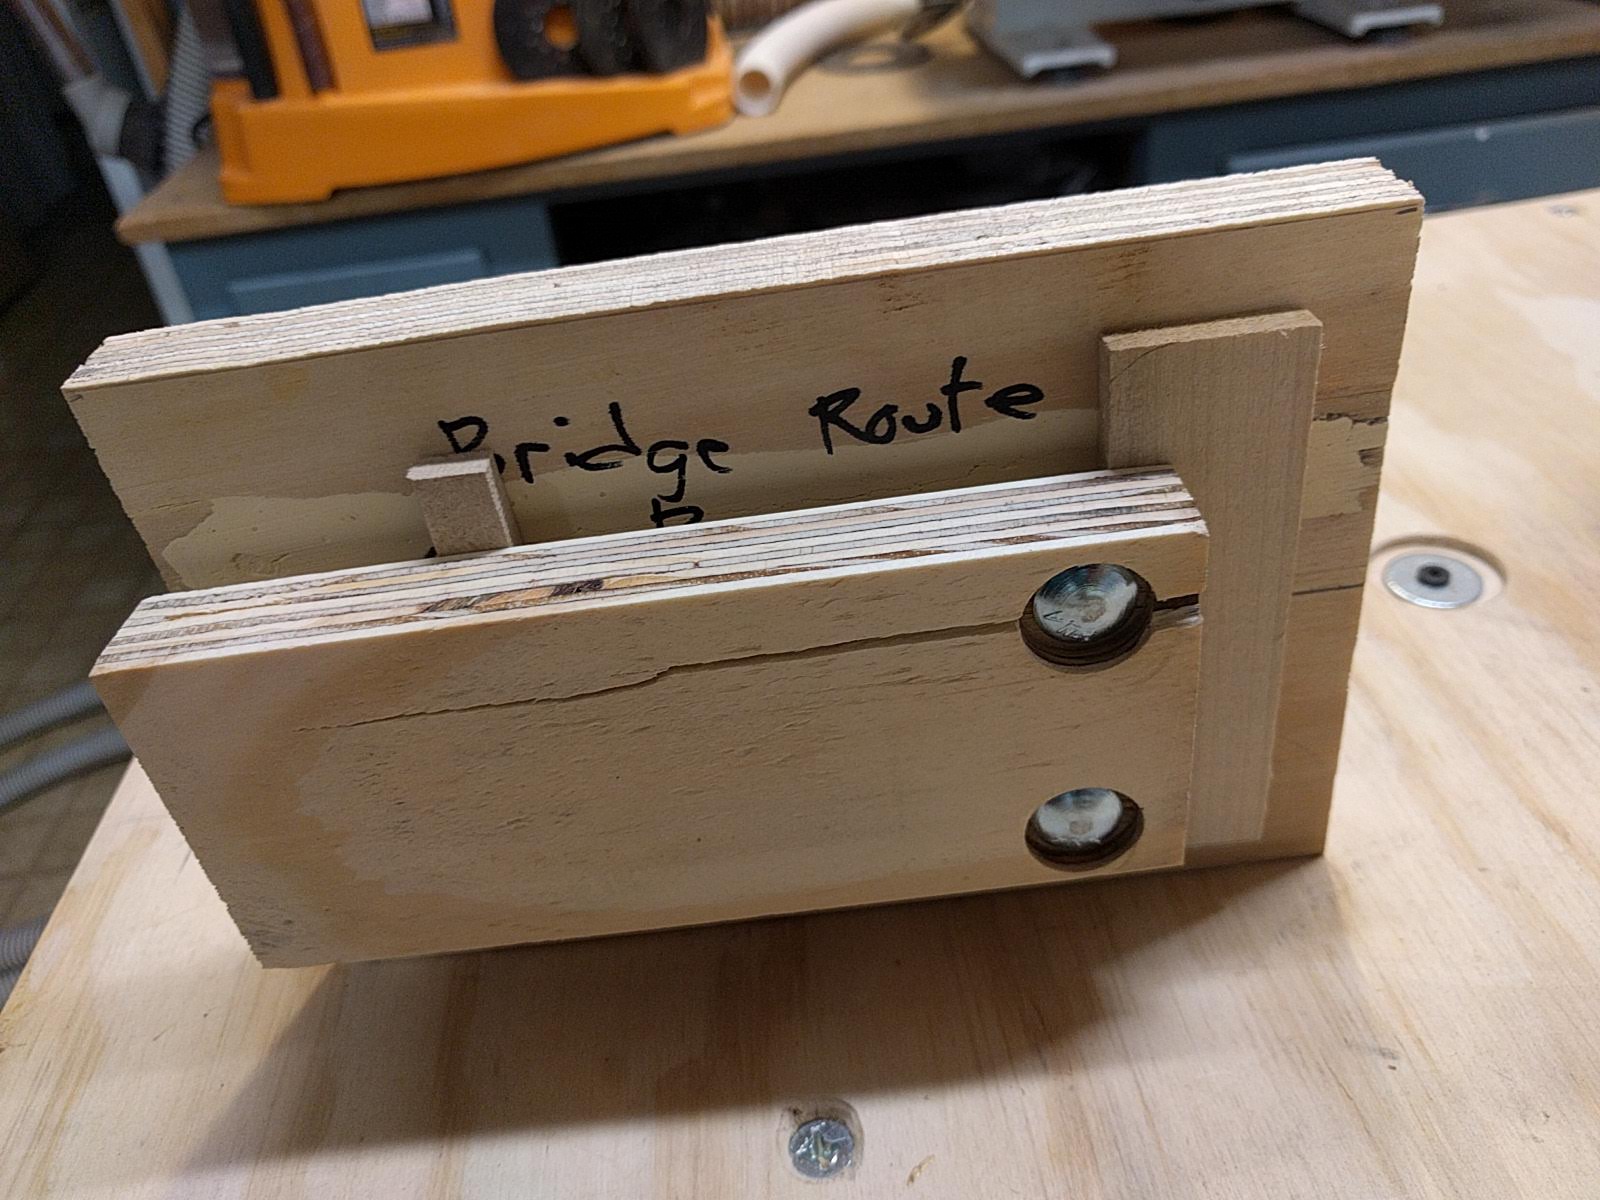
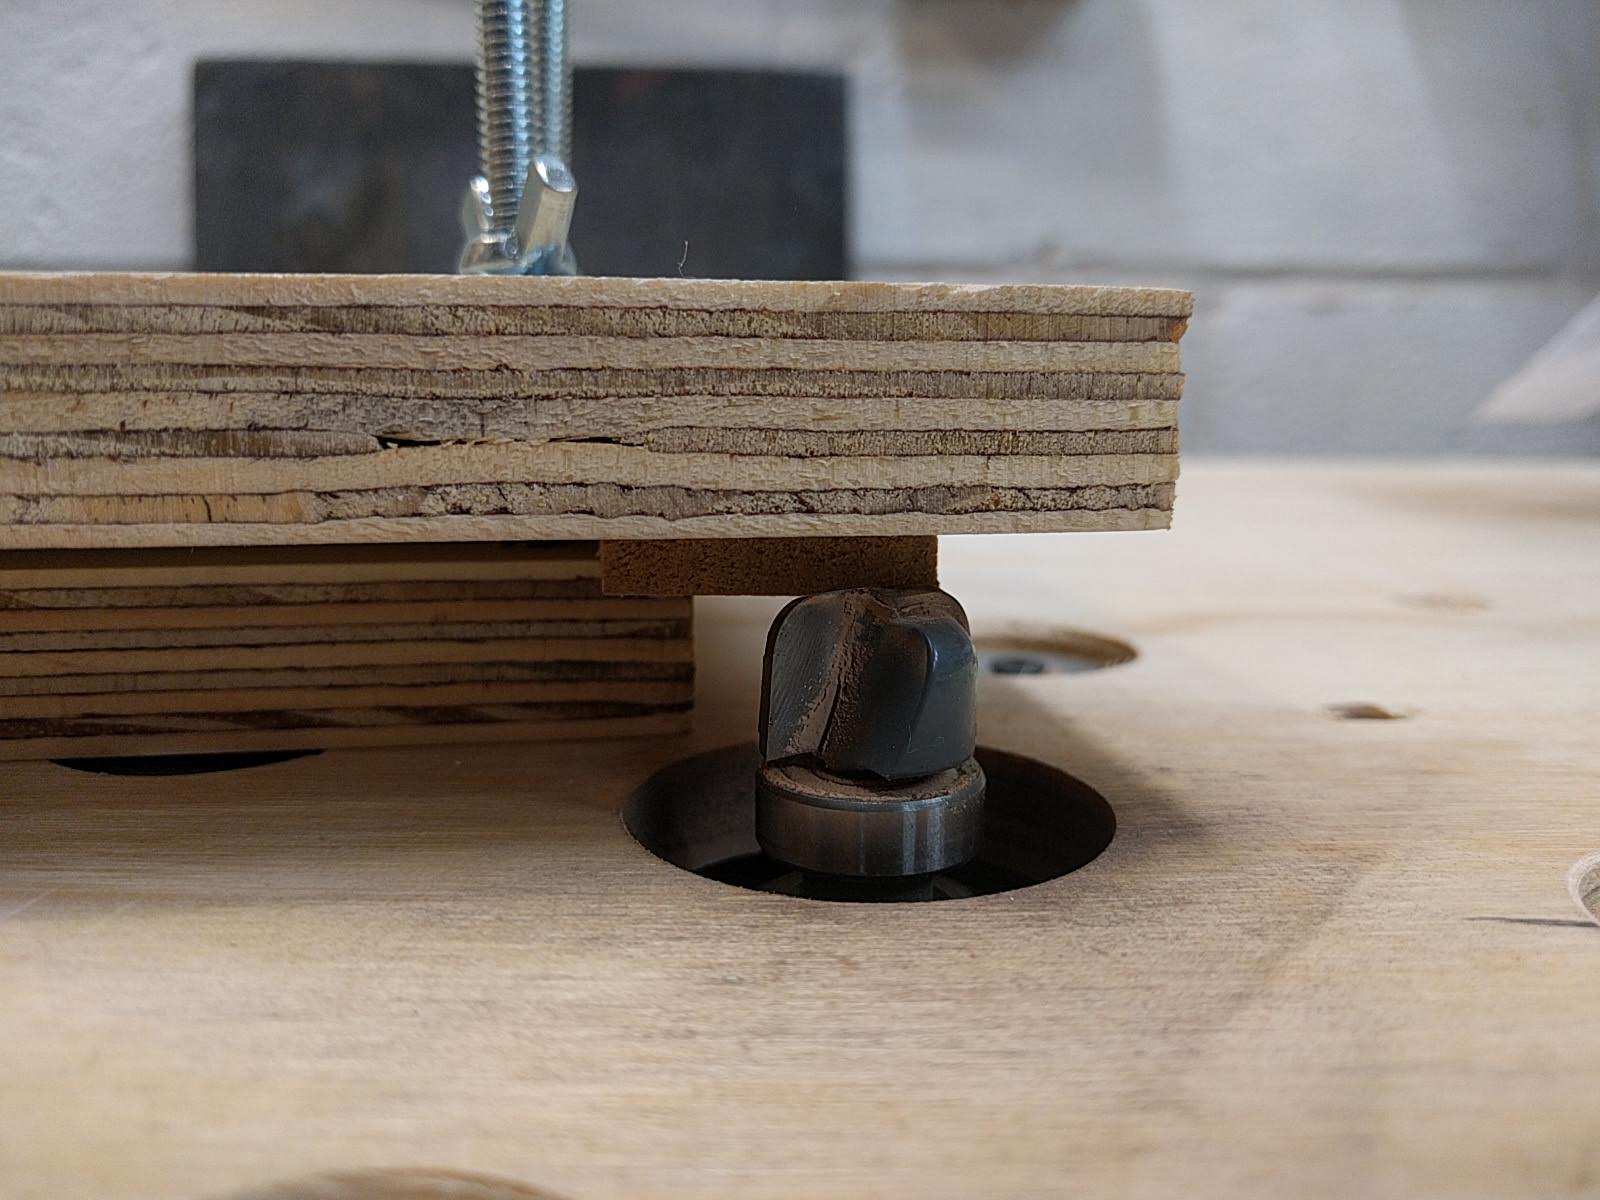
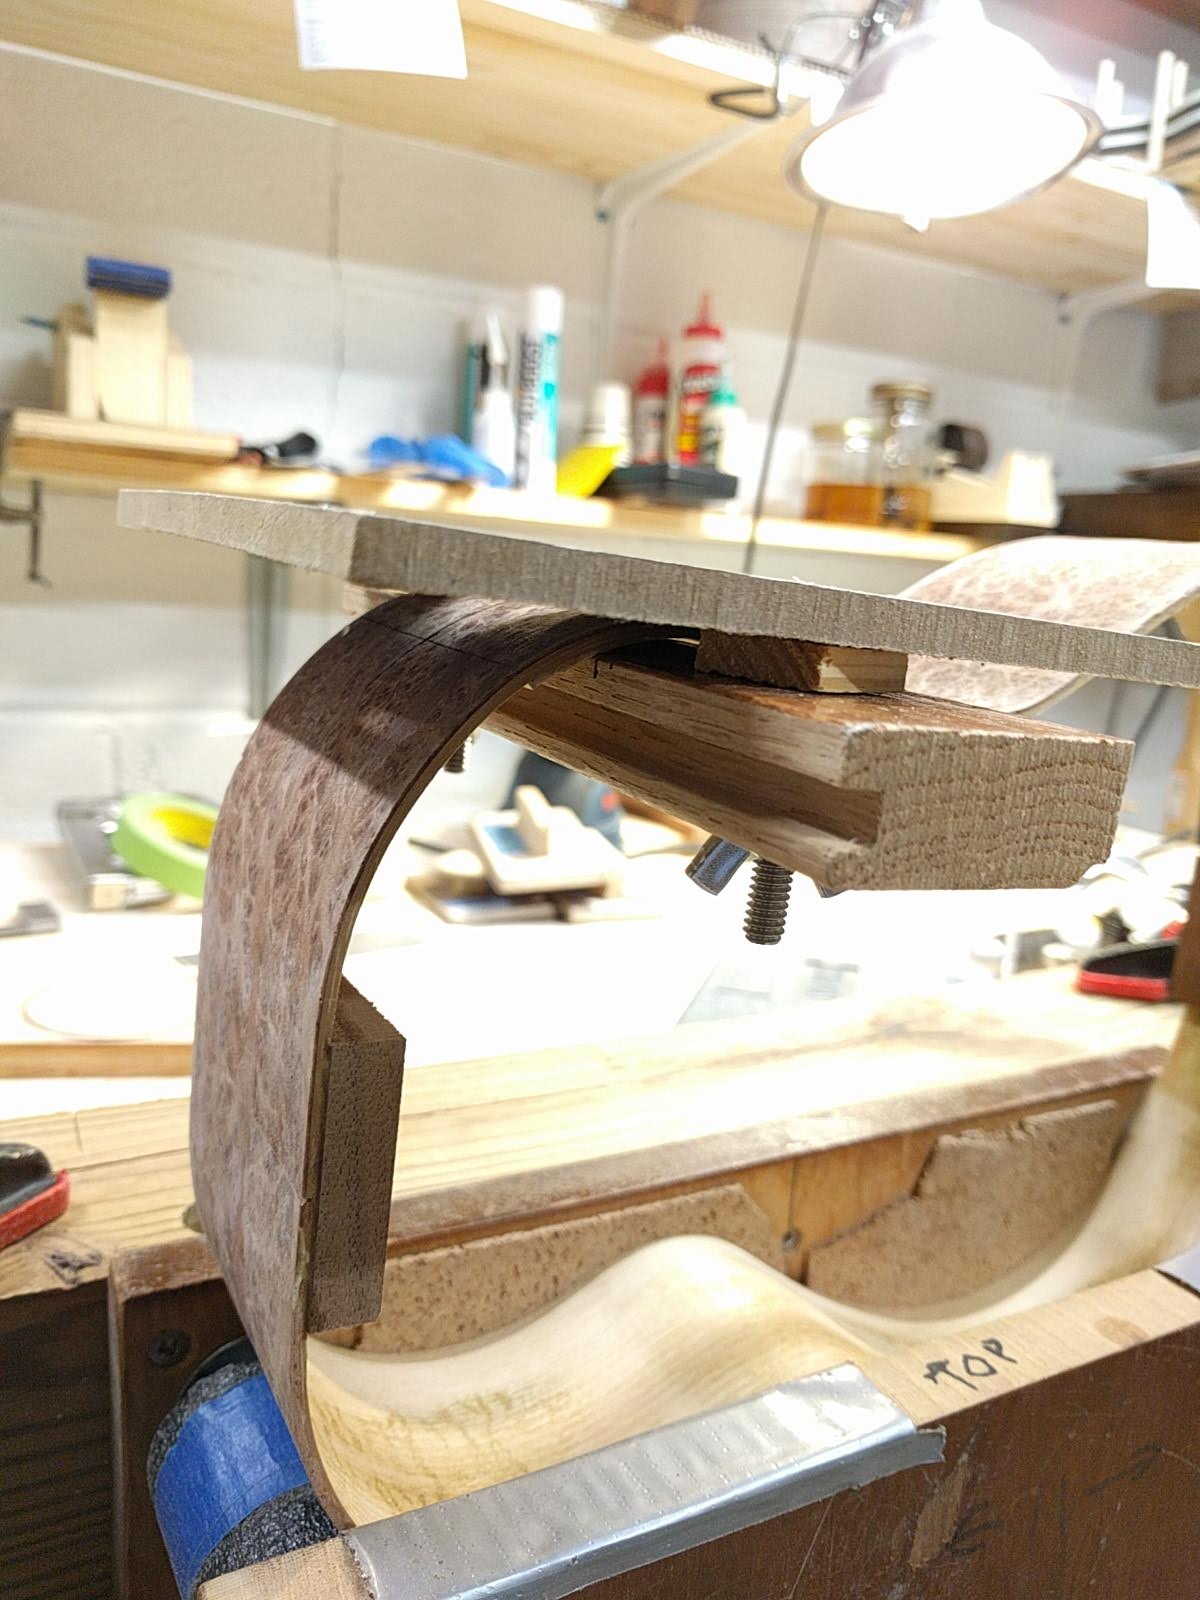
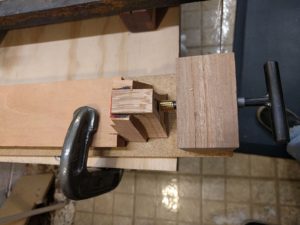
To get the brass insert at the right place, and straight into the neck, I have a little jig that centers the neck using the slot that will take the carbon fiber reinforcing bar to fit over some brass pins.  This jig has a block on the end which has a hole of the size for the insert drilled exactly along the center line.  A drill bit is inserted through this hole and the hole for the insert is drilled into the neck.

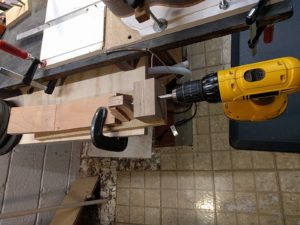
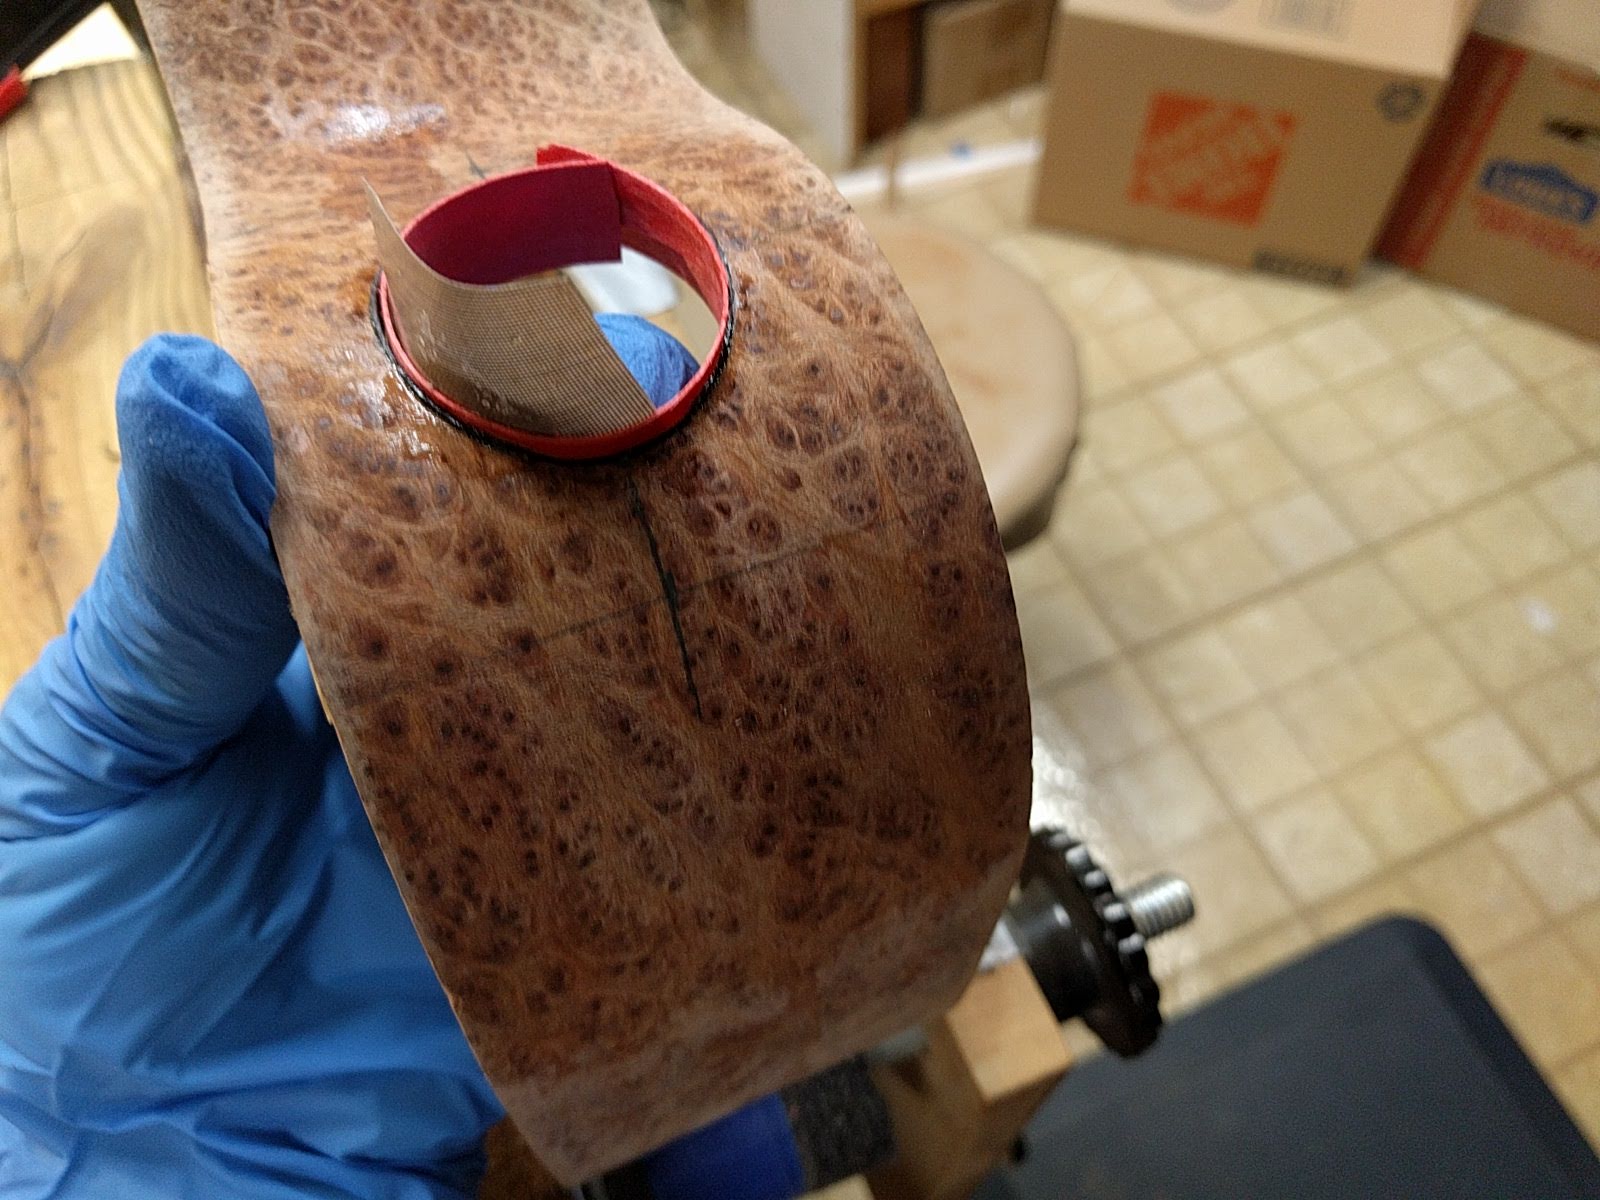
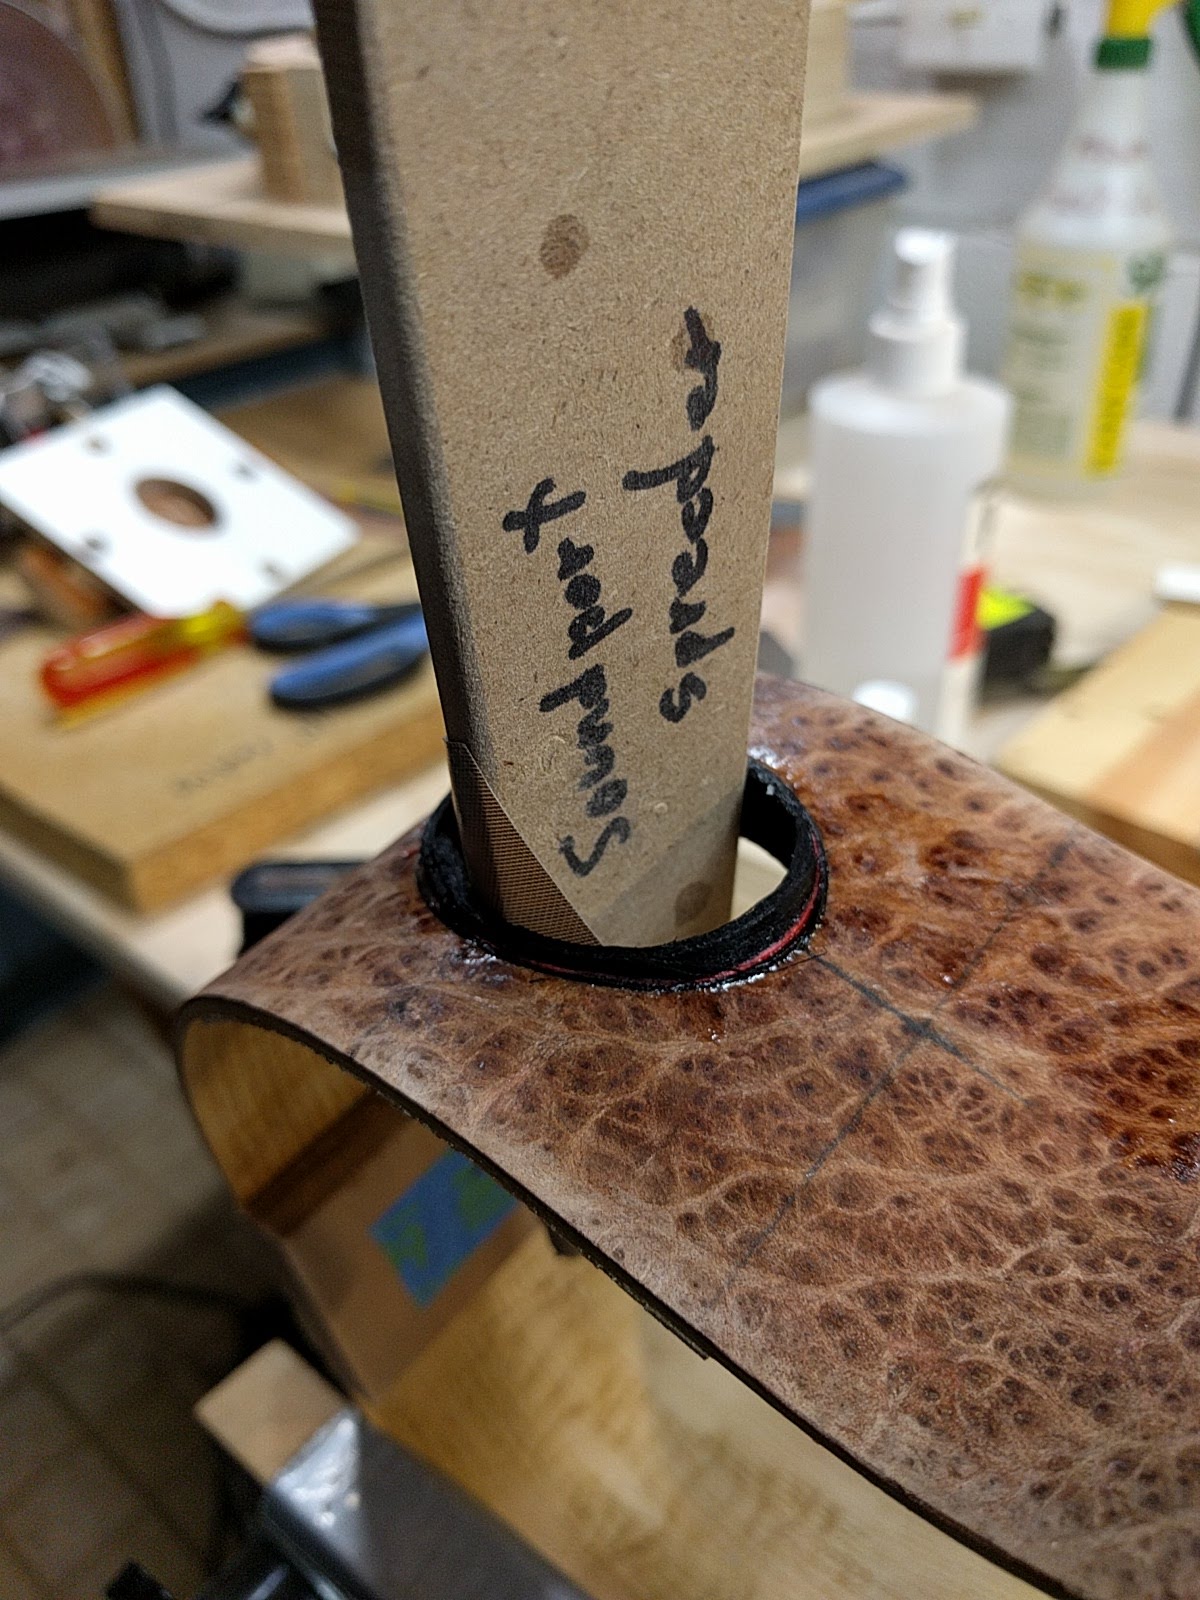
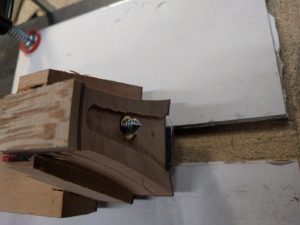
Without moving the neck, the brass insert is then threaded in, using the same reference hole in the jig to ensure that the insert goes in straight and true.

Then finally a center is threaded into the brass insert and the neck is placed back on the jig used to sand the heel profile to fit the body, and the neck is whacked against the body to mark the exact spot that the hole should be drilled through the body for the attachment bolt.

Now one can glue in the carbon reinforcing rod, glue on the headplate and fingerboard, and shape the neck.

Back from Florida

There was no hurricane damage at all to the house or grounds at my winter place in Florida.  We got very lucky.  How about some avocados?  These are a variety called ‘Choquette” which I planted a couple of years ago.  Last year the tree had it’s first 3 fruit.  This year there are 10 on the tree.  The description for the variety says that Choquette is where ‘size meets quality’.  They are very good, very large, and ripen in Dec. – Jan. when I am in Florida.

Closed

The bodies are all closed up, with the tops and backs glued on.  Next step is binding, but it will have to wait a bit.  The shop is going to be ‘closed’ while I go down to our place in Florida to see what sort of mess the hurricane left.  Fortunately the storm decided to stay east, sparing us what was originally predicted to be devastating direct hit.  Be back at work in 4 days.

Potato chip

Just to show you that some ideas do not work out so well.  It has been a while since I built a laminated instrument, with a fancy burl veneer on the outside, and Pennsylvania black locust on the inside (one of our best local tonewoods, I have heard it referred to as the ‘rosewood of the east’).  Anyway, I got some really nice redwood burl veneer and figured I would pair it with a redwood top for an all-redwood instrument.

I glue the veneer to the locust with a catalyzed urea veneer glue which you mix up with water and it sets via chemical reaction.  Since the glue is water based, the water in the glue does swell the wood a bit when it is applied, particularly the veneer.  I have done this in the past and while there was a little cupping of the surface, it was not bad and things could be wrestled into final ukulele shape.

This time however, things were different.  The redwood burl veneer seems to react with the water in the glue in a pretty extreme way, so that when things dried out the veneer pulled the whole back into a major cupped piece. I figured, what the heck, and applied the back braces, hoping that would pull things into shape.  Actually it just made things worse, and shifted the cupping around.  I ended up with this:

That is clearly not going to work very well.  Into the trash it goes!

I have re-made things using epoxy as the glue.  Since epoxy does not contain any water, things stayed nice and flat.  Anyone want to buy some unused veneer glue?


Any port in a storm

Had a good busy day.  Got all of the side sound ports for this set cut and bound.

How do I do side sound ports?  Well. I’m glad you asked.

I made a little oval jig that clamps onto the side.  I find it much easier to do the sound port before the kerfing is put in and the side is just flat, inside and out.  The jig has index marks so I can center it on the marked center of the side.

I use a 1/8 inch spiral down-cut carbide router bit in a laminate trim router that rides on the jig.  The router takes standard template inserts which come in incremental sizes.  Thus, with one jig I can cut larger or smaller oval holes, depending on which template guide I use so one jig works for soprano through baritone ukuleles.

Once the hole is cut, I use the pre-bent veneer strips to bind the edge to match the purfling of the instrument.  I do one layer at a time.  First the black, then the red or white (usually).  The two inner layers, being thin veneer, can be easily bent and held against the edge of the hole with finger pressure.  I use thin CA glue to glue a small section of veneer, hit it with a bit of accelerator to quickly harden the glue, and then move on to the next section.  A small piece of teflon sheet keeps the glue from sticking to the gloved hand.

The last layer is much thicker, and just finger pressure is really not sufficient to force the binding veneer tight against the edge of the hole.  I made a set of tapered tools that I can shove into the hold to force the thick veneer tight against the edge.  Glue it on, accelerator, and then move on to the next section.  The veneer sticks out above and below the hole.  This is trimmed down nearly level with the side using a sharp blade as each layer is done.

As the layers are applied, one wants to hide any seam between the ends of the strip forming the layer.  Making a butt joint that is invisible, particularly given that one is forcing the veneer out around the hole, is difficult.  So what I do is, before the strip is put into the hole, I taper one end.  When the other end comes around it is simply glued on top of the taper, then the excess is shaved away before the next layer is applied.

A final sanding to level everything out, both inside and out and you are done.

getting hot

I am just about to start putting in the side sound ports.  I bind the edges of the sound port to match the instrument purfling, so it is generally black-white-black or black-red-black.  I apply the layers to the edge of the sound hole one at a time with cyanoacrylate (CA) glue (more on that later).  As preparation I pre-bend the veneers so they will fit in the sound hole.

I used to use a propane torch in a piece of pipe but this produced fumes and was not very controllable.  (I burned a hole in a flannel shirt once standing too close to the exaust.)  I found these small cartridge heaters that you can buy.  They come in various wattages, and are not very expensive.  So I bought some, and wired them up to a cord (they do not come with a plug or anything).

To control the temperature I got a standard household dimmer, like you would have for lights.  These are rated for 600 watts, which is plenty.  I put this into an electrical box with a controlled outlet.

Plug the cartridge heater in, shove it down a length of pipe, adjust the dimmer to get the heat you want (hot but not scorching) and bend away.  Larger pipe for bigger bends, smaller pipe for tight bends.

You end up with a lot of little rings.  The thick black ones are for the outside edge of the soundhole binding, which I make thicker.