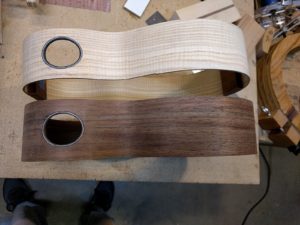
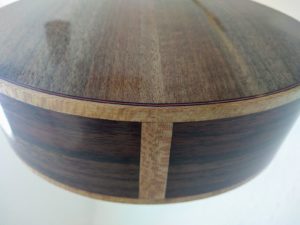
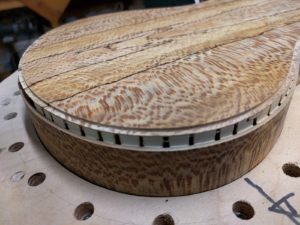
Because I have had a number of requests for them, and because I should know how to build them, the next set all will have radiused fingerboards and side sound ports. I built a new jig to slot fingerboards which does a very nice job on a radiused fingerboard (and a flat fingerboard.) It is easy to cut a hole for the side sound ports. I made a jig which clamps on the sides, and then there is a router follower that goes around an oval hole. The harder part is figuring out how one binds the side of the hole, so there is no end-grain of the side showing, and so it looks nice. After a number of tests/trials, I think I have this pretty well figured out.
Category: Uncategorized
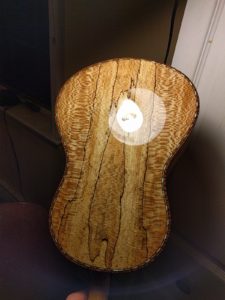
Just in time for fall
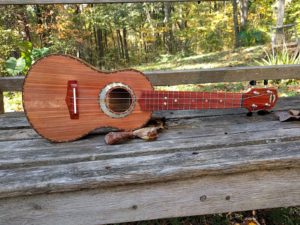
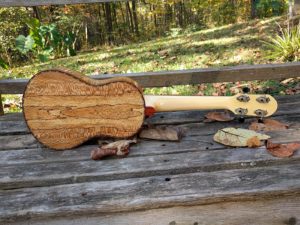
It was a sunny, slightly cool fall day, and I had just strung up this uke. I thought it really looked like the fall colors, so I made a few photo attempts. (Taking good pictures of a three-dimensional shiny object is hard.)
Spalted sycamore sides and back (from a tree a neighbor took down), eastern aromatic cedar top (from my property), curly koa binding with a brown and white chevron purfling, redheart fingerboard, bridge and headplate. A real ‘looker’ that sounds great too!
The last mess, until the next one
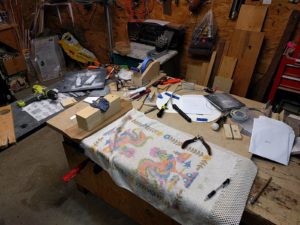
The latest batch of four is finished. In the end, the workbench is left a mess of small tools, sanding sheets from fitting nuts and bridges, doing various operations to get things ready for string-up. I’m going to do a real workshop clean-up, along with some thinking and browsing through the wood pile to decide on what to make next. Some new things: radiused fretboards (may have to come up with a different way of fret slotting), side sound ports (experiments in how to bind the edge of the port yet to be done) and I’m working on a jig to cut the sound hole. Can one bend a side with the hole cut flat? Never heard of it being done this way, but might be worth a try. I got a piece of Port Orford Cedar to try (see “wood pile”). Too many variables. The instruments just completed are numbers 38 – 41, and I have never built the same thing twice.
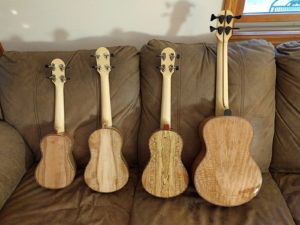
The latest four, a dogwood soprano, two concerts, apple & spalted sycamore, and the mystery sycamore “baritone”. Going to take some “real’ pictures which will get posted in the next couple of days.
Radiused fingerboards
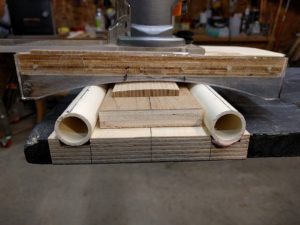
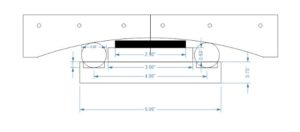
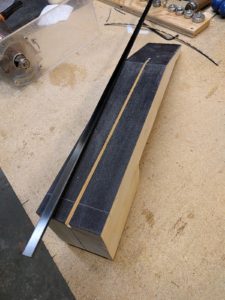
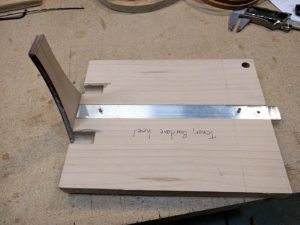
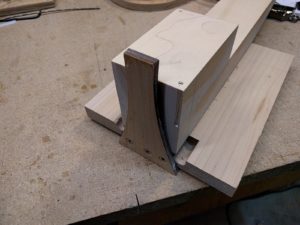
I have received a number of requests for ukuleles with a radiused fingerboard (a slight convex curvature of the fingerboard). This is supposed to make playing easier, particularly if you play bar chords, with a finger (naturally curved) across all four strings. A 12 inch radius of curvature seems to be pretty well accepted. The issue is, how to easily and reliable cut the top surface of the fingerboard into the proper radius. I have seen a number of jigs around, but a number of them were rather complex to construct. I came up with the following design.
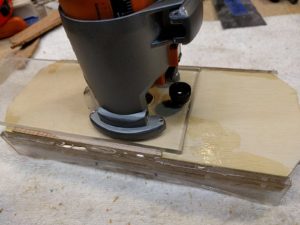
Using the laser cutter I cut 12″ radius curves into two matching acrylic side plates. (The laser cutter allows one to make things very exactly, exactly a 12″ radius, and the two side plates are exactly the same.) I realized that one only needs to have 2 points for these curved side plates to slide along to get a circle, so I used two sections of 3/4″ PVC pipe as it is very uniform, and rather slippery. I routed two parallel groves into a pieces of really good plywood I came up with and bedded the PVC in auto bondo. I epoxied the side plates to a top piece of good plywood, and added a threaded insert to the top with a corresponding hole in the acrylic baseplate of my router so I can easily affix the router to cut fingerboards, and away you go. Works great, so in the future a radiused fingerboard will appear on some ukuleles, and will be an option for a custom order uke.
Shiny objects
What is it about shiny objects that we humans find so attractive? Certainly the shine does not effect the sound quality of an instrument, but still … I’ve been striving for that shiny finish with my limited equipment and facilities. Here is the compact florescent bulb and fixture reflected in one of the new ones, a spalted sycamore concert.
Much better music than I can make !
I was a vendor at a ukulele festival yesterday. Did not sell anything, but passed out a bunch of cards, and there may be some who will get back to me. (Most people were pretty local to Pennsylvania.) A fellow named Glen Hirabayashi from the Aloha Boys who was one of the instructors and performers came by and played a couple of my ukuleles. He really seemed to like them, he came back 3 times. Here are two videos, the beginning of a piece he played, and the end. There actually two different instruments. Both with casuarina back and sides and redwood tops, but one has a standard 17″ scale, and the other is a custom 19″ scale model. The 17″ scale instrument (the ‘beginning’) has a streaky redwood top, and the 19″ scale (the ending) has a clear curly redwood top. Glen played the same thing on both so one can compare the sound.
The same old story, but a new adition
Most of you (at least the regular readers) have seen much of this before, but here is a little article I wrote up for an on-line ukulele magazine. (click on the picture for the article)
How it all starts
Everything I am building these days uses local woods. I do not believe in, nor want to, cut down tropical forests to get things like rosewood. There are all sorts of wonderful woods to be had locally.
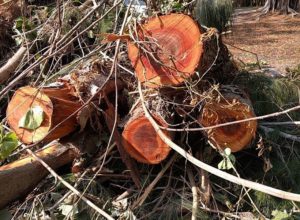
One of my favorites, and I have written about it before in this blog, is an invasive tree that was planted all over south Florida called Australian Pine here in Florida (it is not a pine). I know it as Casuarina (Casuarina equisetifolia). The wood is very hard, dense, takes a wonderful polish, and rings nicely when you tap on it. As good or better than any rosewood I think. I am down in Florida to check on my little house, after hurricane Irma. I took a drive around Jupiter Island, where there are quite a lot of big old casuarinas. I found that along Bridge Road (locals will know where that is) on some town land there was a whole stand of casuarina, part of which was uprooted. This is a different species of casuarina than I had cut before, though it looks very similar. I examined some leaf samples under magnification, and this stand was Casuarina glauca. This species tends to make dense exclusive stands from root suckers which makes this species particularly invasive. I spoke to a nice fellow in the town government, and he gave me permission to get some wood. When I got back out to the site the commercial tree people had already started the cleanup, and indeed were taking down the whole invasive grove. They had piled some larger trees up.
Can’t you just see the ukuleles in there? Can’t you just hear them?
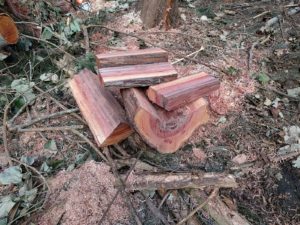
I rented a large chain saw and went to work to cut some billets of wood. I cut quarter-sawn chunks, that will later be re-sawed into thin pieces to make backs, sides, and fingerboards. This is partially through the process:
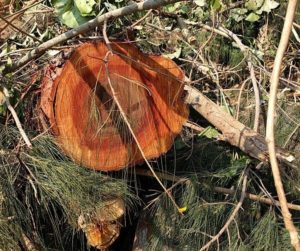
This casuarina is a different color from what I had cut before. Previously most of the wood was dark purple-brown heartwood, with only a thin layer of cream colored sap wood along the outside. This wood seems to be three colors. A dark purple-brown heartwood, and pink-red intermediate layer and then the cream colored sap wood. I assume that this is because it is a different species of casuarina, Casuarina glauca. I don’t know if all trees of this species have these three colored bands, but I’ll pay attention in the future. If these colors hold up on drying there are some stunning instruments in there and I know they will sound great because of the density of the casuarina. Just look at those colors:
The only ‘bad’ part is that it will be a couple of years until this wood is re-sawn and dry enough that the first instruments will be available. Still, it is wonderful to have this stuff in the queue, and is a bit of a bright spot in the problems that hurricanes can bring. My thanks again to the Jupiter Island government for encouraging my wood habit.
Get me some brains
Igor – go get me some brains. We have four bodies (all bound up) and four rough necks with rough ‘heads’ but we have no brains!
But seriously folks, all four bodies are bound, though not finish sanded. Dogwood soprano, spalted sycamore and apple concerts, and a sycamore baritone. The necks are being worked on as glue dries etc.
I put a 1/8″ by 5/16″ carbon fiber beam down the center of every neck. Probably overkill for a ukulele neck, but it is real cheap insurance against the neck warping, or distorting under the string tension. I route a channel down the center of the neck to accept the beam. The dimensions of the beam, and the router bit, are exact in width so the beam fits with a stiff push. I used to epoxy the beam in, but it was very messy, and the beam fits so tightly that I figure I scraped most of the epoxy off the sides of the channel fitting in the beam. Now I insert the beam, make sure it is down in the slot, and then run thin CA glue along to fix it in place.
I put the beam in last. The slot becomes the reference center of the neck, and is used with various jigs to easily carry out operations on the neck, in a very exact way. For example, I have a jig used to route the rough profile of the heel. It is slotted for a 3/4″ aluminum bar (used on other jigs), which has centered 1/8″ pins. With the bar in place, the slot in the neck fits over the pins, and slides up against the heel profile, against which I run a router with a bearing on the jig to easily cut the rough heel profile.
The ties that bind
I have been working on the binding of the next four. The binding I do consists of two pieces, “purfling” which is a thin colored line (black-red-black for example) that goes around the top and back, right next to the top and back. The purfling is purely decoration, it serves no structural purpose. Outside of this is the “binding”, which is a strip of wood (I never use plastic which is the usual commercial material). The binding is there to cover the end-grain of the top and back, and to provide some bump and dent protection to the edge of the instrument. (Let’s not forget about looks however.)
The two pieces get their own little ledges routed into the body. A shallow inner one for the purfling and a deeper wider one for the binding.
I cut the binding channel so that when it is glued in the binding will be just thicker than the side, so that it is easily sanded down flush. In this case the sides are particularly thin (.075″) and the binding is a little thicker (.085″) so cutting the binding channel actually cuts through the sides and exposes the kerfing that was glued in earlier, and is there precisely for this reason, to hold the sides onto the top and back, regardless of any binding cuts. (I make my own binding so the thickness can vary a little from one batch to the next.)
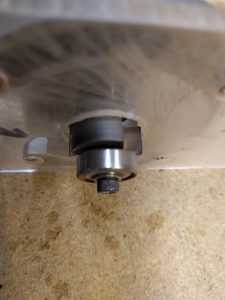
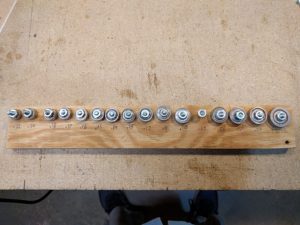
To cut these channels I use a trim router, and a cutter which takes bearings of varying diameters, so that I can set the depth exactly, without having to ‘adjust’ anything, and can easily adjust for different purflings and bindings.
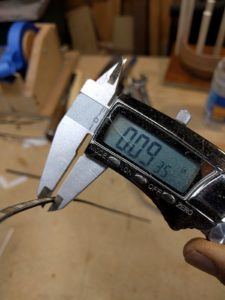
First you measure the purfling and the binding thickness with the digital calipers:
Add the two widths together, and this is the depth of the first cut, which is for the purfling. In this case it is .0935″ for the purfling and .085″ for the binding, so the depth should be .1785″. Since the bearings for the router are only in increments of one-hundreths, one takes the next smallest one, .017″. This will mean that in a perfect world the binding will stick out just a bit, .0085″ or 85 thousand’th of an inch. The purfling cut is made first, since it is shallow and you want the bearing to ride on the side, not a previous binding cut.
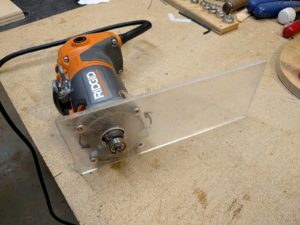
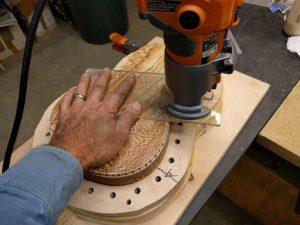
I have made a long baseplate for the router, which provides much better control than trying to use the small base that comes with the trim router. With this base I can support the router in an easy vertical position from the center of the instrument, with one hand, and then just pivot it around to cut the ledges, guiding it with the other hand.
After the purfling ledge is cut, you replace the bearing with the bearing for the depth of the binding (.08″) and cut the binding ledge.
Then all you have to do is glue in the purfling and binding making sure that they are tight and making the ends where the left and right sides meet as invisible as possible (I have a new technique I learned this summer which makes part of this much easier and gives a better result). But that is a story for another day.
