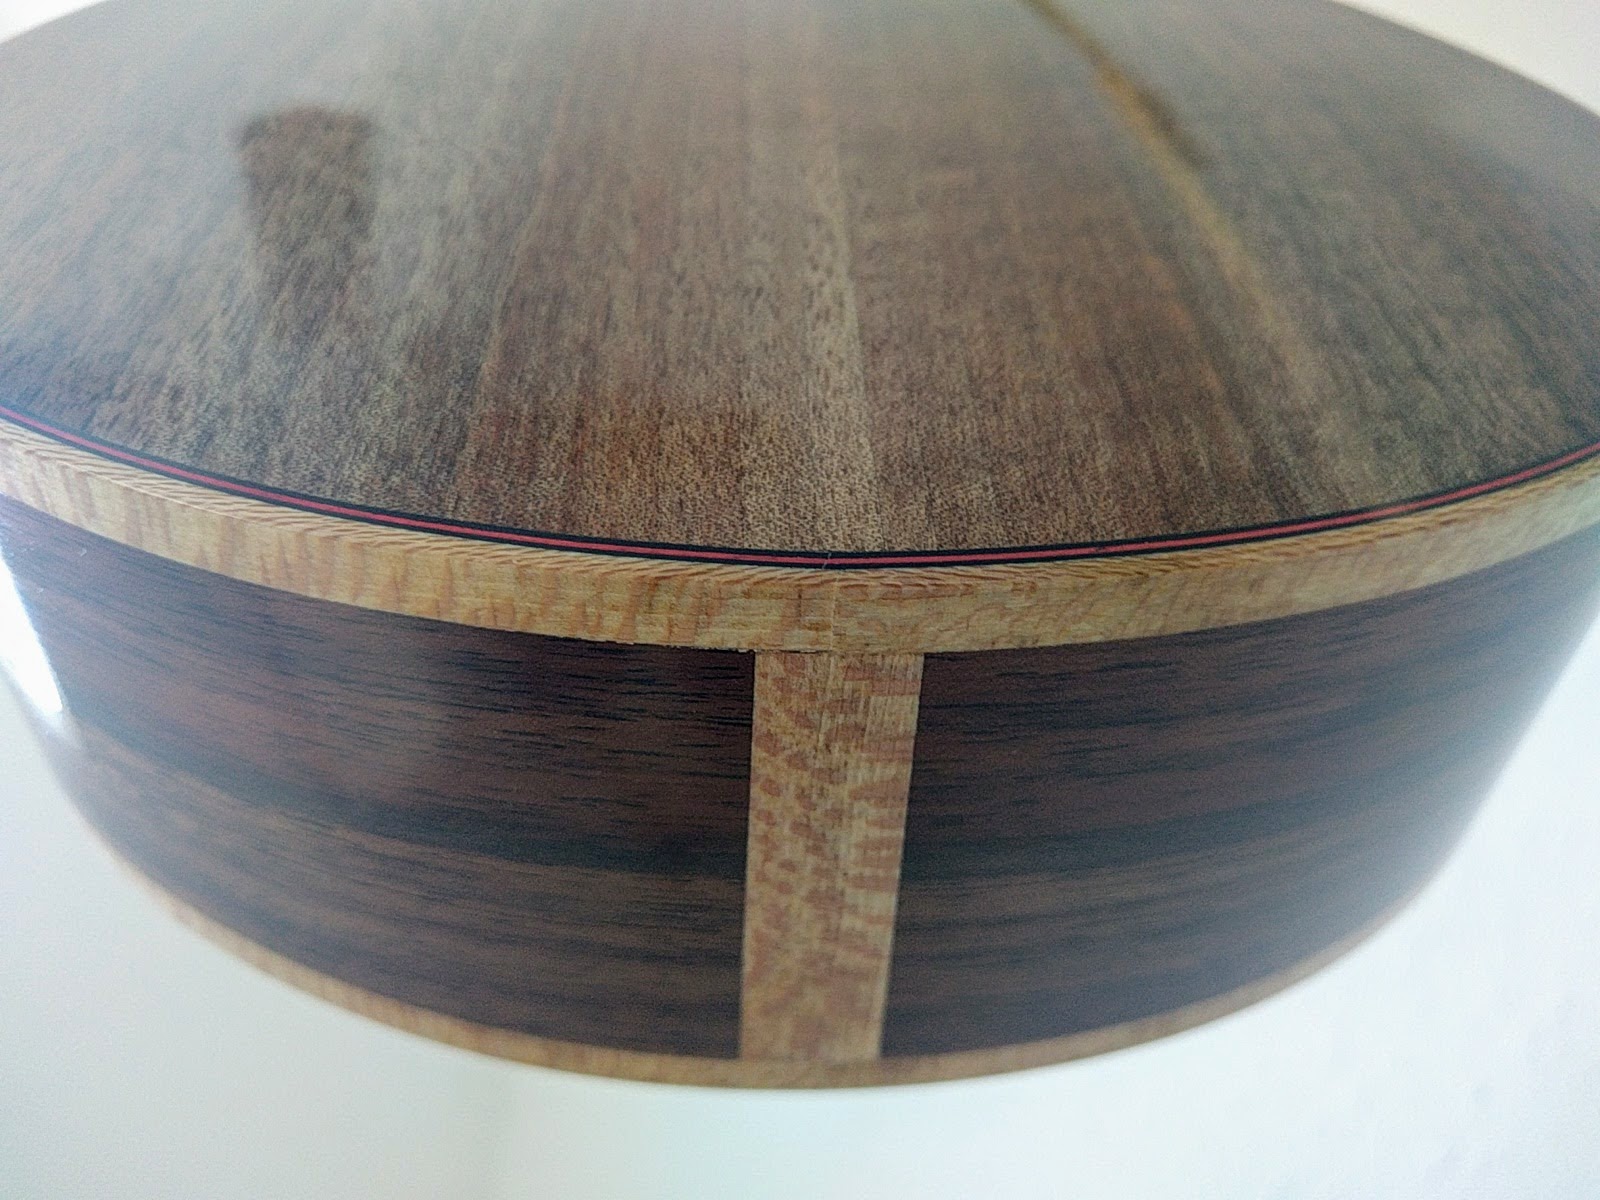
I have been working on the binding of the next four. The binding I do consists of two pieces, “purfling” which is a thin colored line (black-red-black for example) that goes around the top and back, right next to the top and back. The purfling is purely decoration, it serves no structural purpose. Outside of this is the “binding”, which is a strip of wood (I never use plastic which is the usual commercial material). The binding is there to cover the end-grain of the top and back, and to provide some bump and dent protection to the edge of the instrument. (Let’s not forget about looks however.)
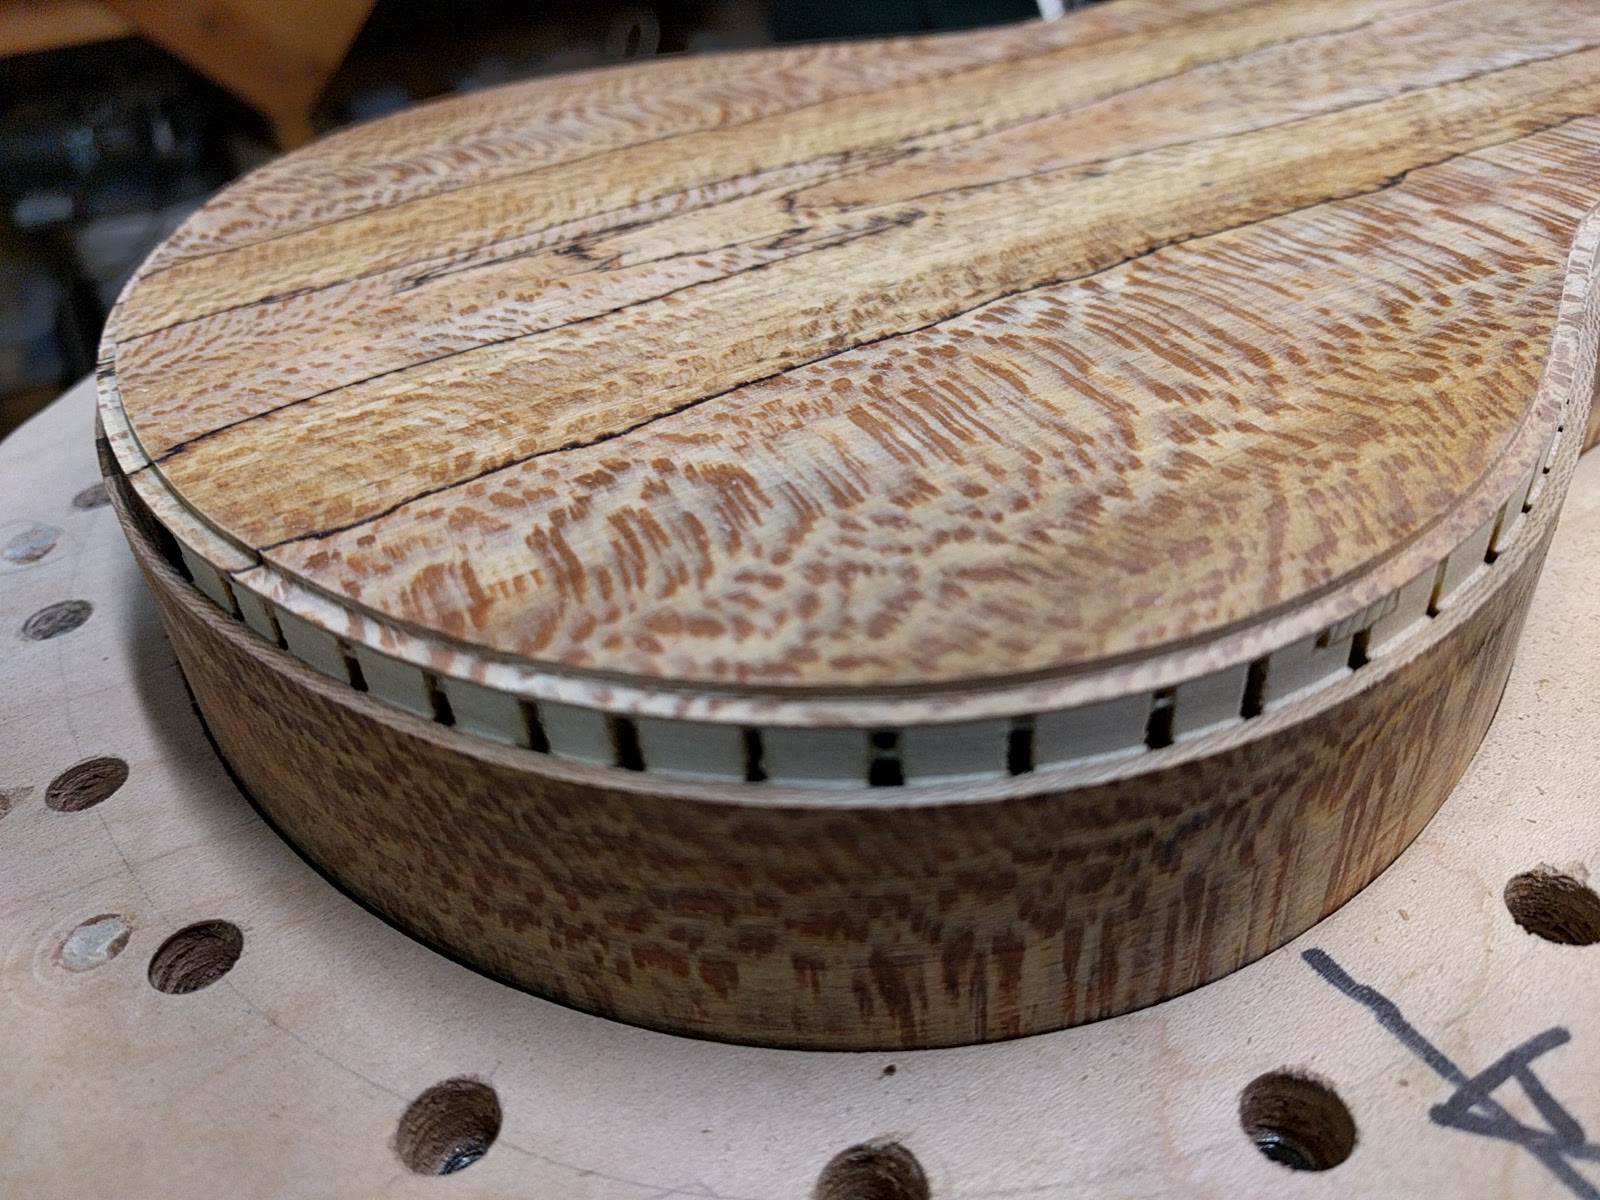
The two pieces get their own little ledges routed into the body. A shallow inner one for the purfling and a deeper wider one for the binding.
I cut the binding channel so that when it is glued in the binding will be just thicker than the side, so that it is easily sanded down flush. In this case the sides are particularly thin (.075″) and the binding is a little thicker (.085″) so cutting the binding channel actually cuts through the sides and exposes the kerfing that was glued in earlier, and is there precisely for this reason, to hold the sides onto the top and back, regardless of any binding cuts. (I make my own binding so the thickness can vary a little from one batch to the next.)
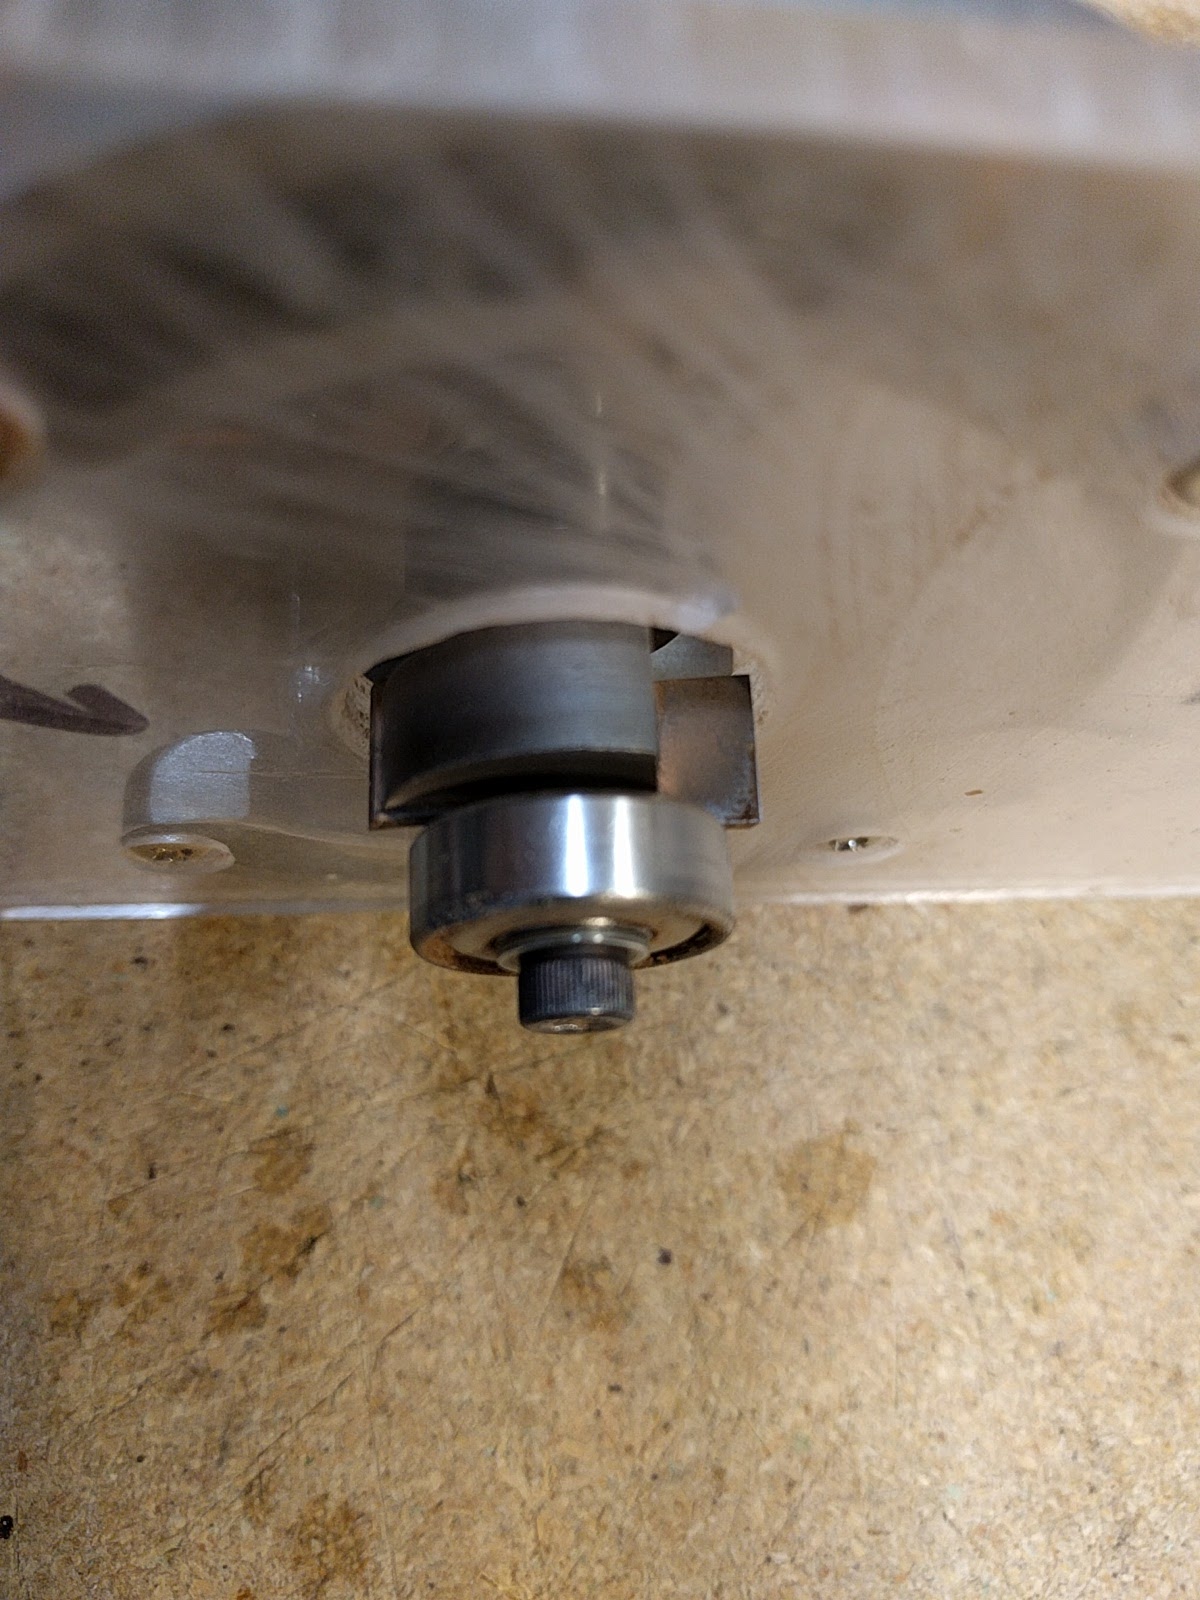
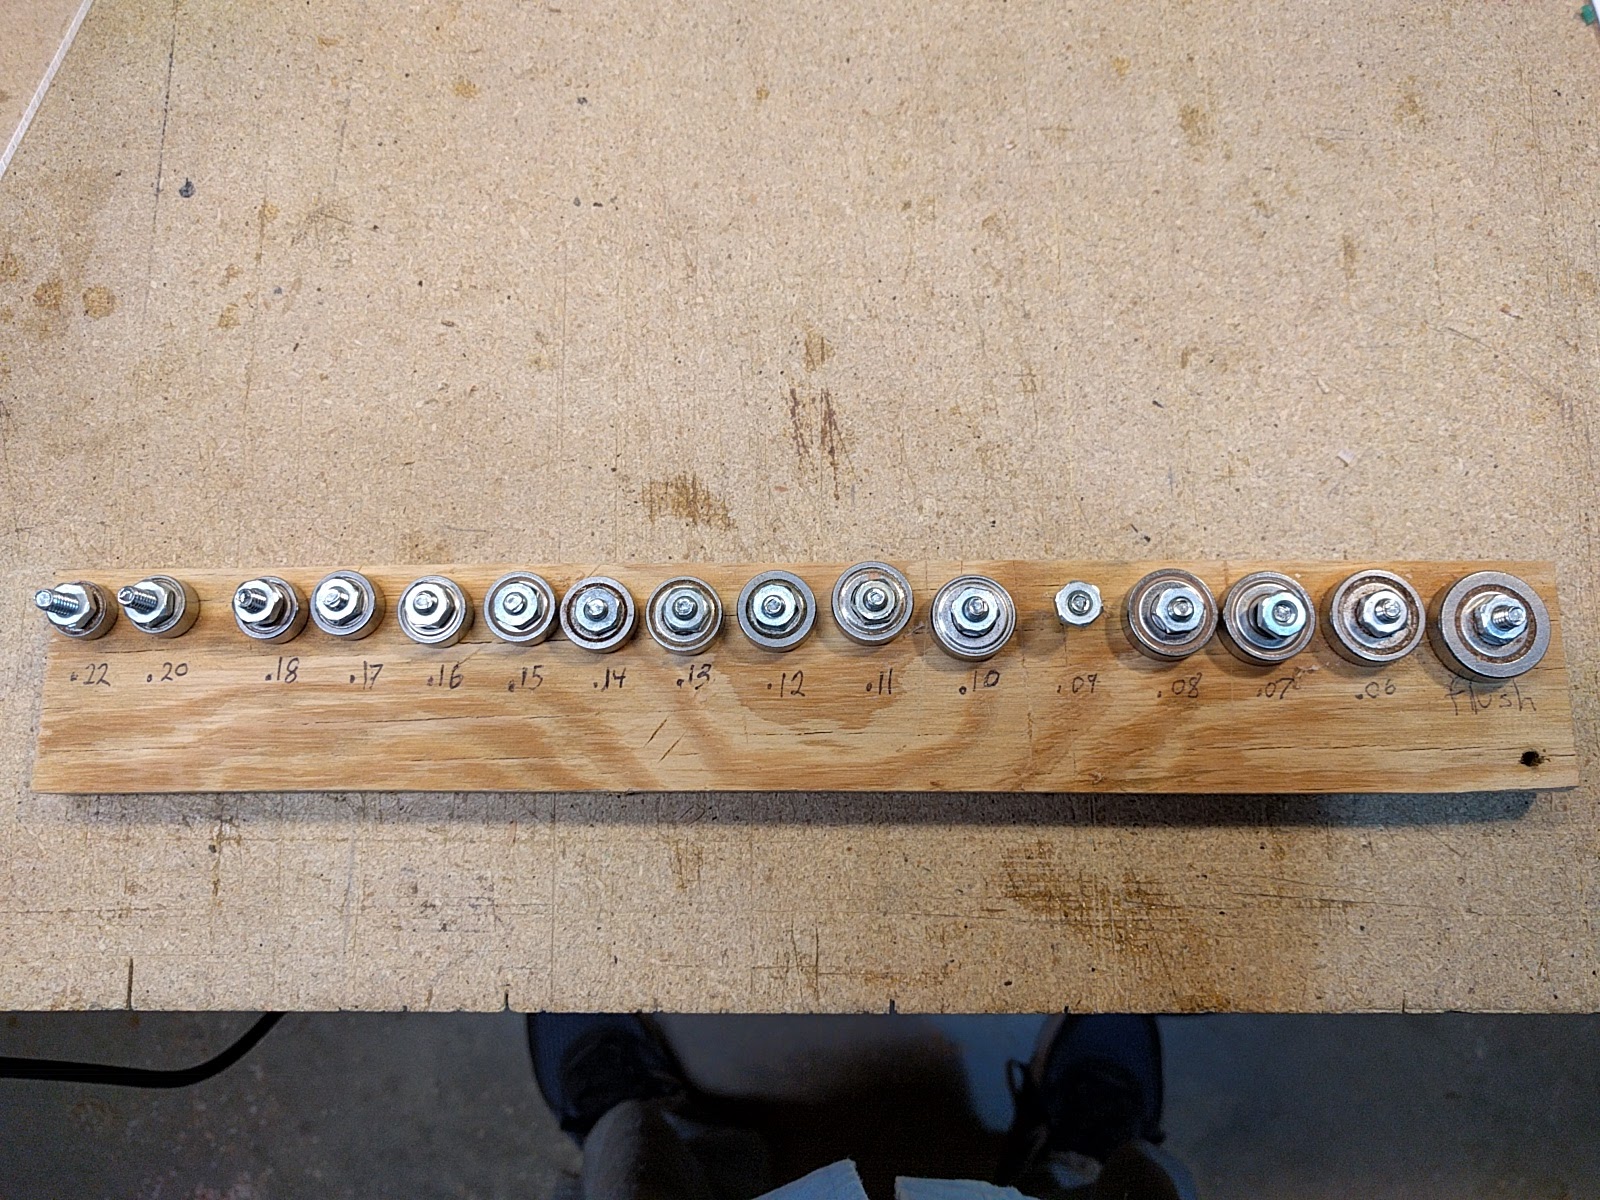
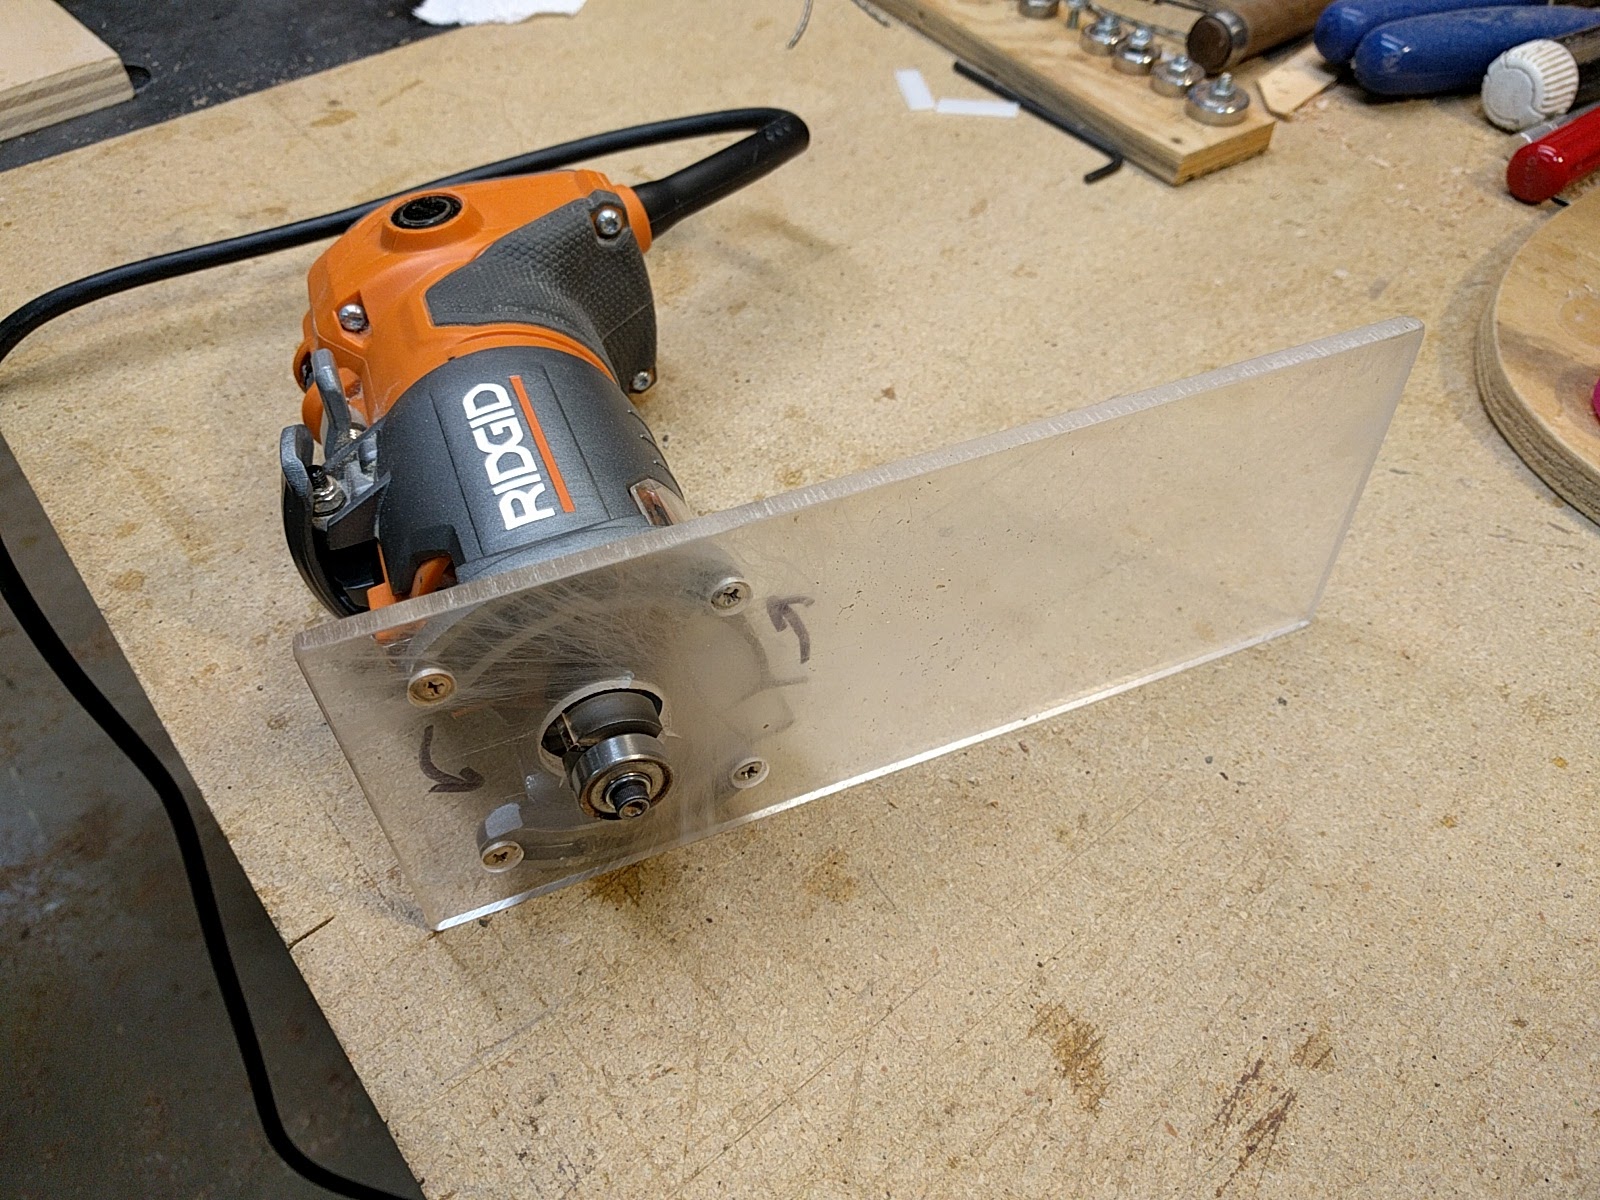
To cut these channels I use a trim router, and a cutter which takes bearings of varying diameters, so that I can set the depth exactly, without having to ‘adjust’ anything, and can easily adjust for different purflings and bindings.
First you measure the purfling and the binding thickness with the digital calipers:

Add the two widths together, and this is the depth of the first cut, which is for the purfling. In this case it is .0935″ for the purfling and .085″ for the binding, so the depth should be .1785″. Since the bearings for the router are only in increments of one-hundreths, one takes the next smallest one, .017″. This will mean that in a perfect world the binding will stick out just a bit, .0085″ or 85 thousand’th of an inch. The purfling cut is made first, since it is shallow and you want the bearing to ride on the side, not a previous binding cut.
I have made a long baseplate for the router, which provides much better control than trying to use the small base that comes with the trim router. With this base I can support the router in an easy vertical position from the center of the instrument, with one hand, and then just pivot it around to cut the ledges, guiding it with the other hand.

After the purfling ledge is cut, you replace the bearing with the bearing for the depth of the binding (.08″) and cut the binding ledge.
Then all you have to do is glue in the purfling and binding making sure that they are tight and making the ends where the left and right sides meet as invisible as possible (I have a new technique I learned this summer which makes part of this much easier and gives a better result). But that is a story for another day.