Cut this from an old big Haden mango tree taken down by a local mango grower. Looks like pretty good stuff. Nice quarter-sawn billets and spalted without being at all punky and soft. Plenty big enough for baritones.
Cut this from an old big Haden mango tree taken down by a local mango grower. Looks like pretty good stuff. Nice quarter-sawn billets and spalted without being at all punky and soft. Plenty big enough for baritones.
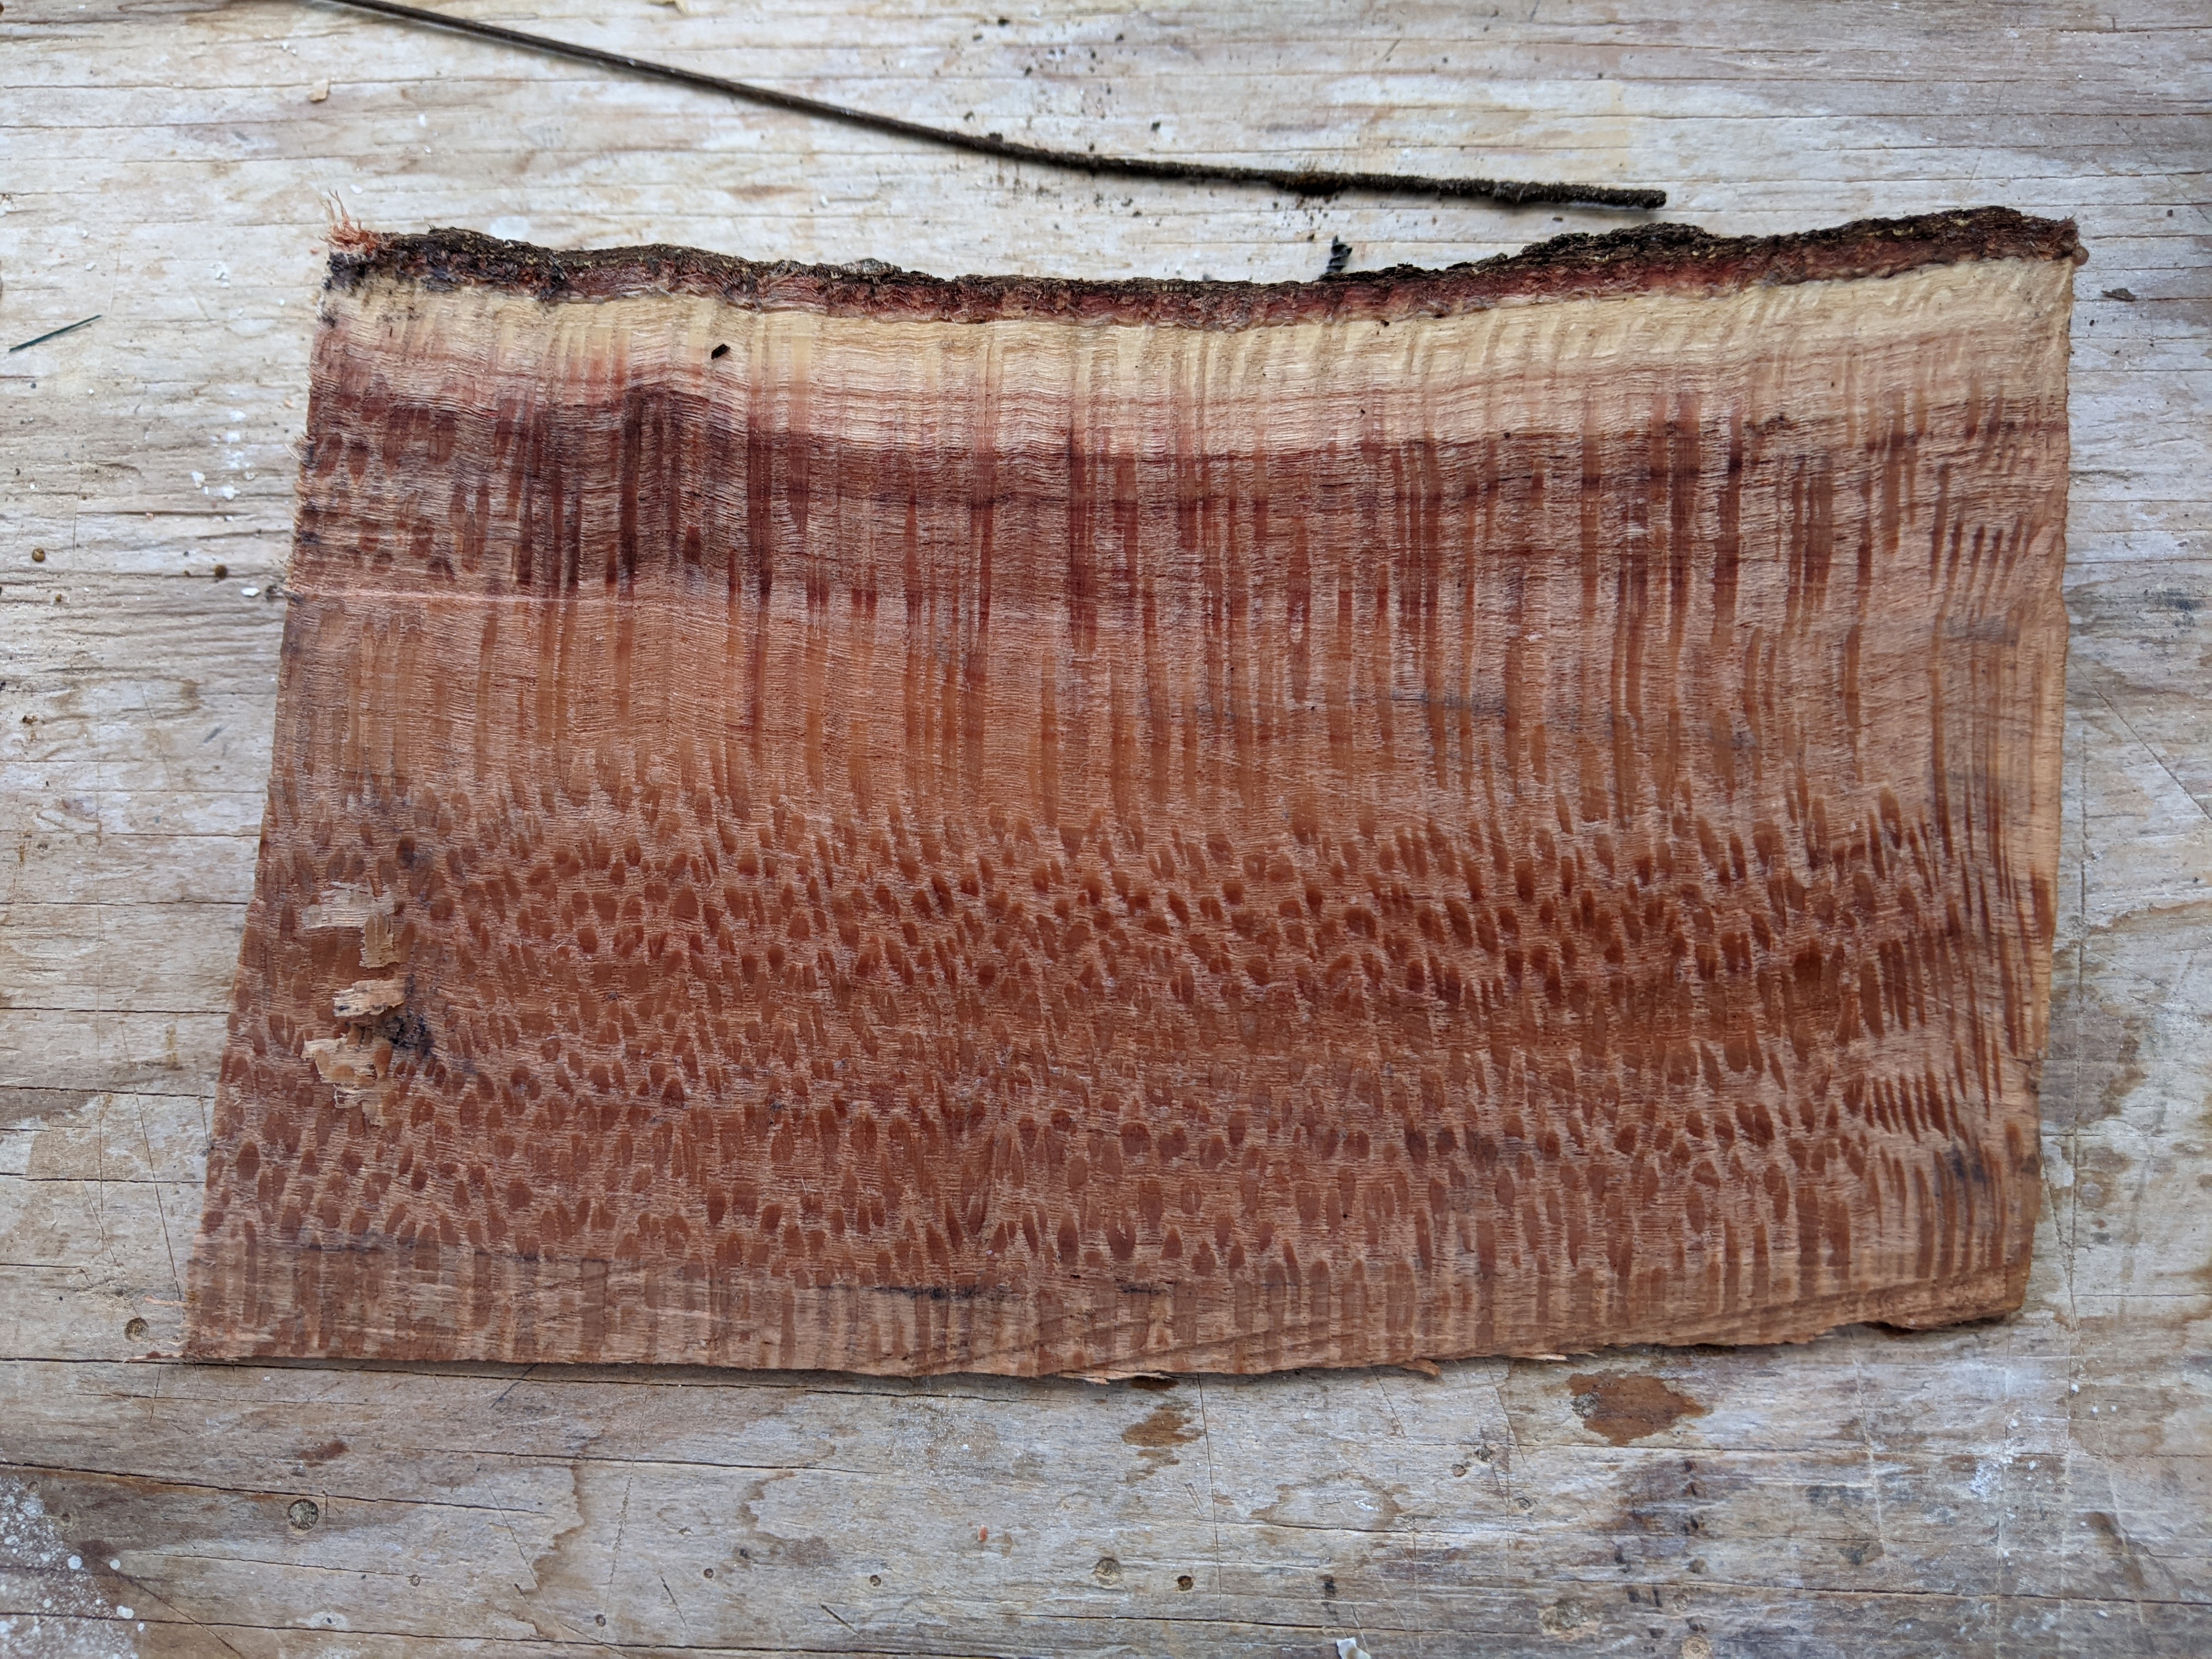
From a big tree taken down in the neighborhood, Southern Silky oak, Grevillea robusta. Not a real oak, native to Australia. It has very strong medulary rays like sycamore and a nice warm color with small pores. Has a good potential I think. Nice clear pieces and big enough for baritones.
Sample planed off and wet down to show wood.
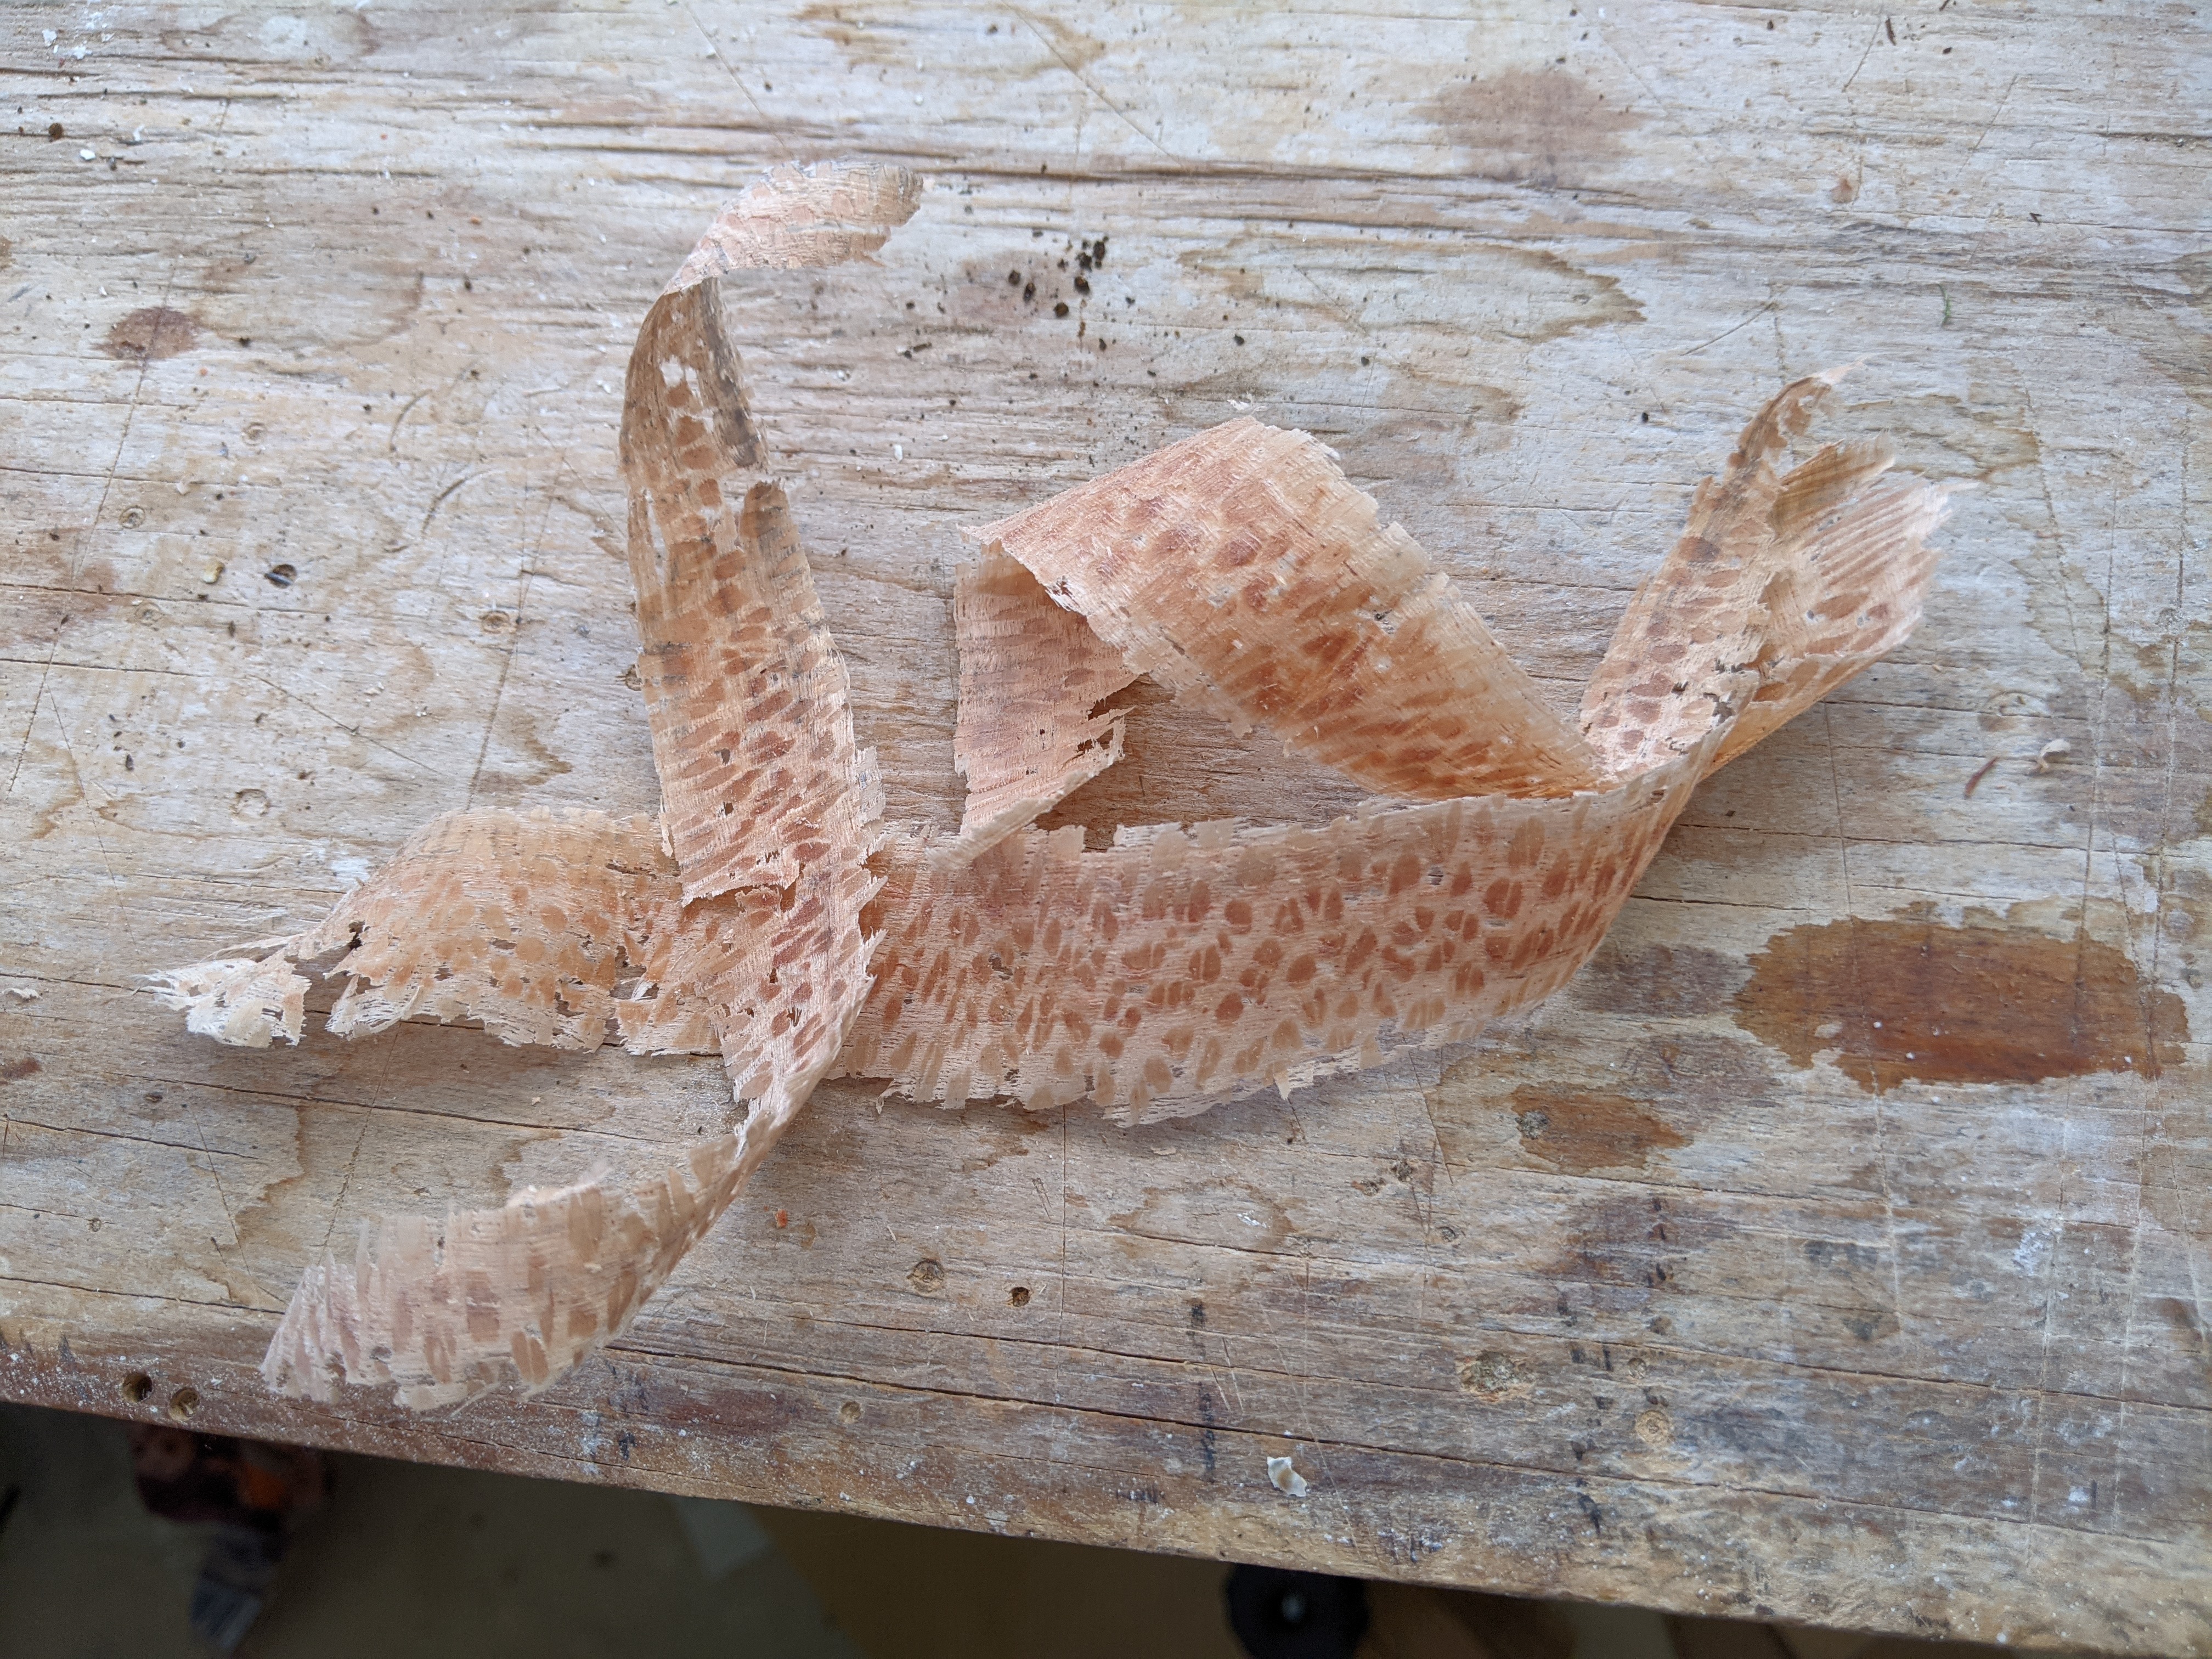
Even the plane shavings are interesting.
(I am going to try adding to this one entry to tell a chronological story)
March 15, 2021
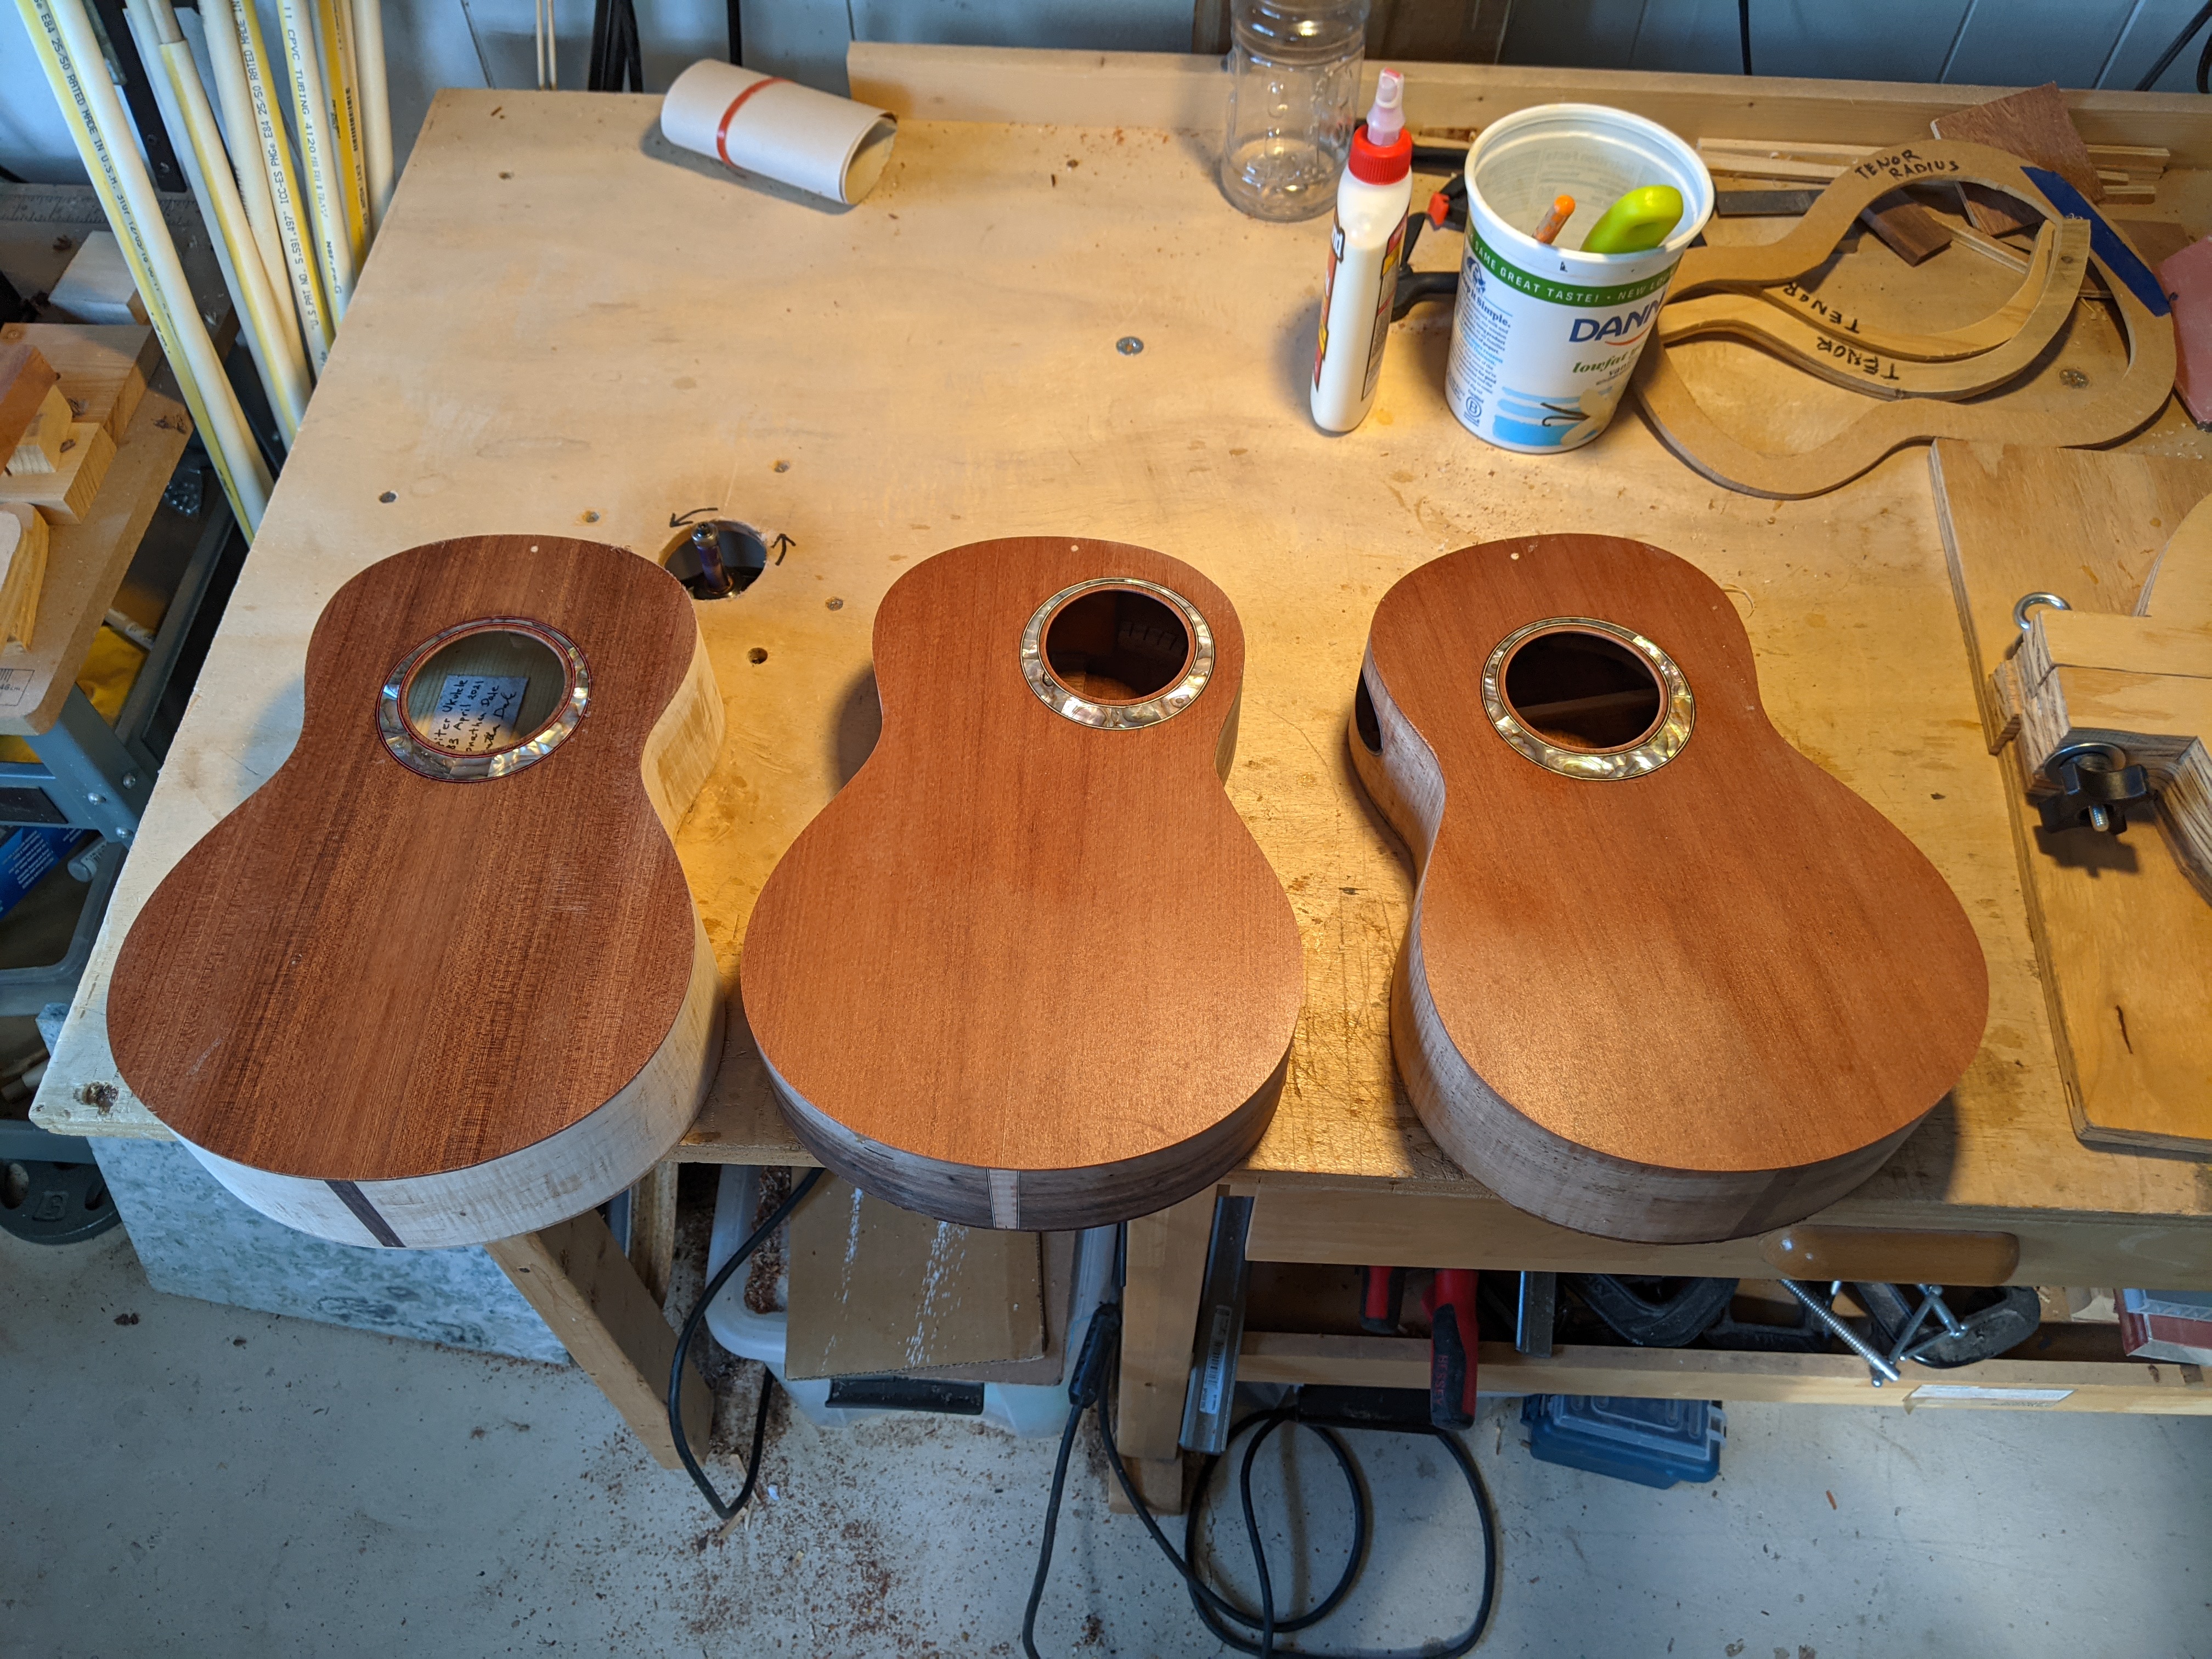
I have a bit of a break from commissions, so I decided to conduct an experiment. I am building three tenors, with very similar top woods but different bracing/construction details. I am interested in comparing the resultant sound side-by-side.
The top wood is some very fine grained redwood. Two tops are from the same board, and the third is very similar. I counted (under a microscope) 351 growth rings across the 5″ board used to make the top. Picture is of a .5mm pencil point.
The three experiments from right to left:
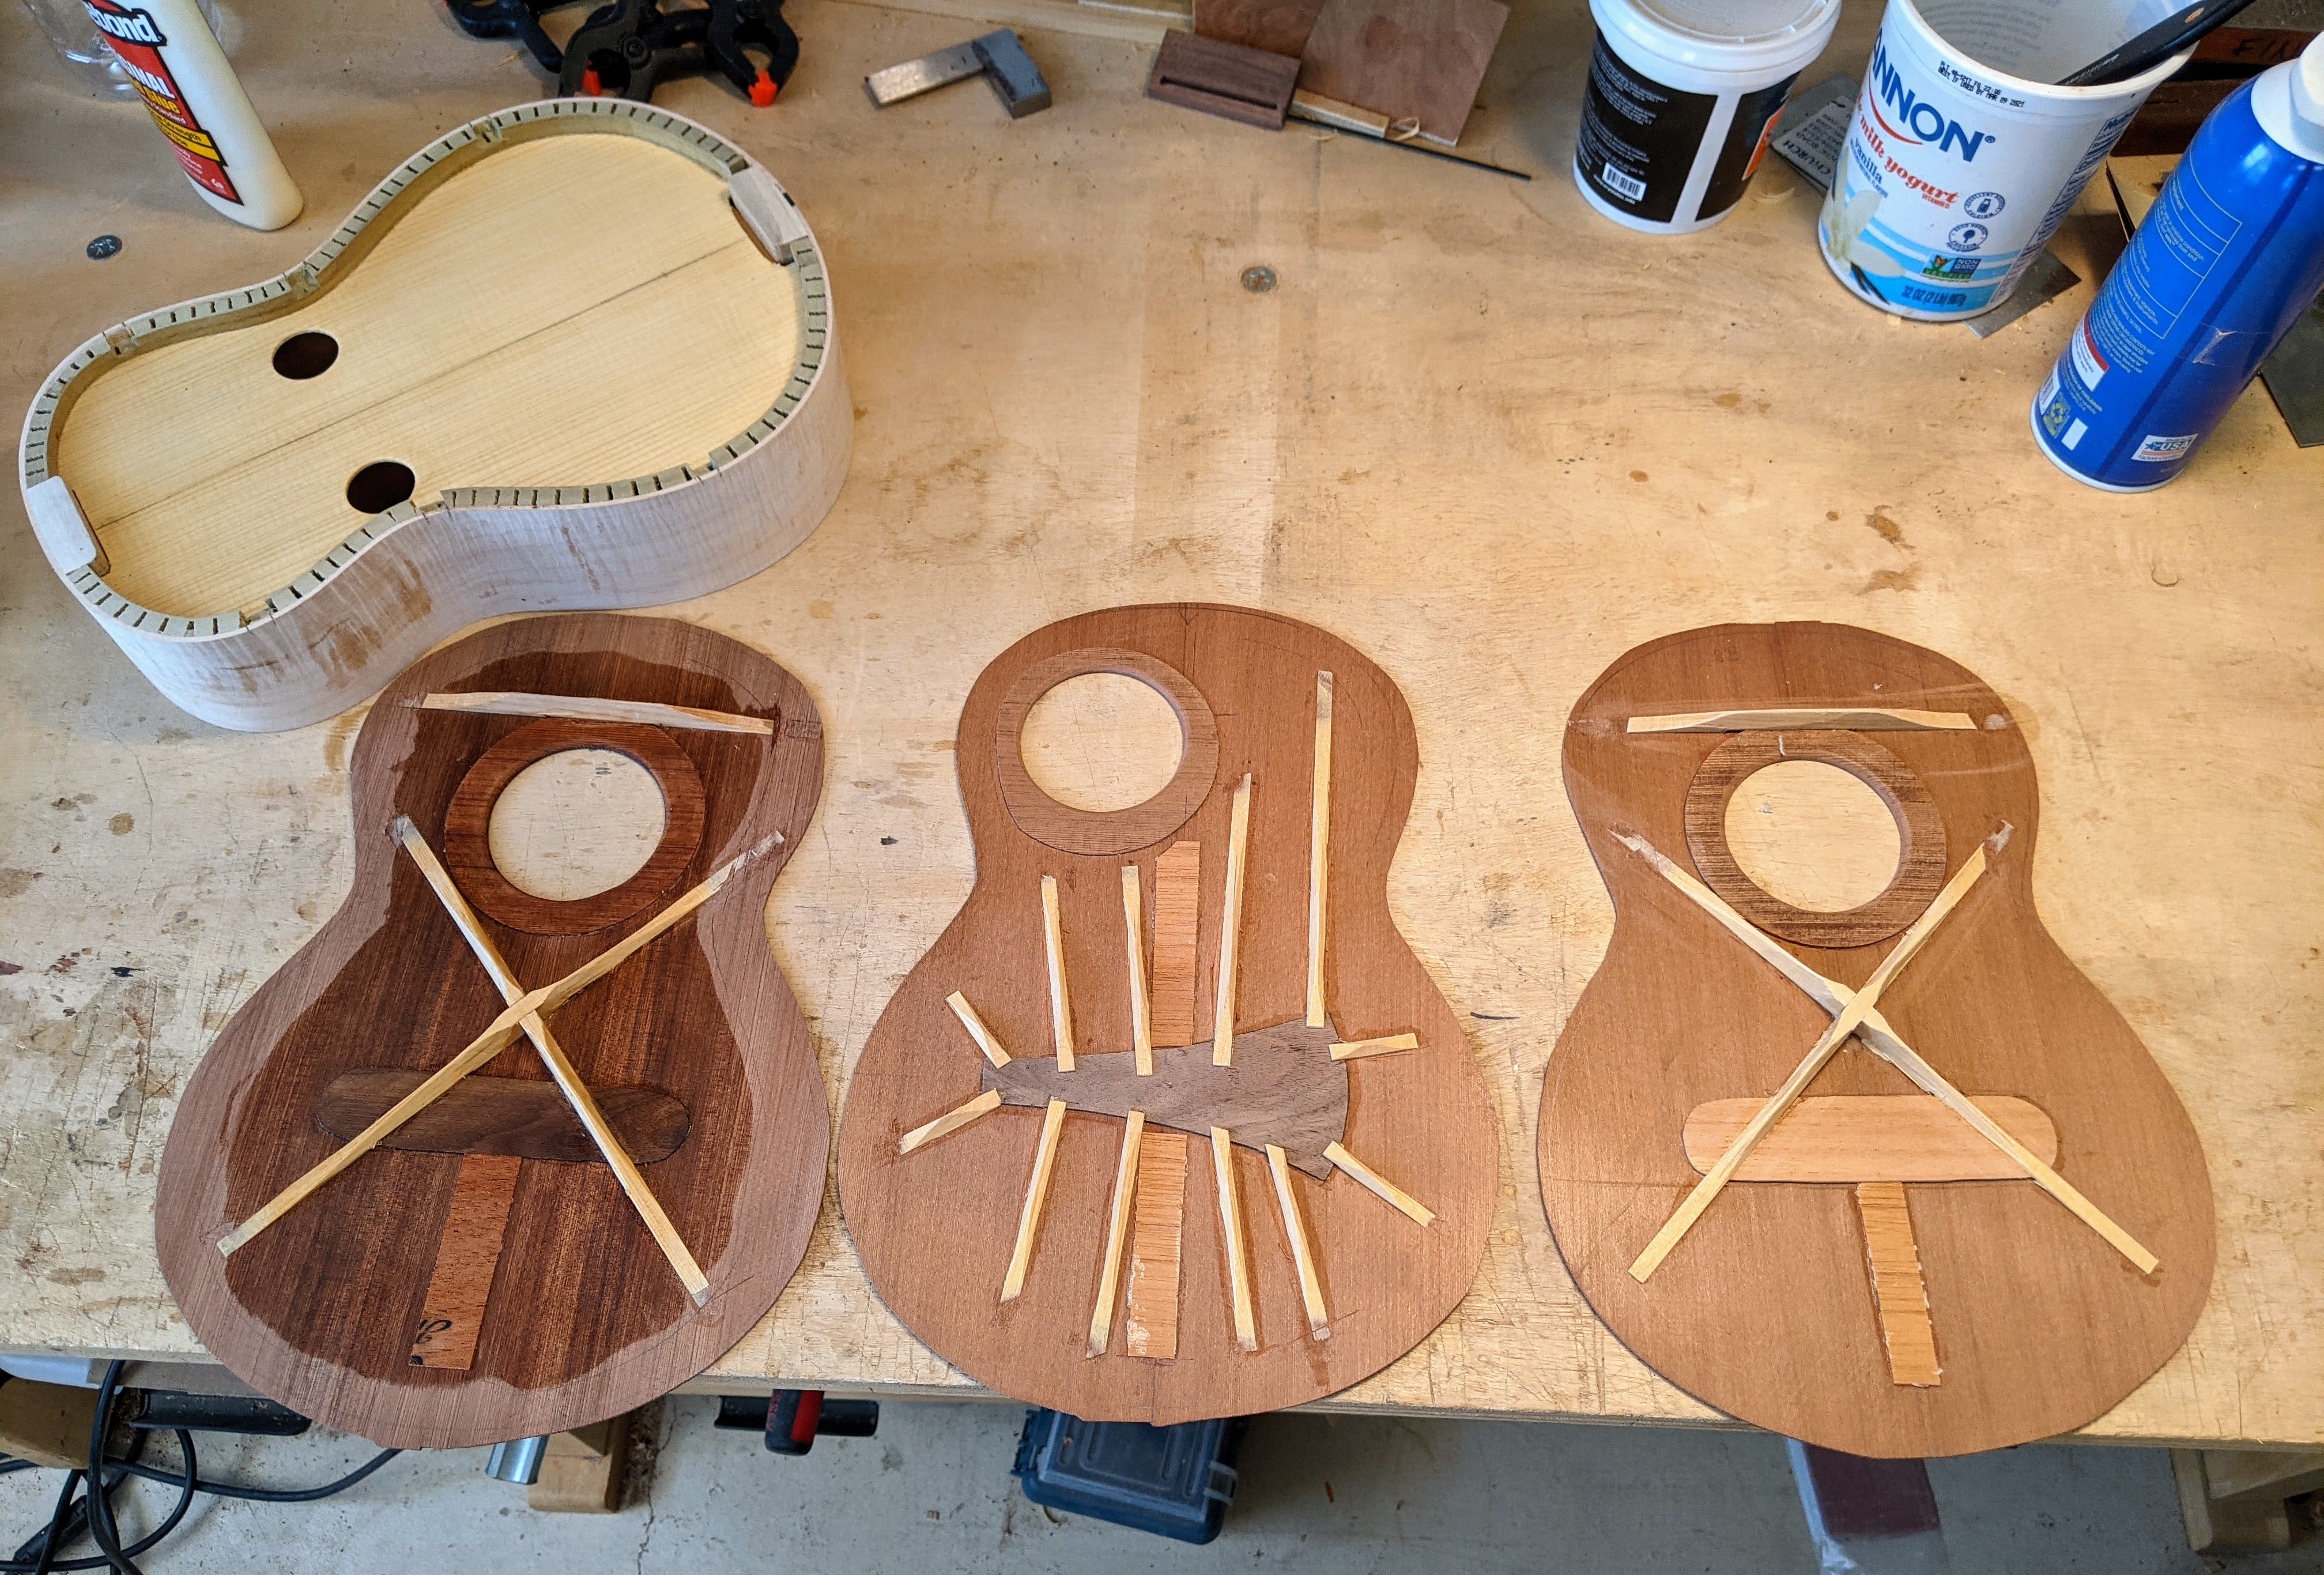
An X braced top – a design which is my standard, and has yielded very good results. Note, no lower transverse brace, allows more of the top to vibrate I think.
Kasha braced top – I have built some Kasha instruments, and the results have been good, but I am interested in hearing this side-by-side with the X braced top. This uses wood from the same board as the X braced top.
Double-back – I read recently about having an inner back so that the instrument back does not get damped by being against the player. There are a few builders who seem to have built double-back instruments. I have a friend with a double-back Appalachian dulcimer which is quite loud. An intriguing concept, and an opportunity to figure out build issues and do something rather different. Spruce inner back (shellac on inside of top).
March 16, 2021
The three tenors are all boxed up.
March 25, 2021
Some interesting news/data. I have gotten the fine grained redwood board dated via Dendrochronology which is the study of tree rings and the comparison of those trees rings to others going backwards in time. (A very interesting new book, “Tree Story: The History of the World Written in Rings” by Valerie Trouet. I highly recommend it. Her lab dated my redwood.) The full width board yielded 755 rings, and was accurately dated to show that it grew from 979-1734 AD. Depending on which side of the board the tops came from they are from wood that started growing in 979 AD or 1357 AD !!
April 12, 2021
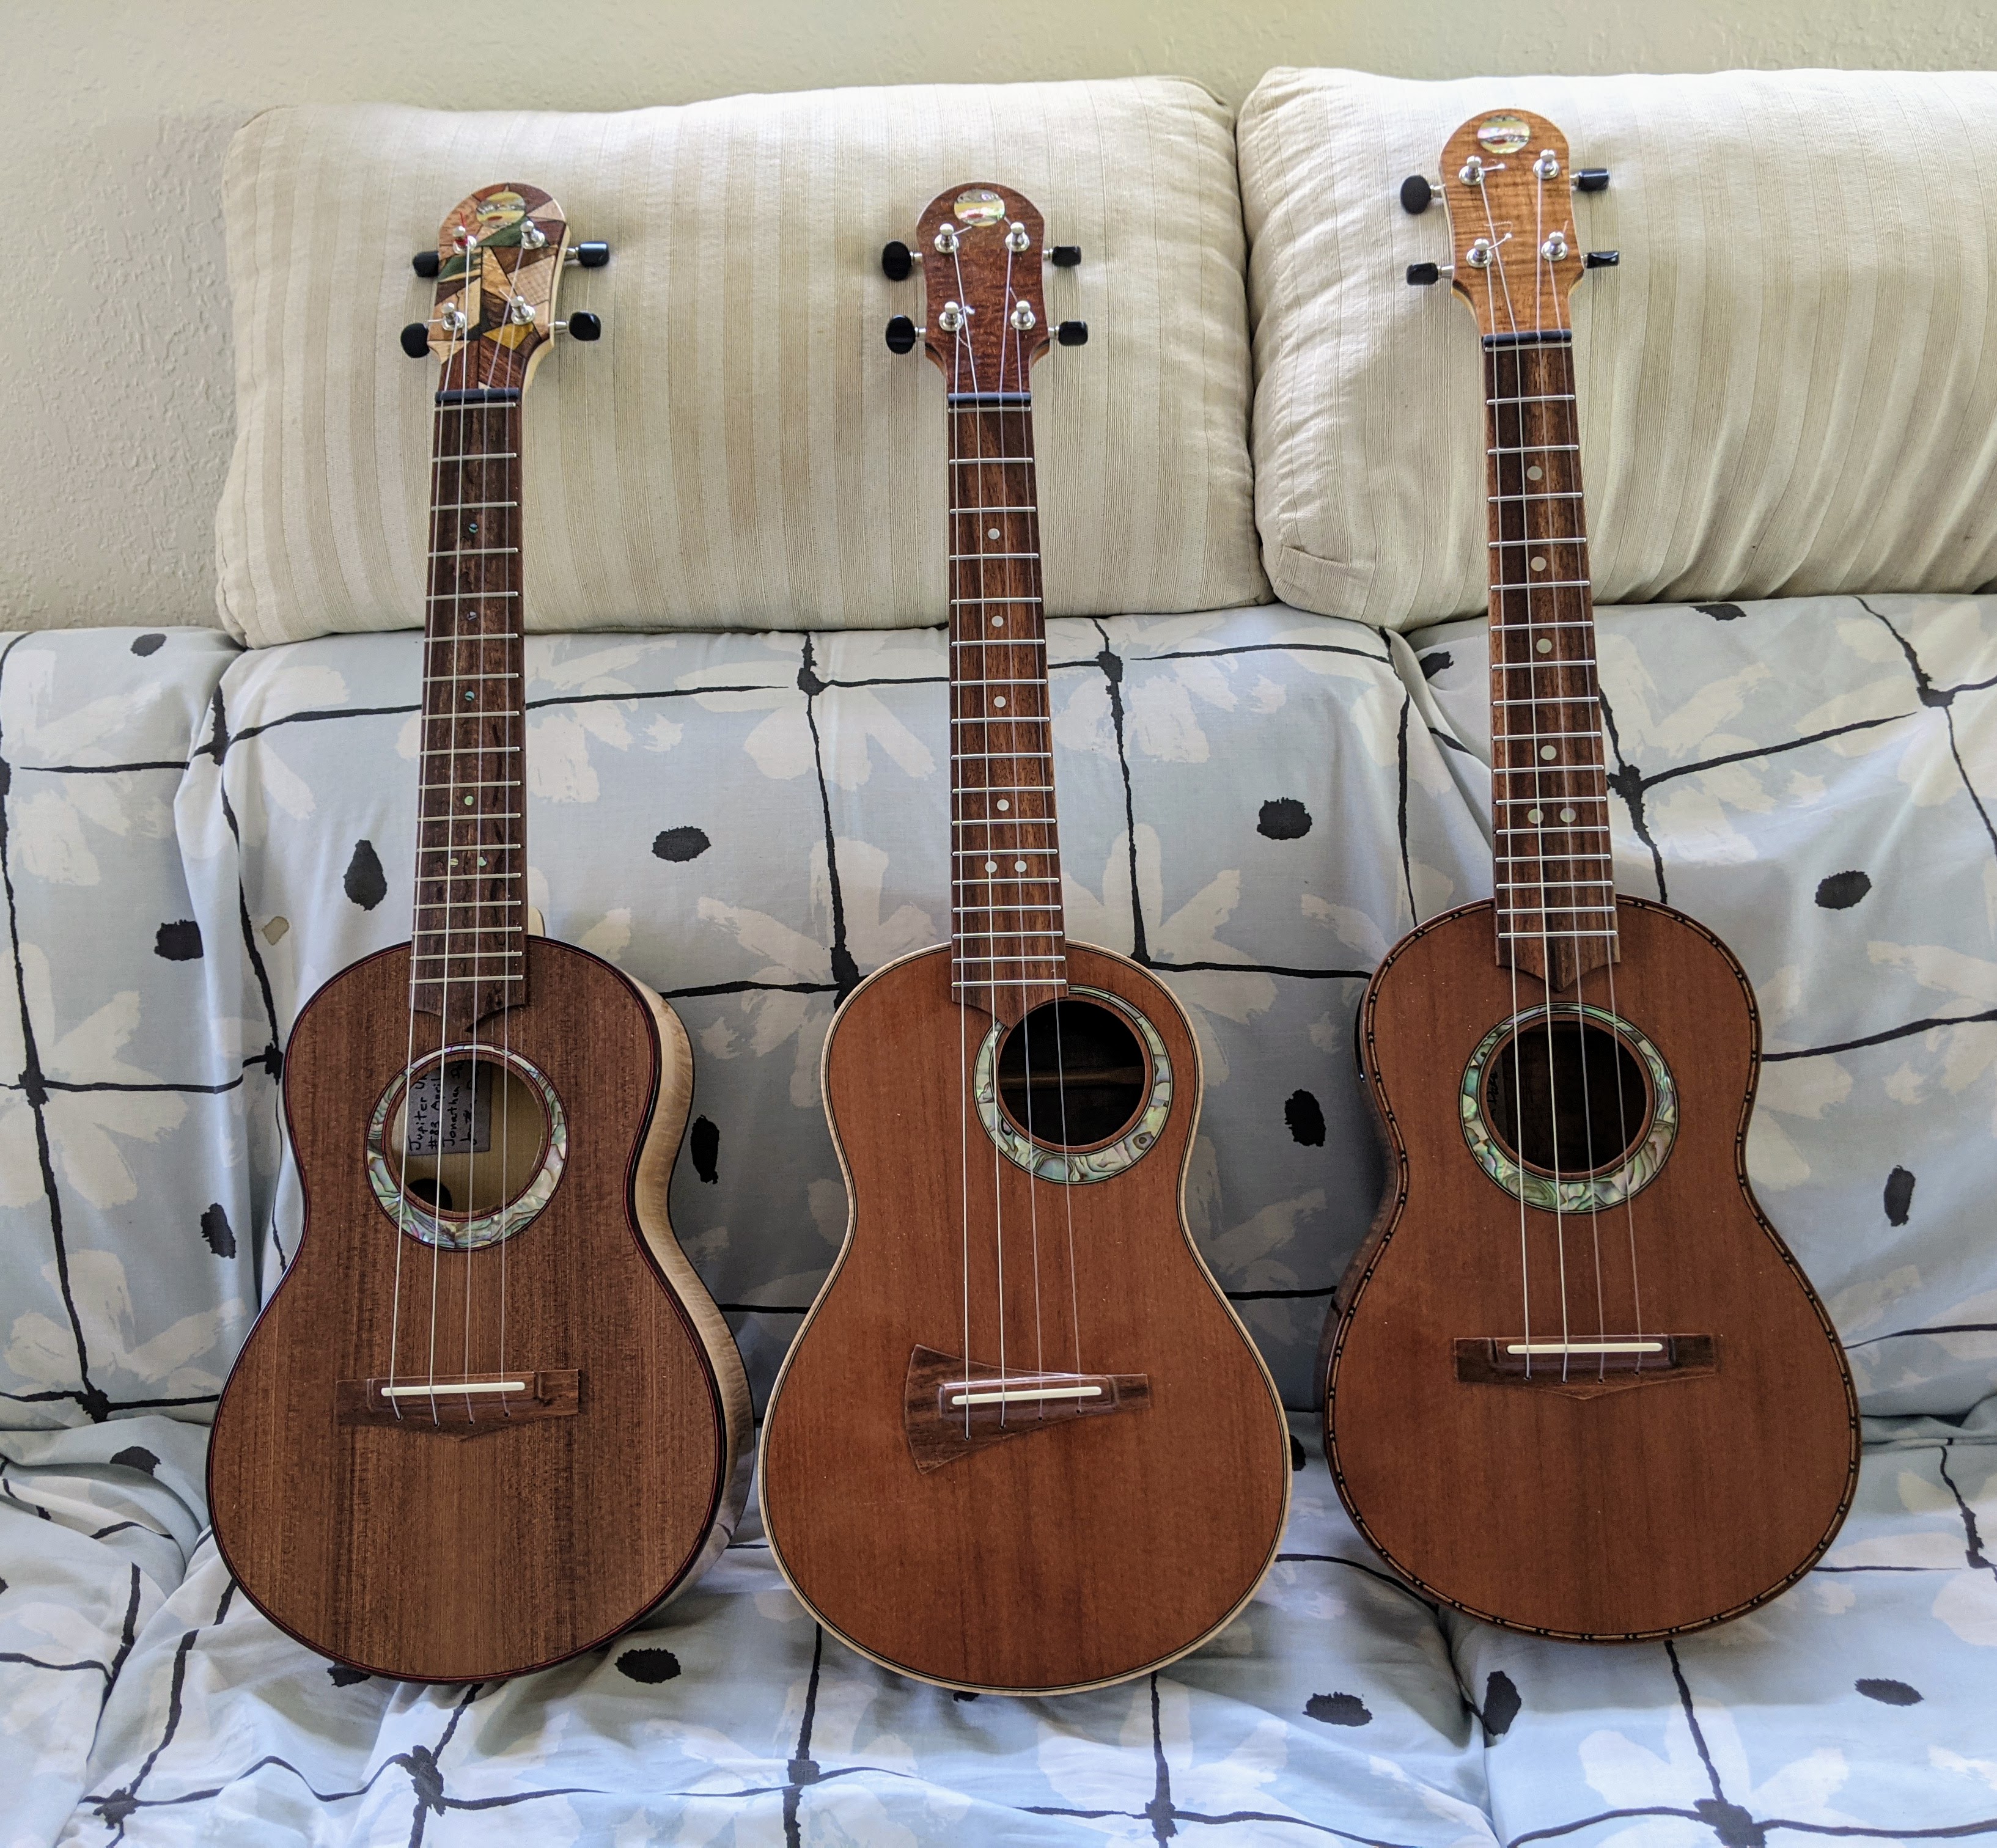
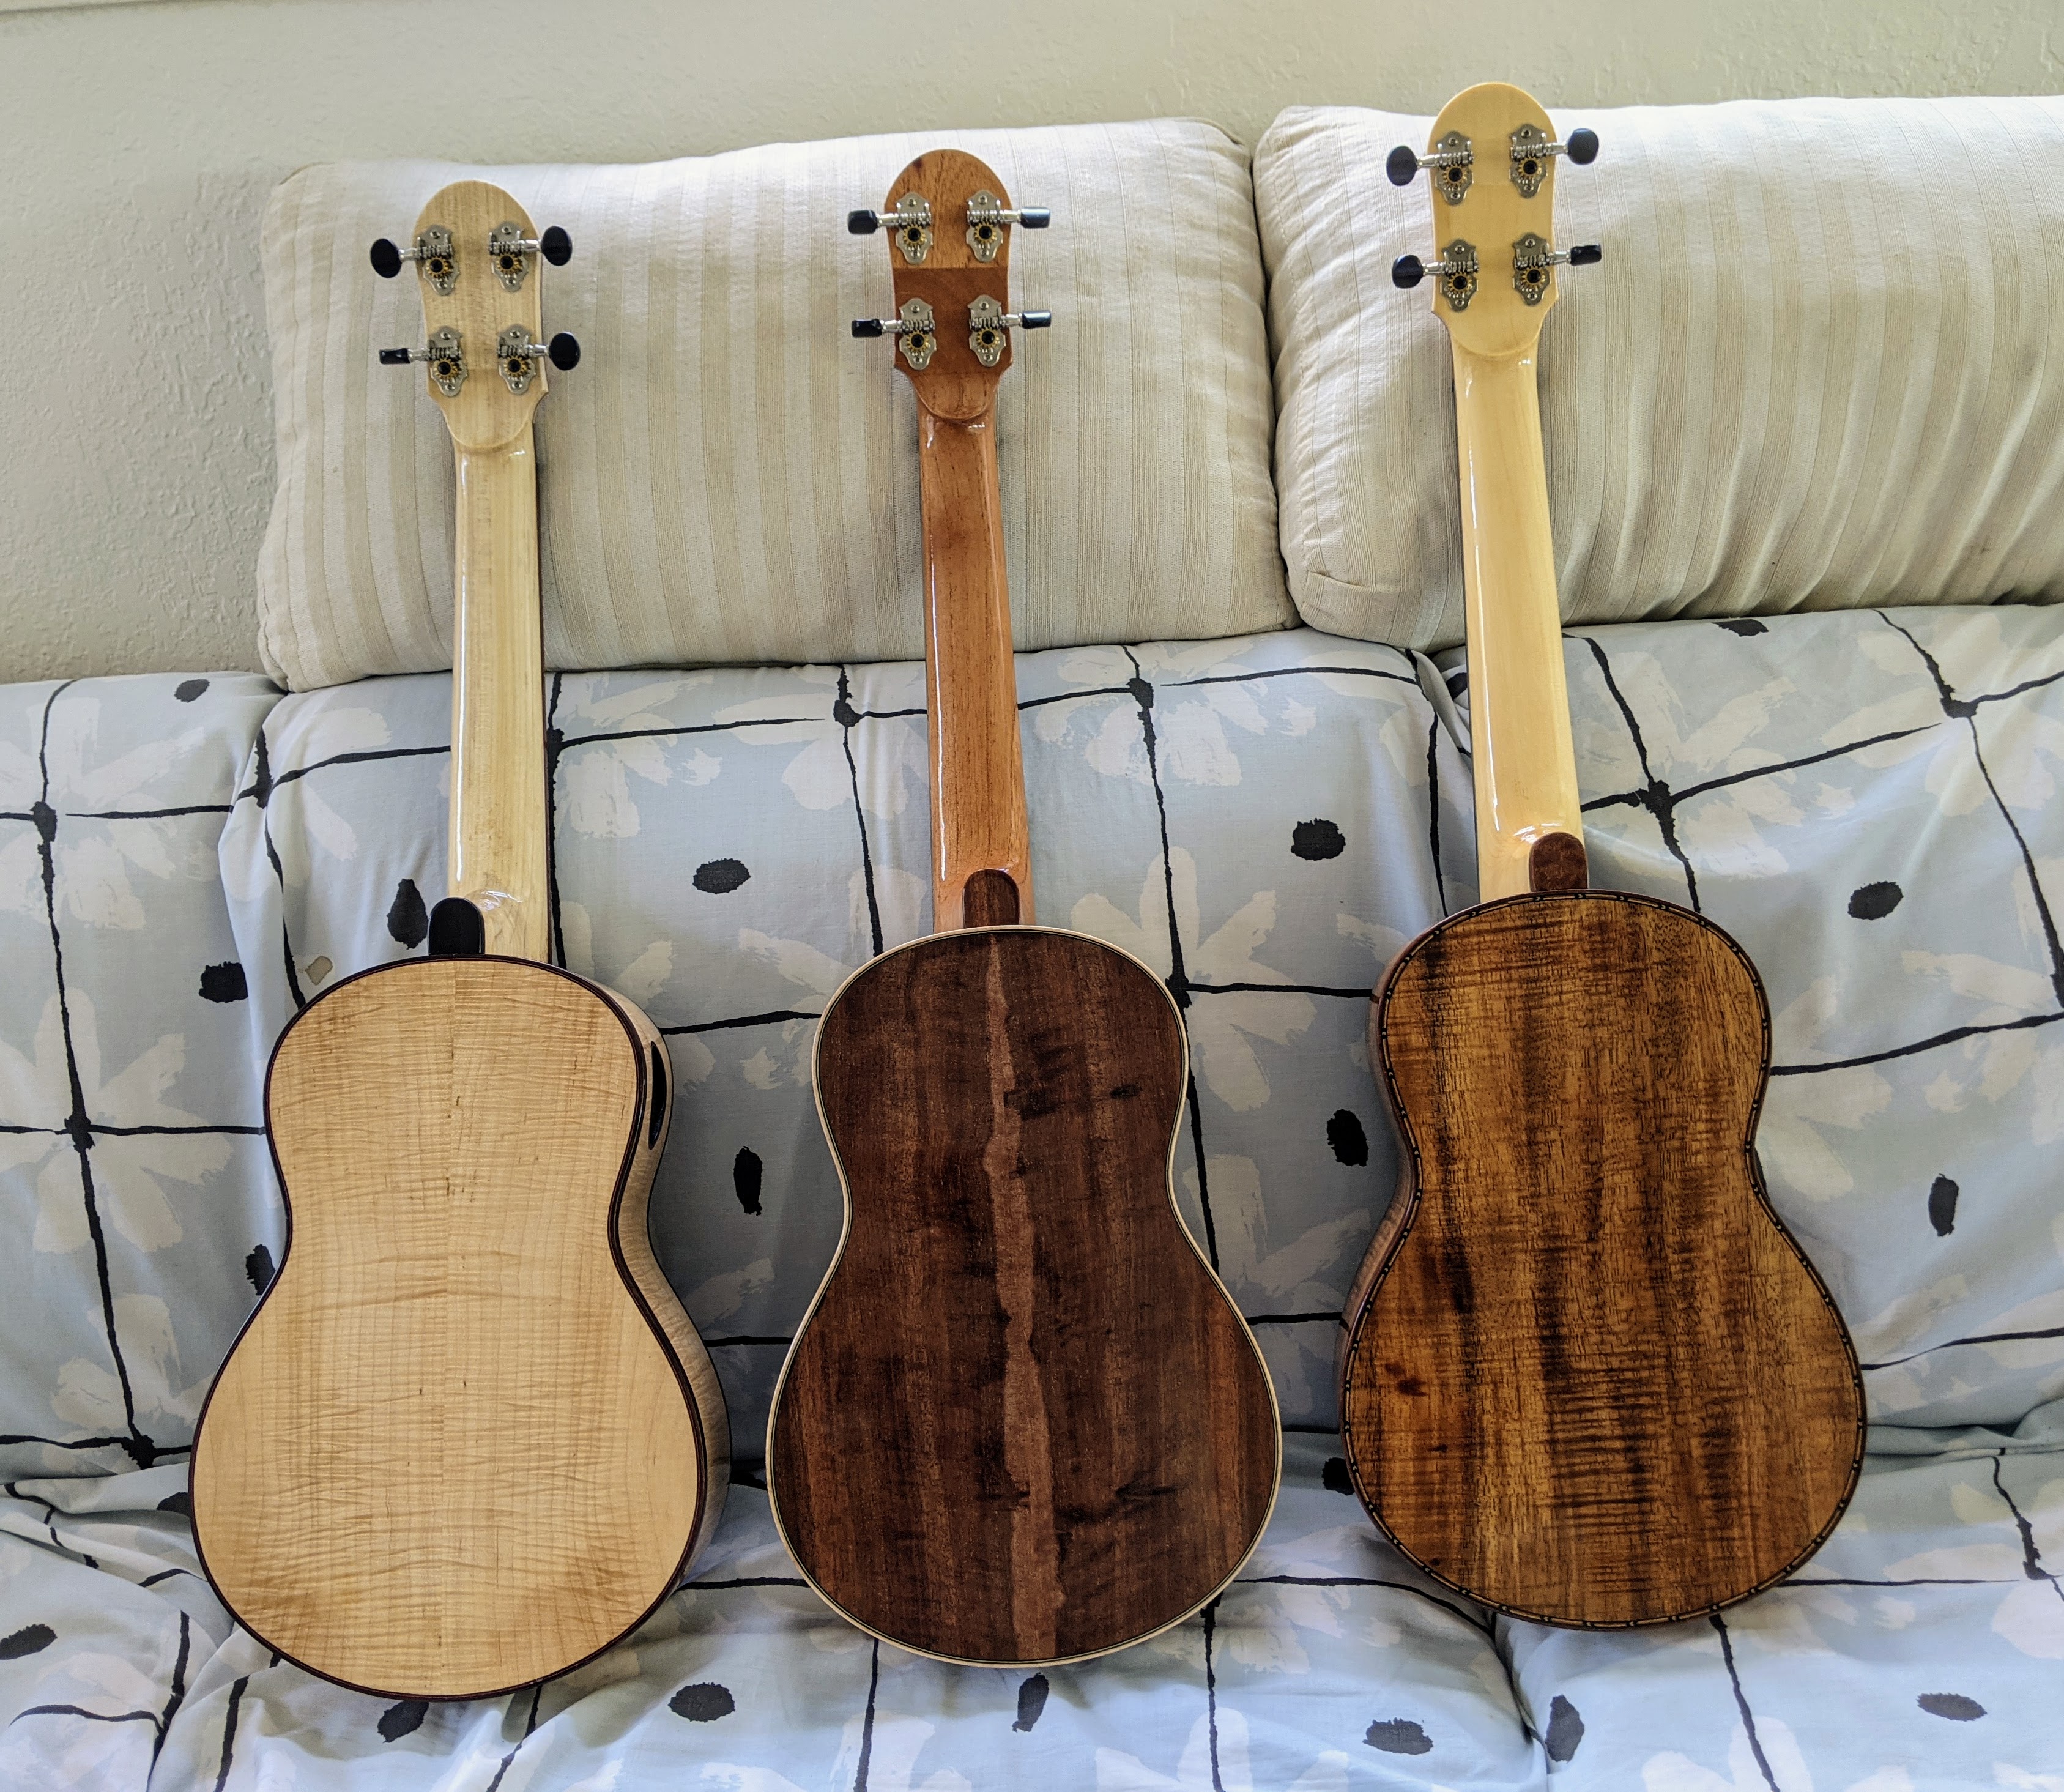
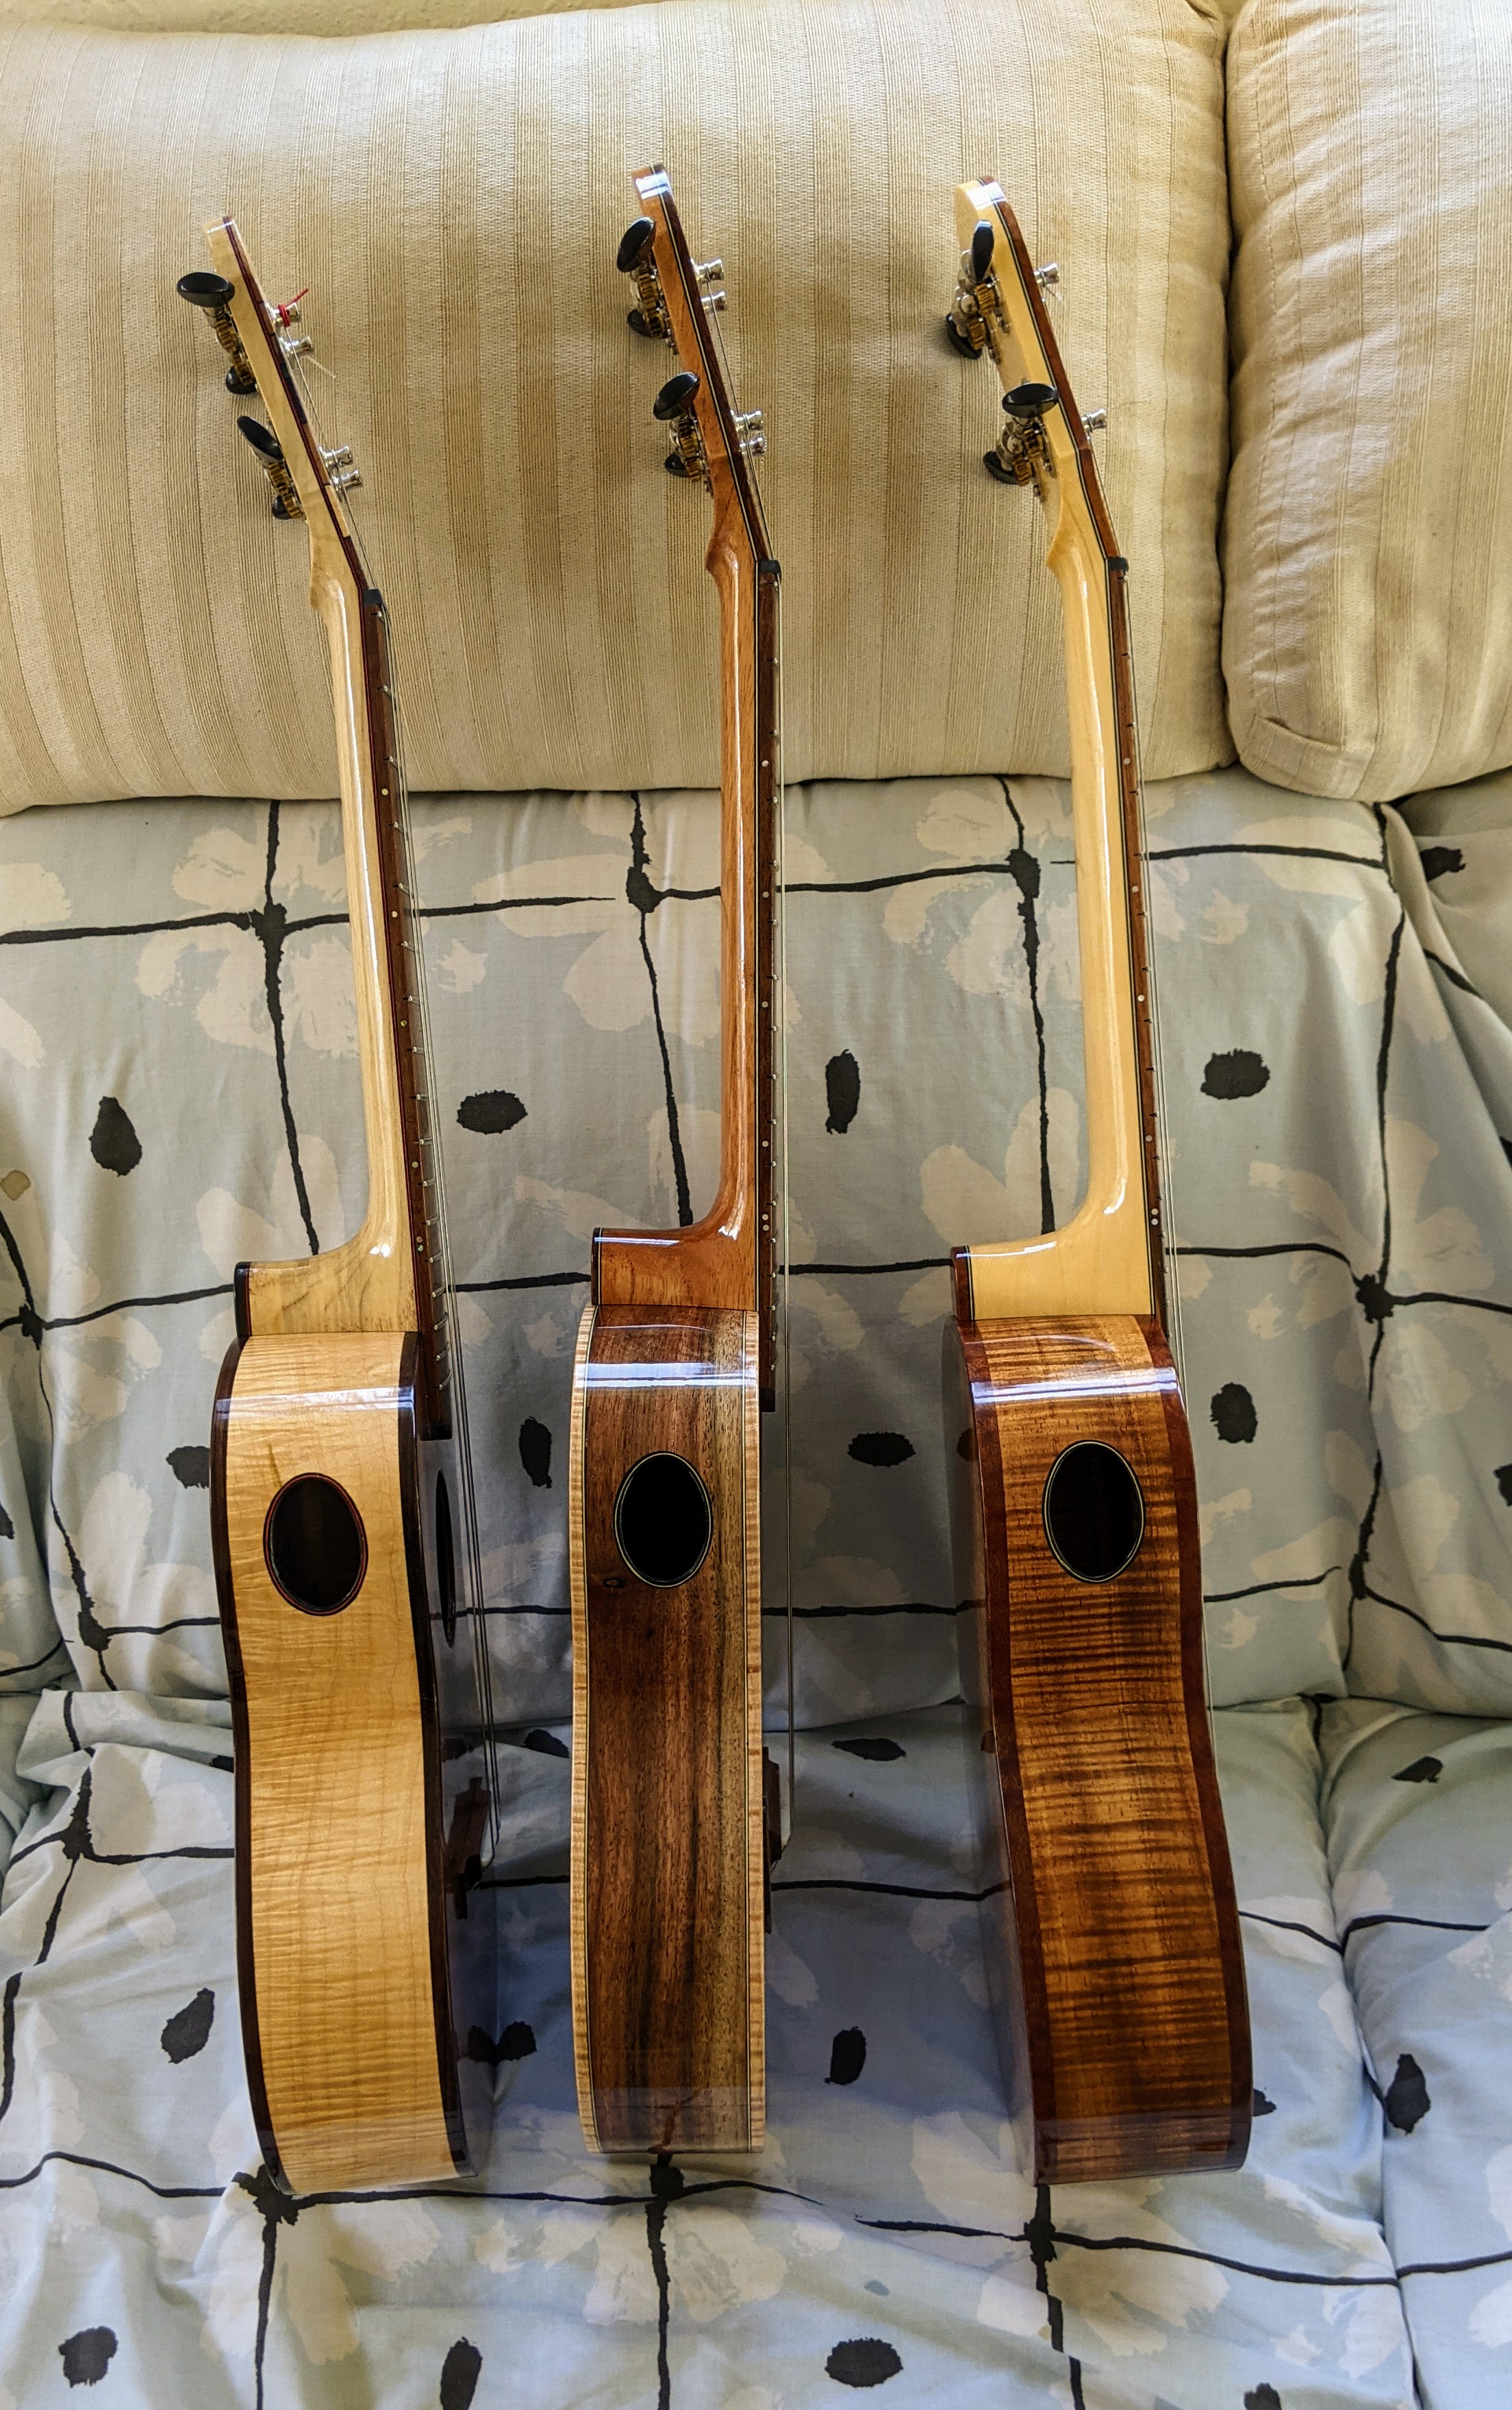
The three tenor instruments are finished. All have very similar redwood tops and are all strung with the same strings (low-G). Oasis fluorocarbon for the 1’st and 2’nd strings, Thomastik-Infeld CF27 and CF30 for the 3’d and 4’th strings. All three instruments sound good (I do like a low-G setup). I am not a player so the comparisons are made by plucking open strings and listening for the differences.
Kasha vs. X braced
These two instruments have redwood tops cut from the same redwood board. It is a very fine grained and pretty stiff redwood. There is a tonal difference, but it is not a very large difference. The Kasha instrument has a bit more bass, particularly on the 4’th string, giving the instrument a bit ’rounder’ sound. As one progresses up the strings the difference between the two instruments becomes less and less, so by the first string there is virtually no difference. Sustain is the same across the two instruments. The overall difference is such that I think unless one has a very good ear (and memory) it would be hard to tell the difference if there was a 10 minute break between playing either one.
X braced vs. X braced with a double back
The short story here is that the double back seems to make no difference. Maybe the double back instrument has a bit more sustain, but that difference is well within the range of different pieces of redwood tops and/or different back & side woods. I do not think I could tell the difference when blindfolded. I do note that with either when I place my hand on the back I feel the same amount of vibration when a string is plucked so that double back does not seem to be isolating the real back.
Player comparisons
An update on comparisons of the three tenors. The instruments have had a couple of weeks to settle in, and I have had two friends who are good ukulele players come over and play the three instruments. Both of theses two friends reported the same sound characteristics. (Their preferences as to which instrument they would like to play differed however, the ear of the beholder and all of that.) Their impressions:
The X braced instrument is the brightest.
The Kasha instrument is noticeably warmer, with more low-end.
The double-back instrument falls between the X and the Kasha in terms of warmth, and it is the loudest.
Volume and sustain are very similar across all three instruments.
All in all, the instruments are different, but not wildly different. If all three were hanging in the ukulele store and you were going to buy one, there would be a lot of back-and-forth before you made your selection. (Of course they all sound better than anything else in the ukulele store!) Also, the one you pick is not all all necessarily the one your friend would pick. Factor in the different looks and it is a real toss-up.
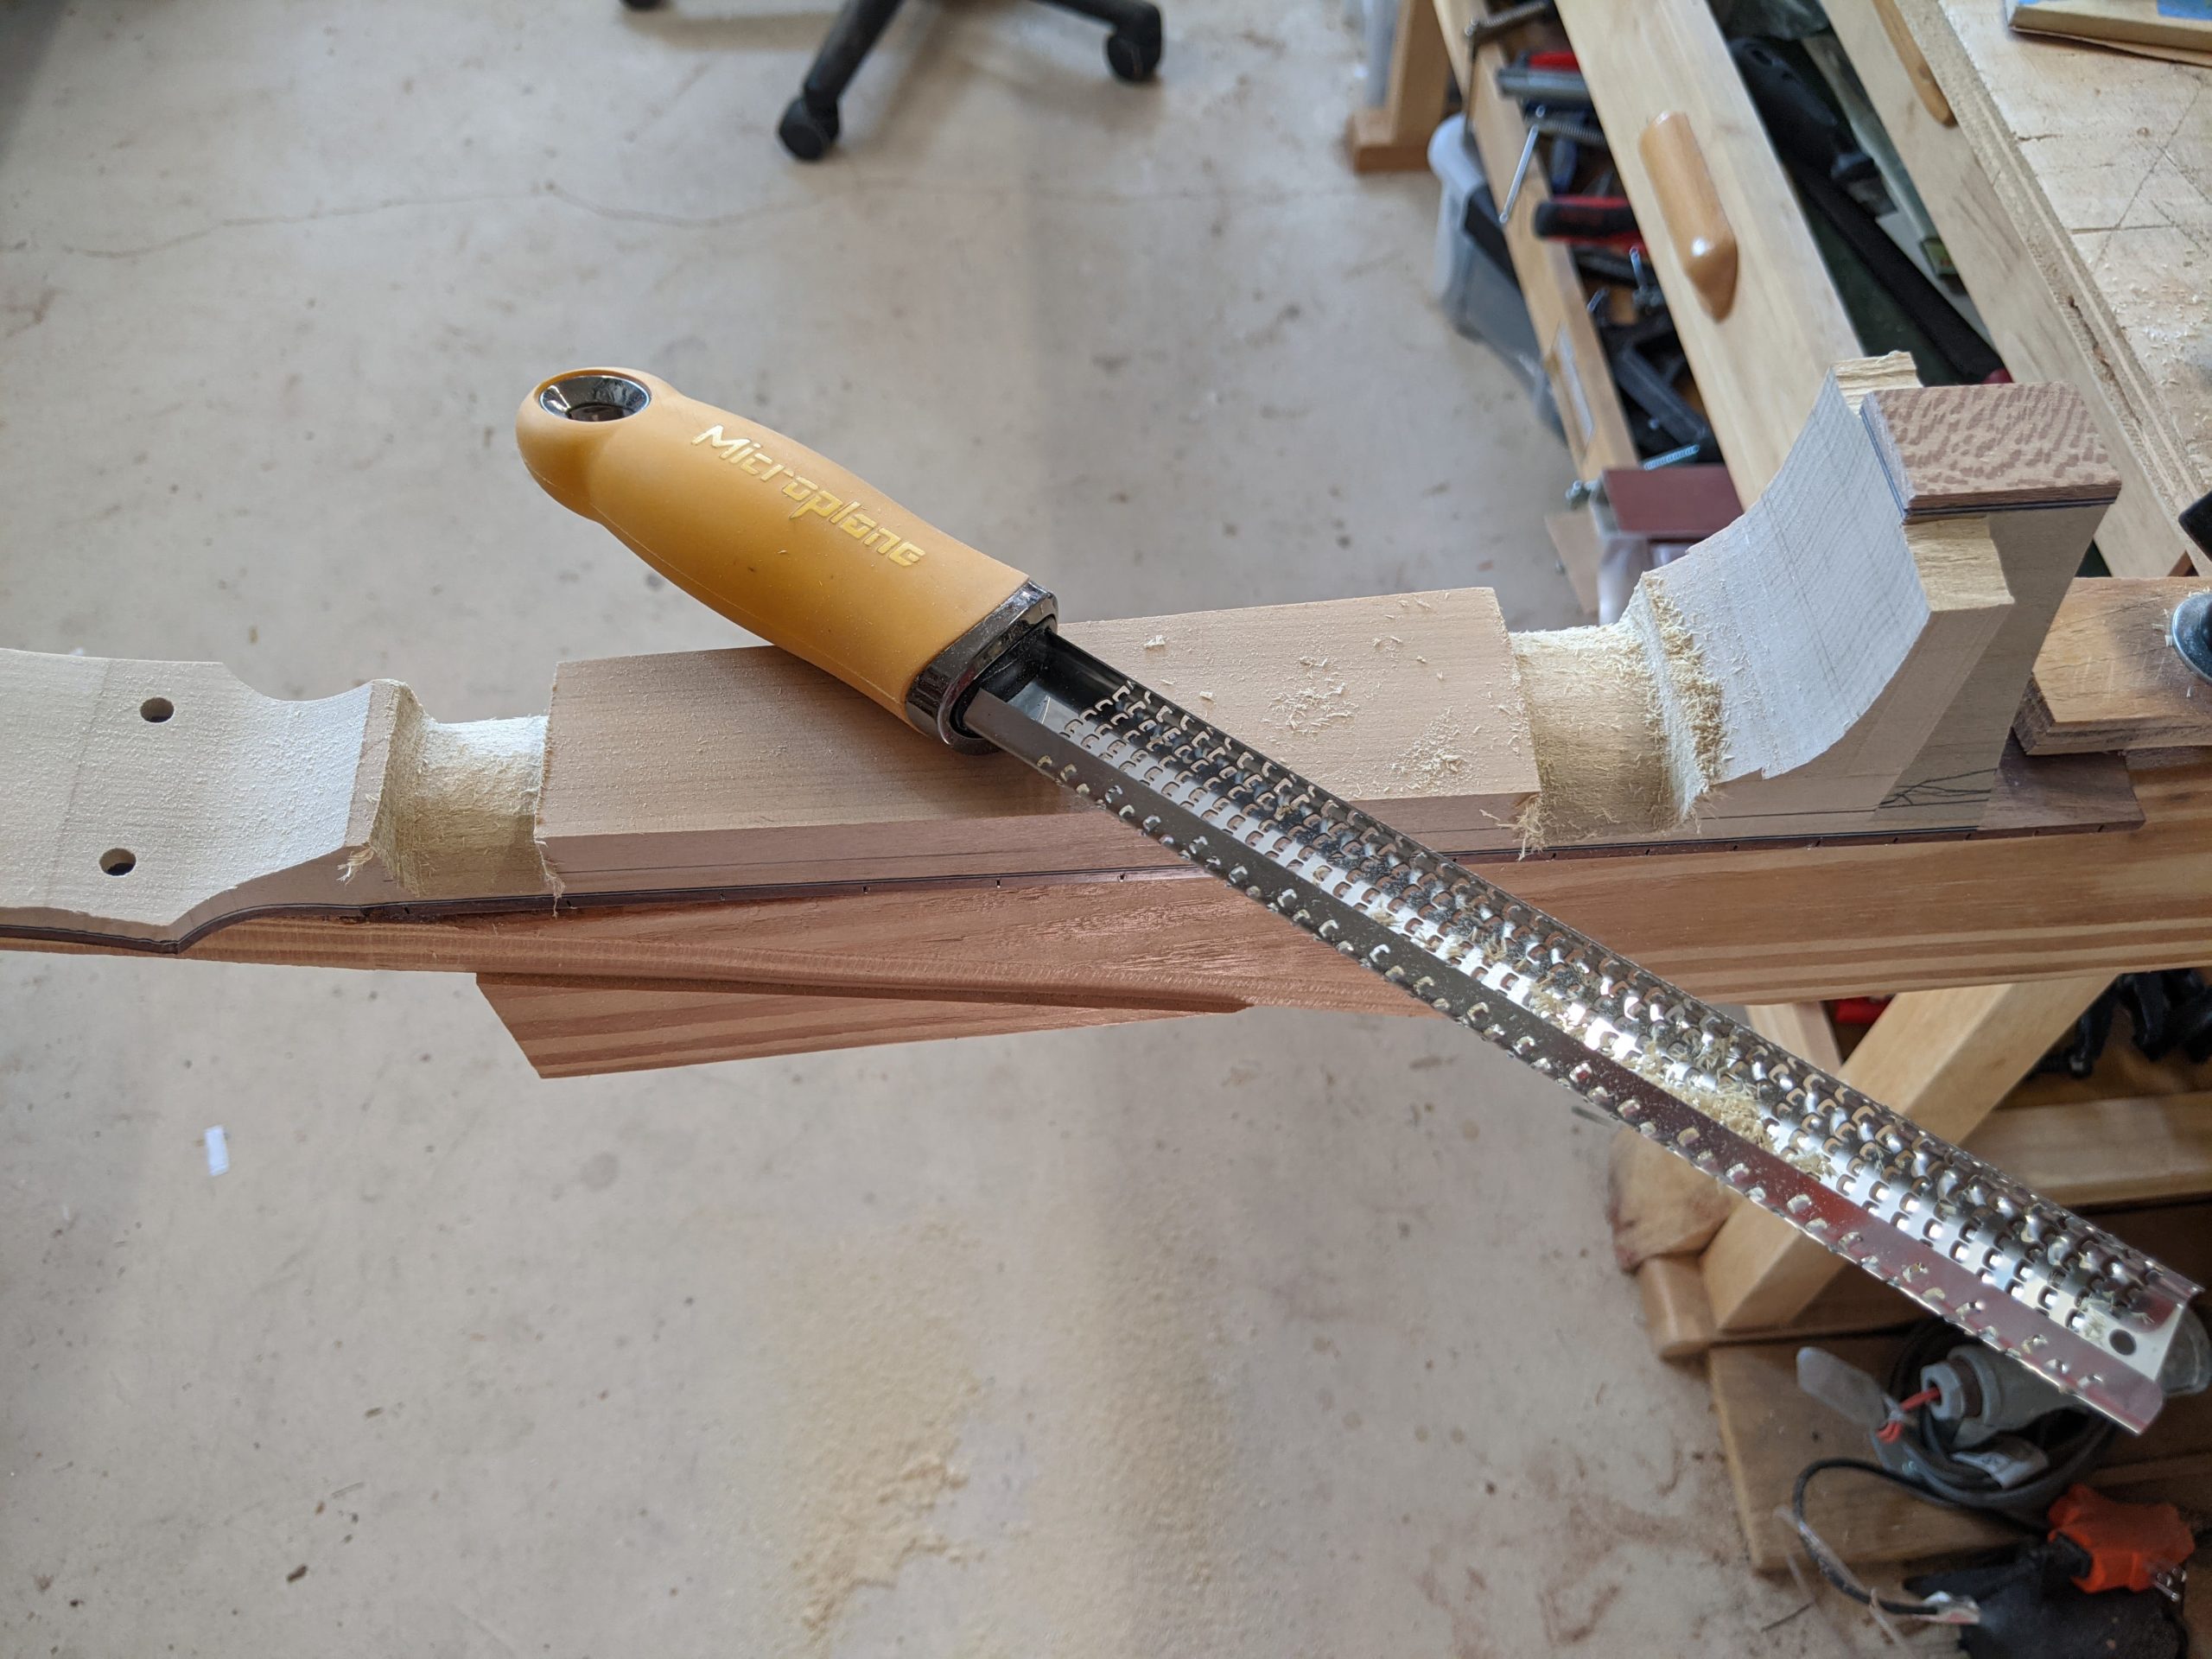
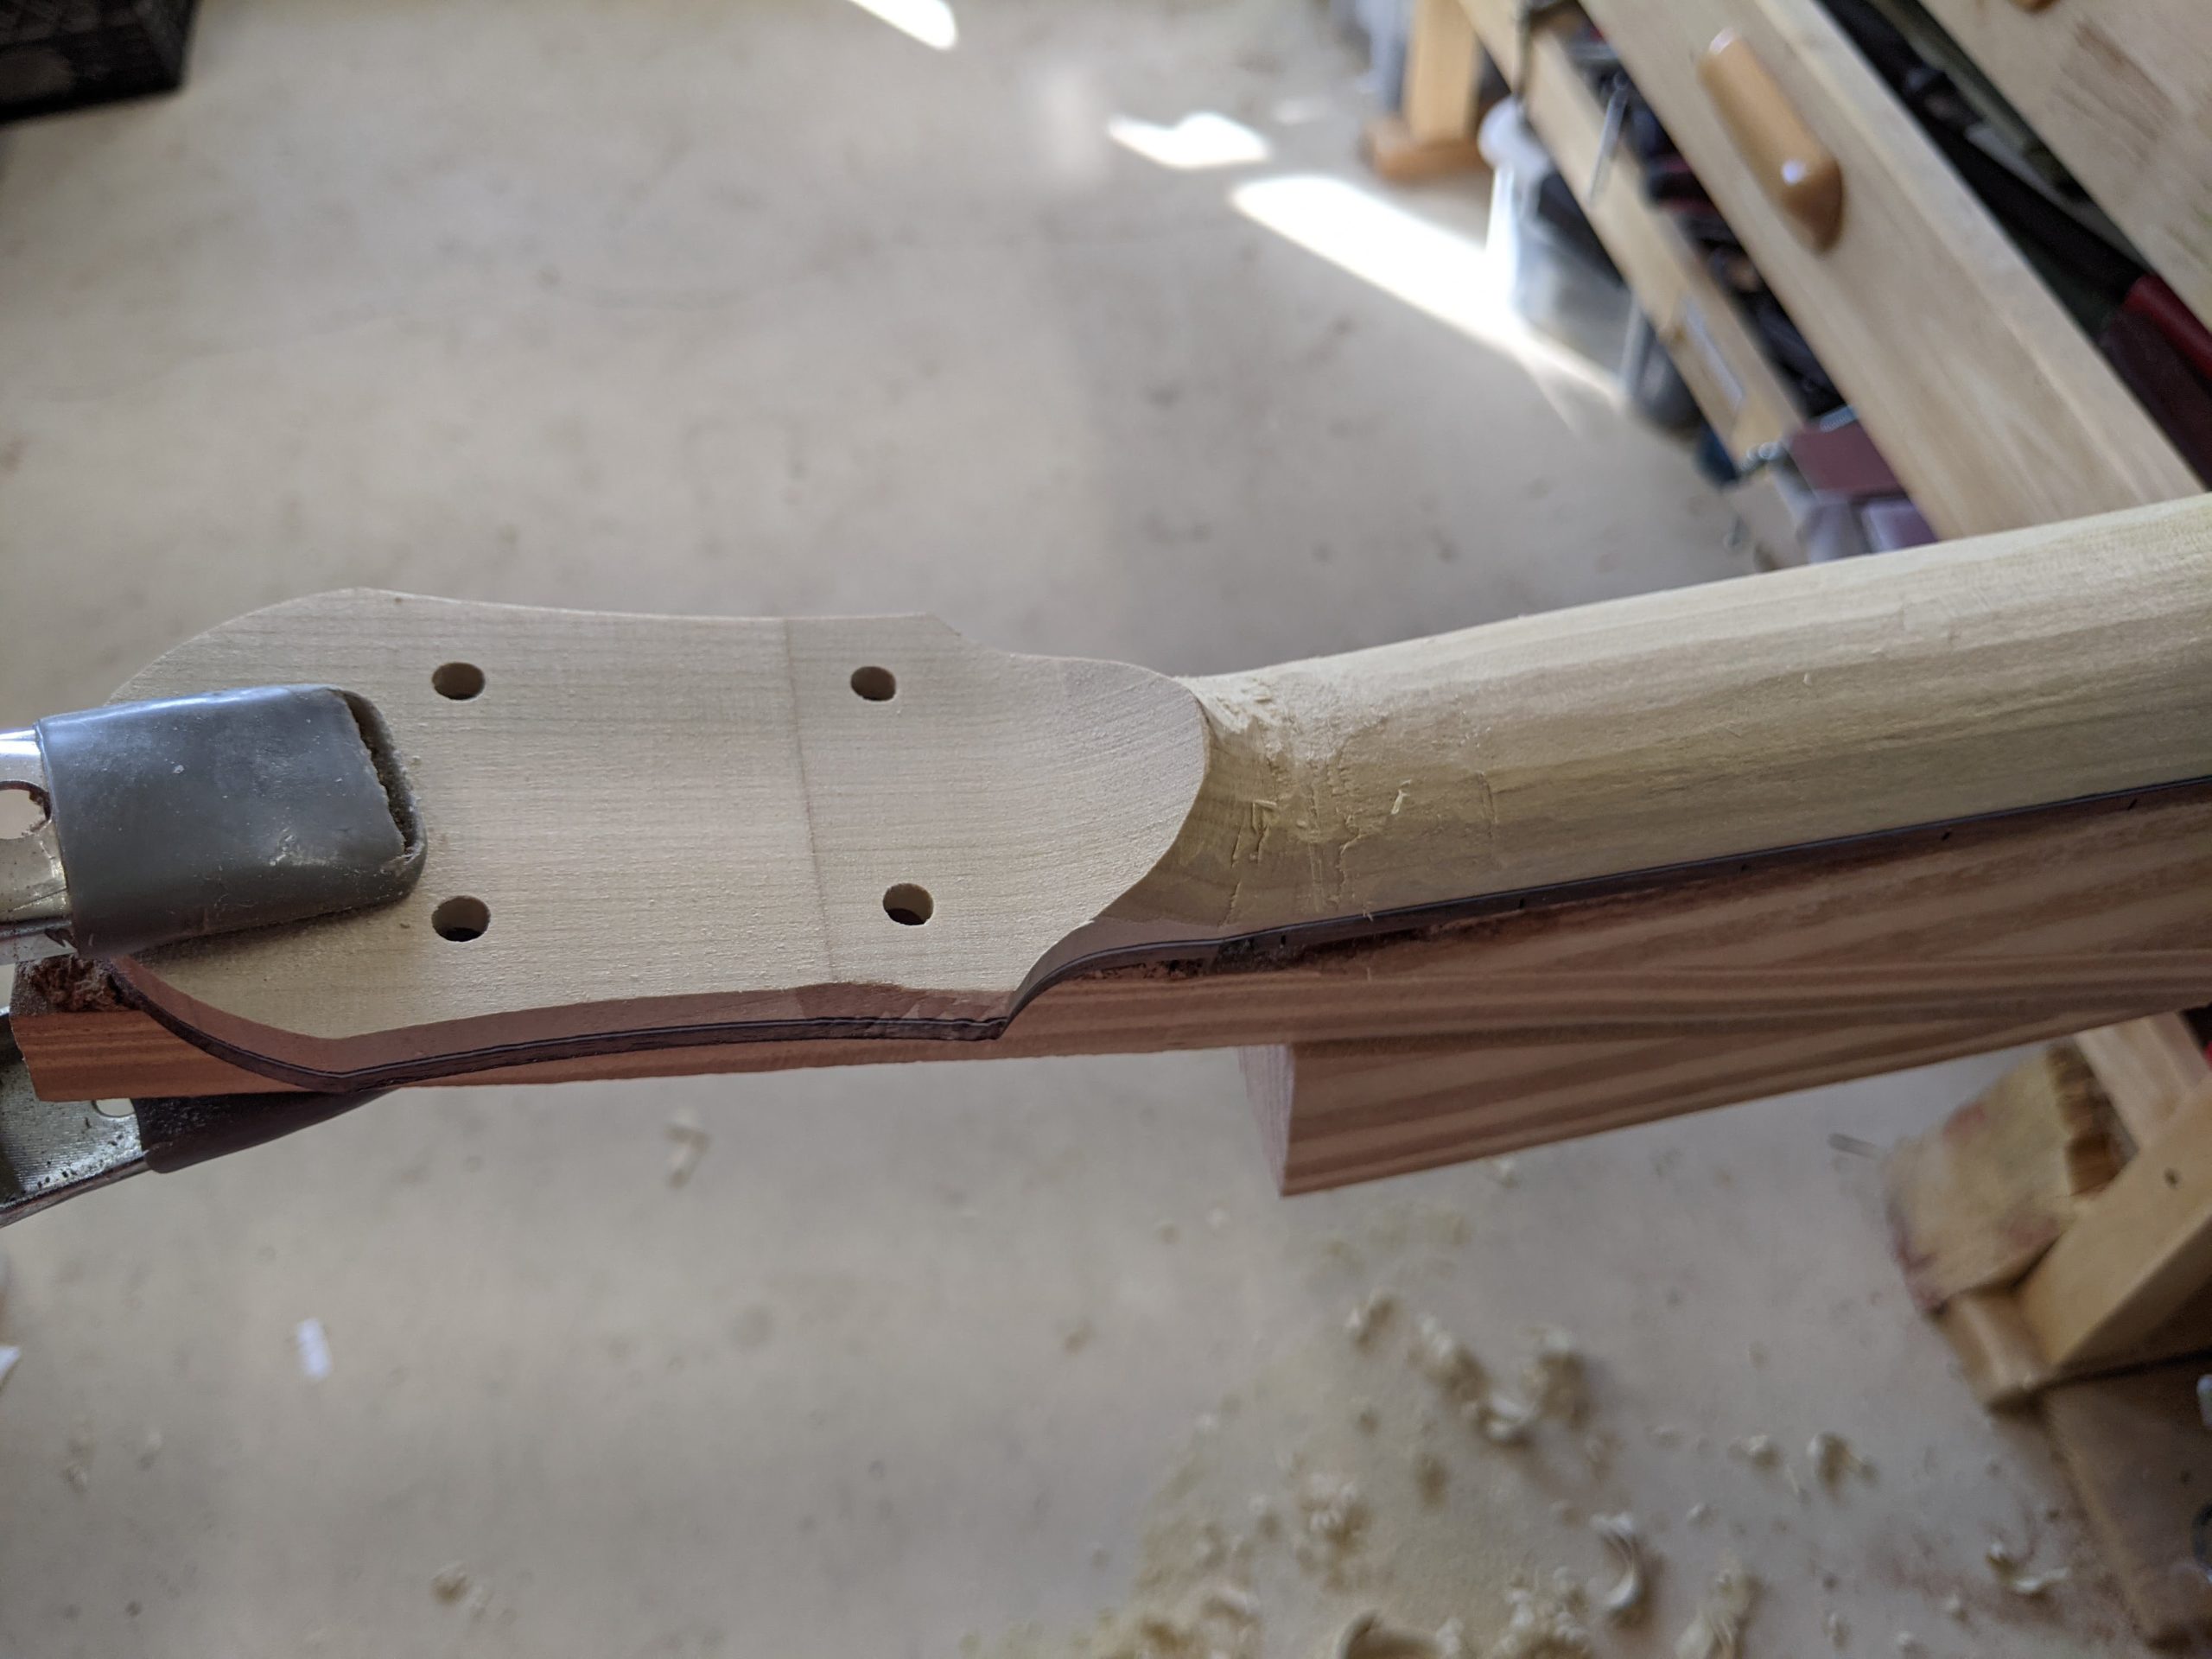
This is a brief description of how I carve a neck, starting from a rough shaped blank. I shape the neck on a holder which clamps into my workbench vice. There is a hold-down which holds the end of the fingerboard (glued onto the neck) and a spring clamp holds the headstock end.
The first step is to use a micro-plane, a sharp grater-like tool, to cut the basic neck profile into the blank at the top and bottom of the neck. This establishes the basic curvature and depth of the neck.
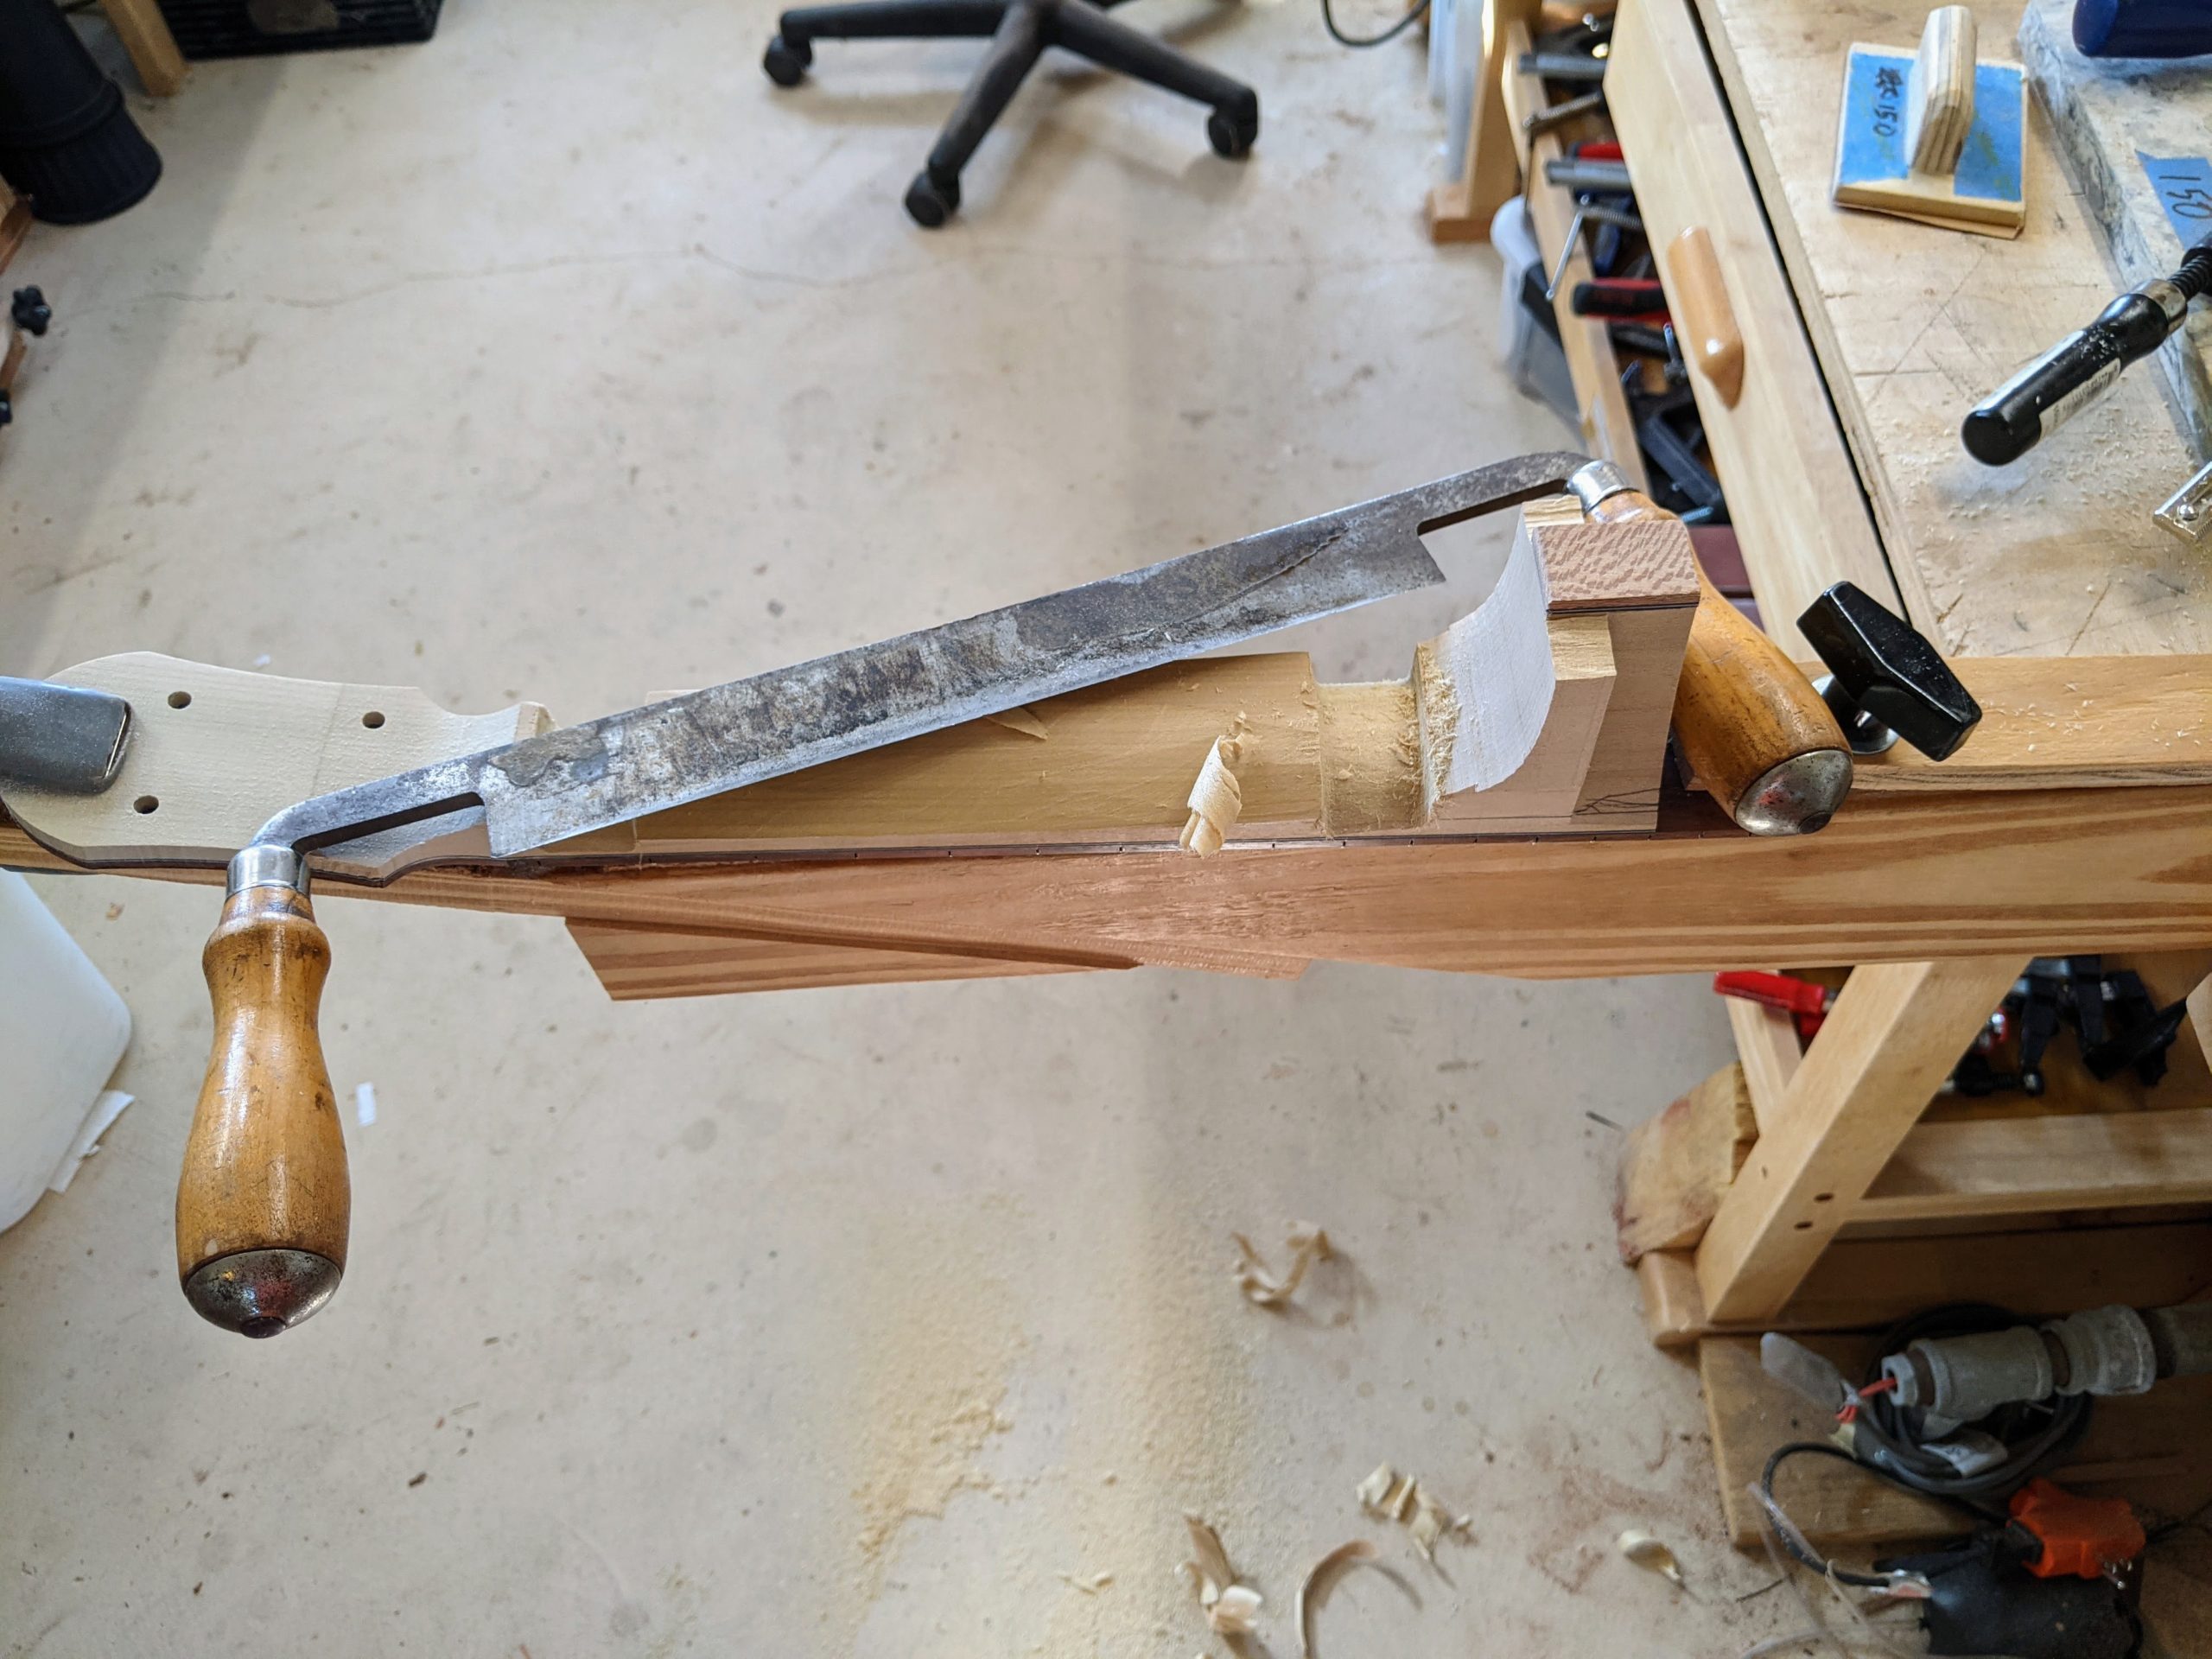
Then I take a drawknife to rough cut out the shoulders between the two neck curve sections. My father helped me buy this drawknife when I was about 10 or 12 years old. I don’t remember what sort of project I was doing, but my father trusted me with a sharp blade at a rather young age. I still have the drawknife, and it still works well.
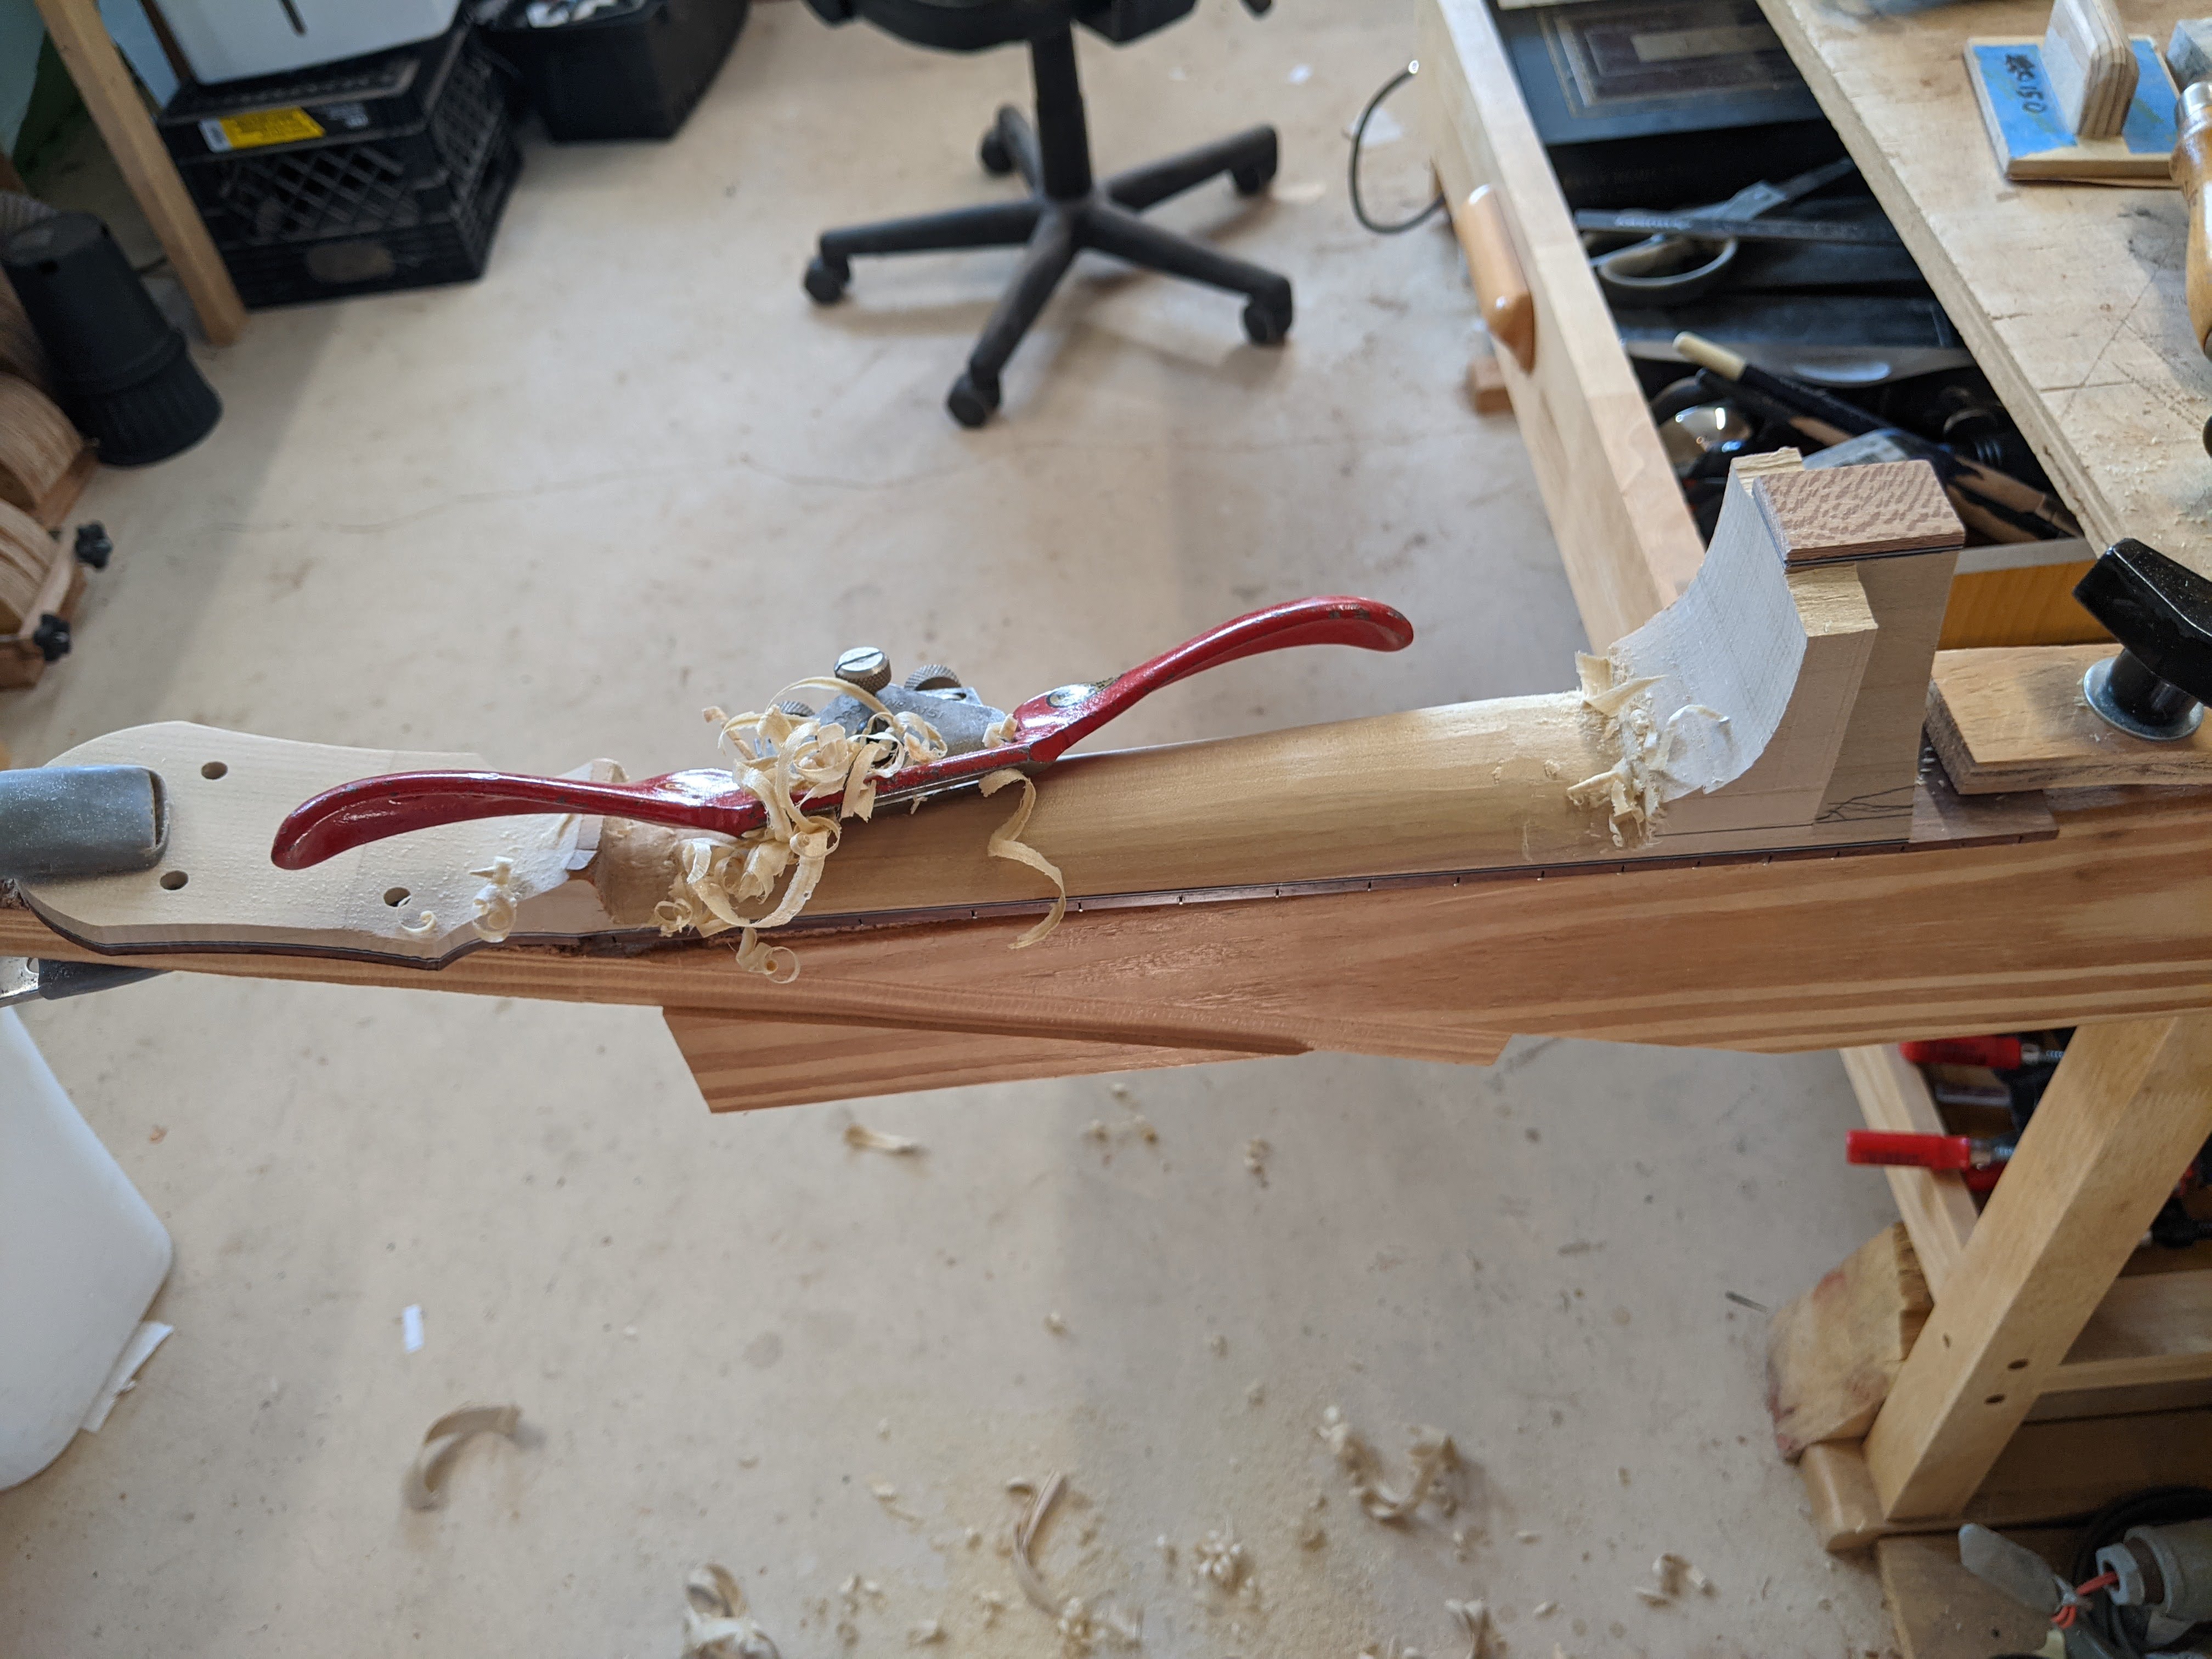
Then the neck shape is refined with a spoke shave. I have also had this tool for many years.
![]()
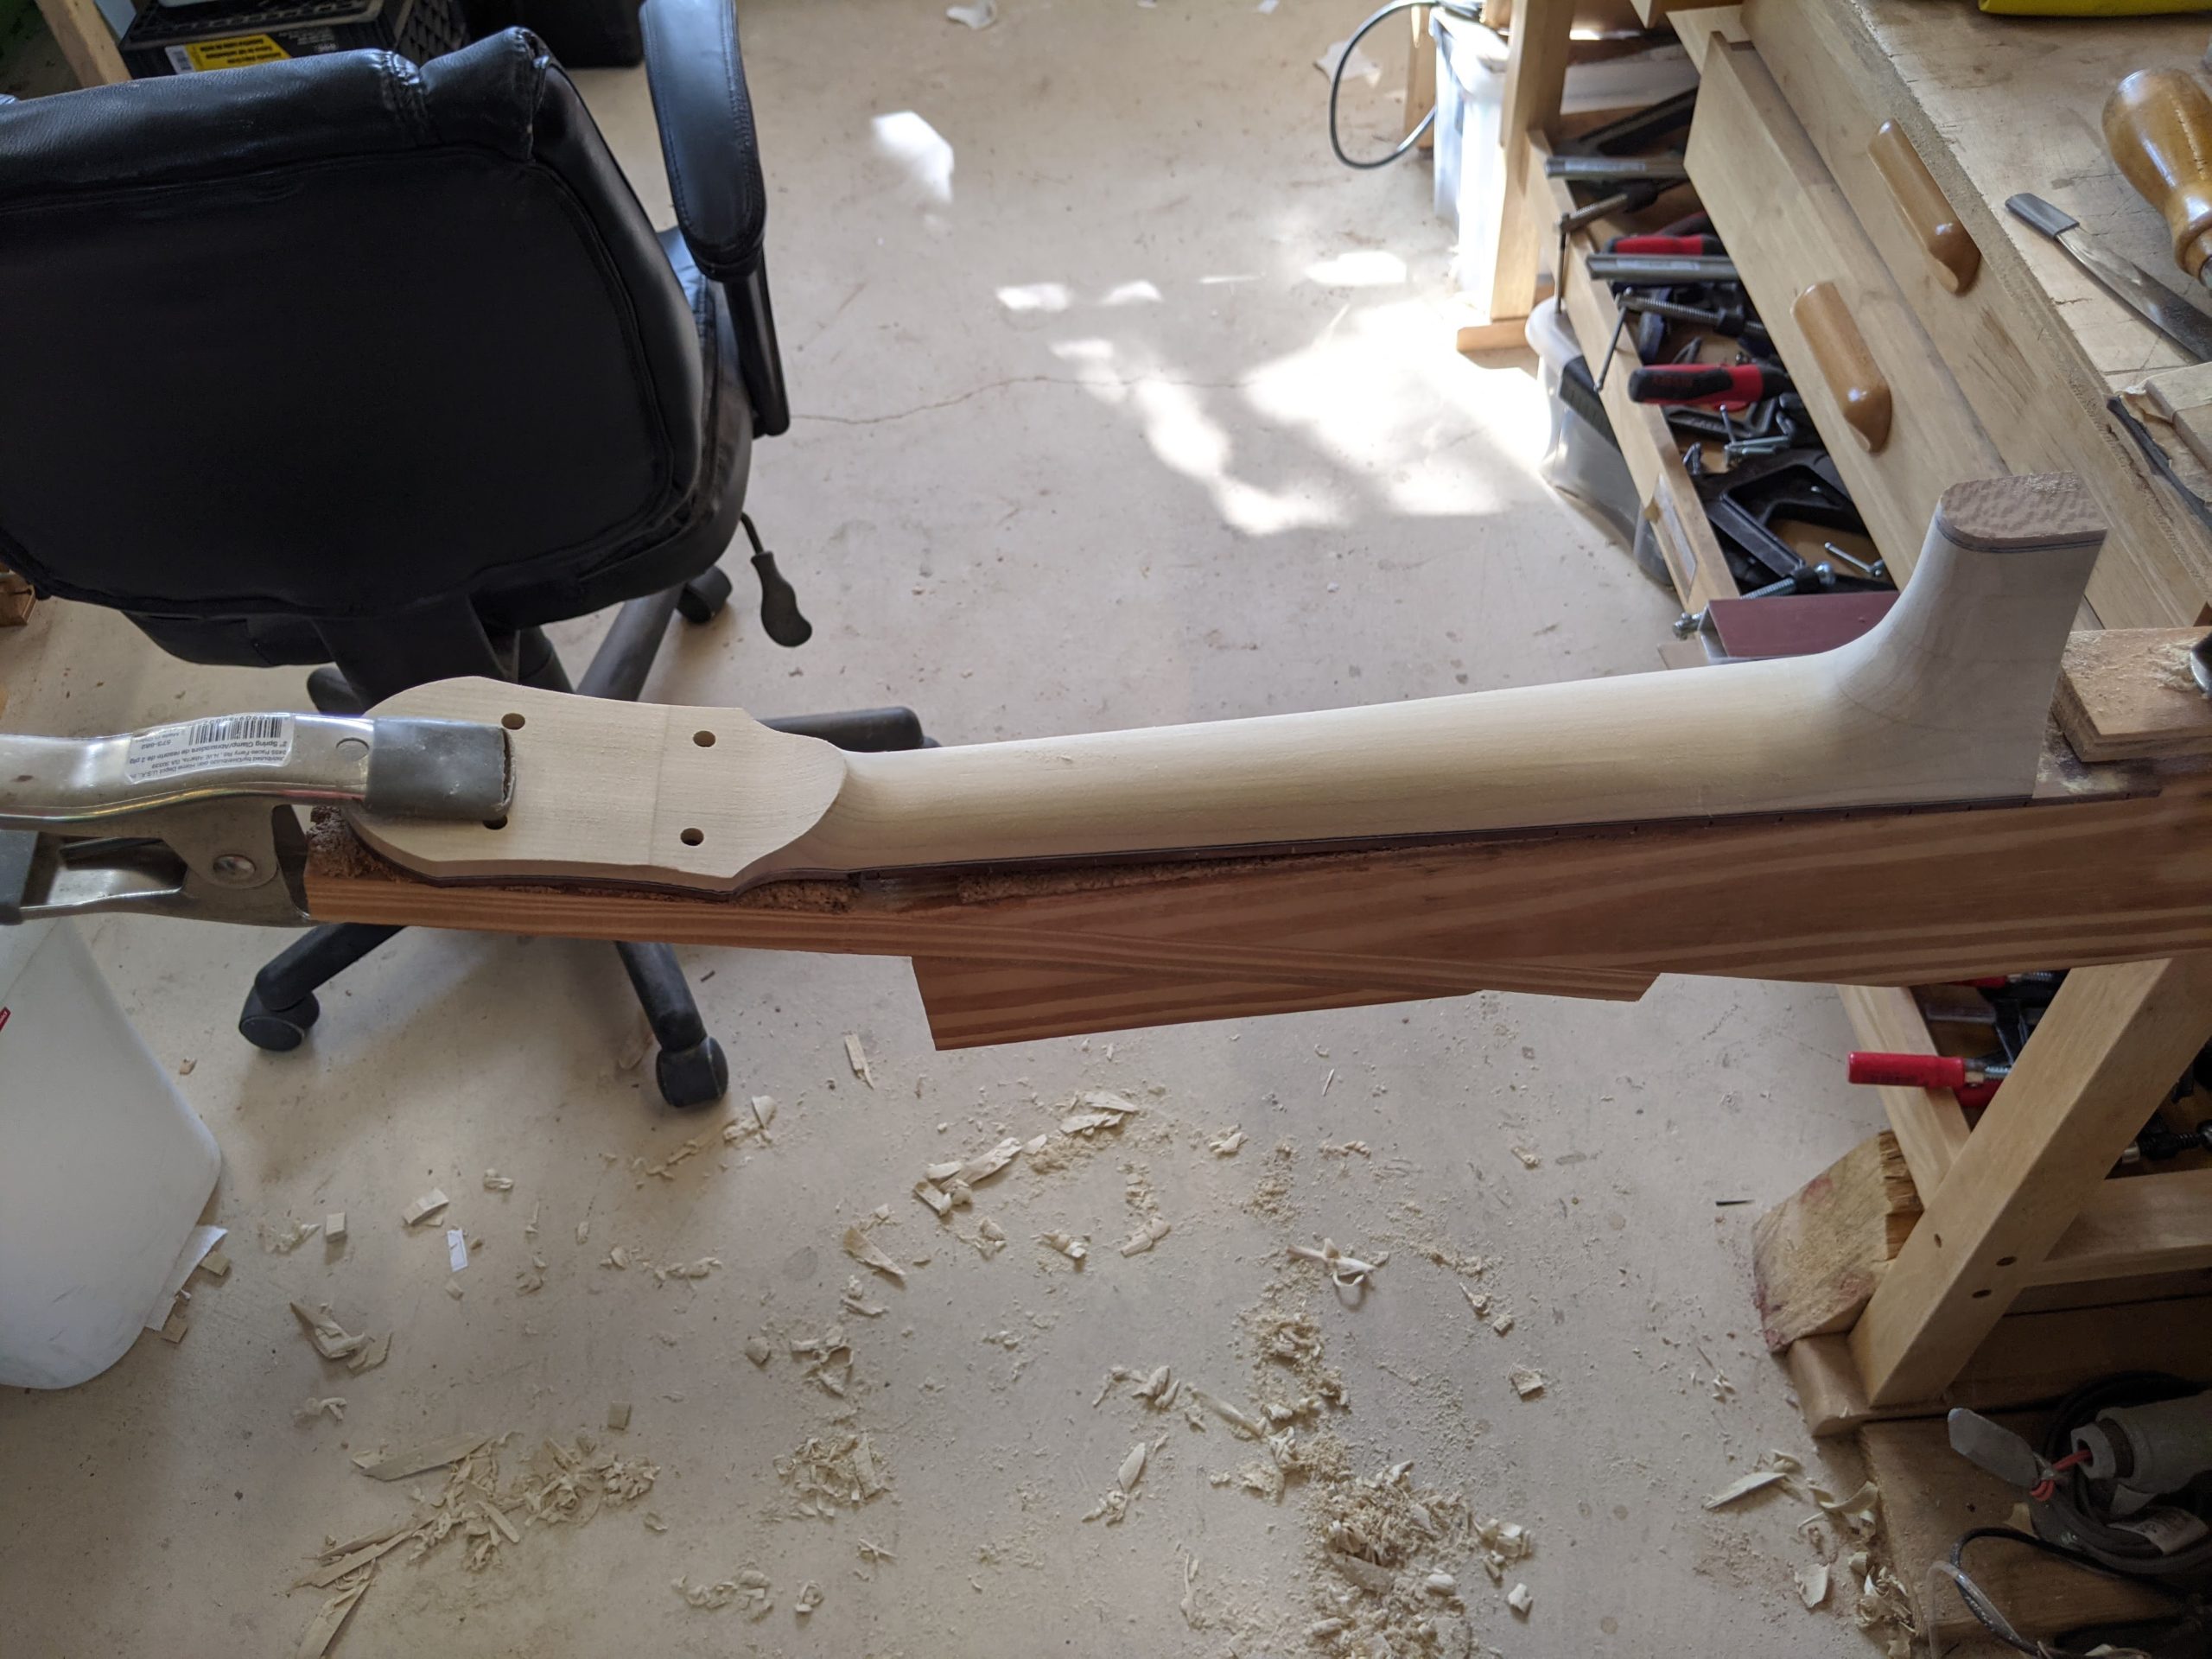
A rough curve is left at the headstok end from the drum sander I use to flatten the back of the headstock.. I turn this into a volute with the aid of some knives made for me by a friend. (Still in test phase, no real handles yet.) My favorite is this one made of Damascas steel.
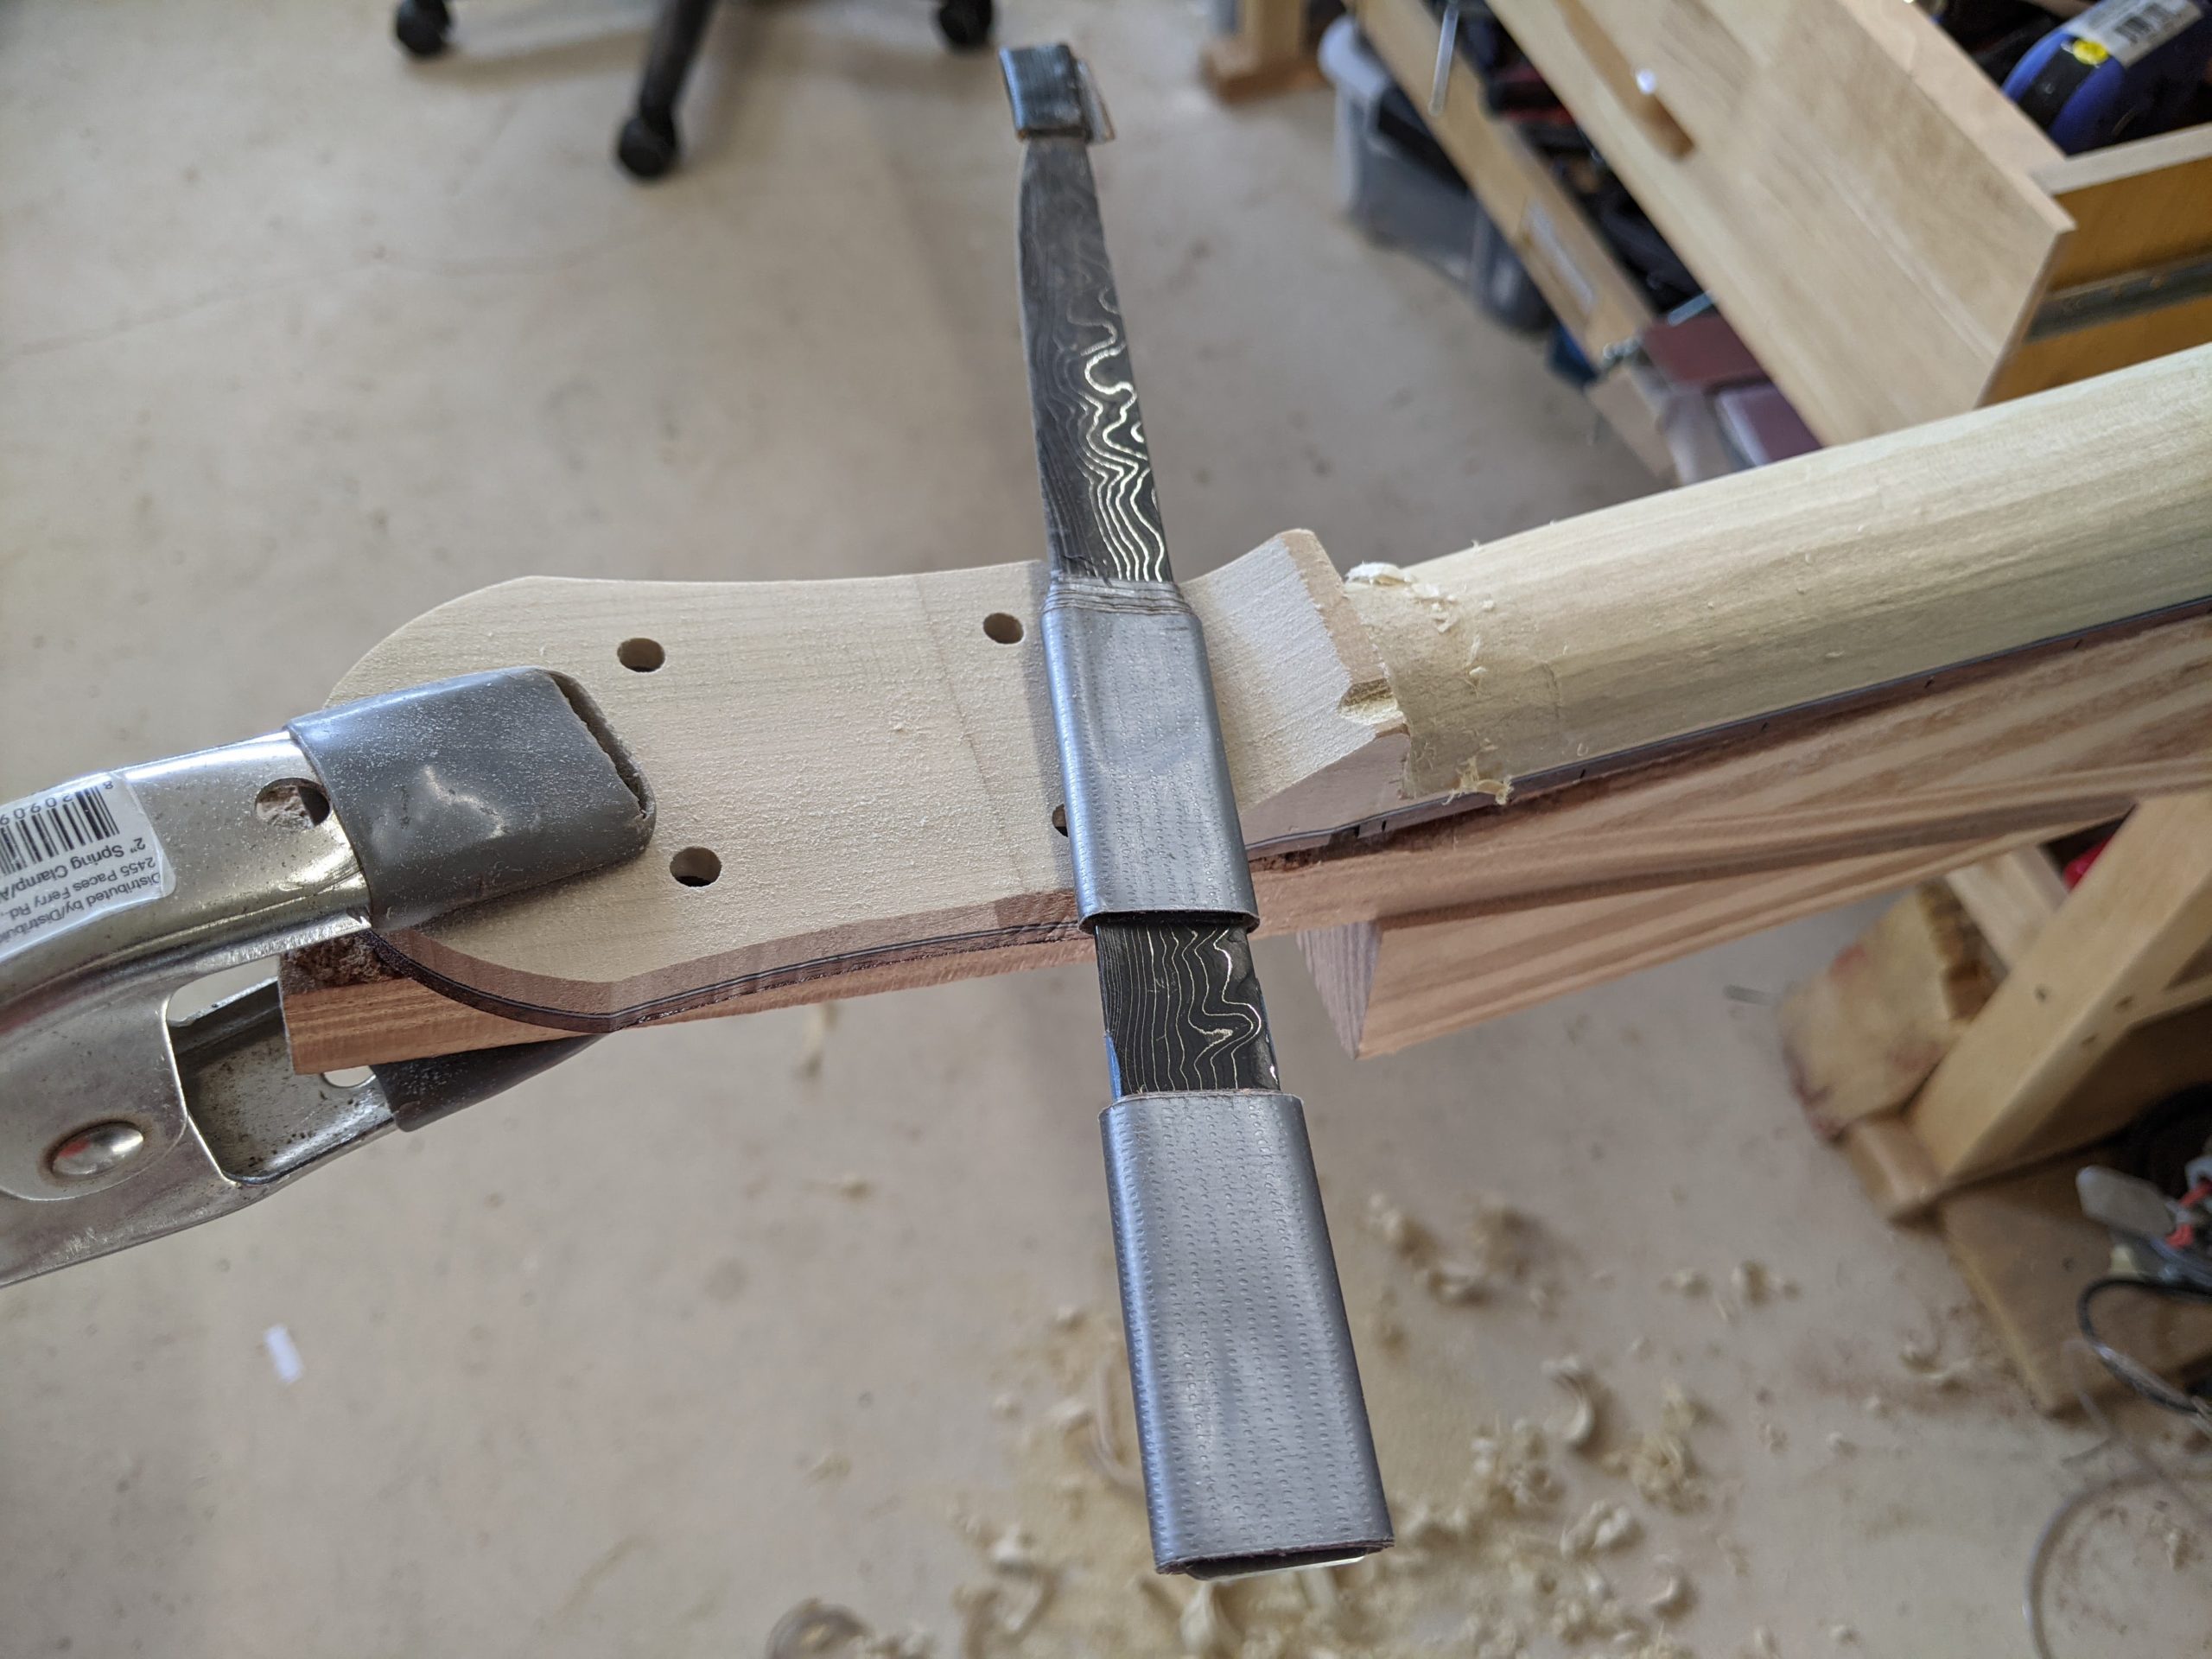
Using this knife I can carve the volute to shape, and profile it into the curve of the neck.
The heel area is curved and refined with various curved rasps, micro-planes, and files. Then some (quite a lot actually) sanding and the neck is looking like a neck.
A customer wanted a penguin inlay. Here is a bit of description about how the inlay process goes.
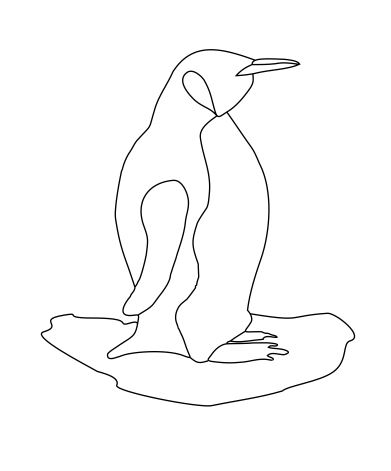
To start with I started looking at pictures and drawings of penguins on the internet. Google “penguin images”. I selected a couple of prototypical images and consulted with the customer about what was intended. The basic image was something like:

I use Corel Draw to develop images. In Corel it is pretty easy to trace over a bitmap image such as the one above to give a vector line drawing that can be scaled and edited. The customer commented on the drawing, and suggested some edits. The end result was:
Since the drawing is vector it can be scaled to fit the headstock.
The first step of actually doing the inlay is to pick out the pearl. While each individual inlay does not require a lot of pearl I like to have a pretty big selection so I can pick out pieces that fit what I am trying to do. In this case I wanted a black pearly body, with a slightly darker black pearl for the flipper which is mostly inlayed into the side. So get out the black pearl, and sort through the options:
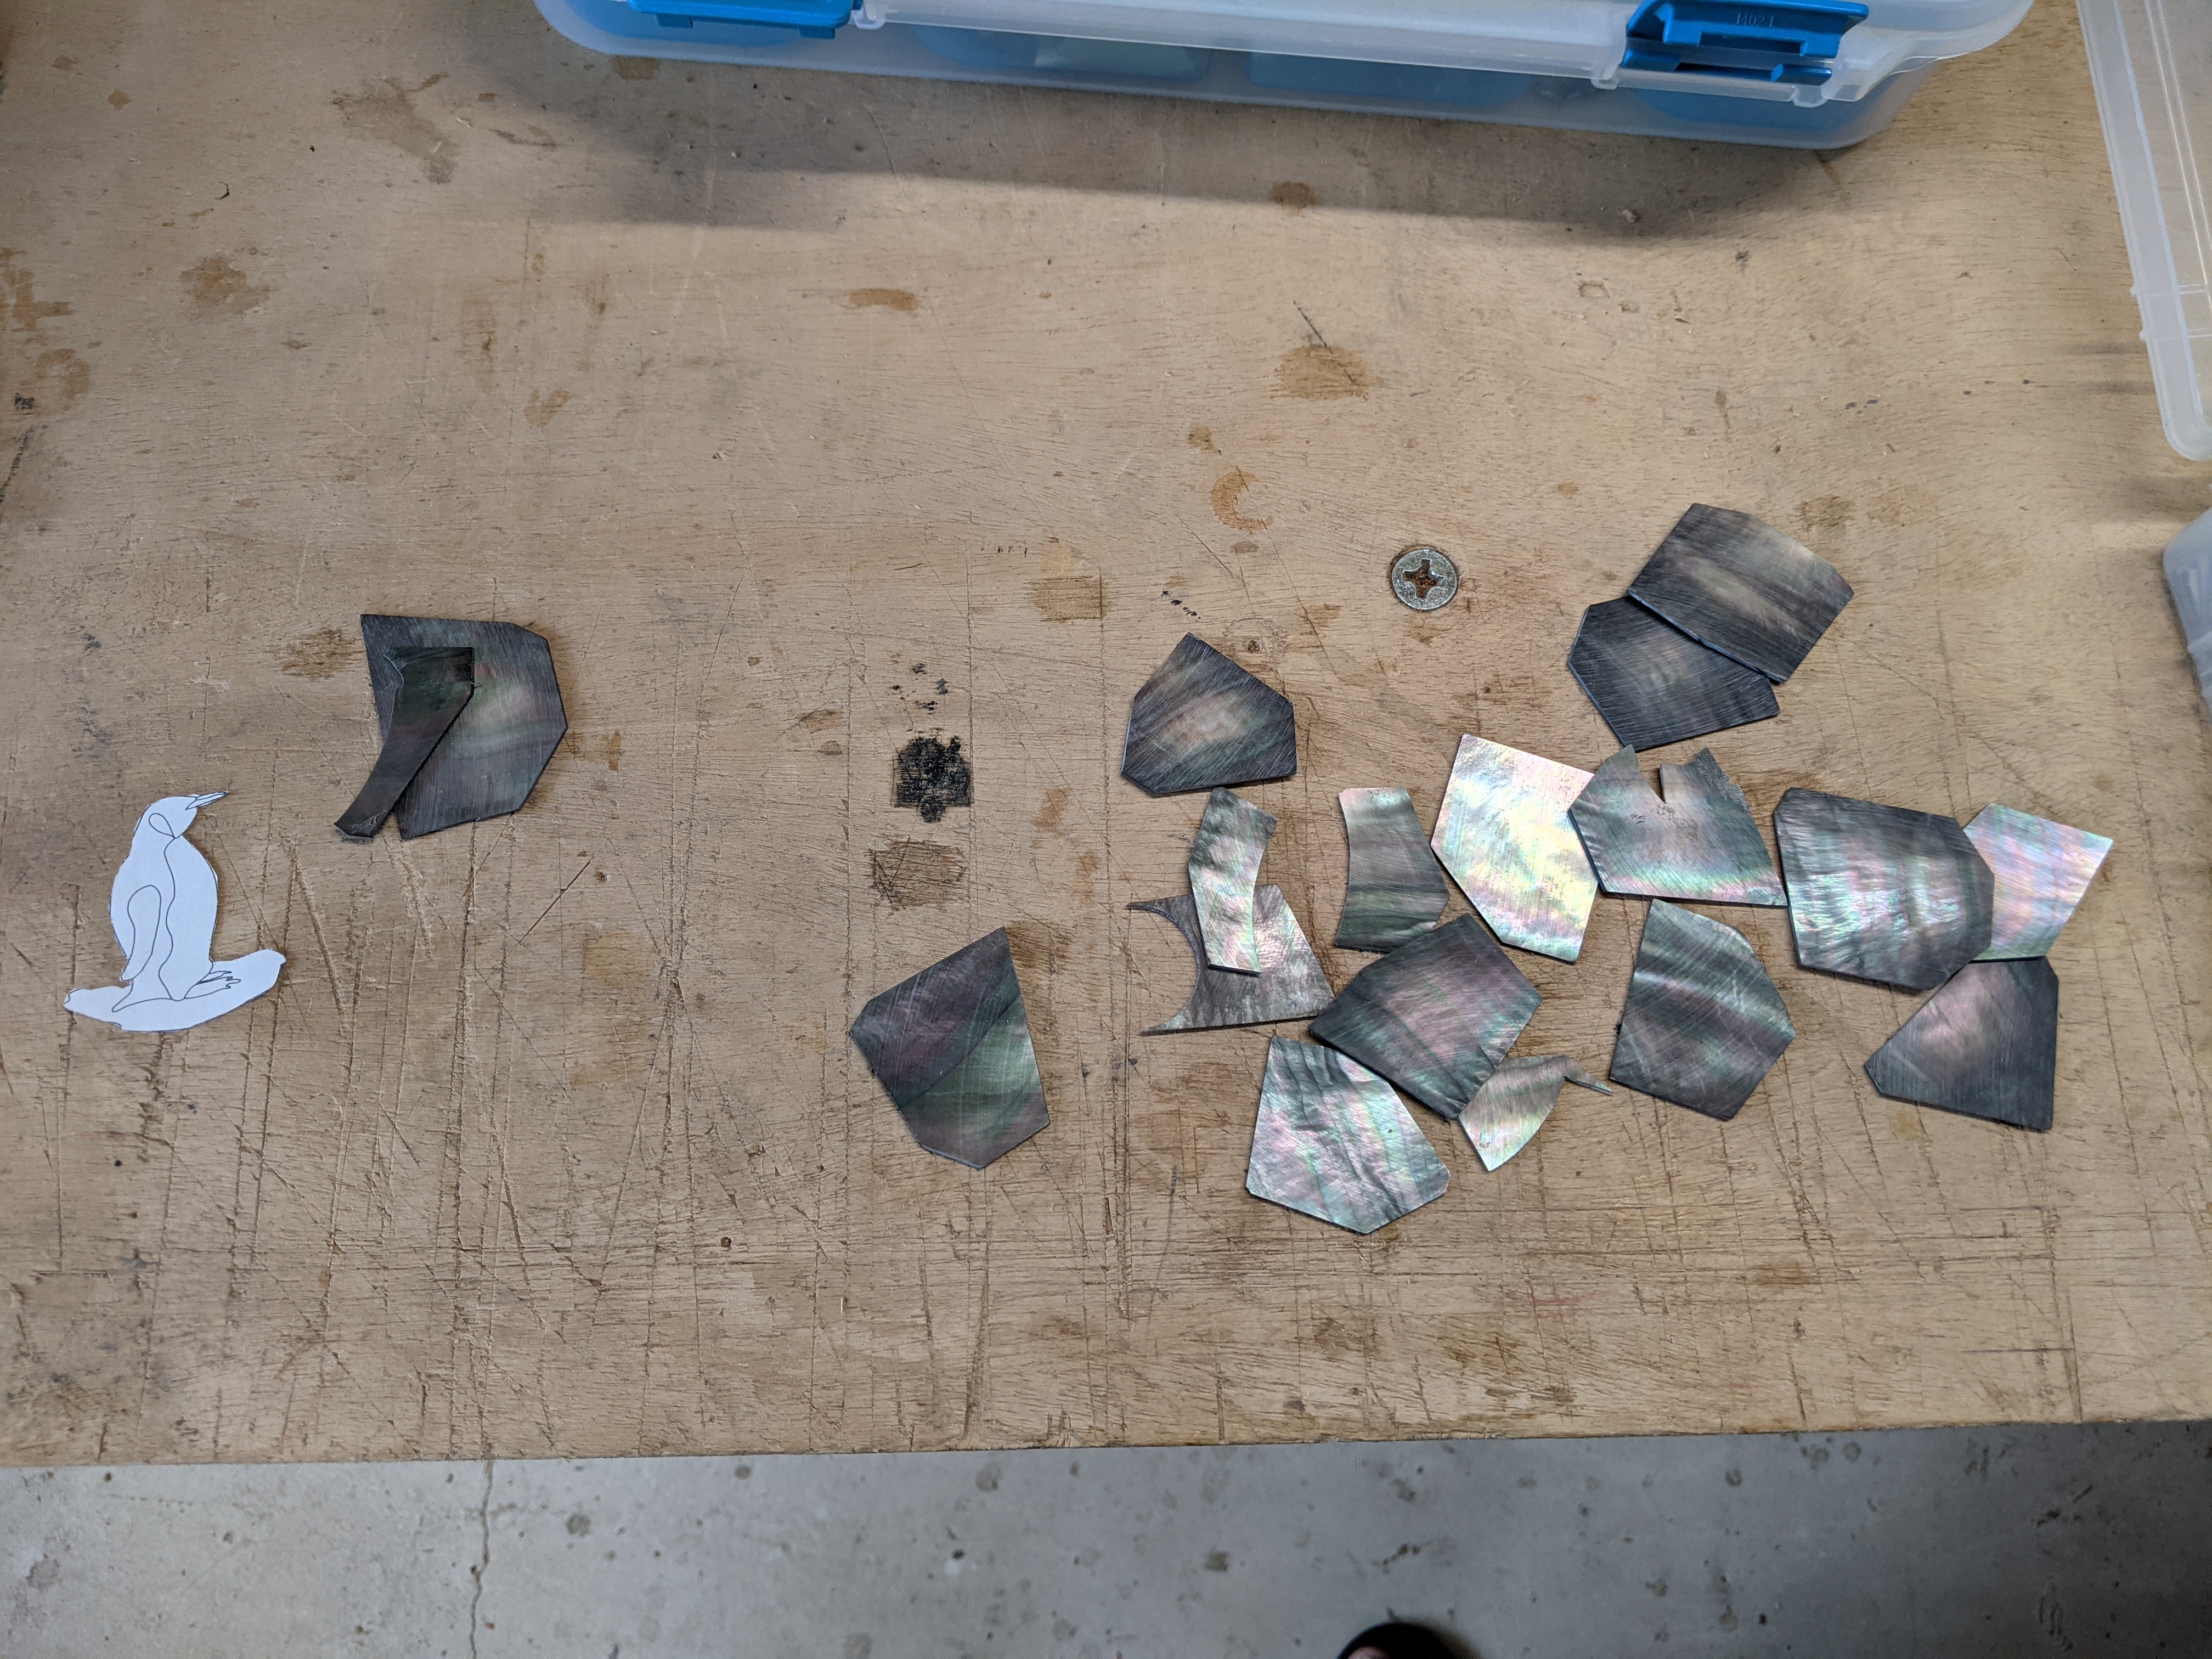
I found a piece which was big enough for the body, and a smaller darker piece for the flipper.
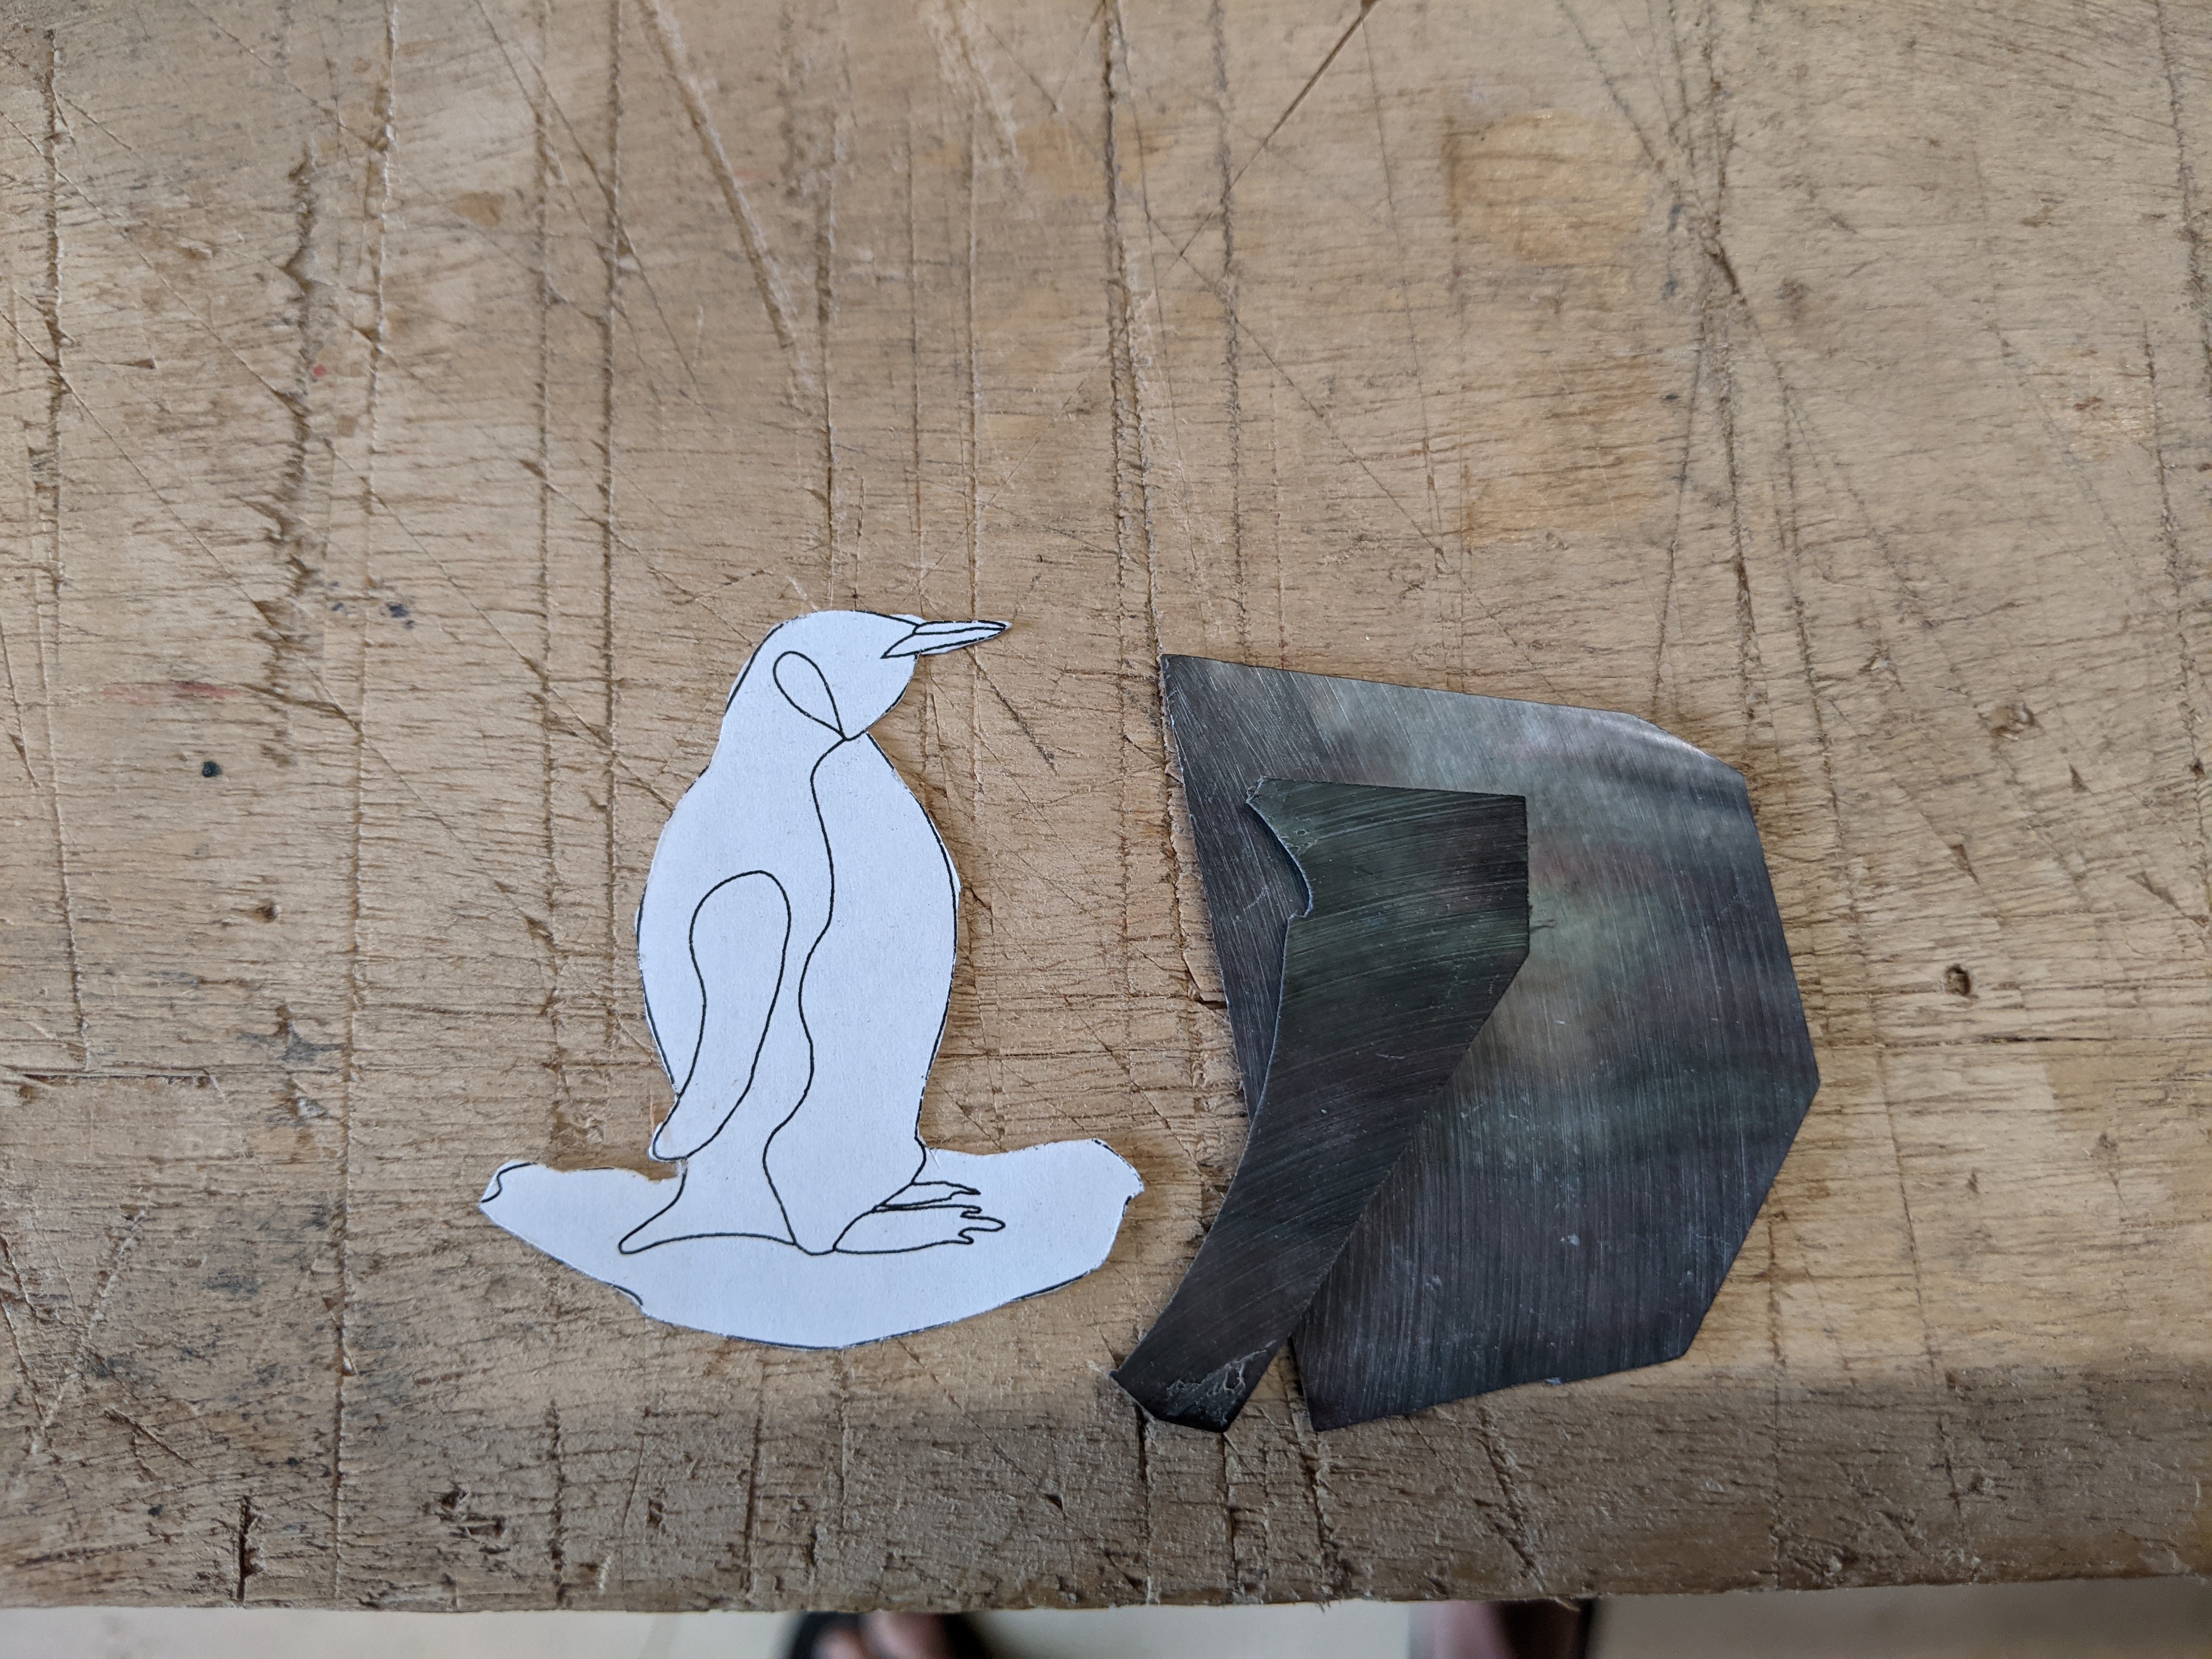
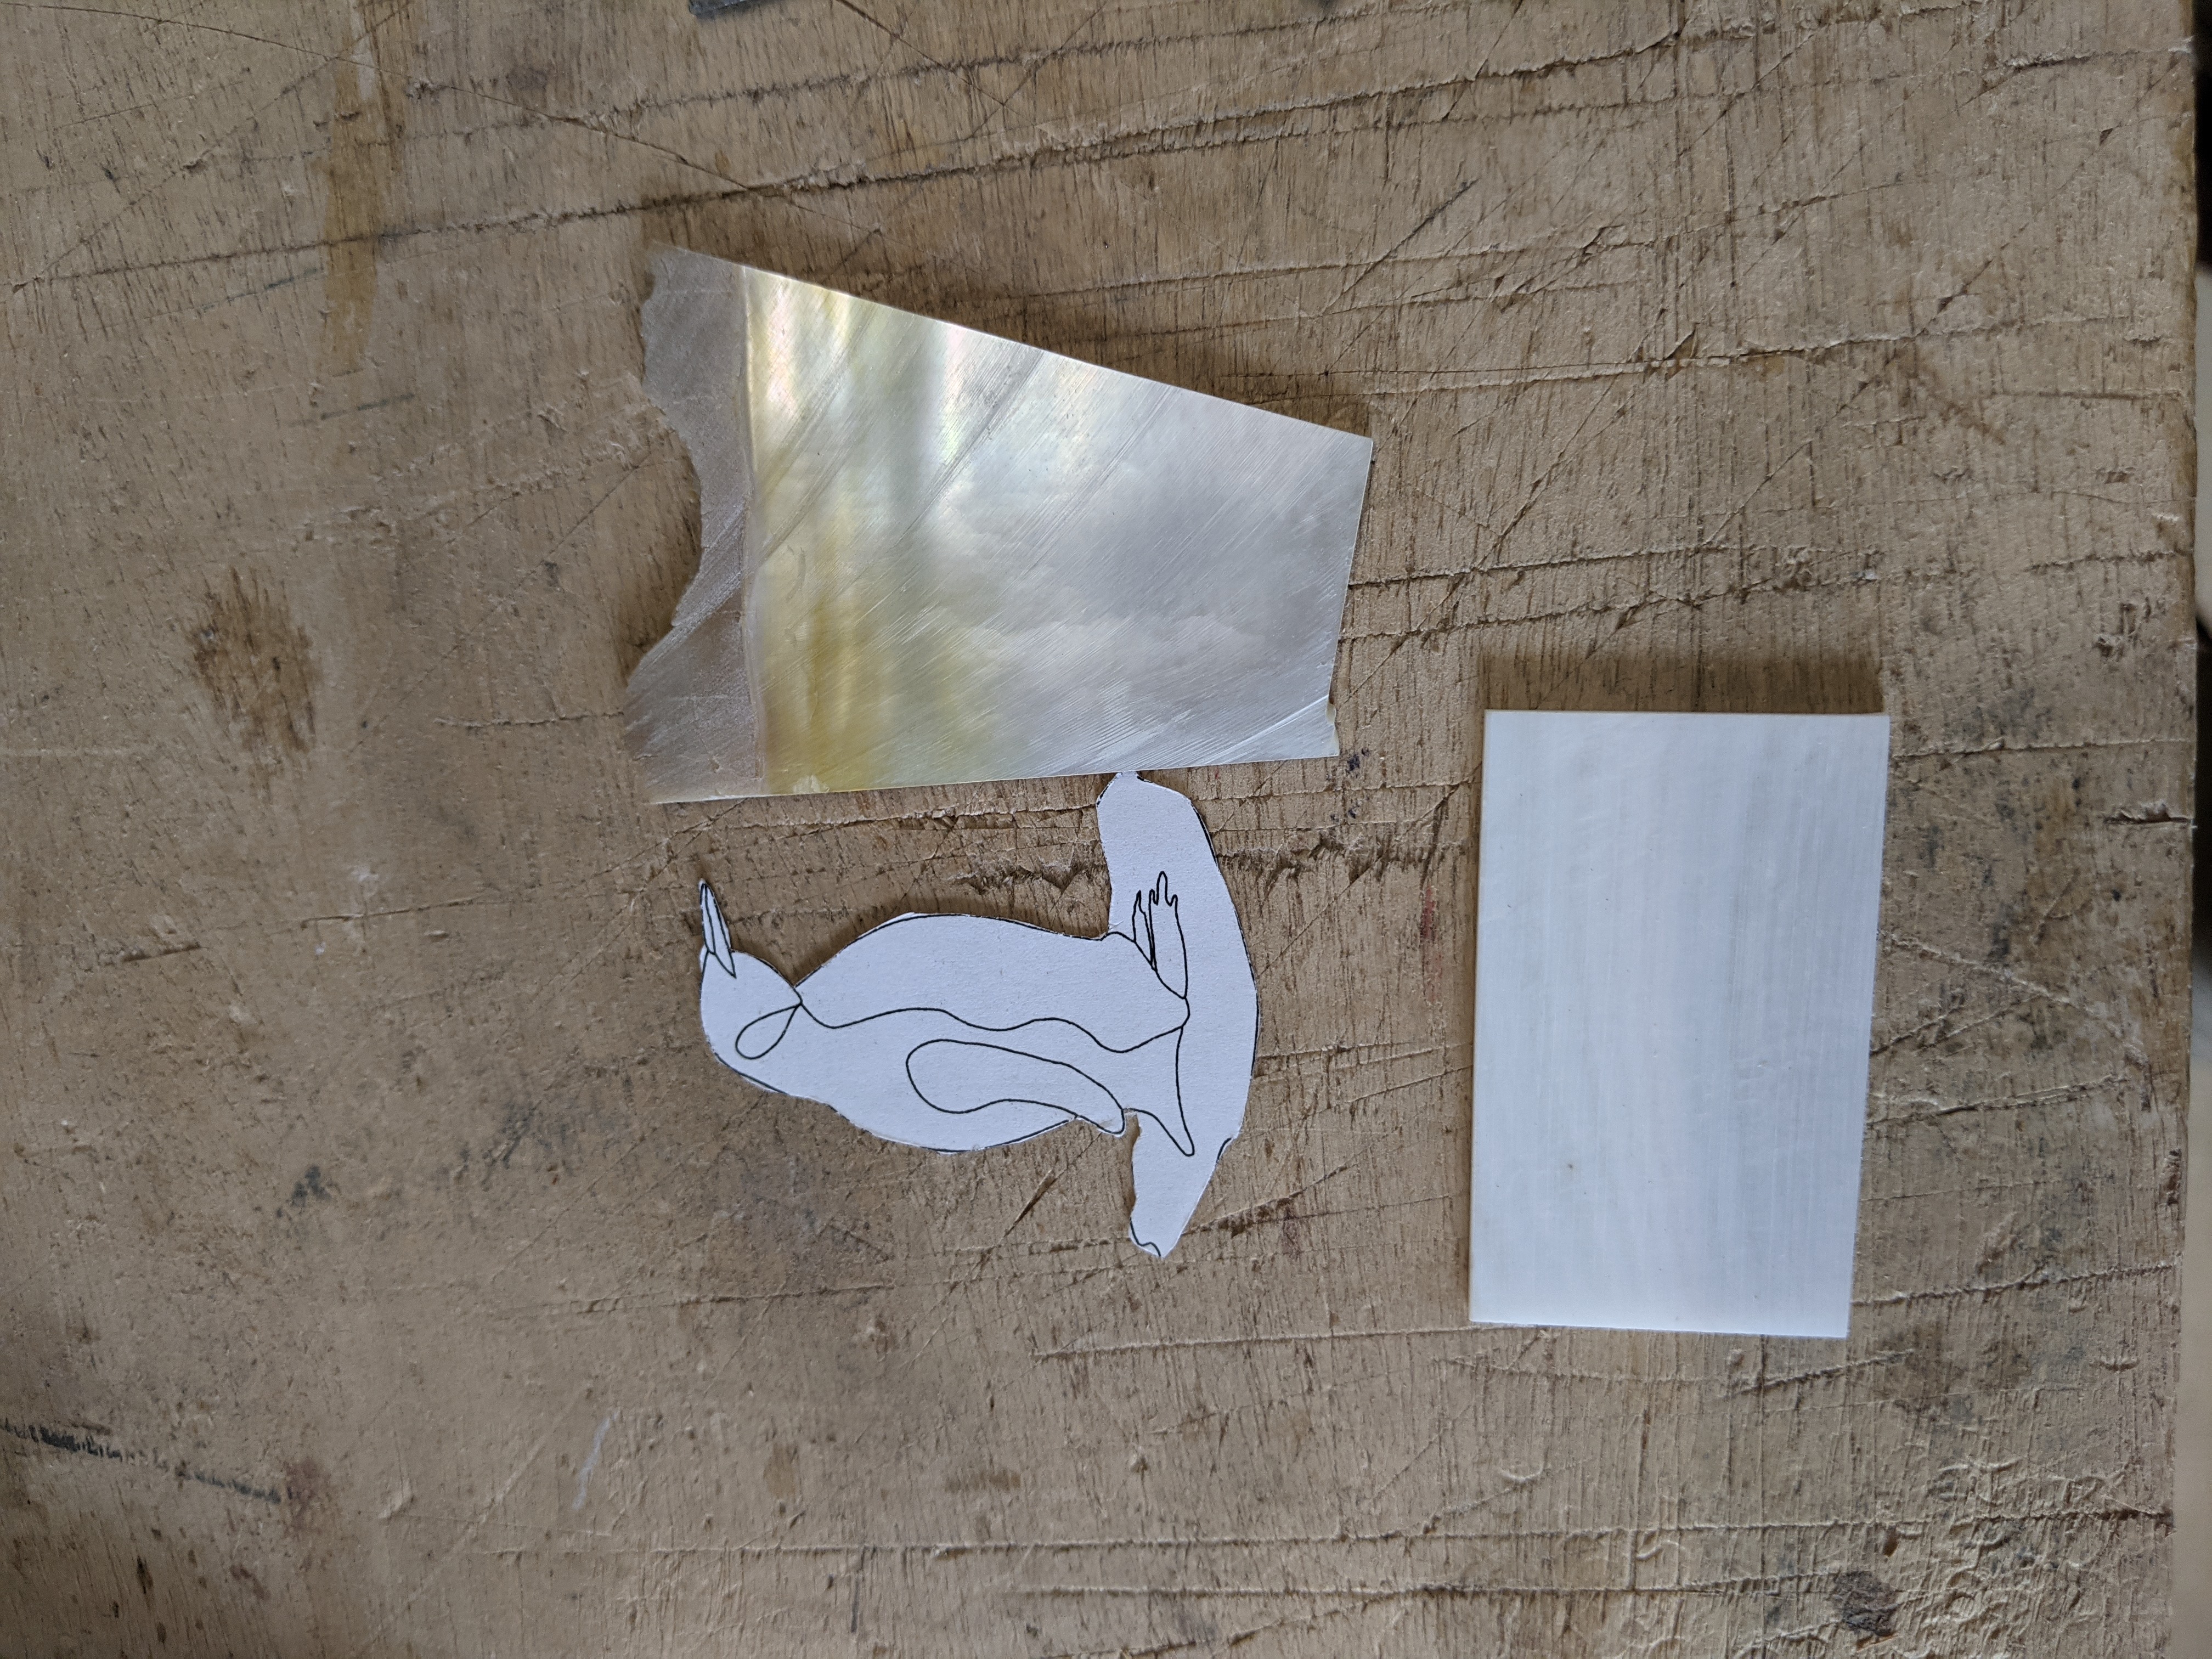
For the orange accents I have some orange recon-stone. The breast area is white, with the upper part being yellow. I have some white pearl I cut a long time ago from some shells my father brought back from the south Pacific. These shells have a yellow/gold lip area. I selected a piece that would allow me to have a yellow ‘chin’ fading to white towards the feel. For the ice on which the penguin is standing I have some freshwater mussel pearl which is very white and has a certain texture, perfect for ice.
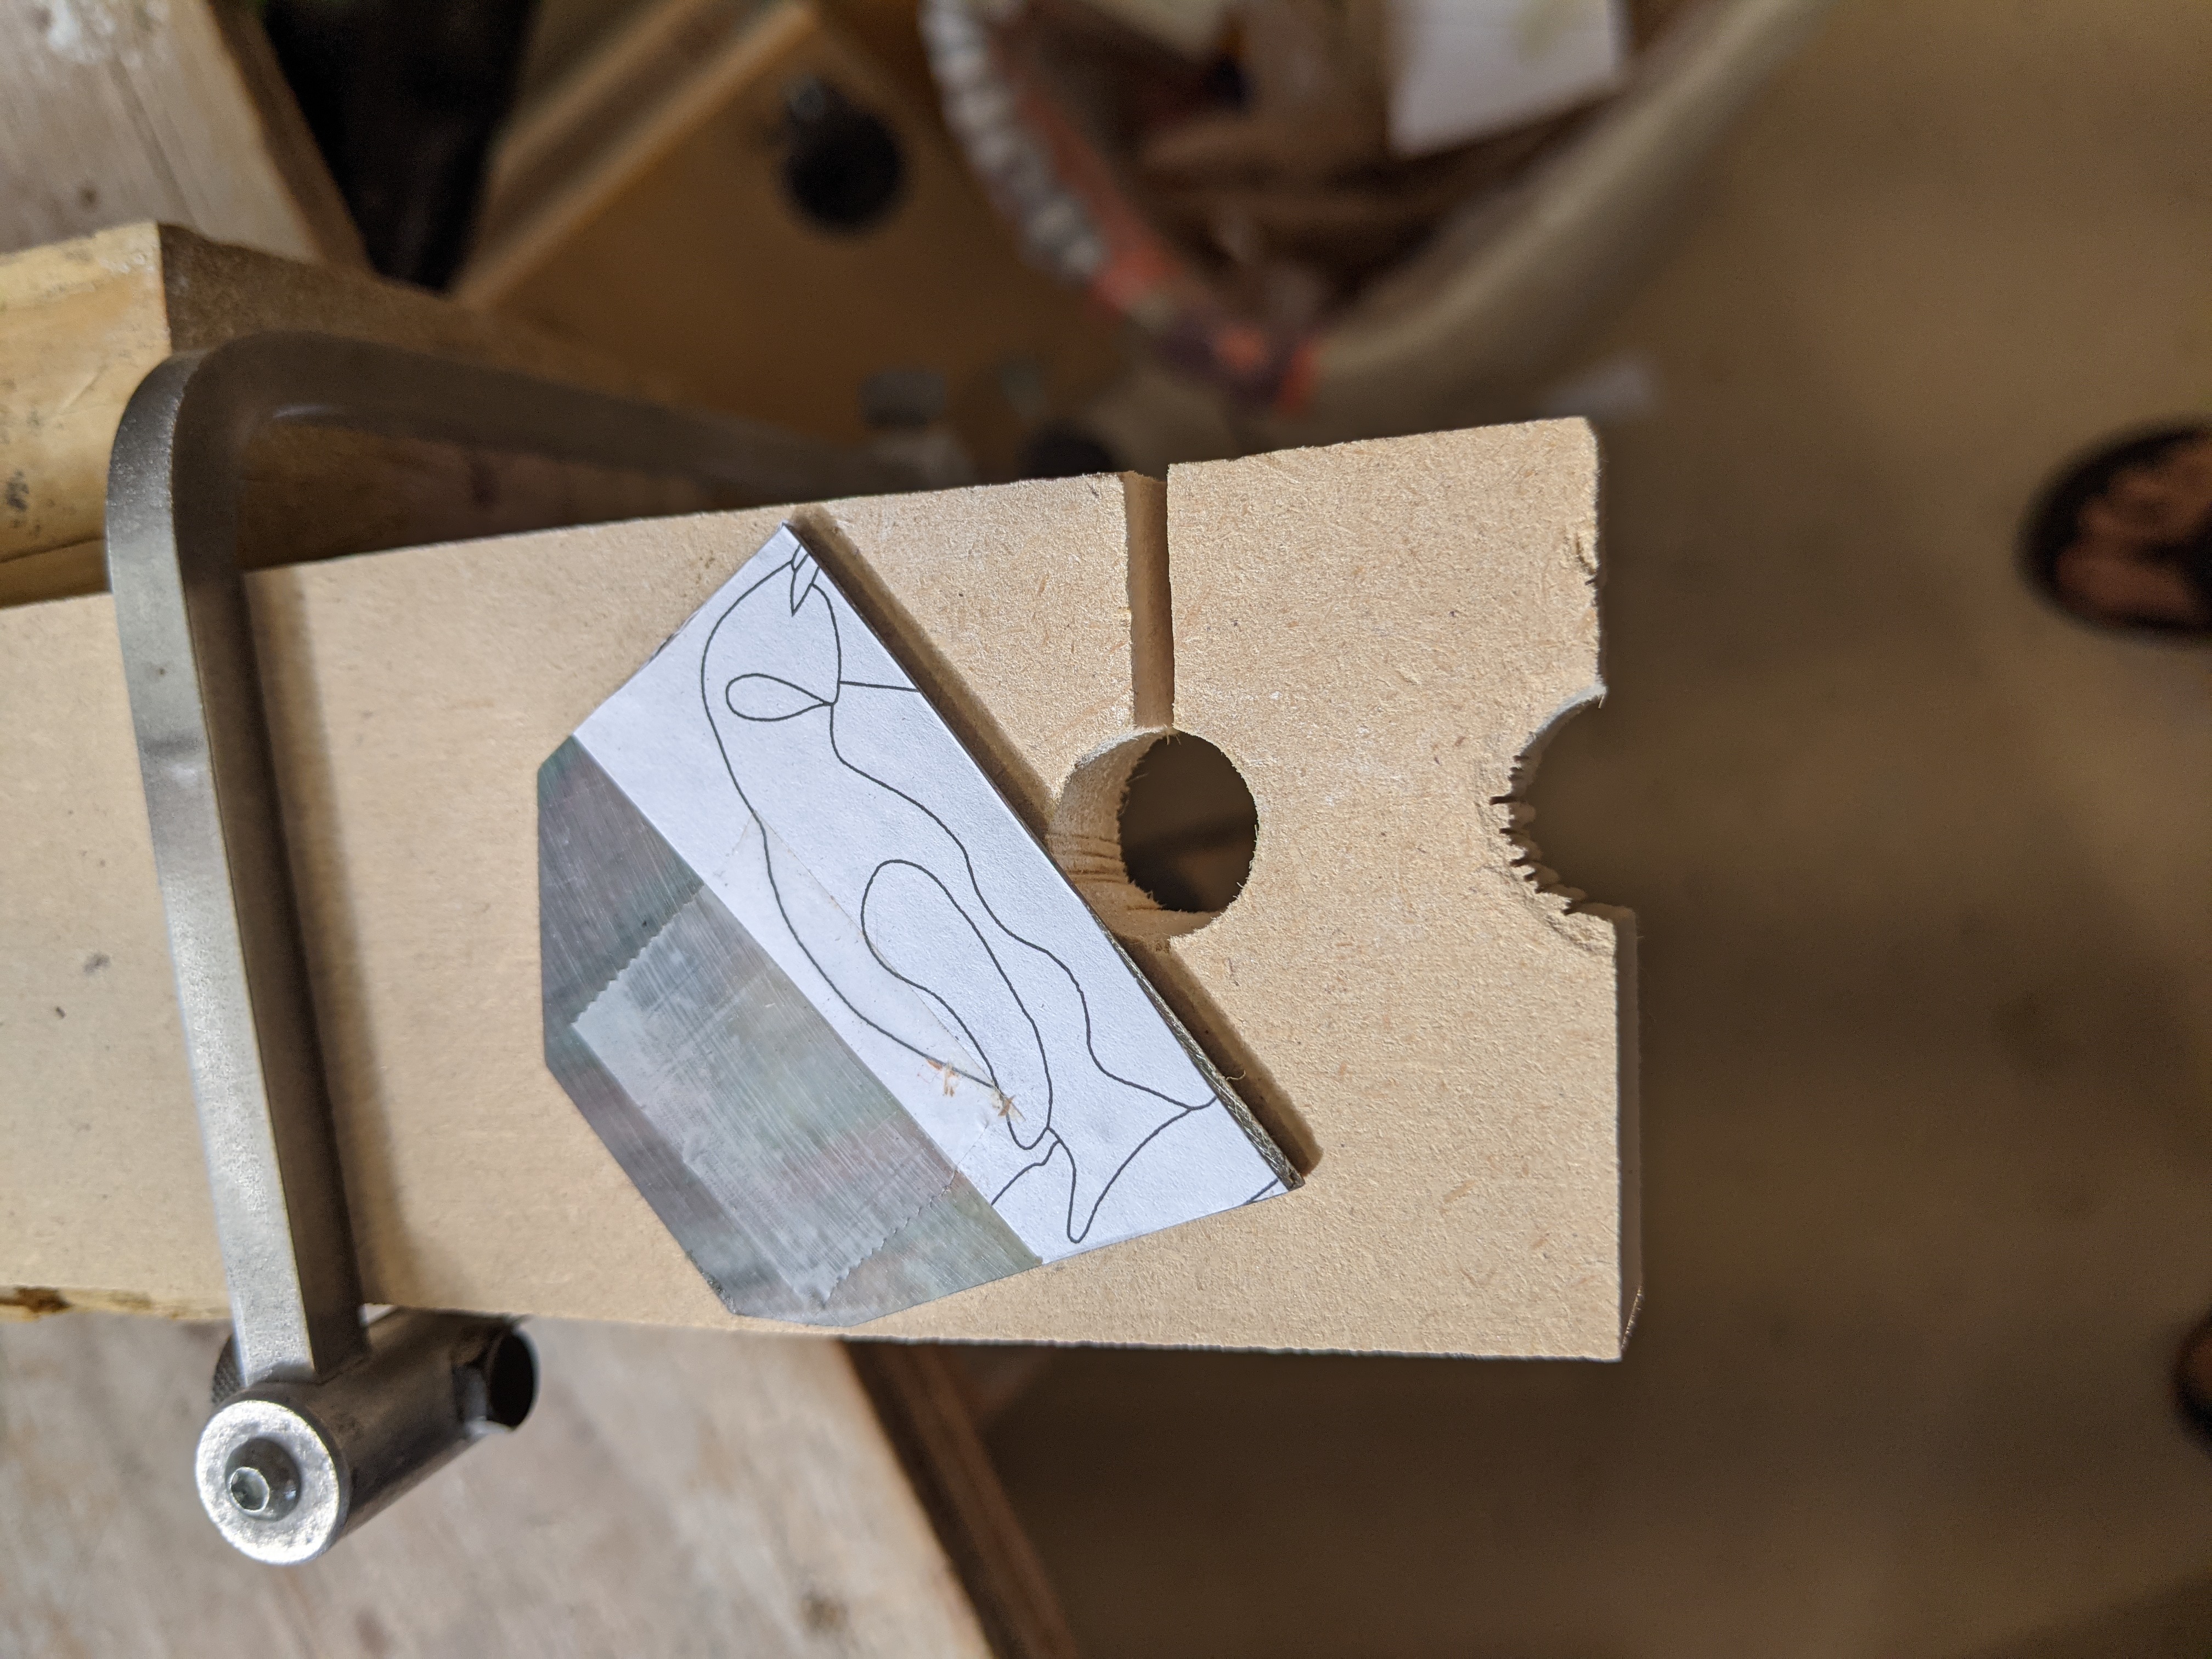
I print out multiple copies of the drawing, and then glue them down to the pearl with rubber cement. To glue it down in just the right place I hold the pattern against the pearl and put on a bit of a scotch tape hinge. Then I can coat things with rubber cement and fold the hinge down with the pattern just where I want it.

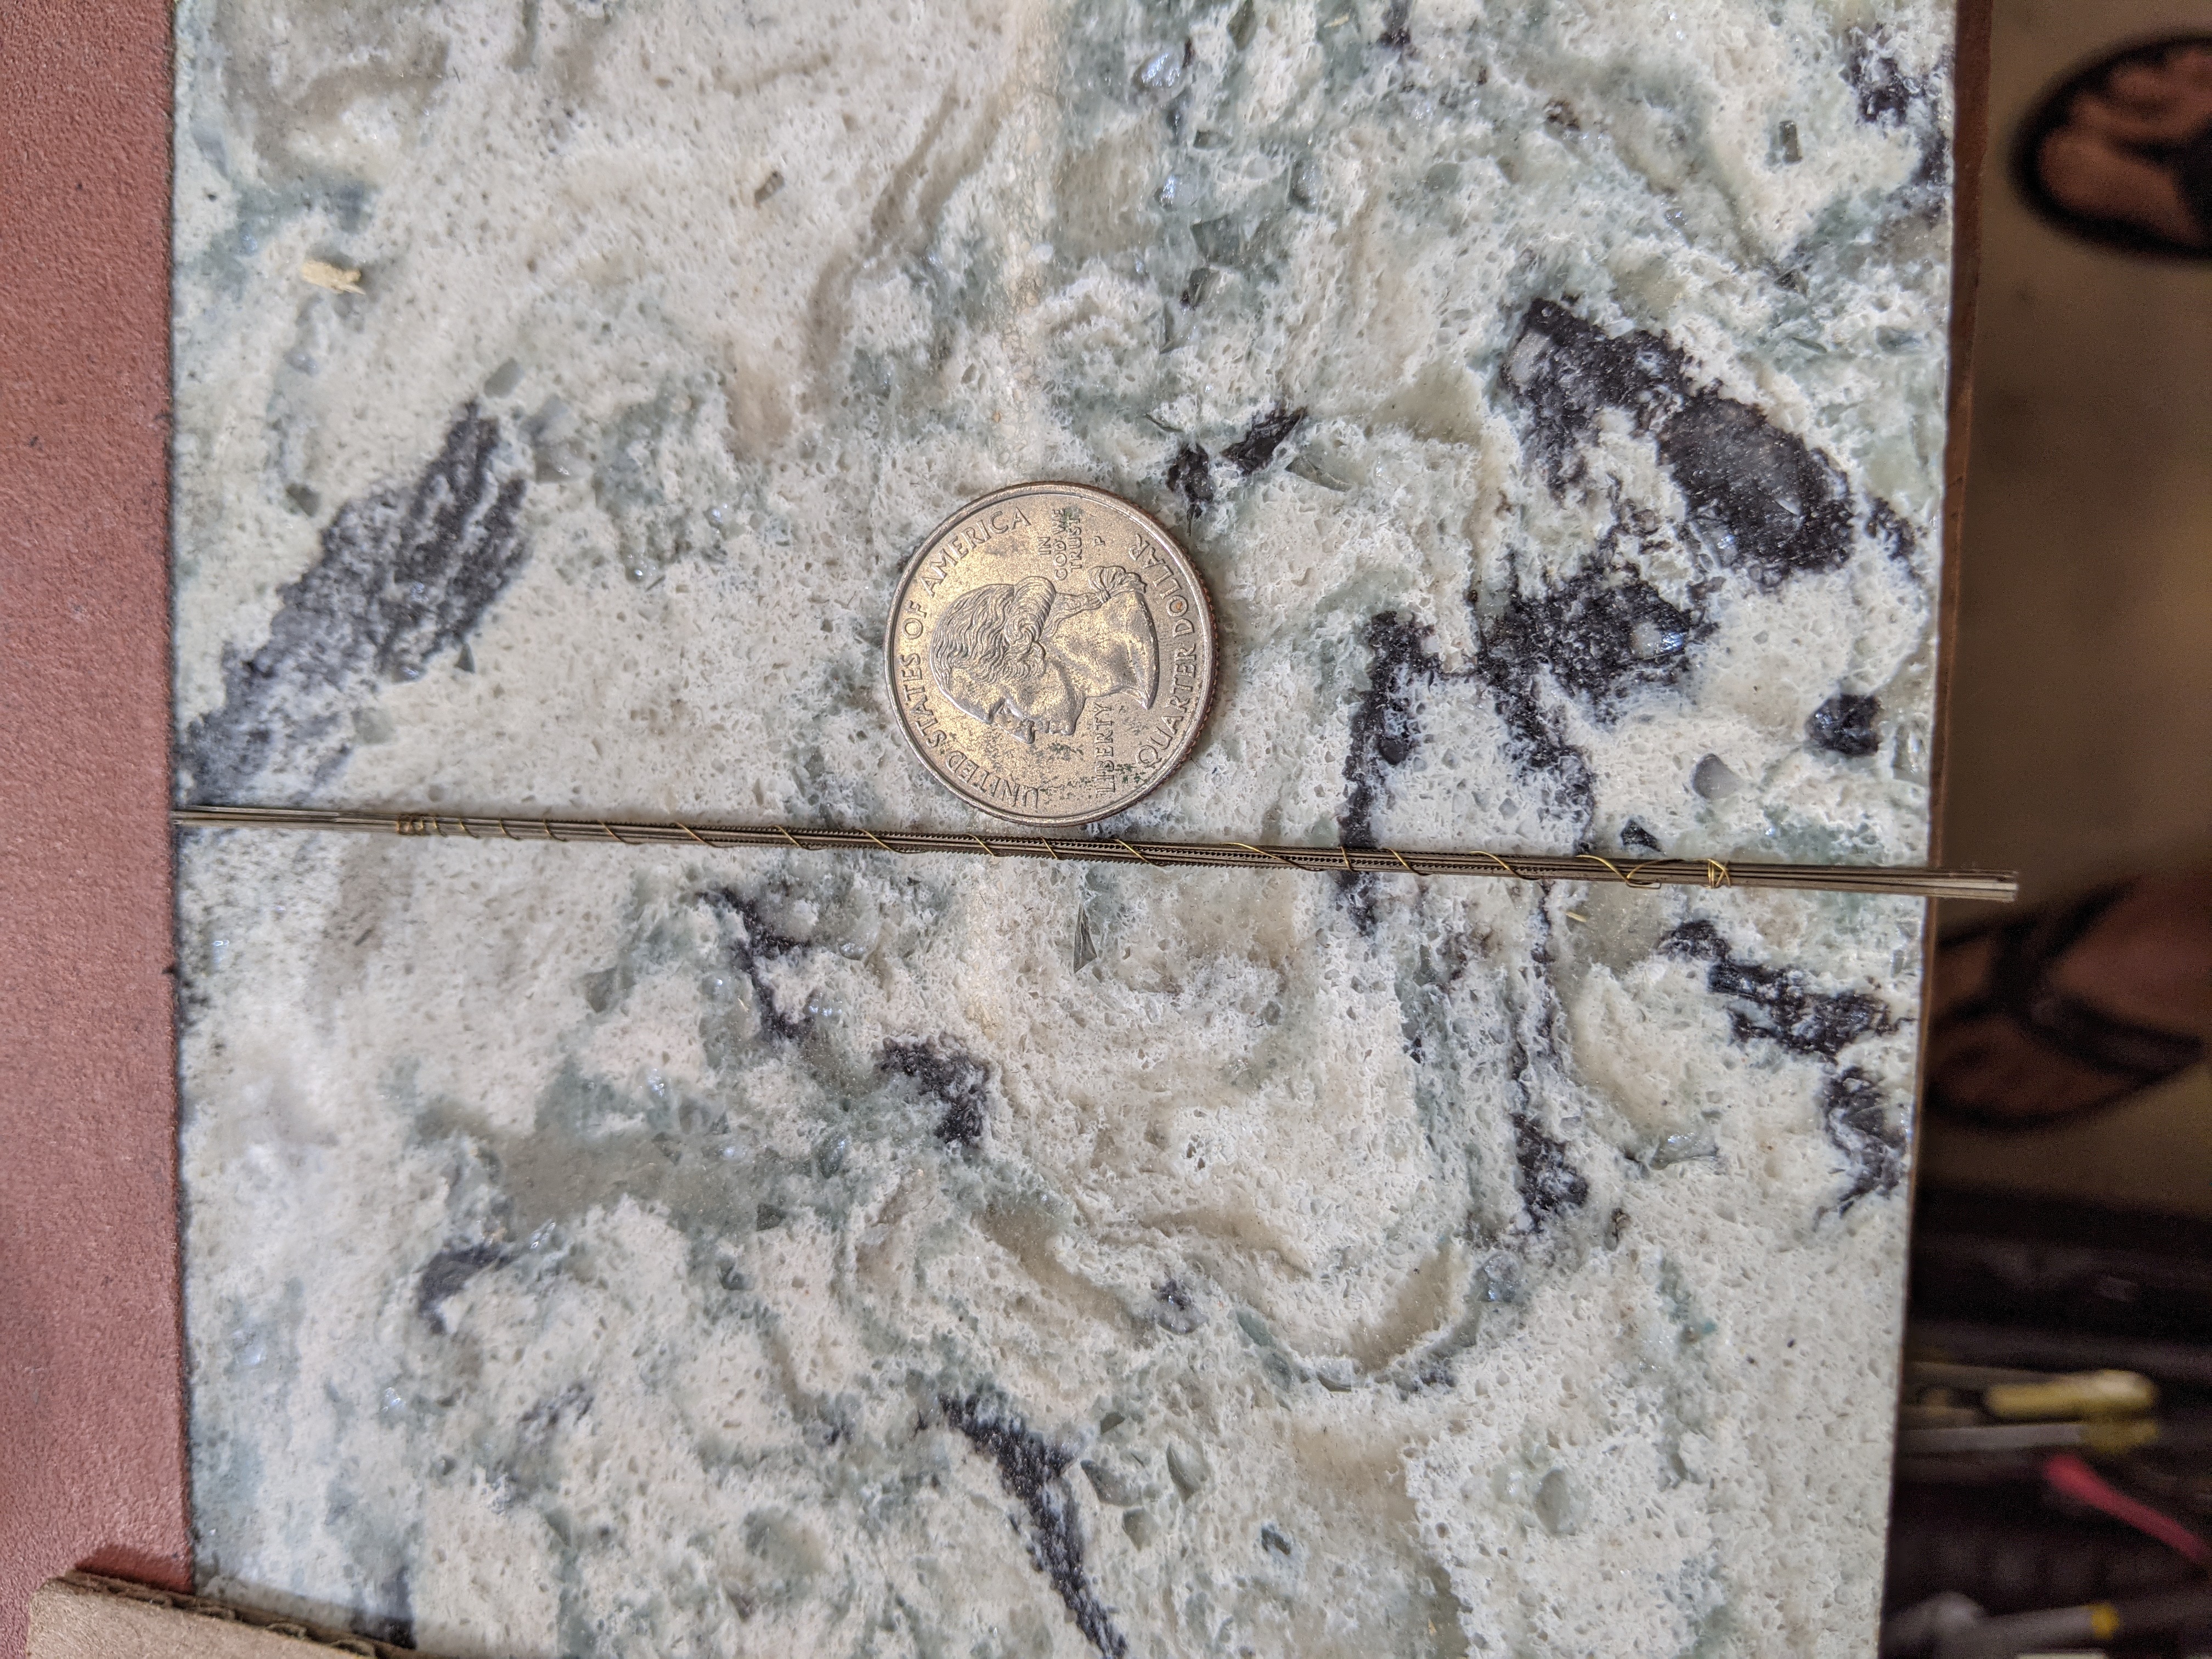
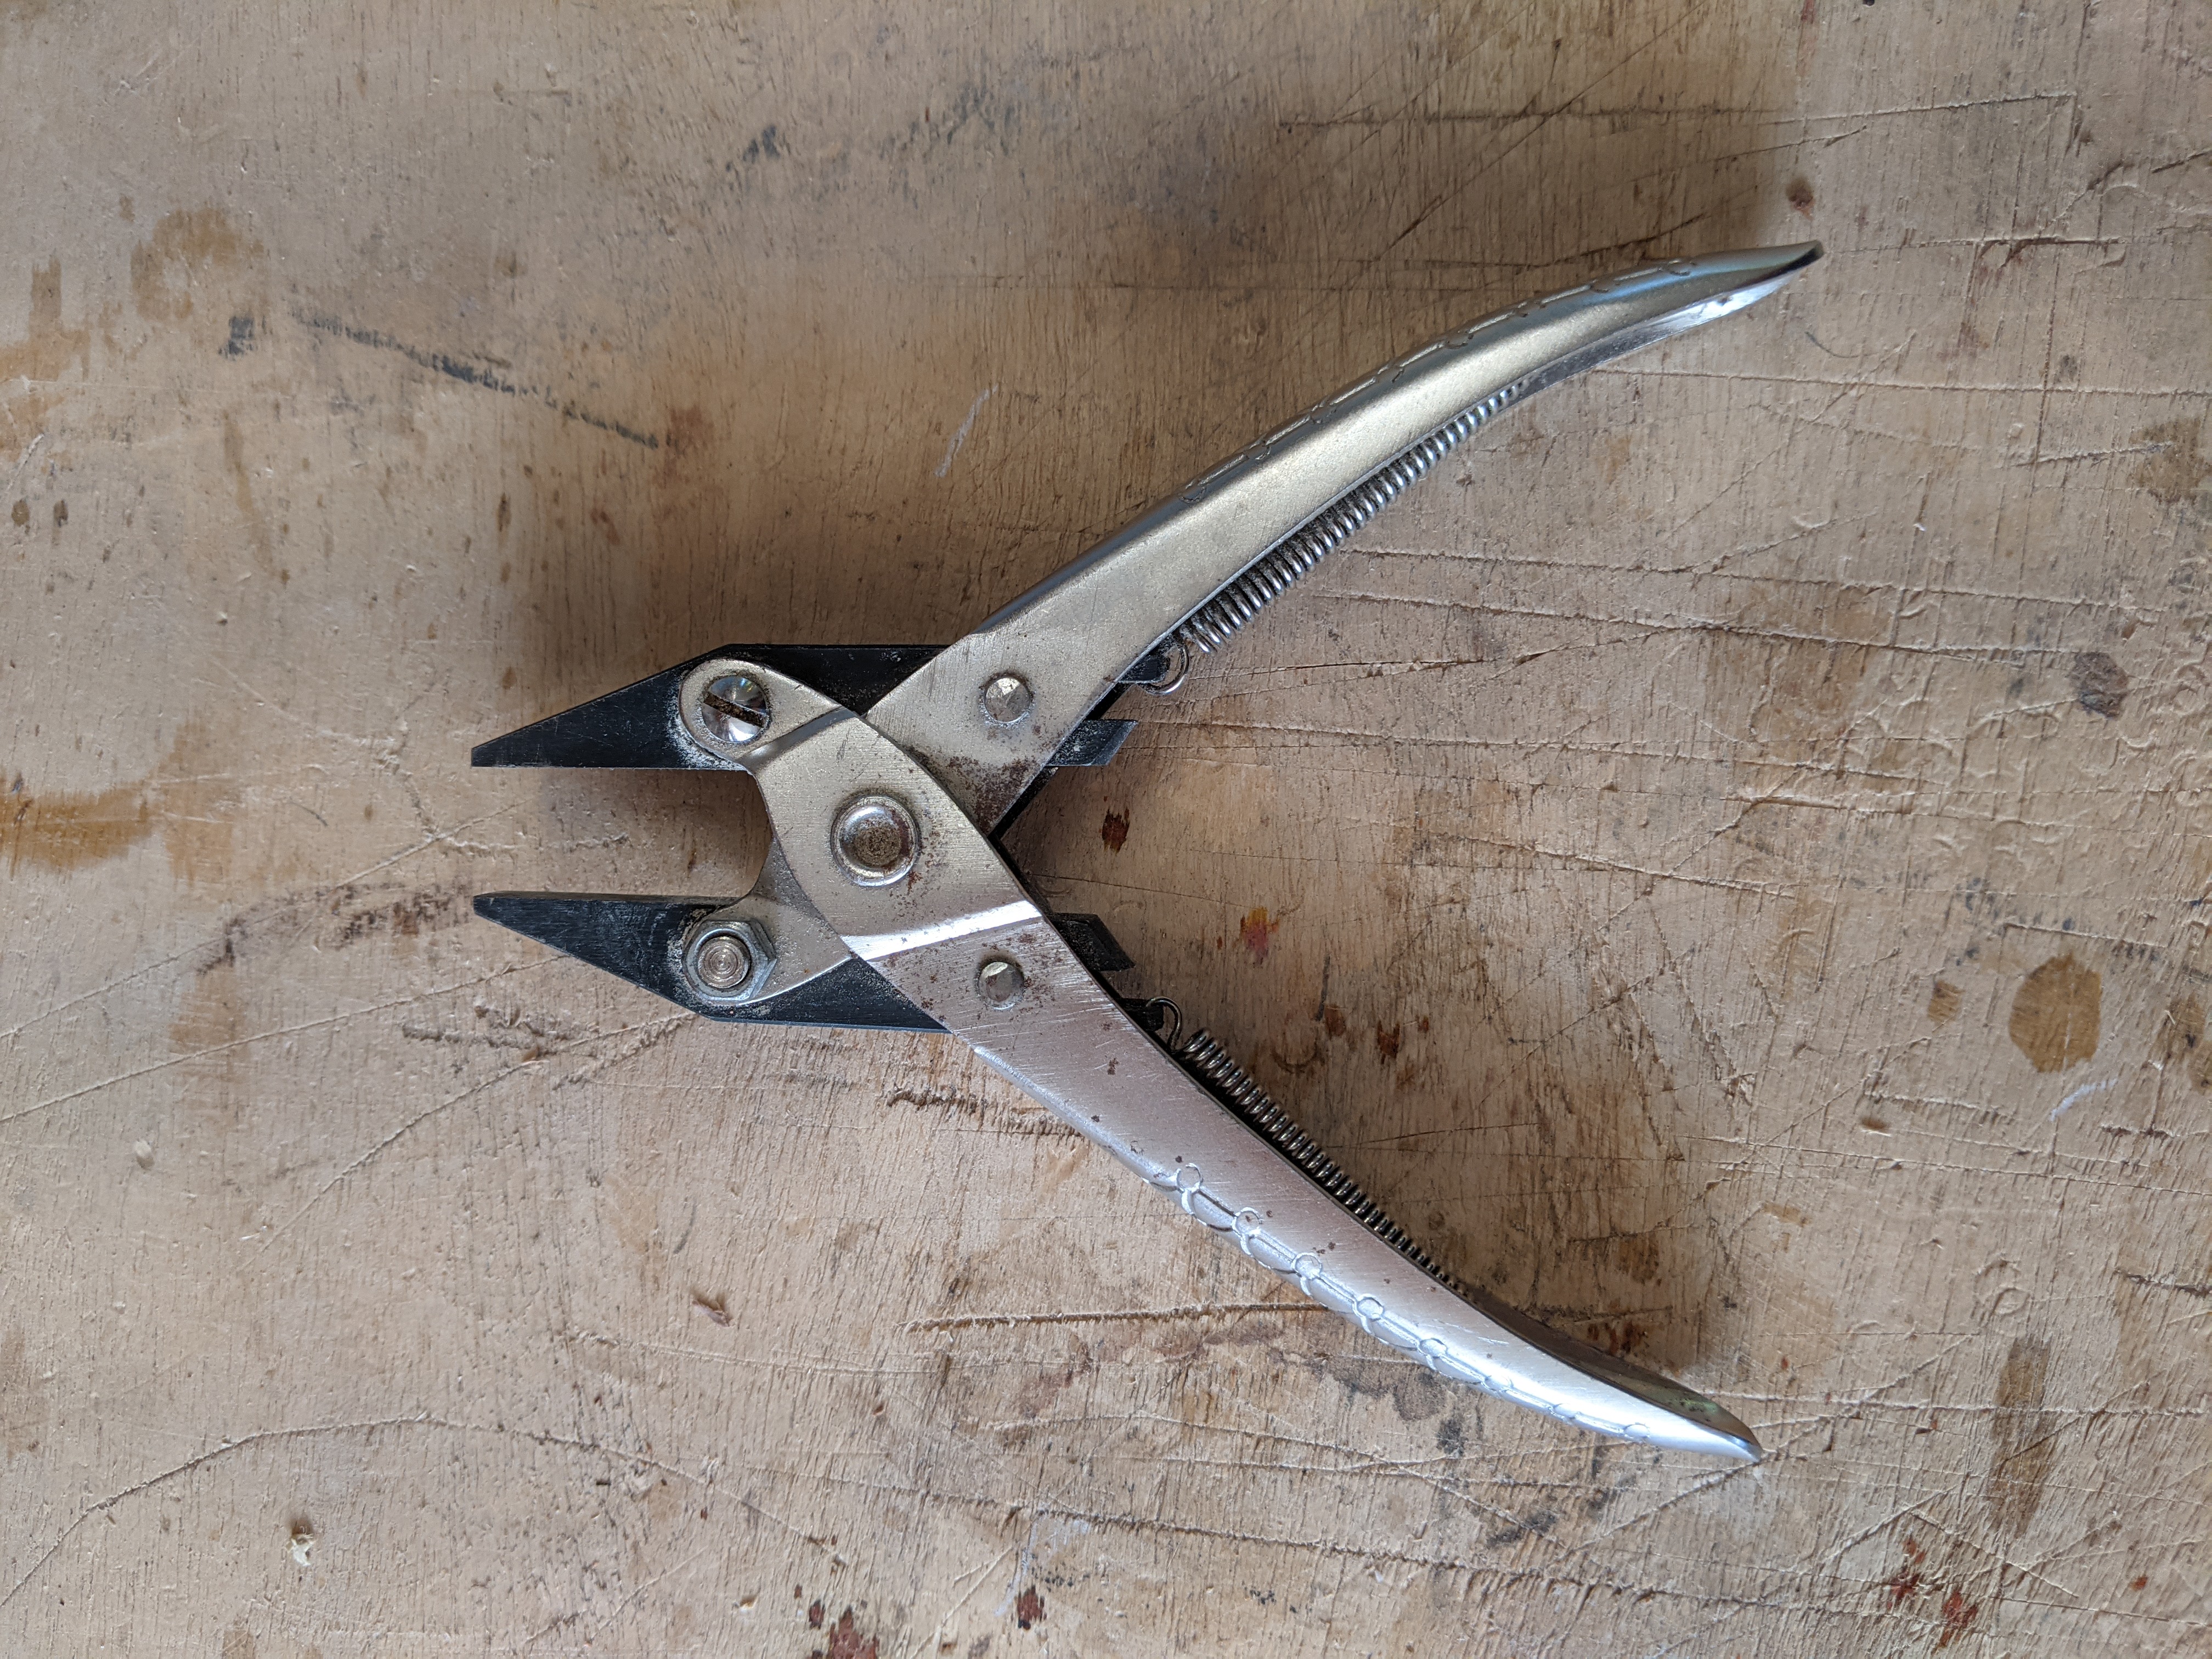
The pearl is cut out with a jewelers saw, using jewelers saw blades. These blades are very fine. Here is a bundle of 12 blades of size 4/0. The sizes go all the way down to 8/0 which is like a hair. The blades wear out pretty quickly but allow a very precise cut, basically the width of the lines in the pattern.
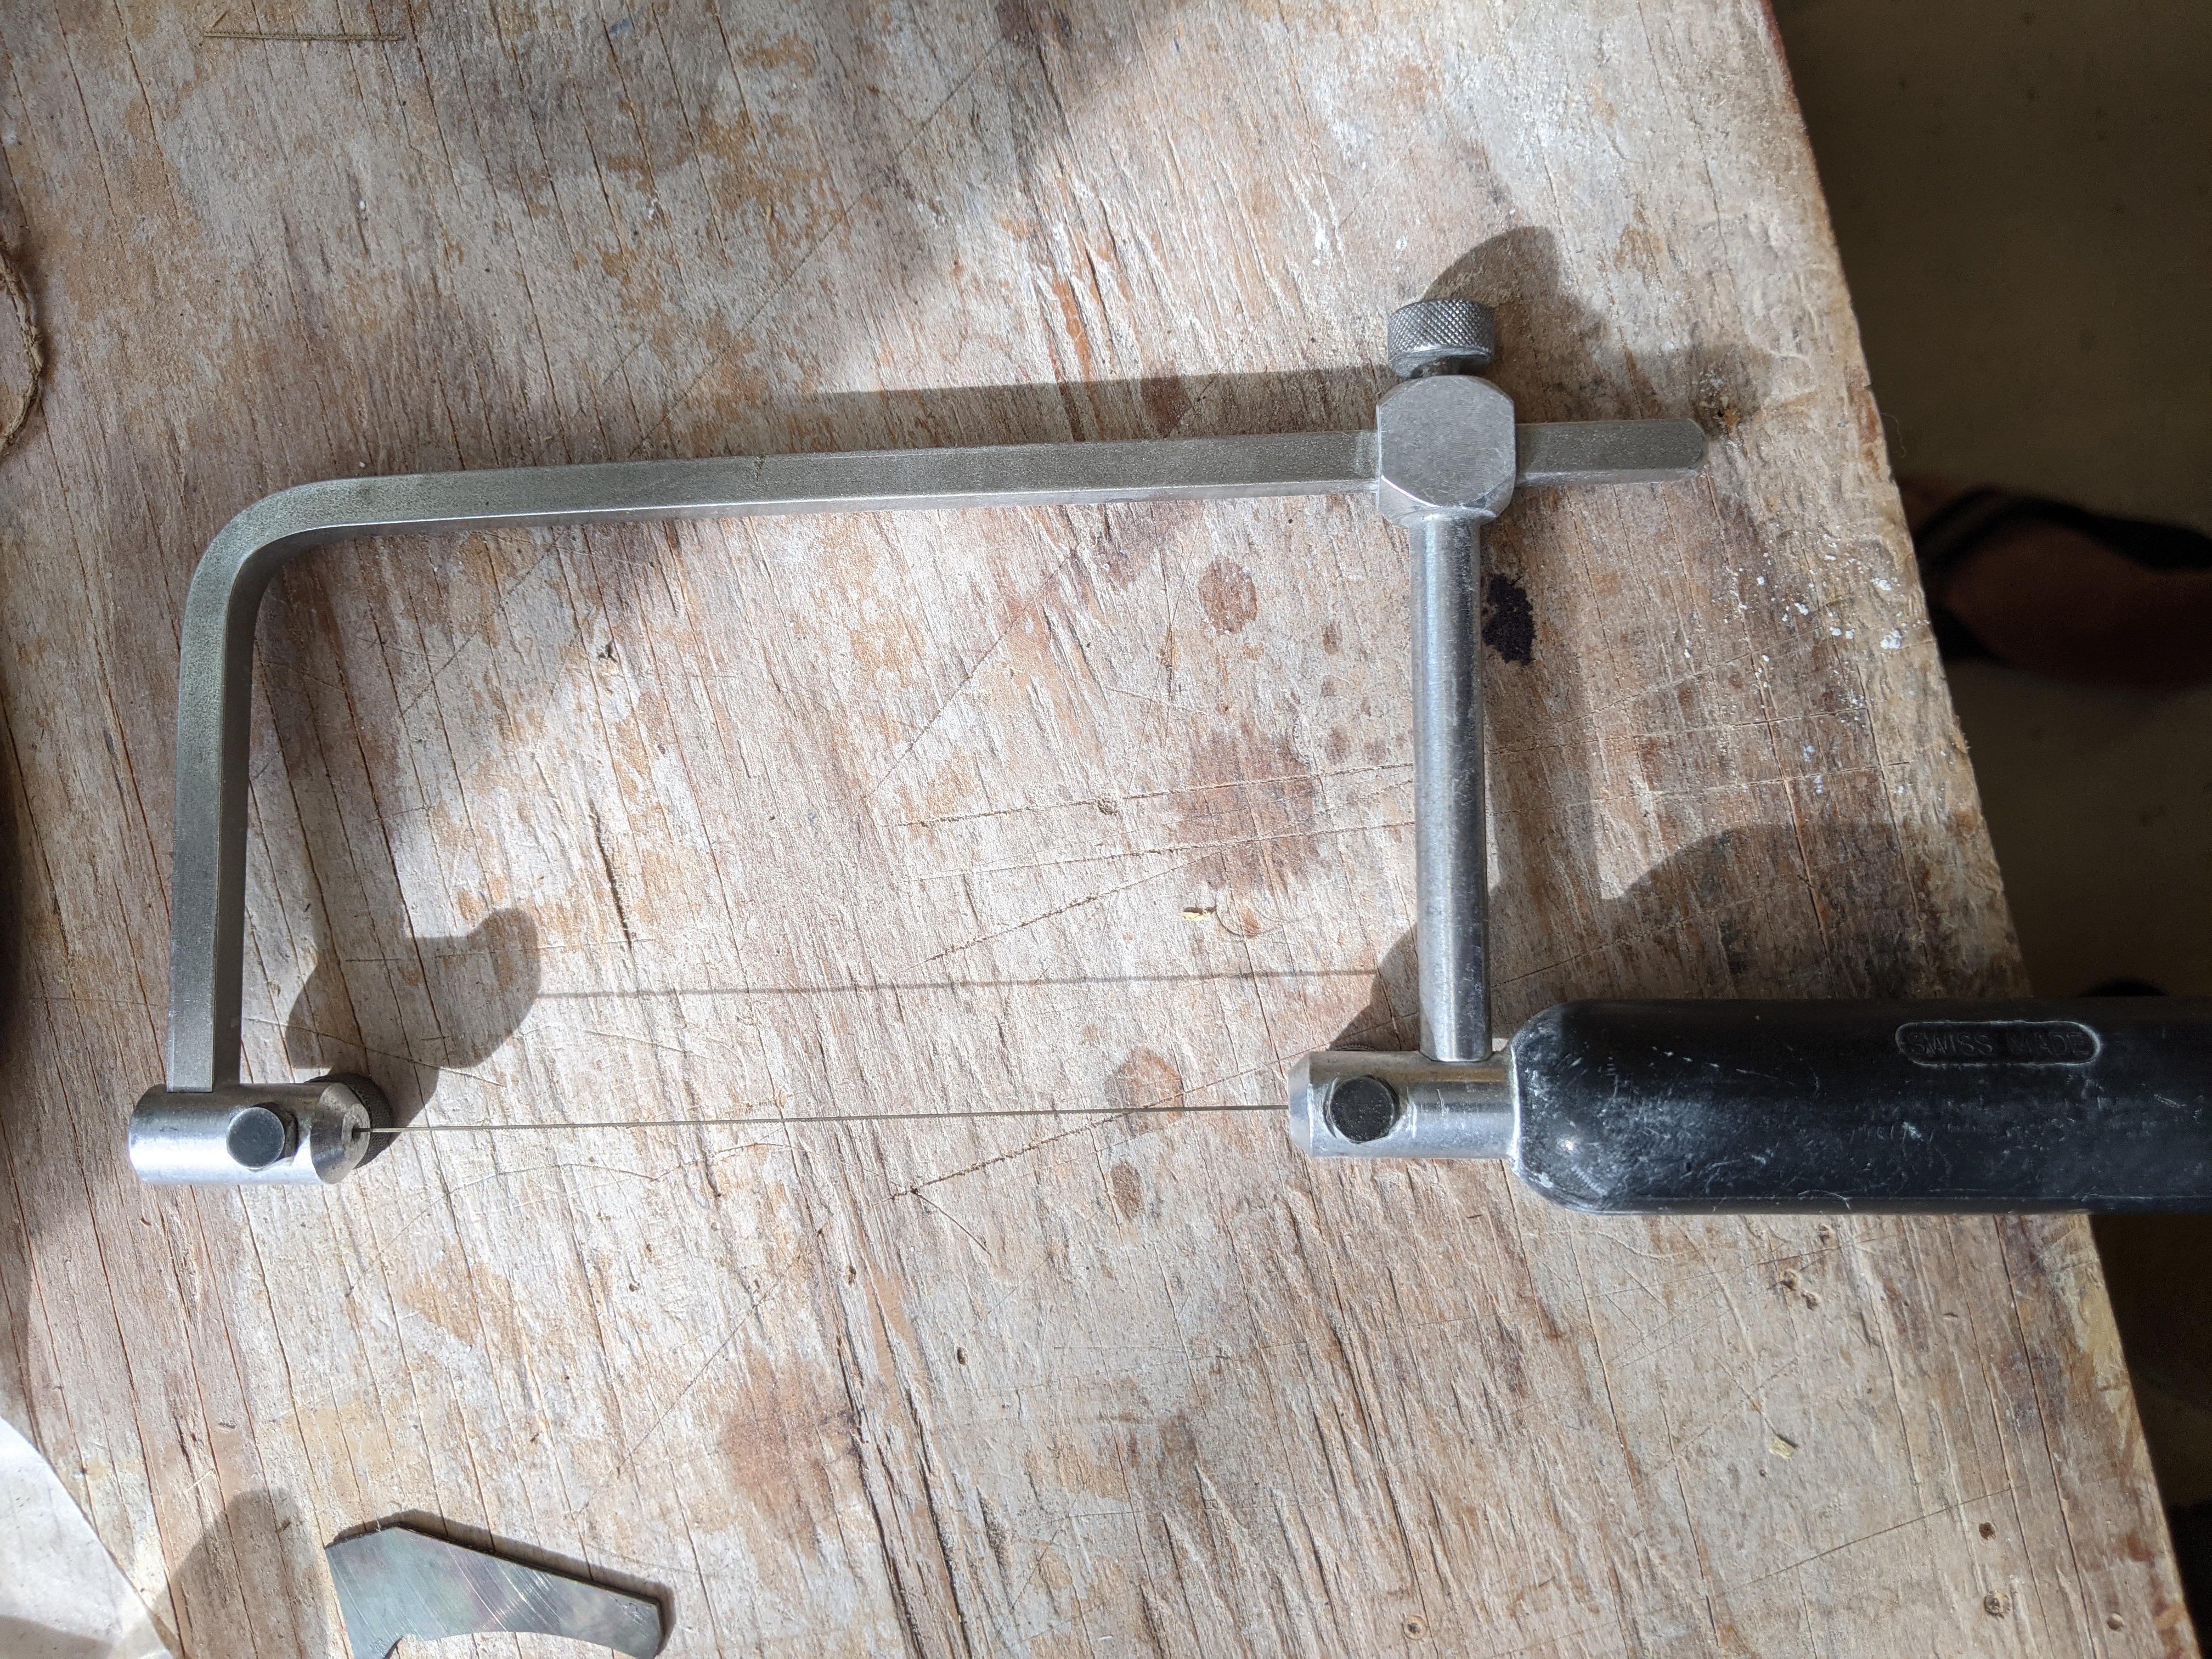
The pearl is supported on a small board with a hole in it and the saw is held vertically. One carefully cuts out the pattern. I try to work from the ‘inside’ of the overall inlay to the ‘outside’ so the first piece is the black body. To help handle small pieces when fitting them into the inlay by fining the edges I have some parallel jaw pliers. The jaws of these remain parallel as they are closed so they grip flat little pieces of pearl well.
Once the body is cut out the orange cheek piece is cut and fit and then the flipper is cut and fit. These are glued into the body with CA glue. Then the breast section is cut out and fitted to the edge of the body. So the intermediate work looks like:
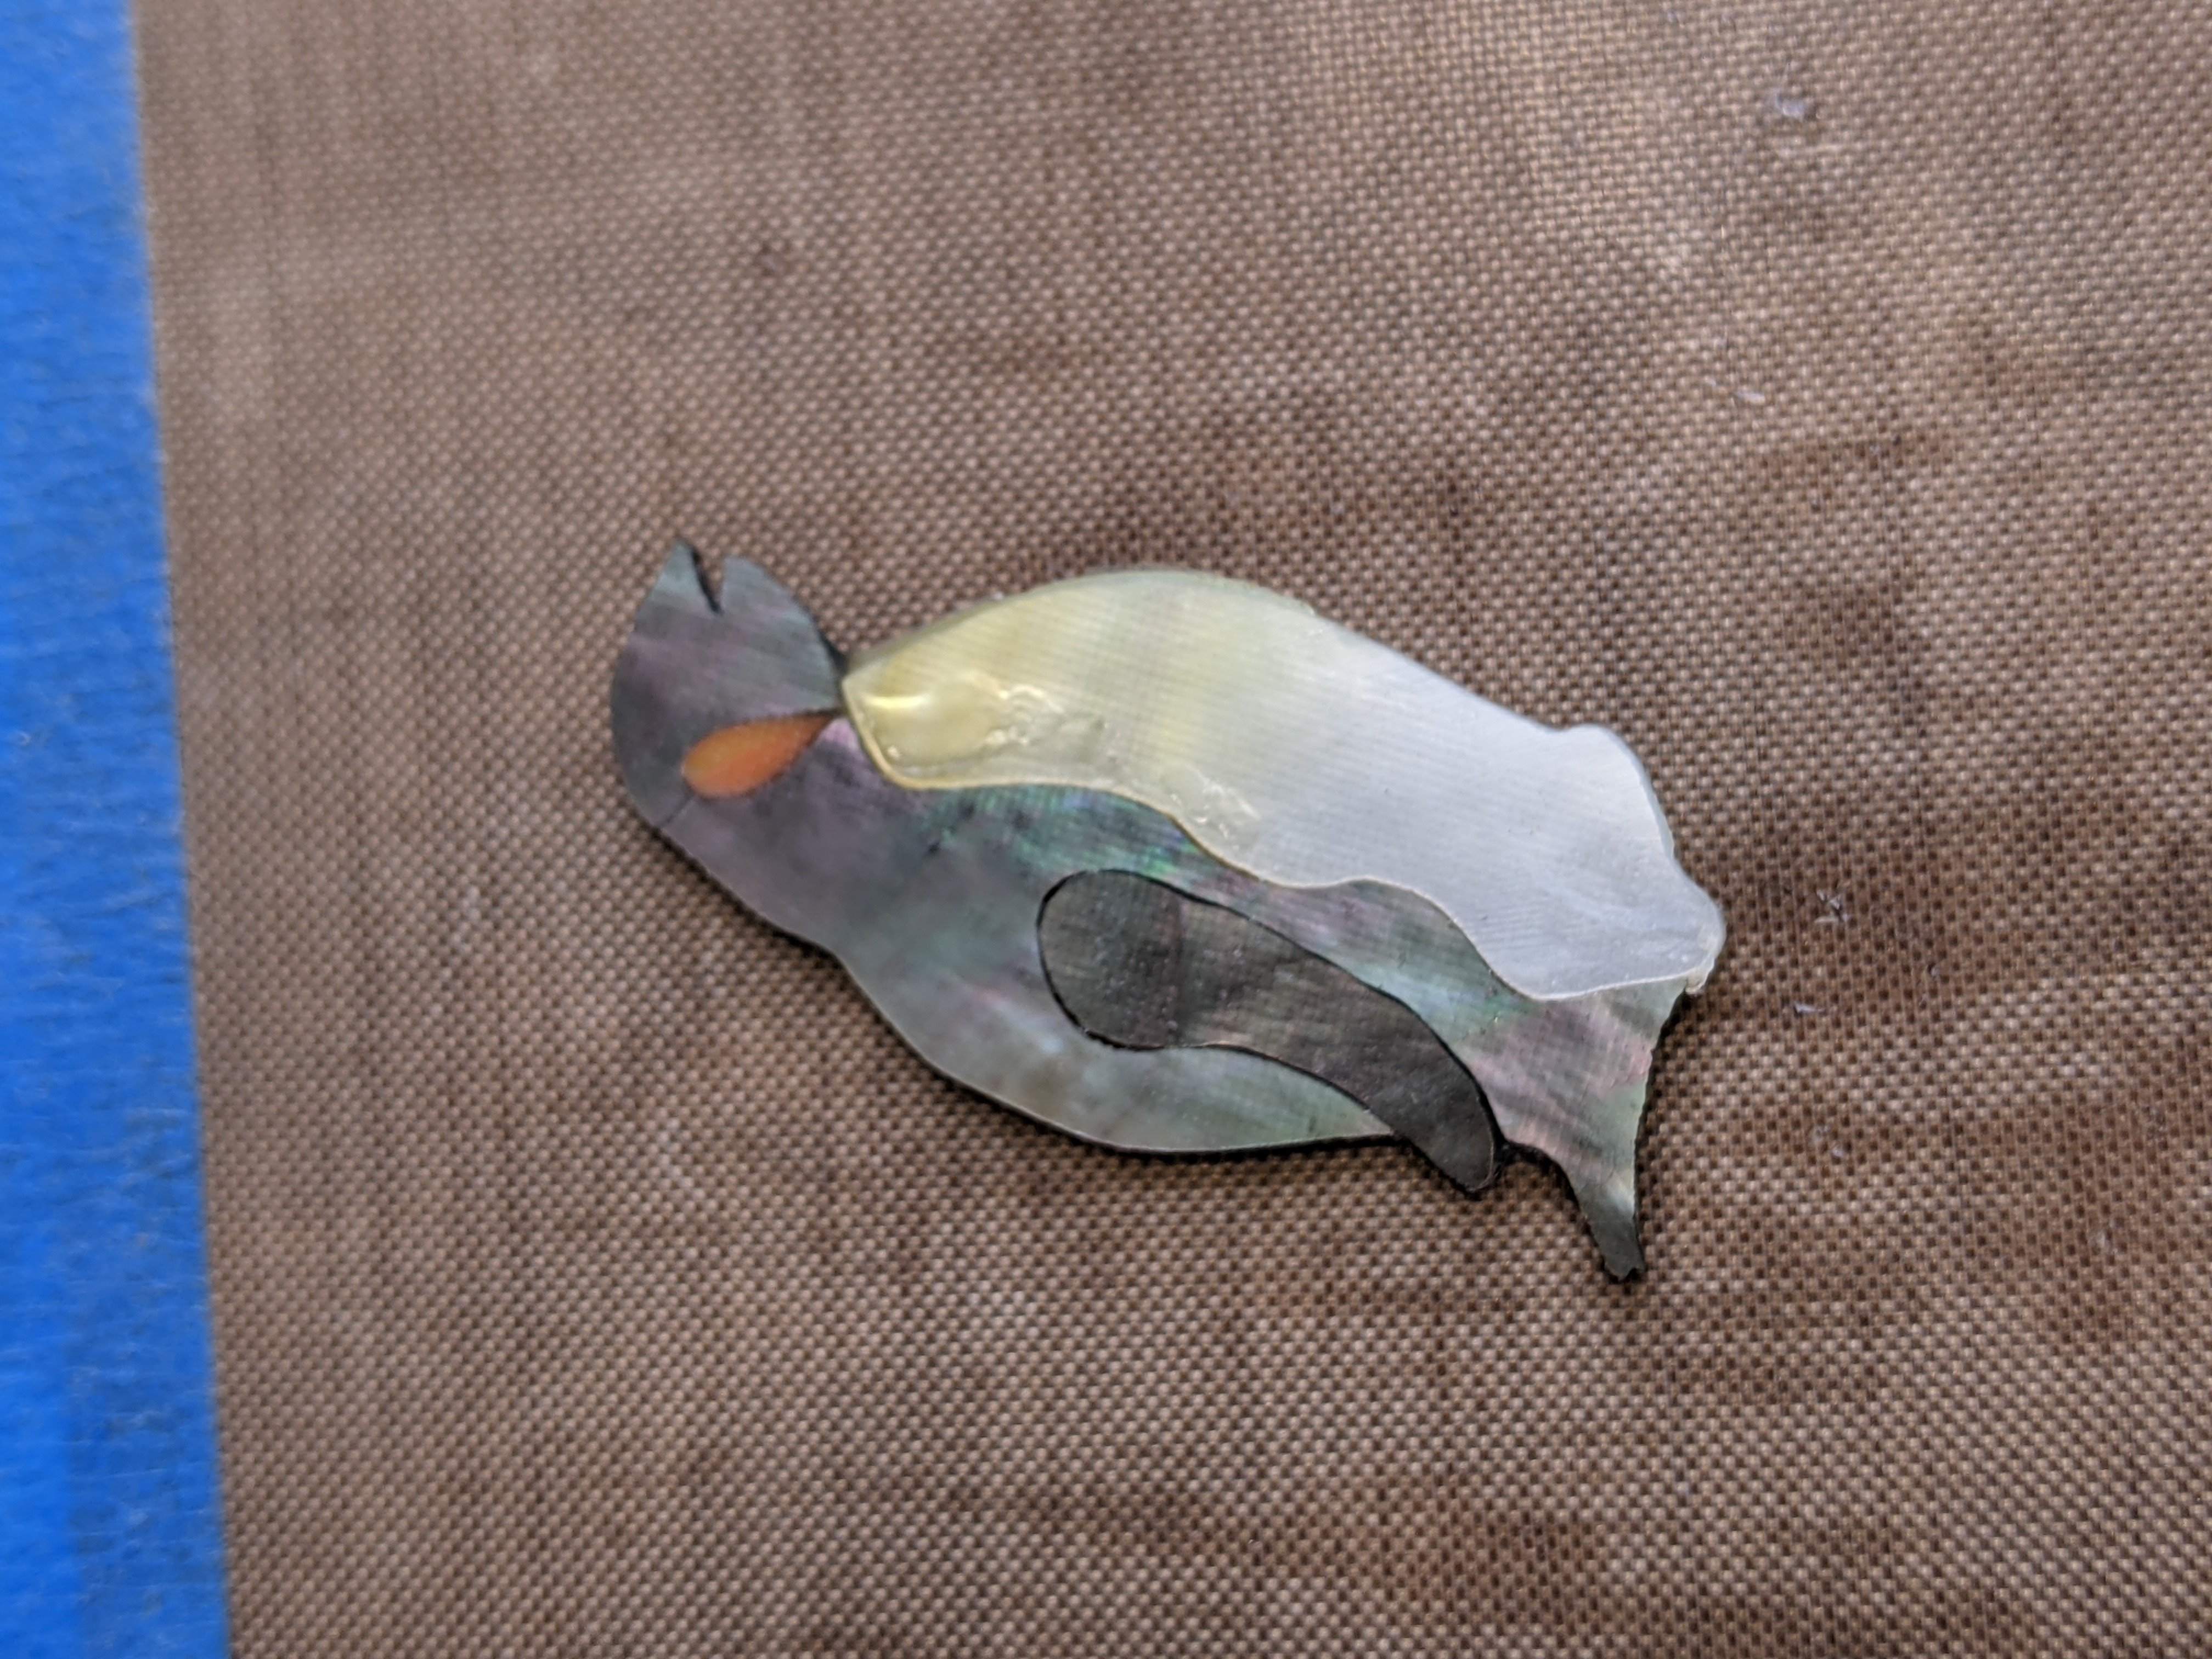
Then the ice is cut, the feet are fit first and then the body is fit into the ice. The result is:

I have developed a way of making spiral rosettes, which you will see on some of my instruments. In the current build set, one customer wanted a spiral rosette on his guitalele, which has a baritone size body. I did not have a baritone sized rosette template, so I had to make one, and in the process figured I would illustrate the process.
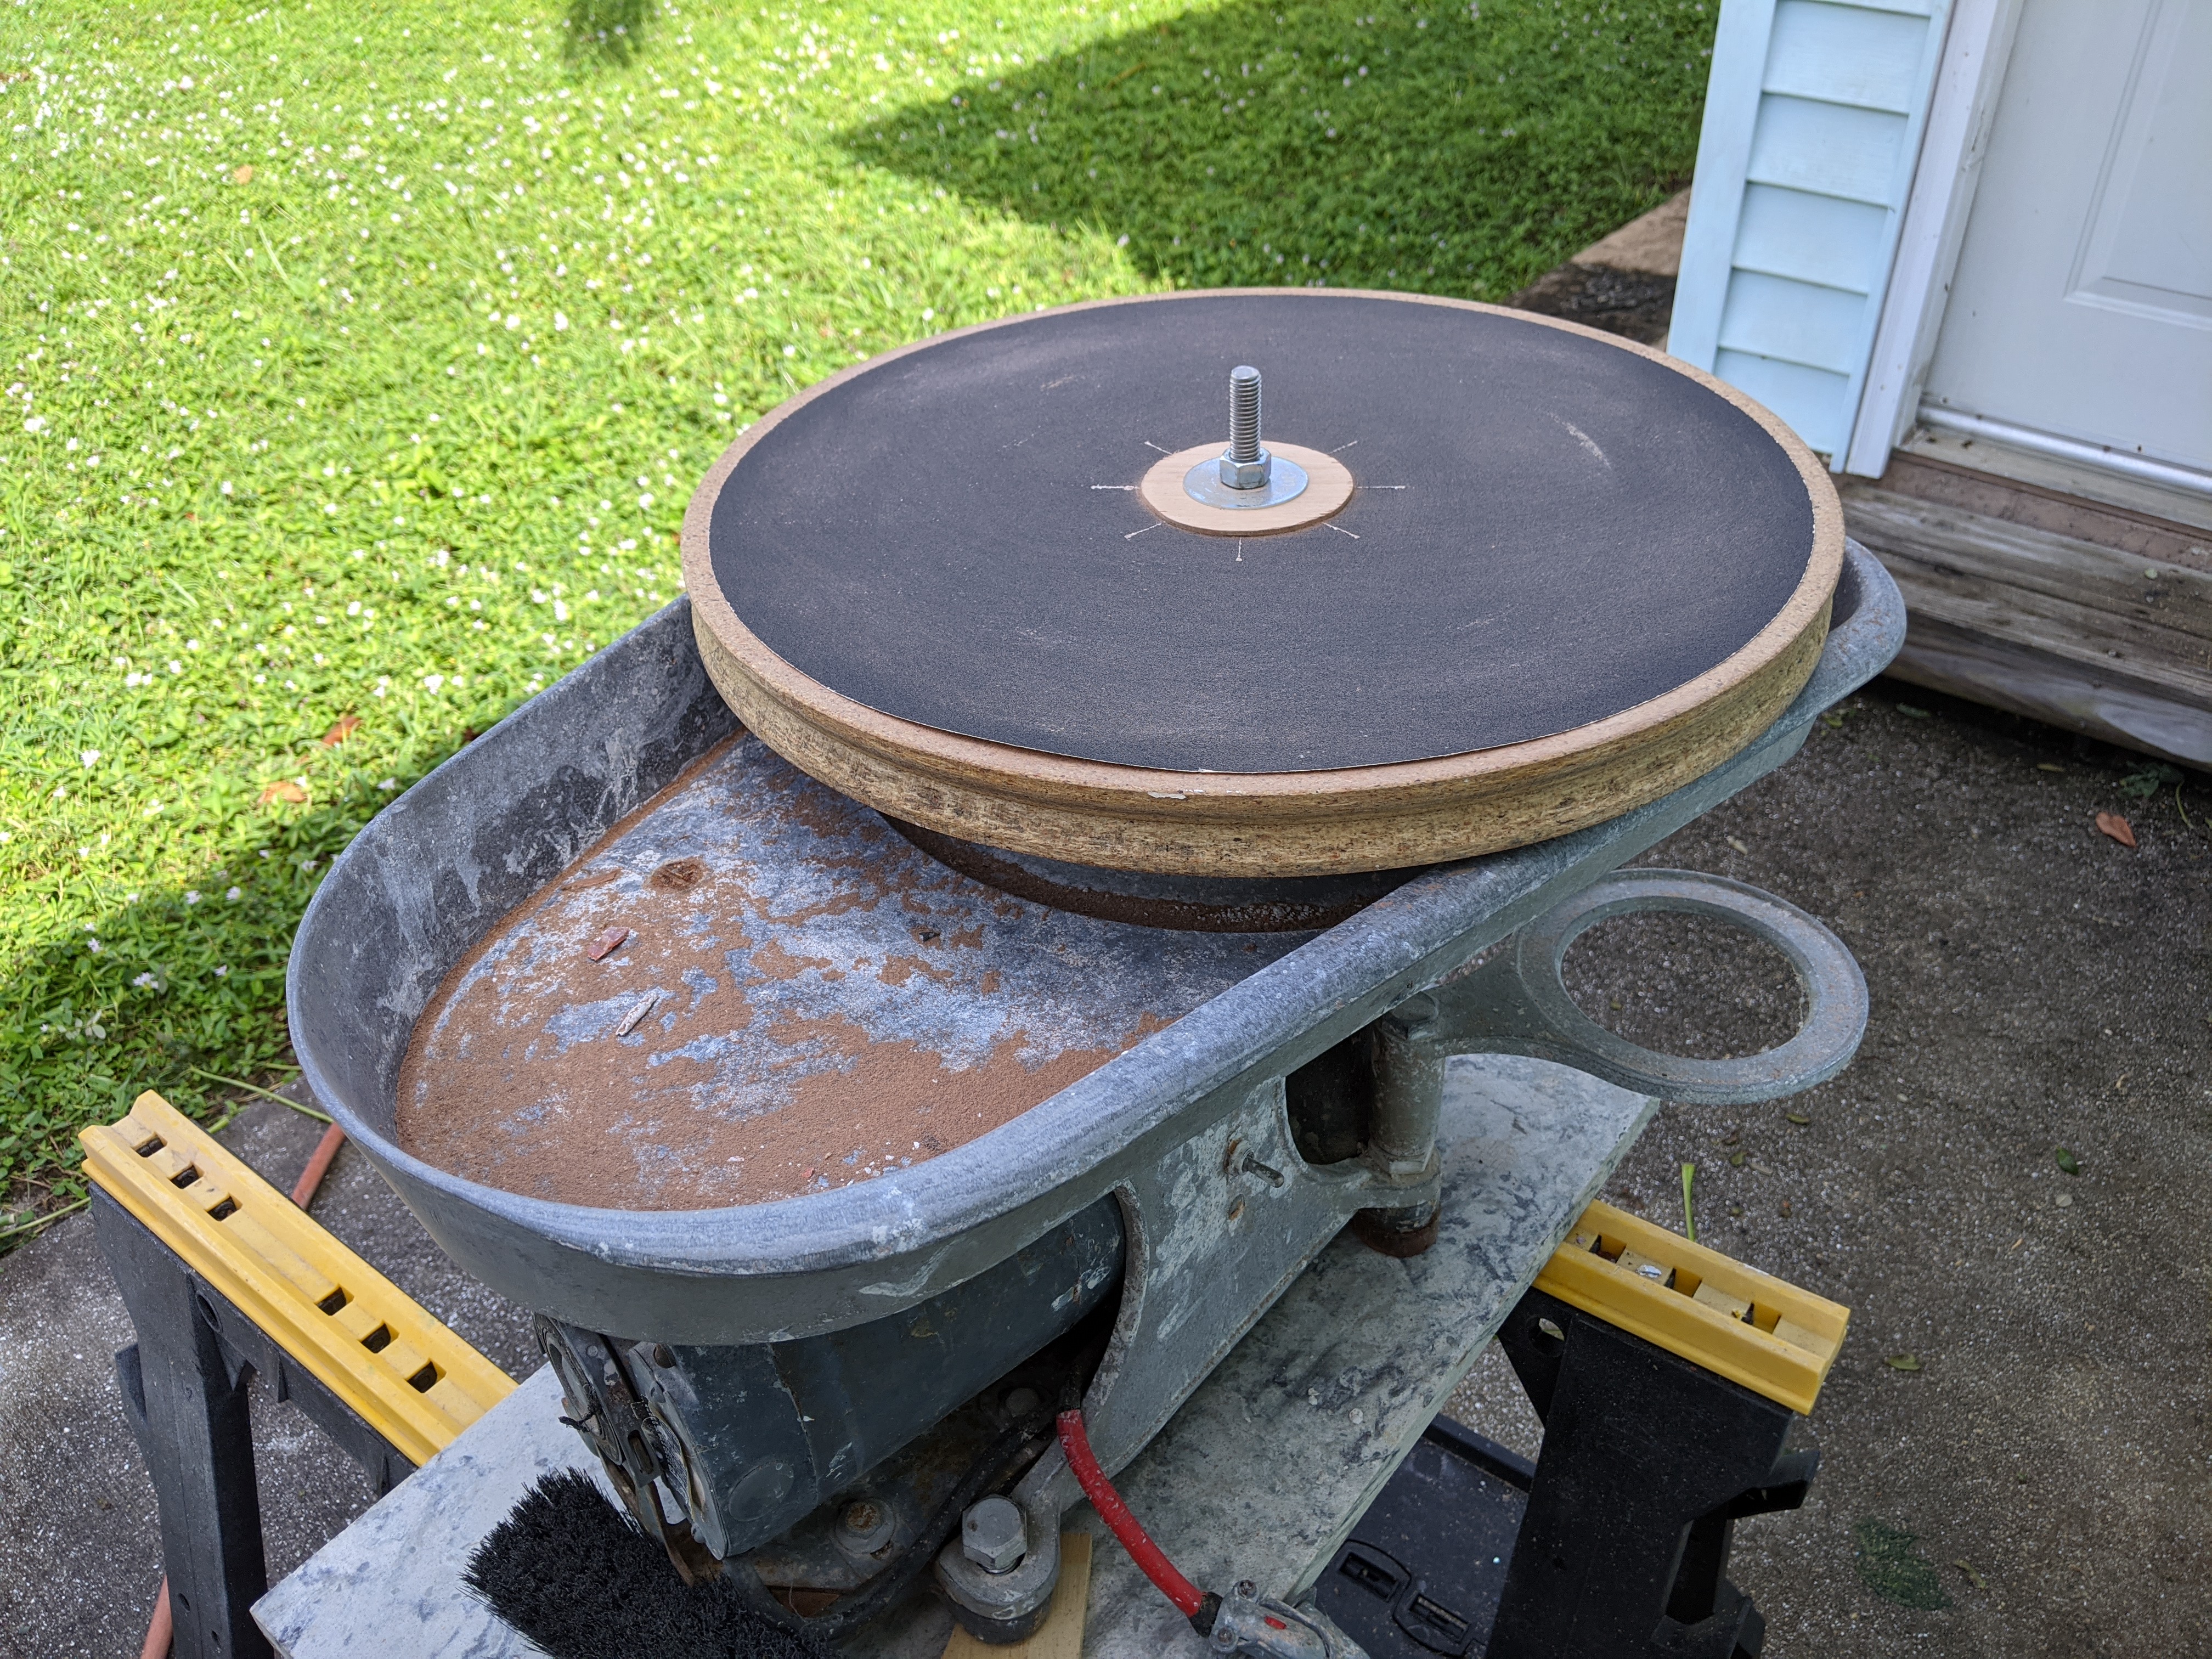
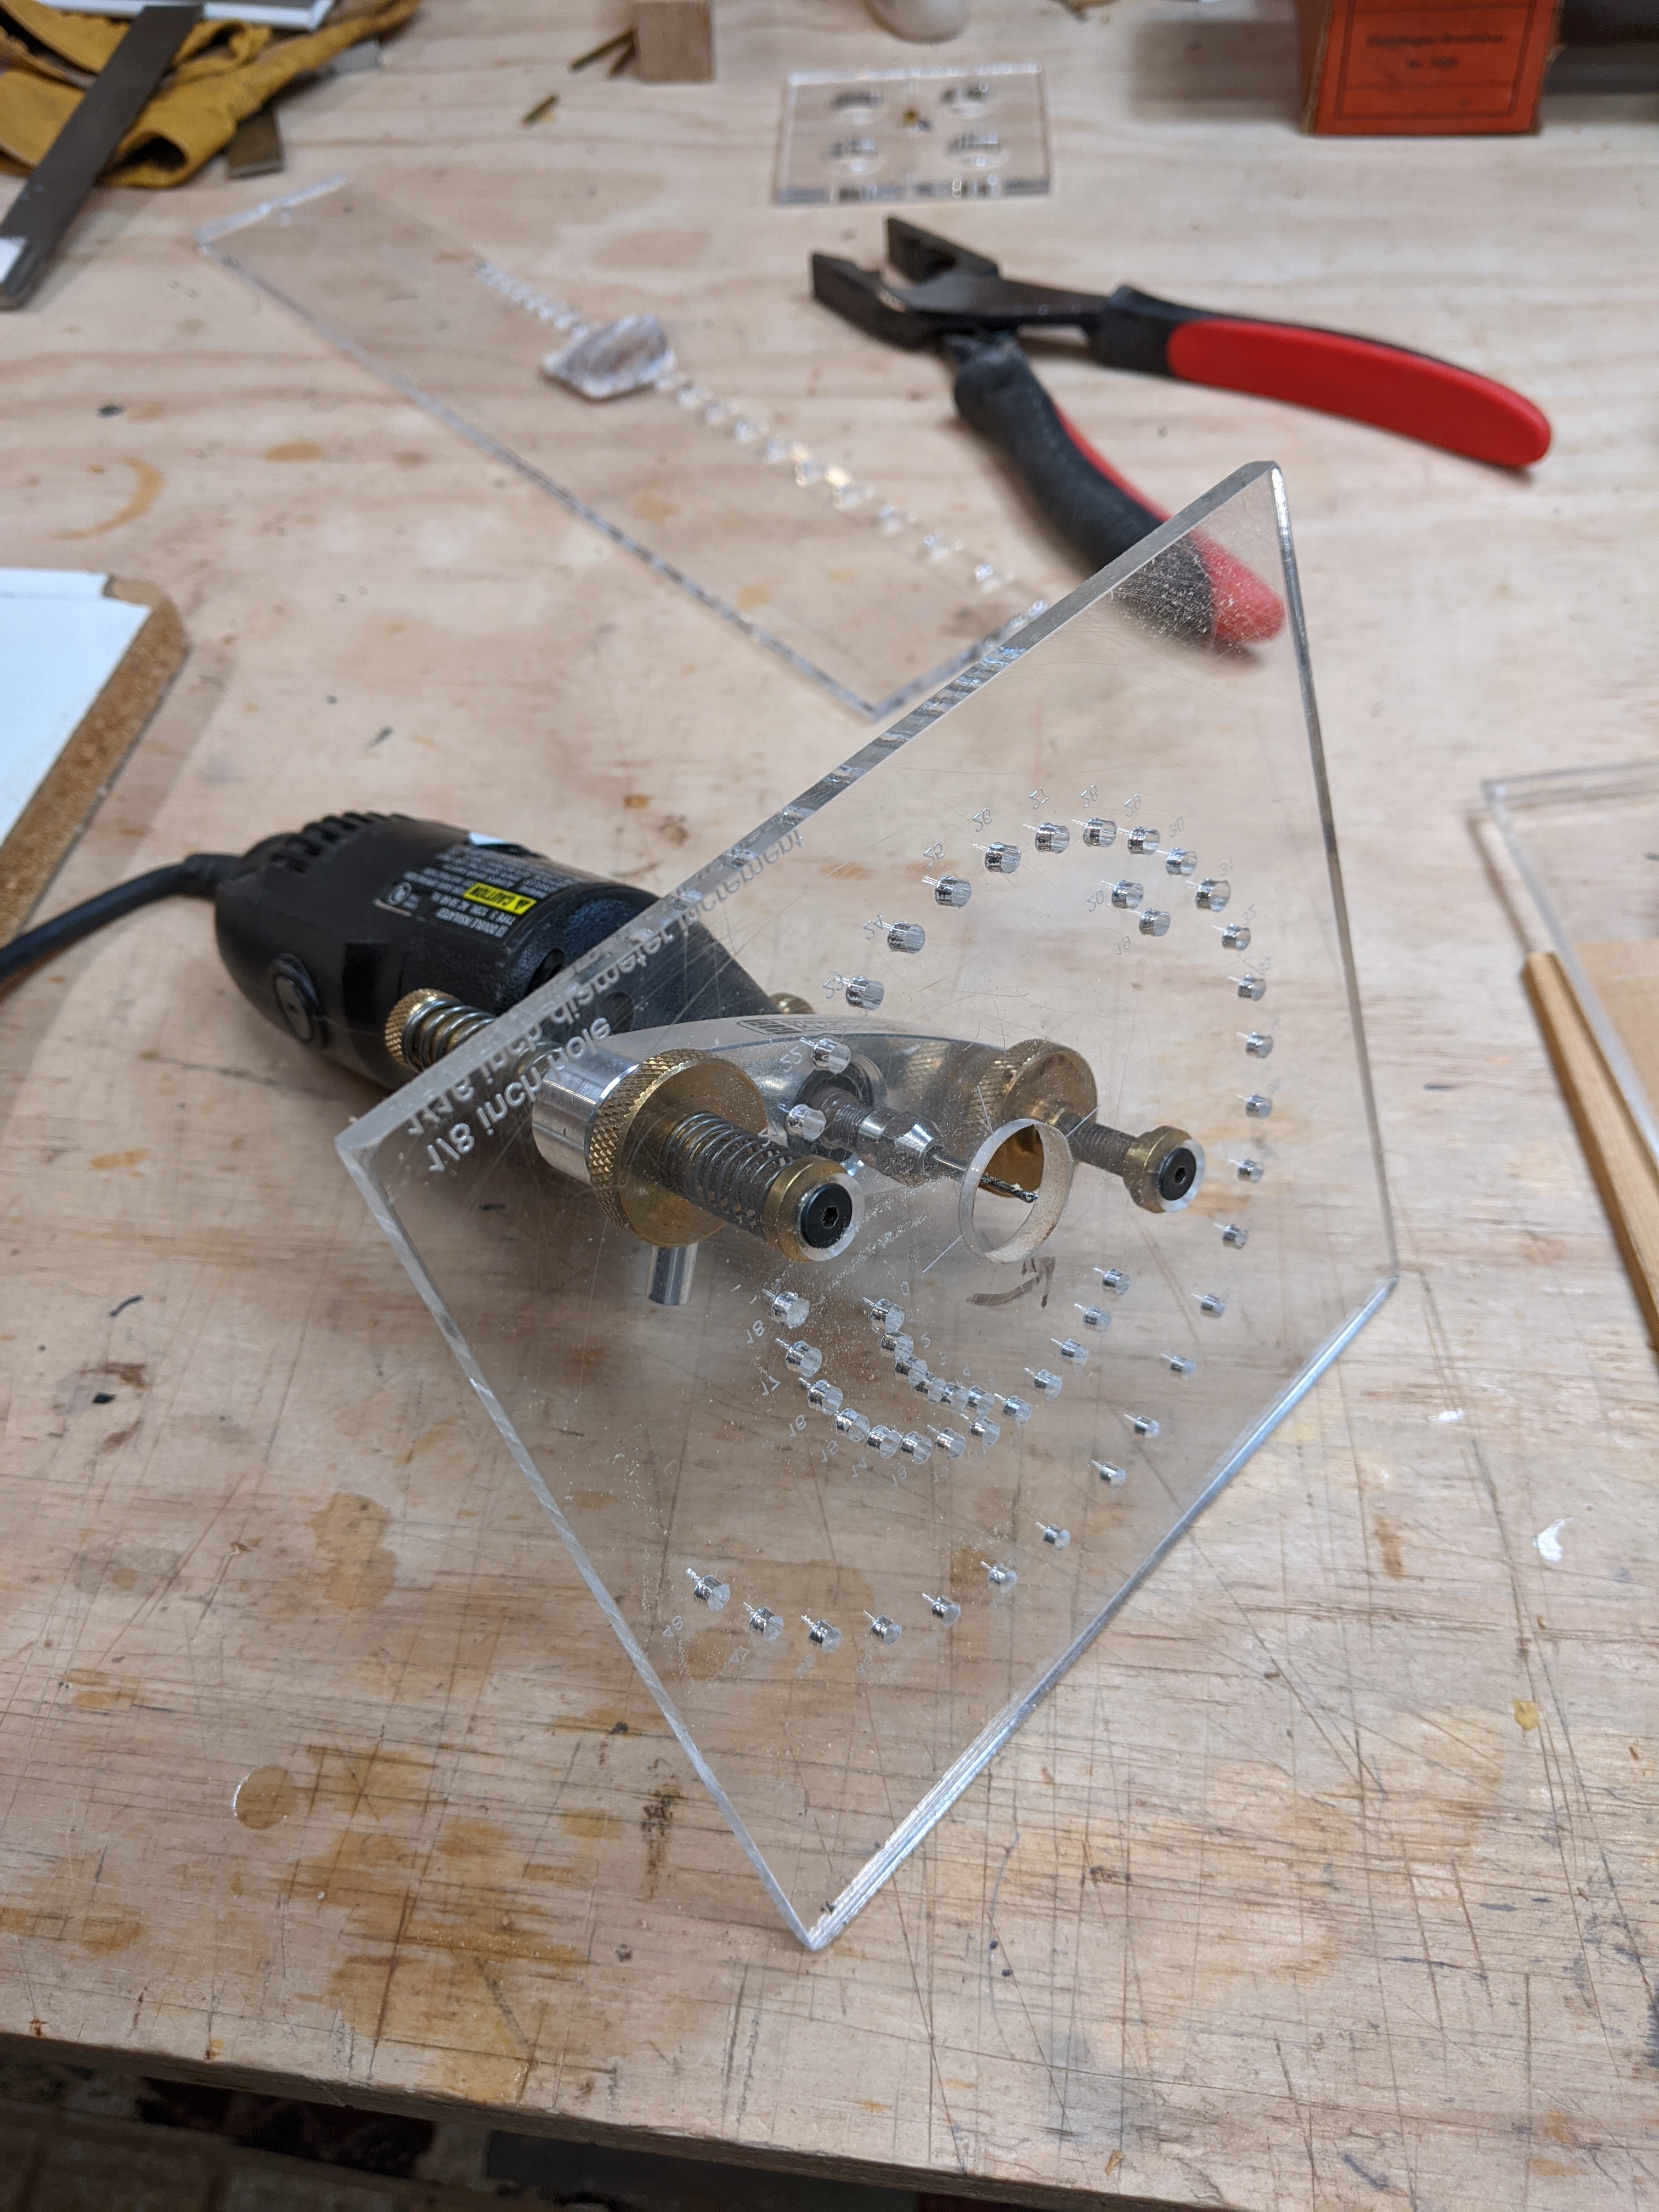
The local community college has a wonderful place called the “Fab Lab”, as in ‘fabrication’. They teach courses in building all sorts of stuff, and have complete wood and metal shops. After taking a course, members of the public can come in and use the equipment by the hour. The piece of gear which I use is a large bed laser cutter. It will cut 1/4 in acrylic just fine, with thousandths of an inch accuracy. One does the design in Corel Draw, which I do at home, take the drawing over on a thumb drive, and then simply ‘print’ to the laser cutter. Red lines in the drawing cut, and black lines engrave on the surface of the acrylic.
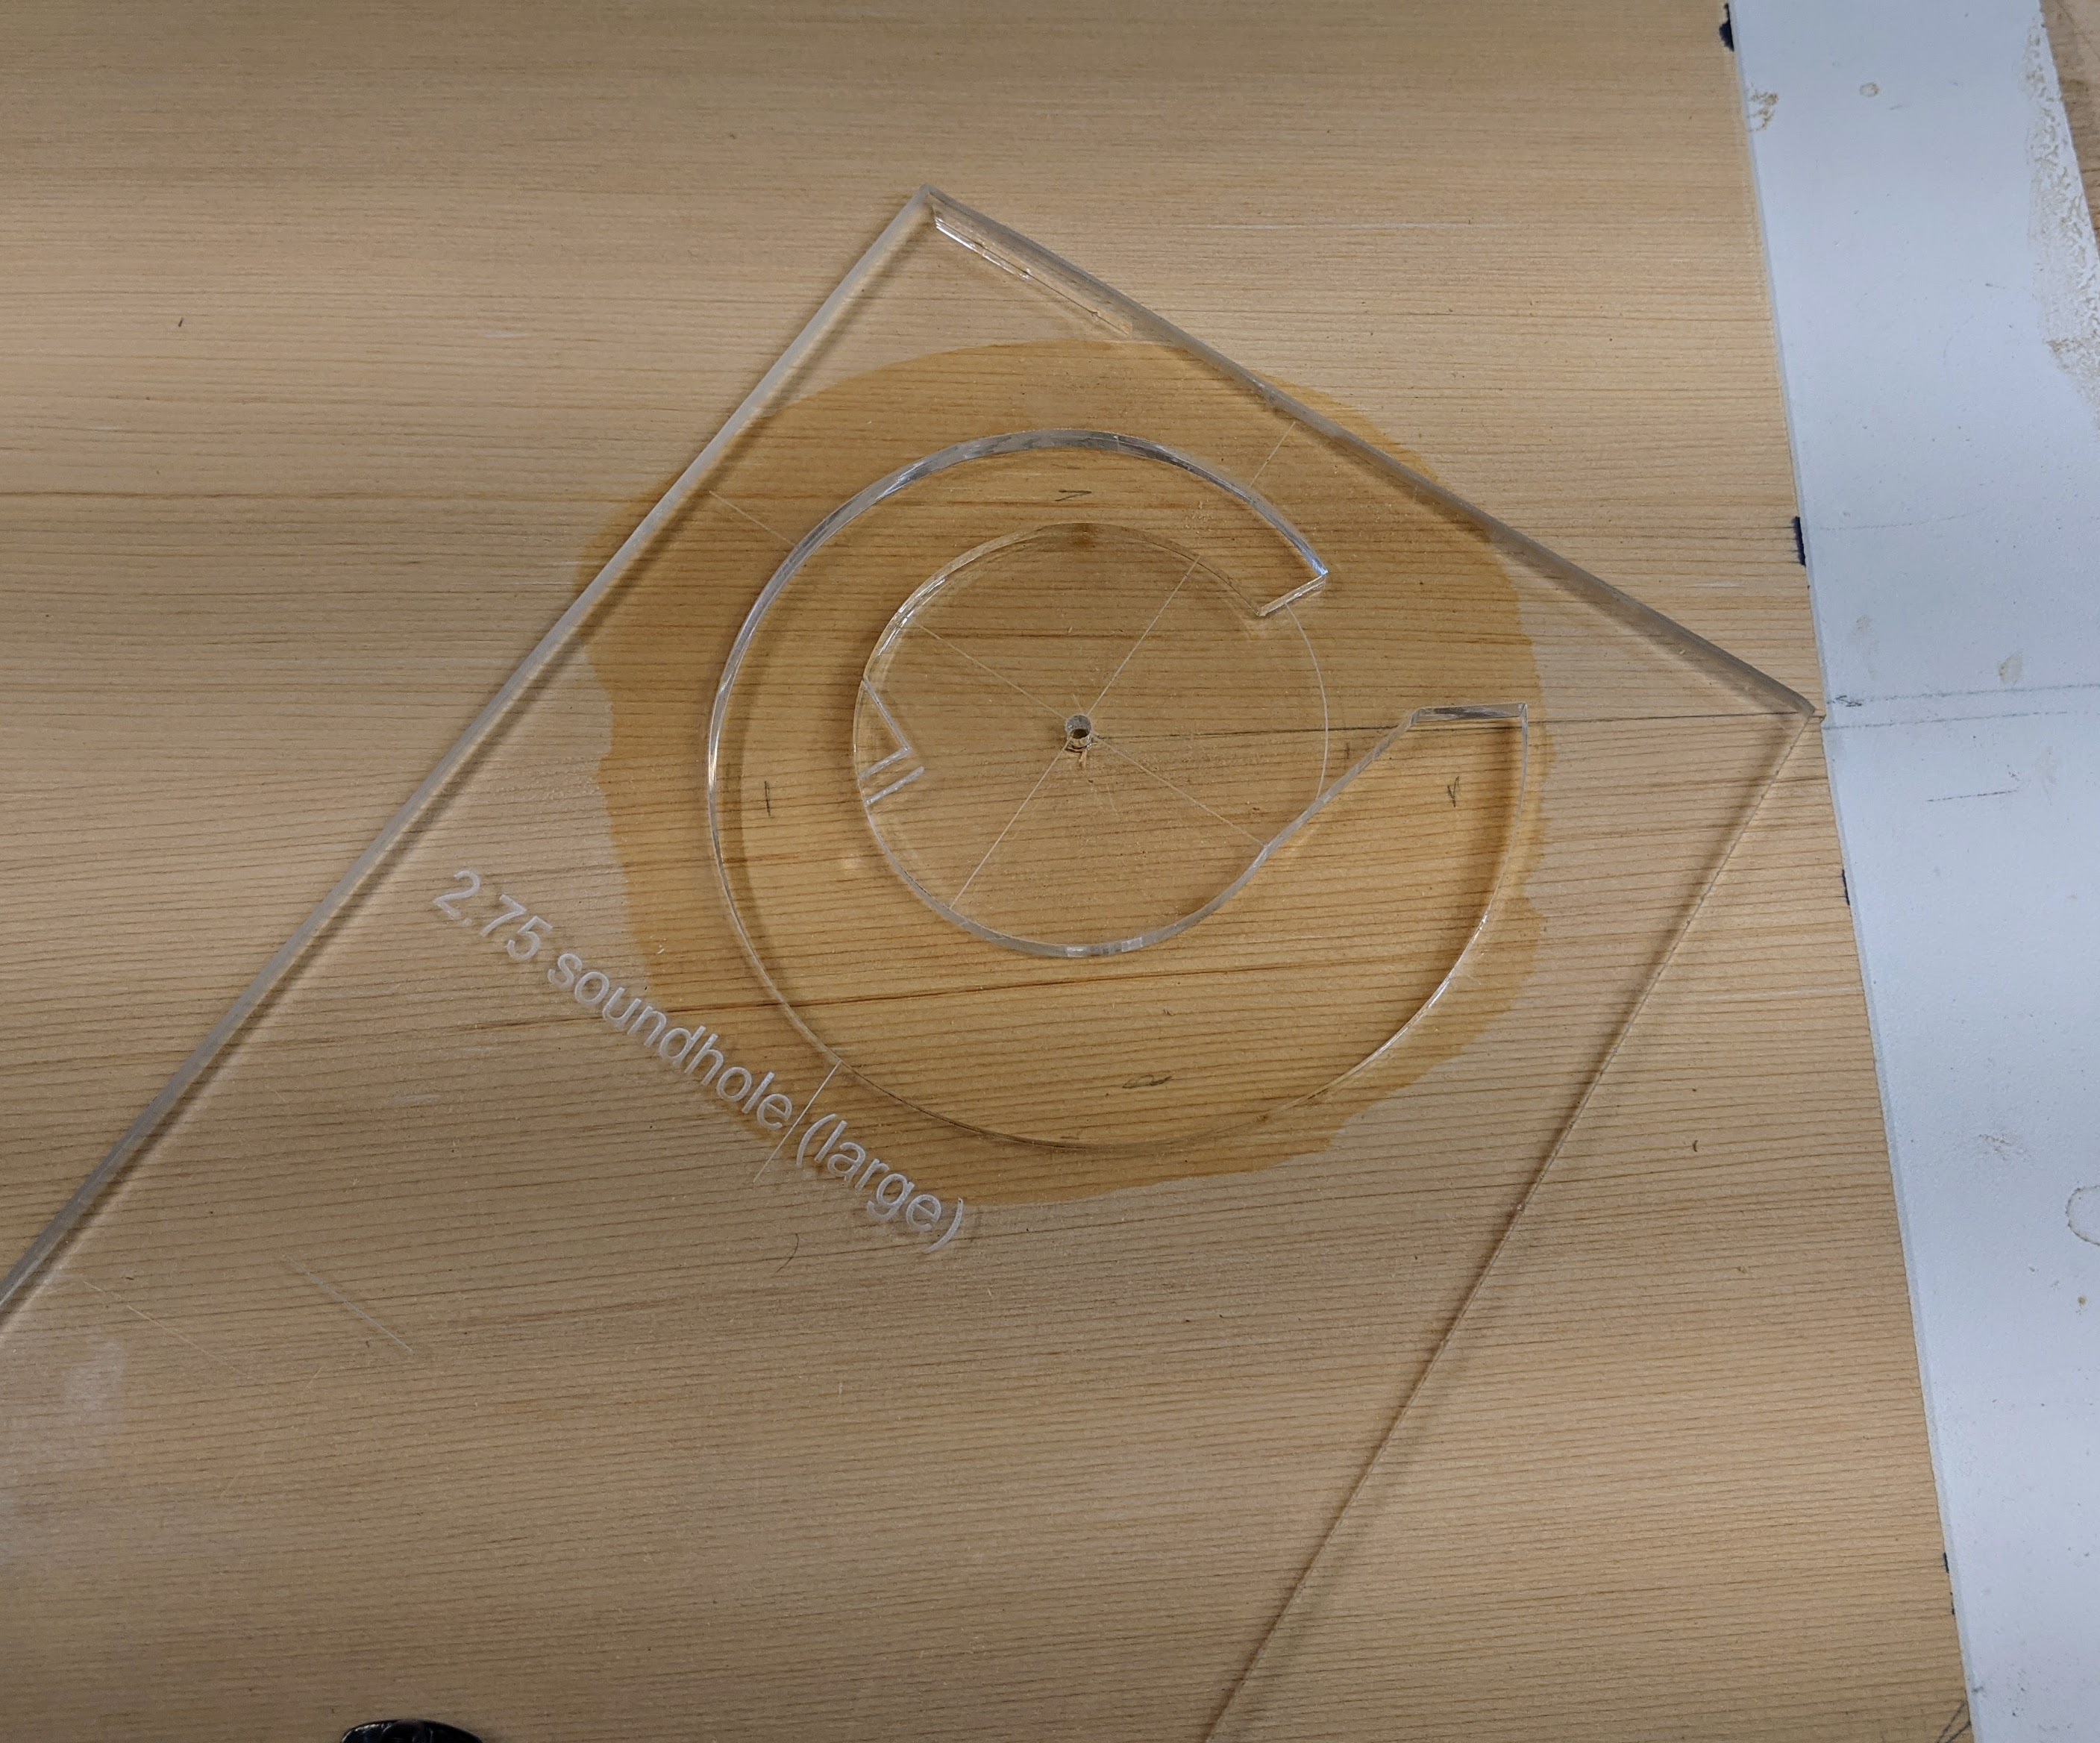
For a spiral rosette I made up a spiral template which fits over a central 1/8 in pin, which I use to register all of my rosette cutting. With this template I am only interested in the outer spiral.
To make the cut against this outer spiral I also made up a small base which fits the Stewart-Macdonald Dremmel router base. This base has glued into it a bit of 3/16 brass tubing which sticks below the base and rides in the channel of the spiral template.
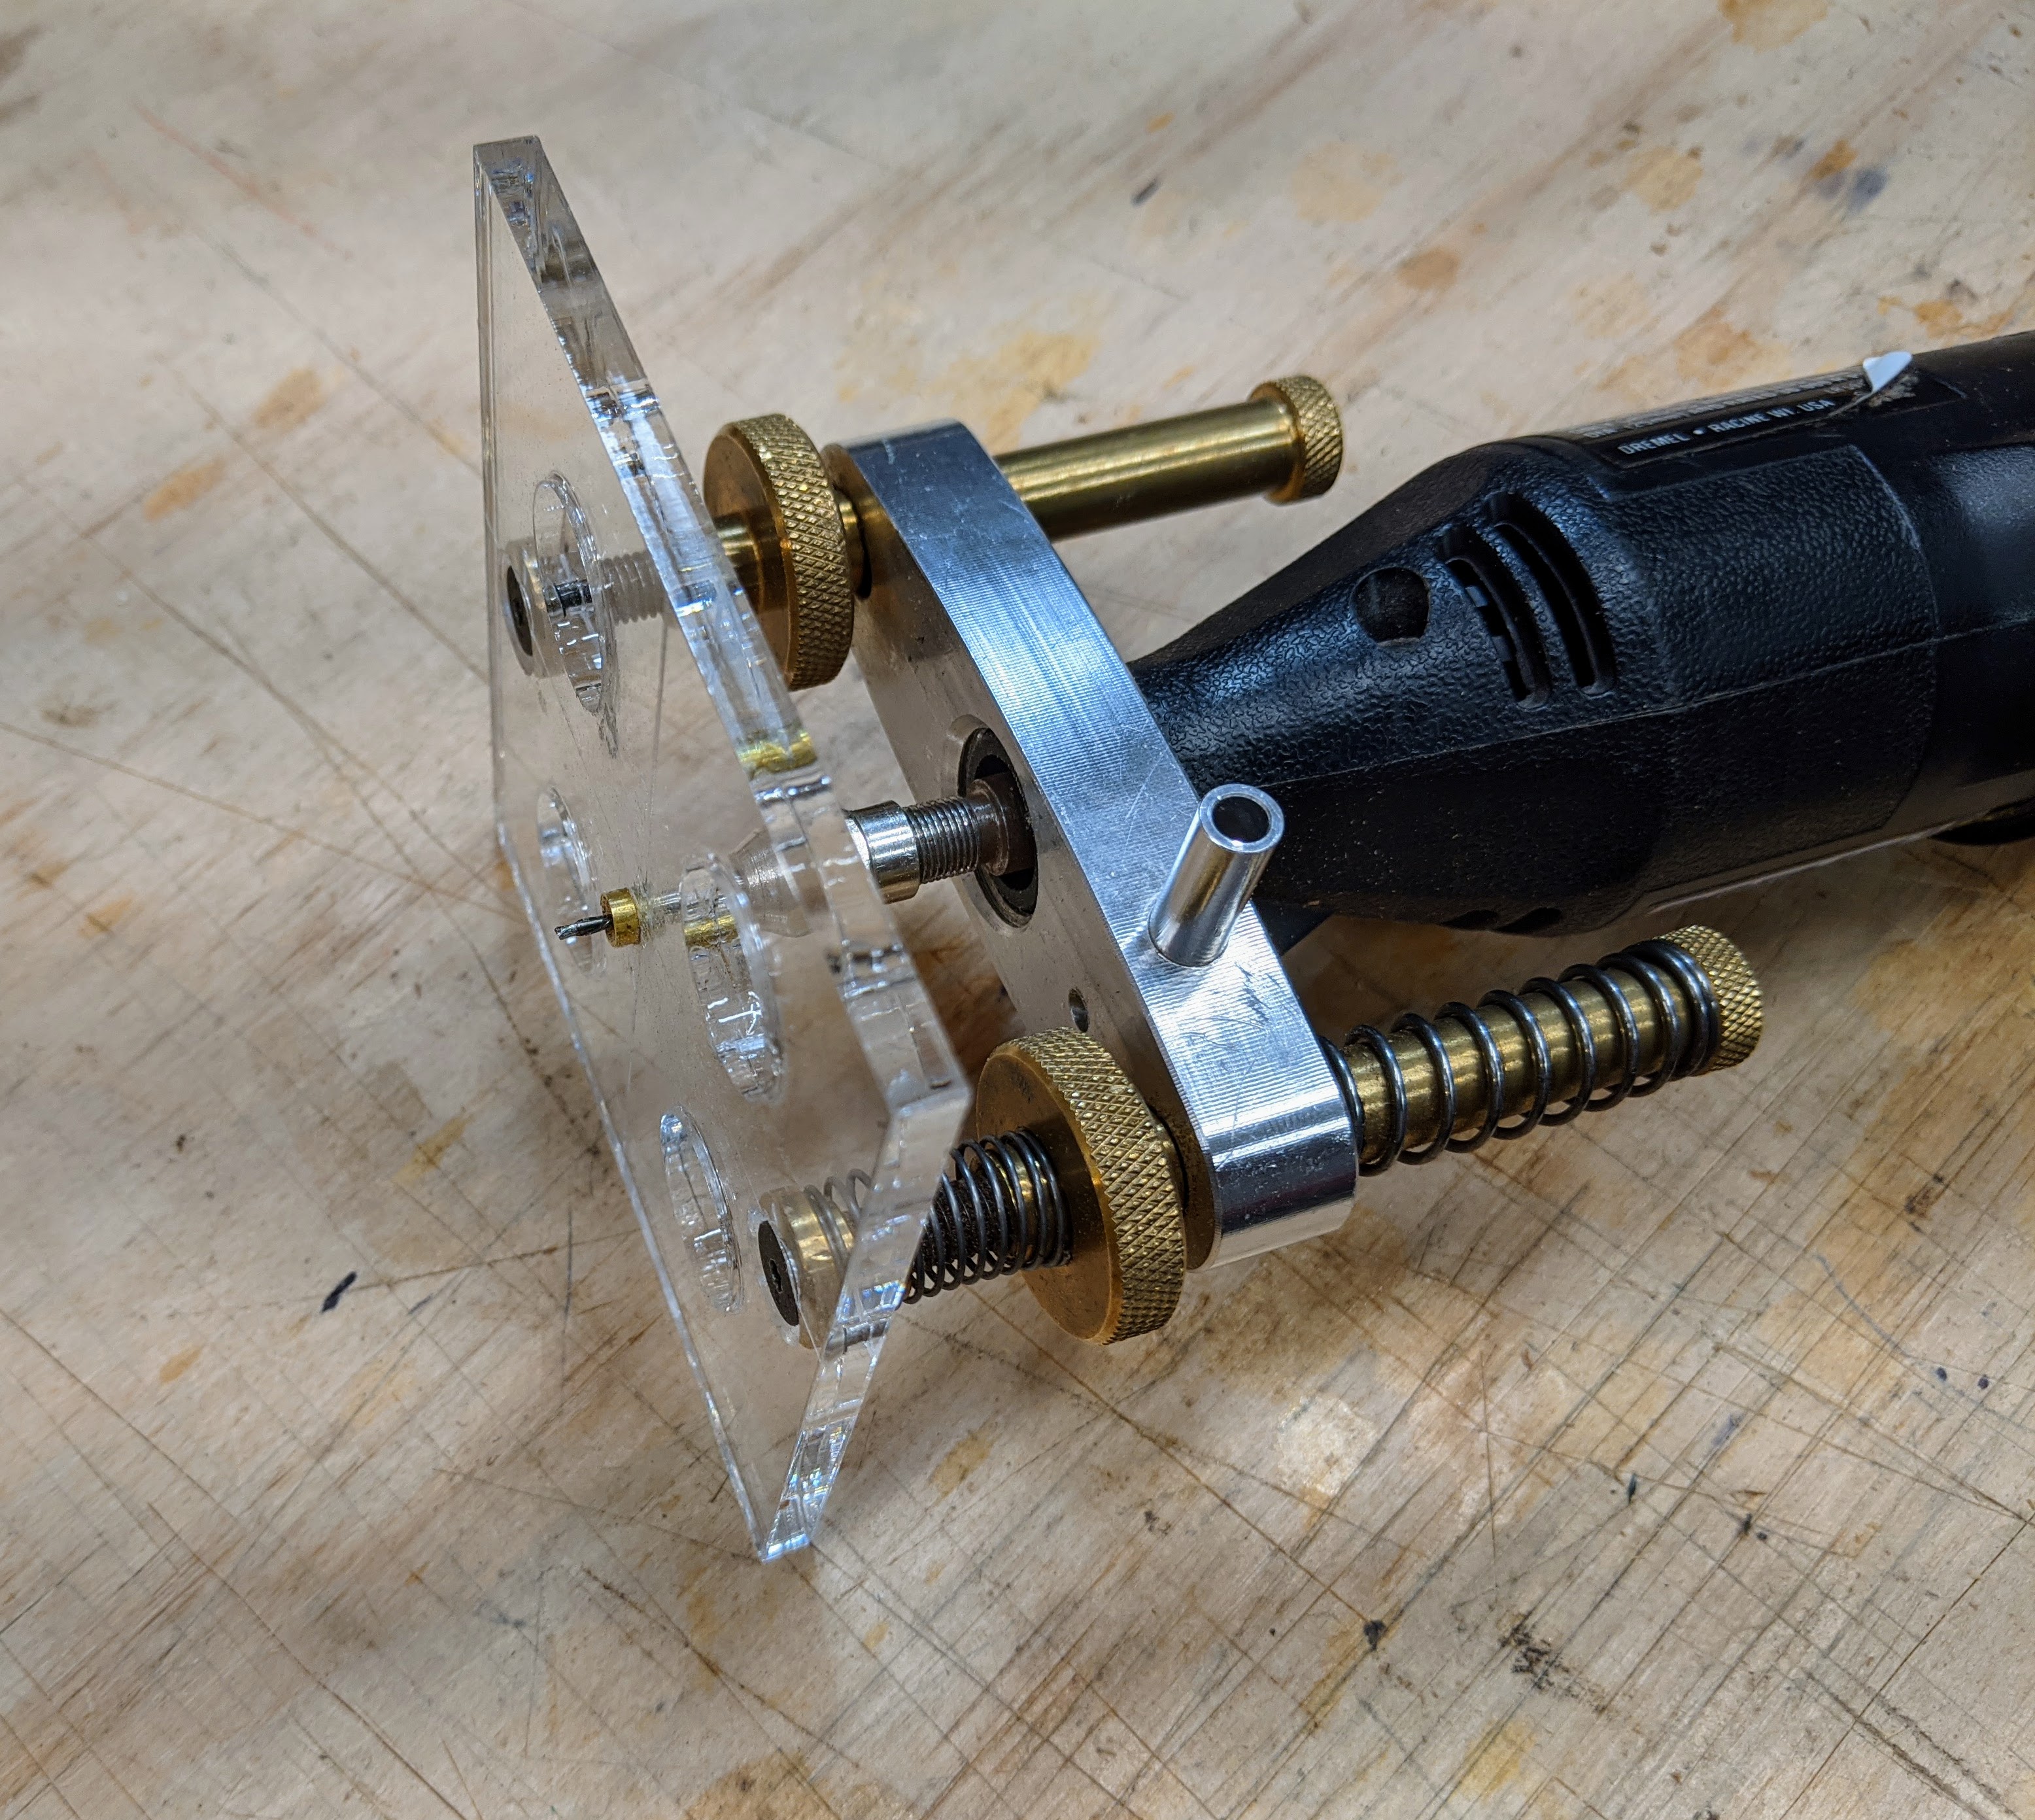
Using a fine down-cut bit, and pressing the dremmel and router base against the spiral one cuts a thin spiral outline.
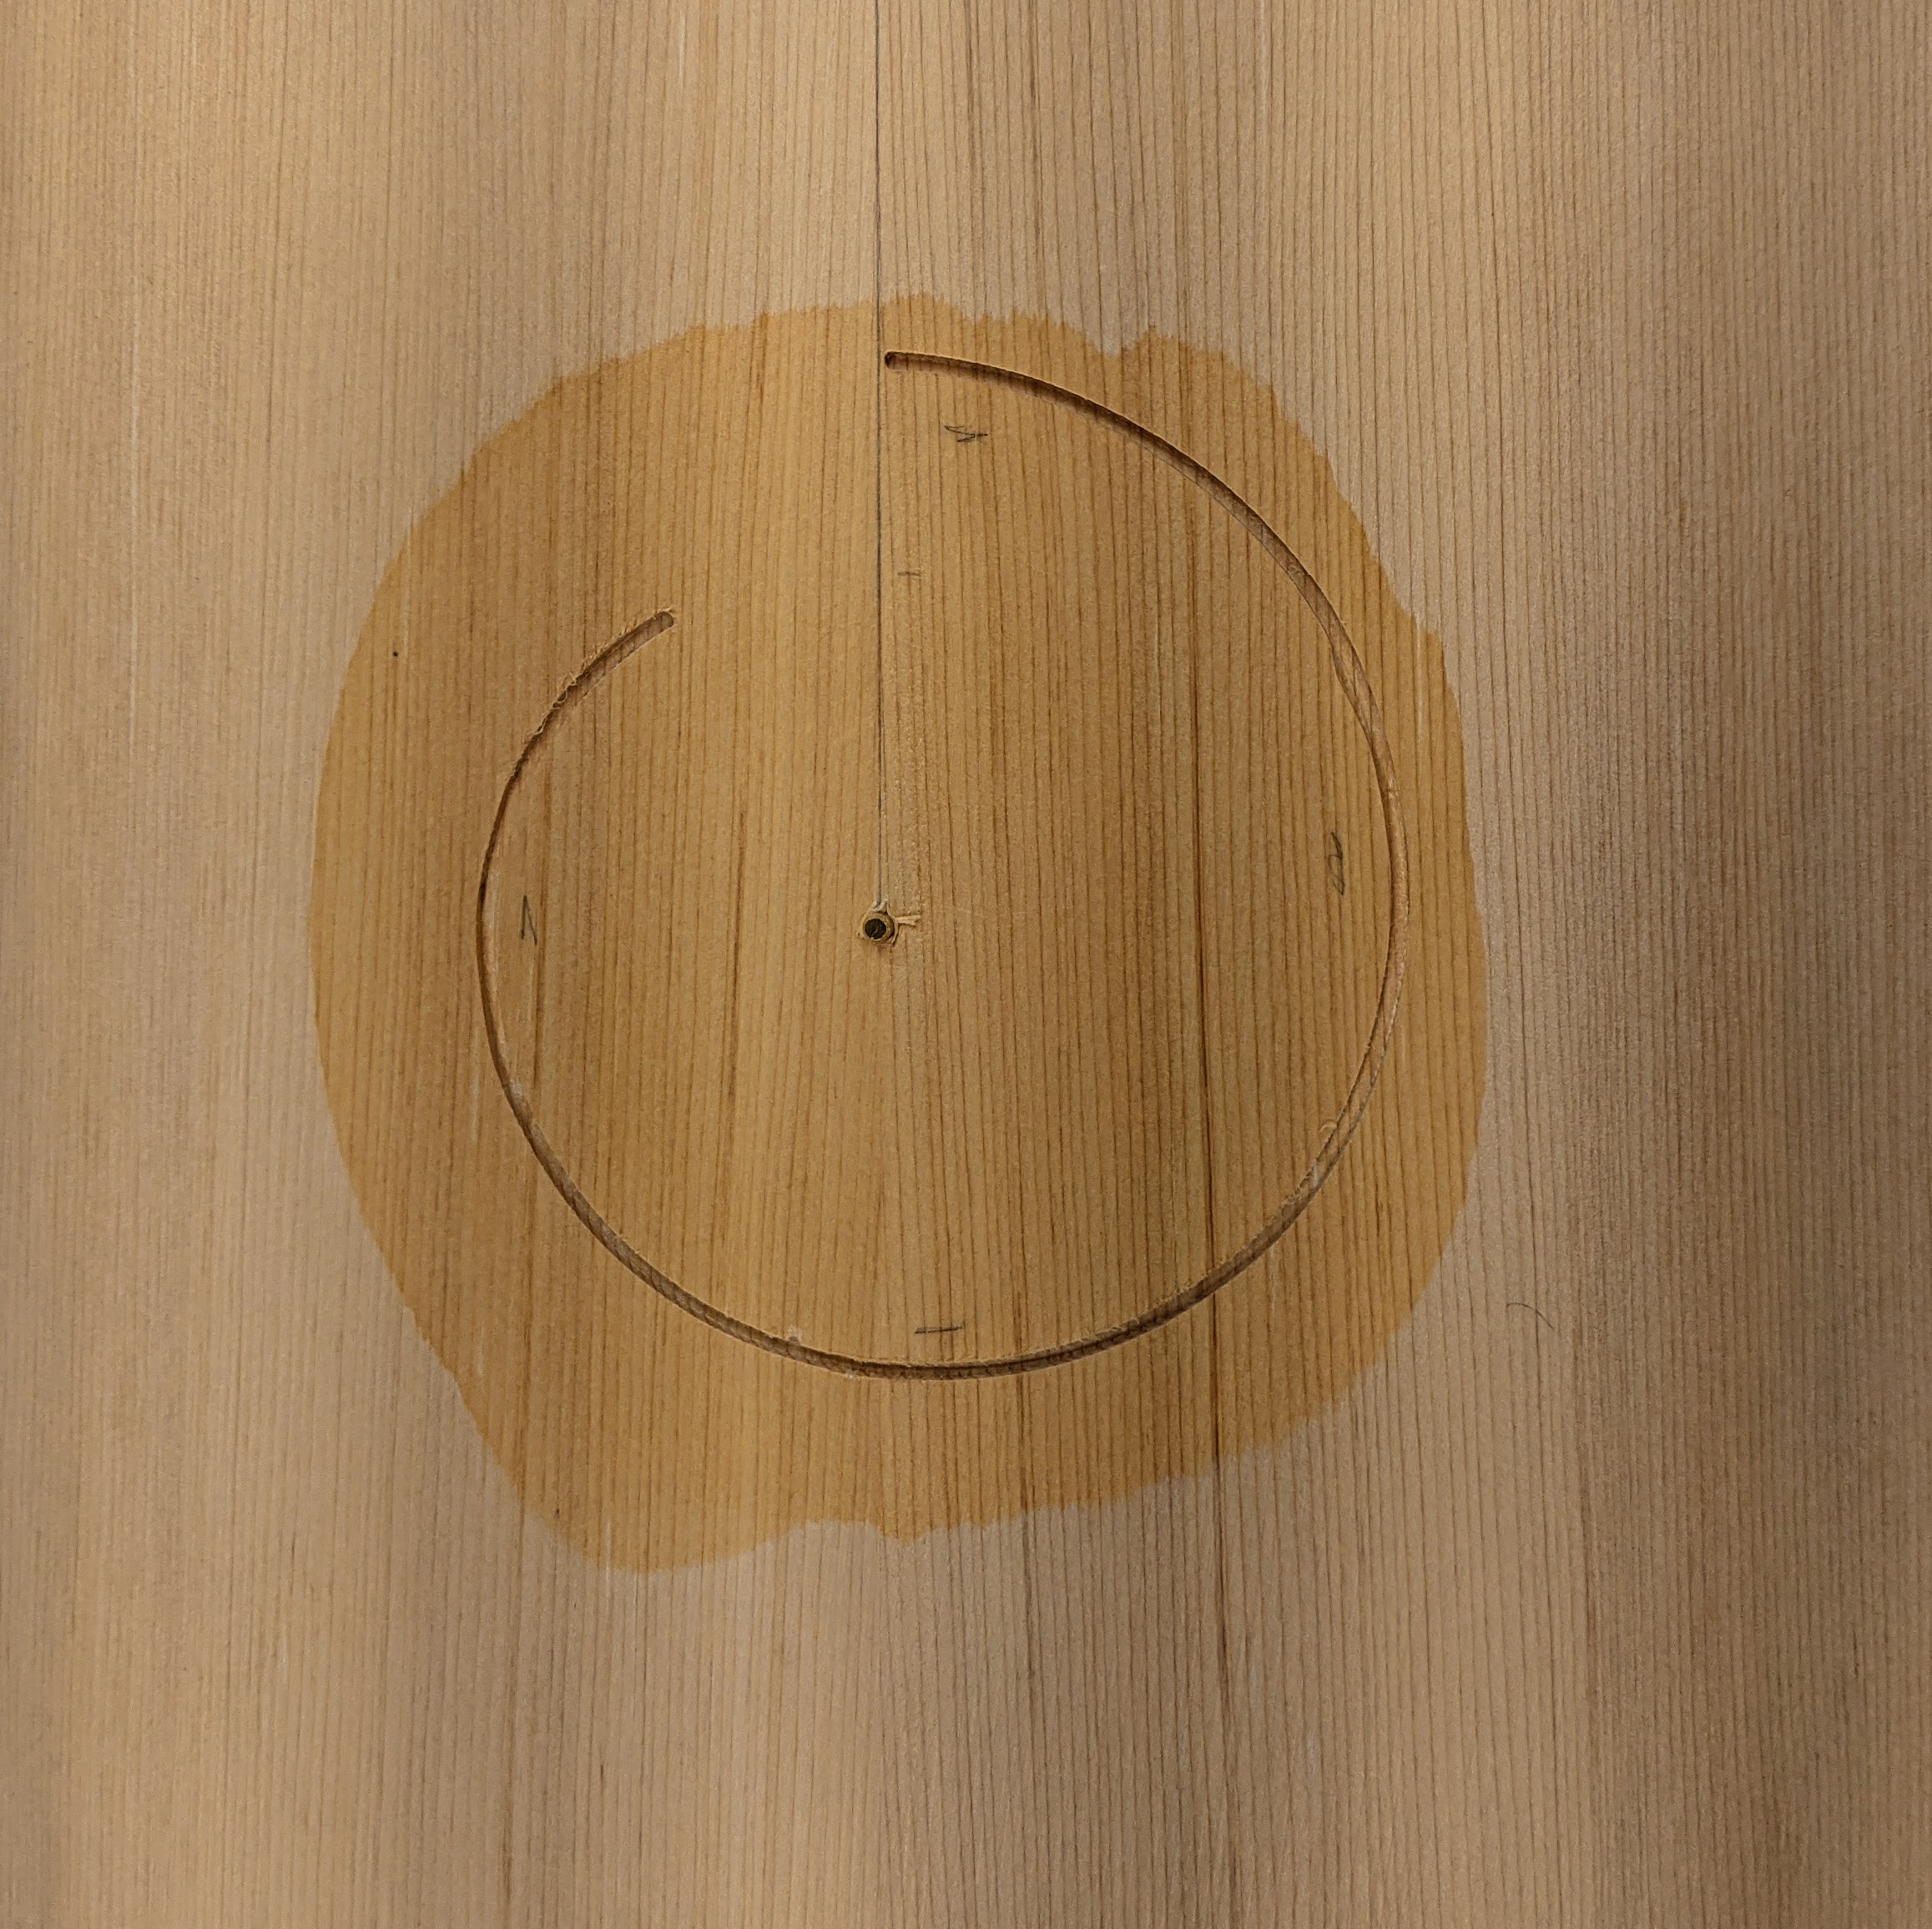
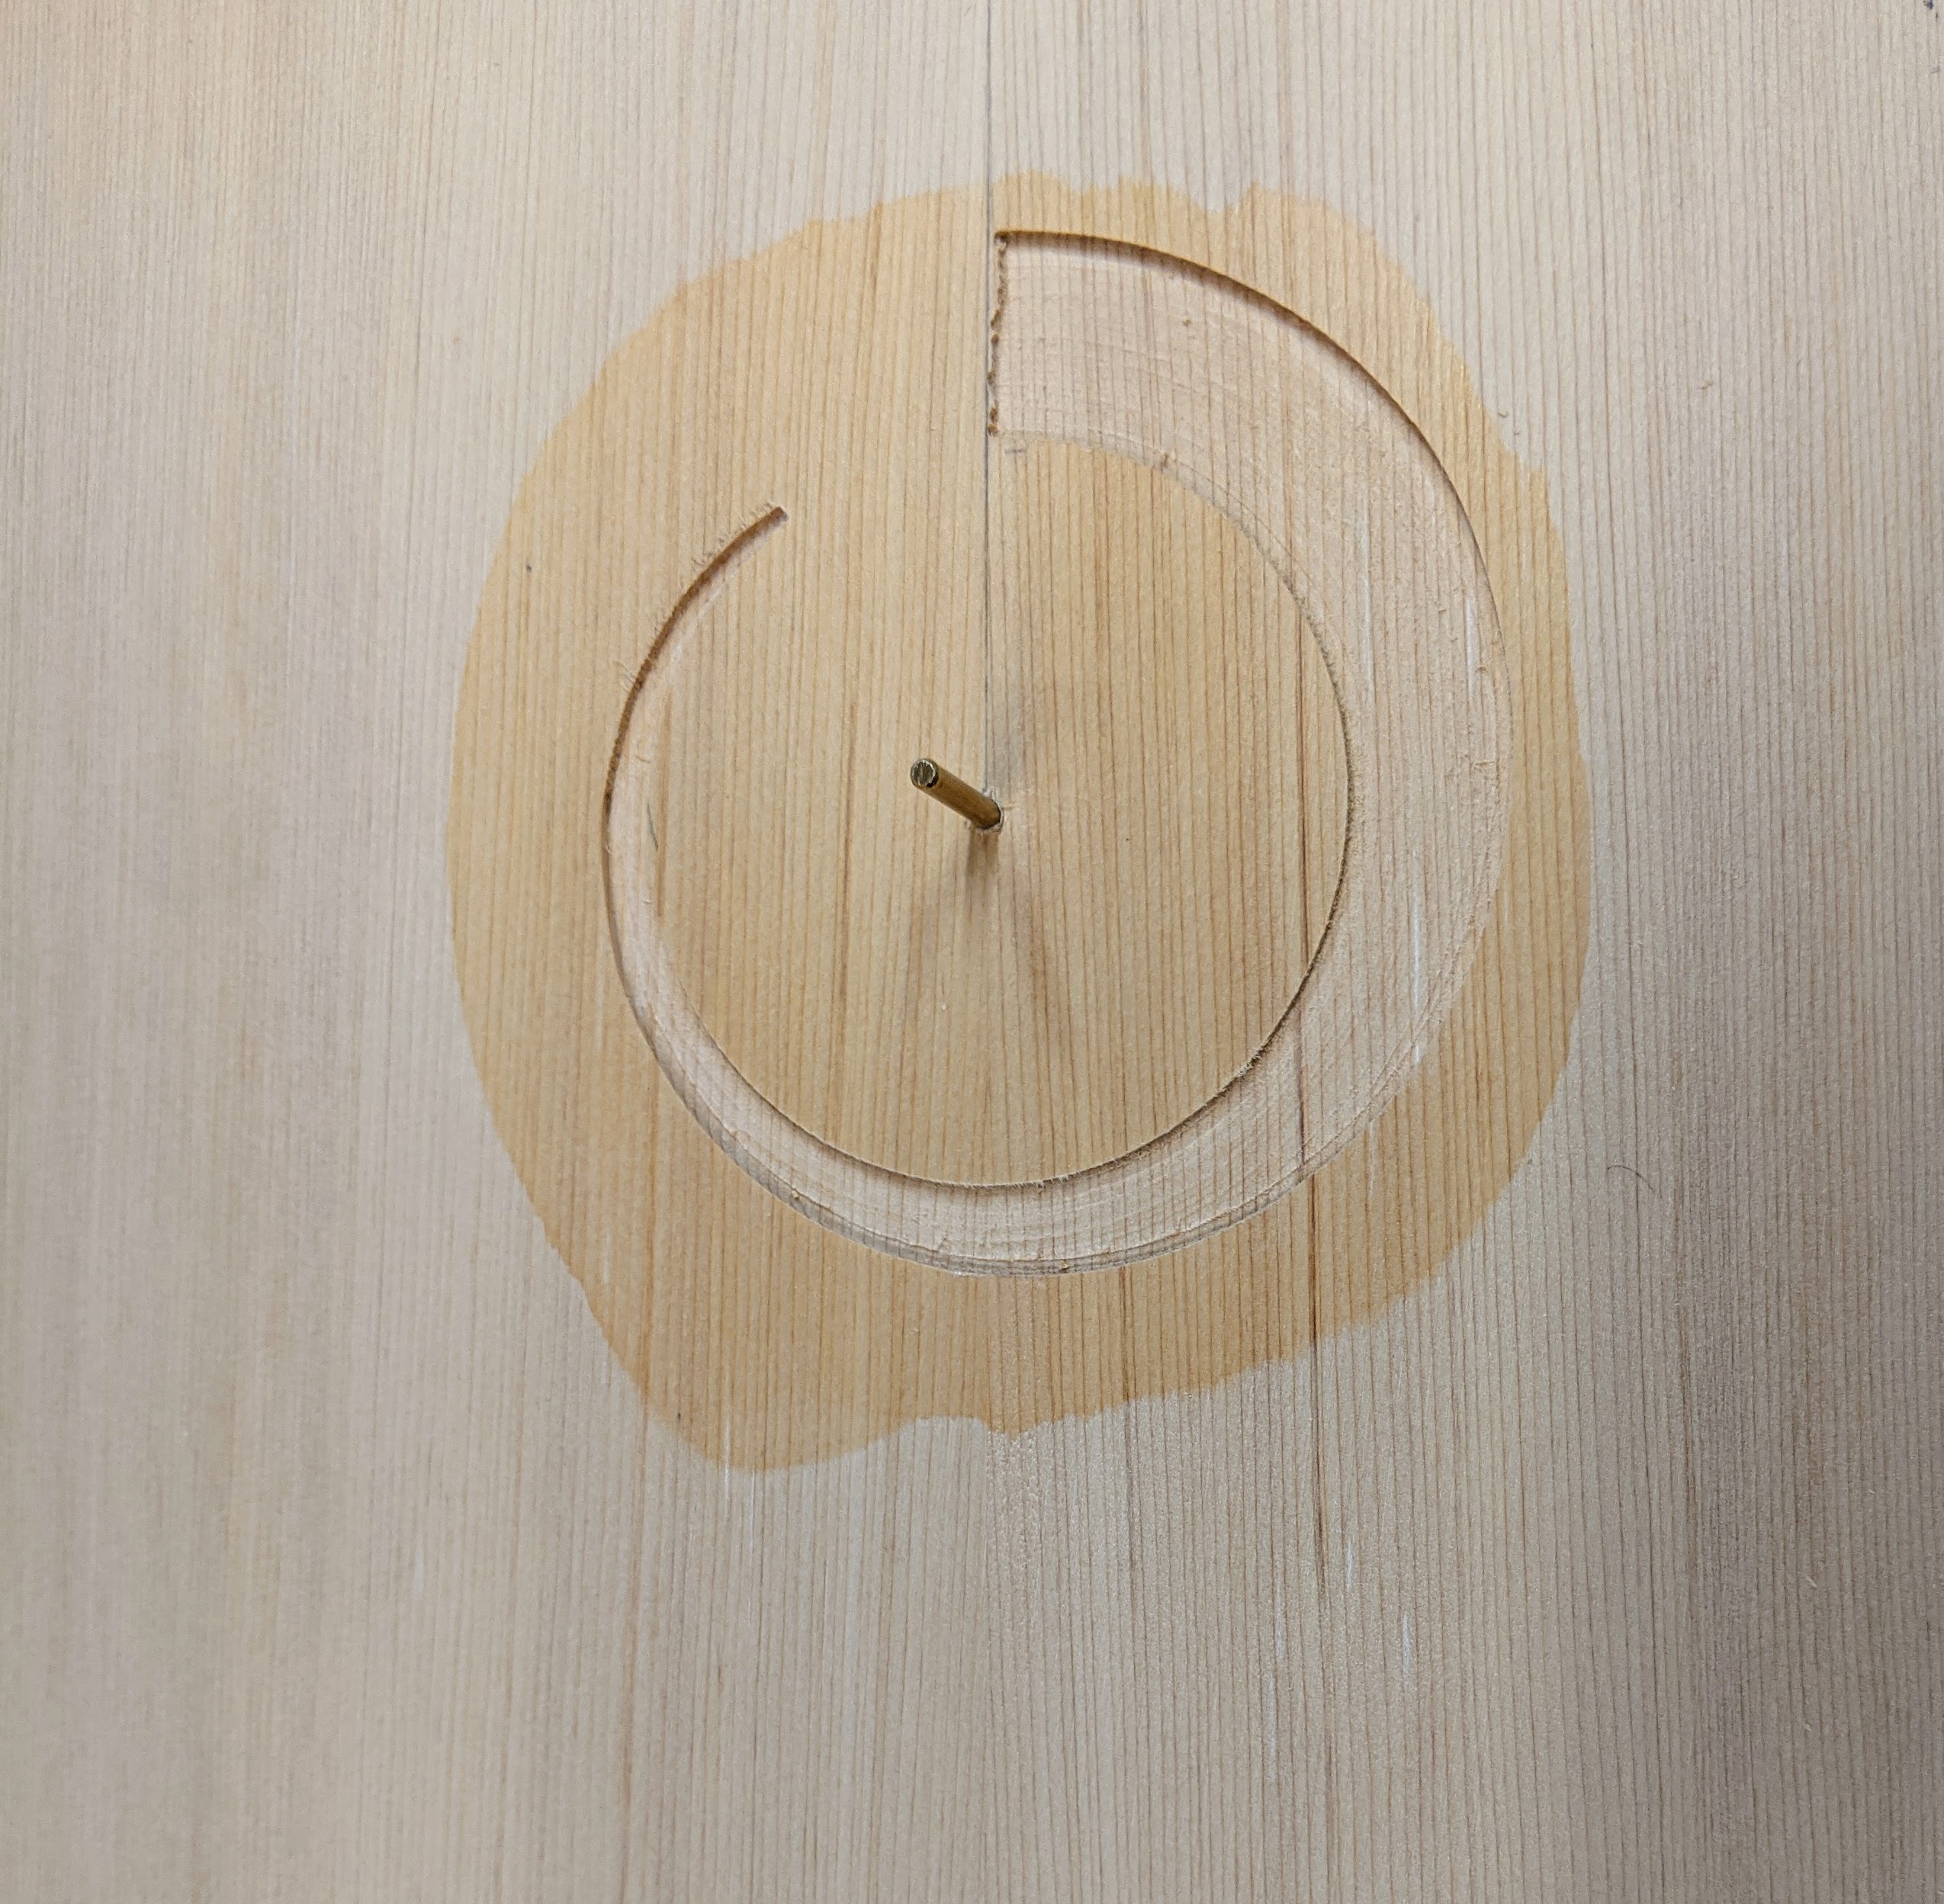
Then I switch router bases to the one I use for circular rosette cutting. This base has a series of holes that fit over the 1/8″ registration pin. Between successive holes the circle which is cut changes by 1/32 of an inch.
Using this I cut a circle which just meets the tip of the spiral and contine this circle around. The sound hole will be centered in this circle, cut with the same router base, just moving to lower order holes. As I am cutting the spiral rosette, by moving to successive holes I clean out the whole spiral channel
Now all that remains is to do the pearl work. Since I have the drawing of the spiral template in Corel Draw I can us that to print the pattern to cut the pearl.
Here I will detail the next set of instruments as they go along. Right now there is a guitalele, based on a baritone body, and a true baritone. The guitalele is caramel sycamore back and sides with a Port Orford cedar top and the true baritone is curly black walnut back and sides and a redwood top.
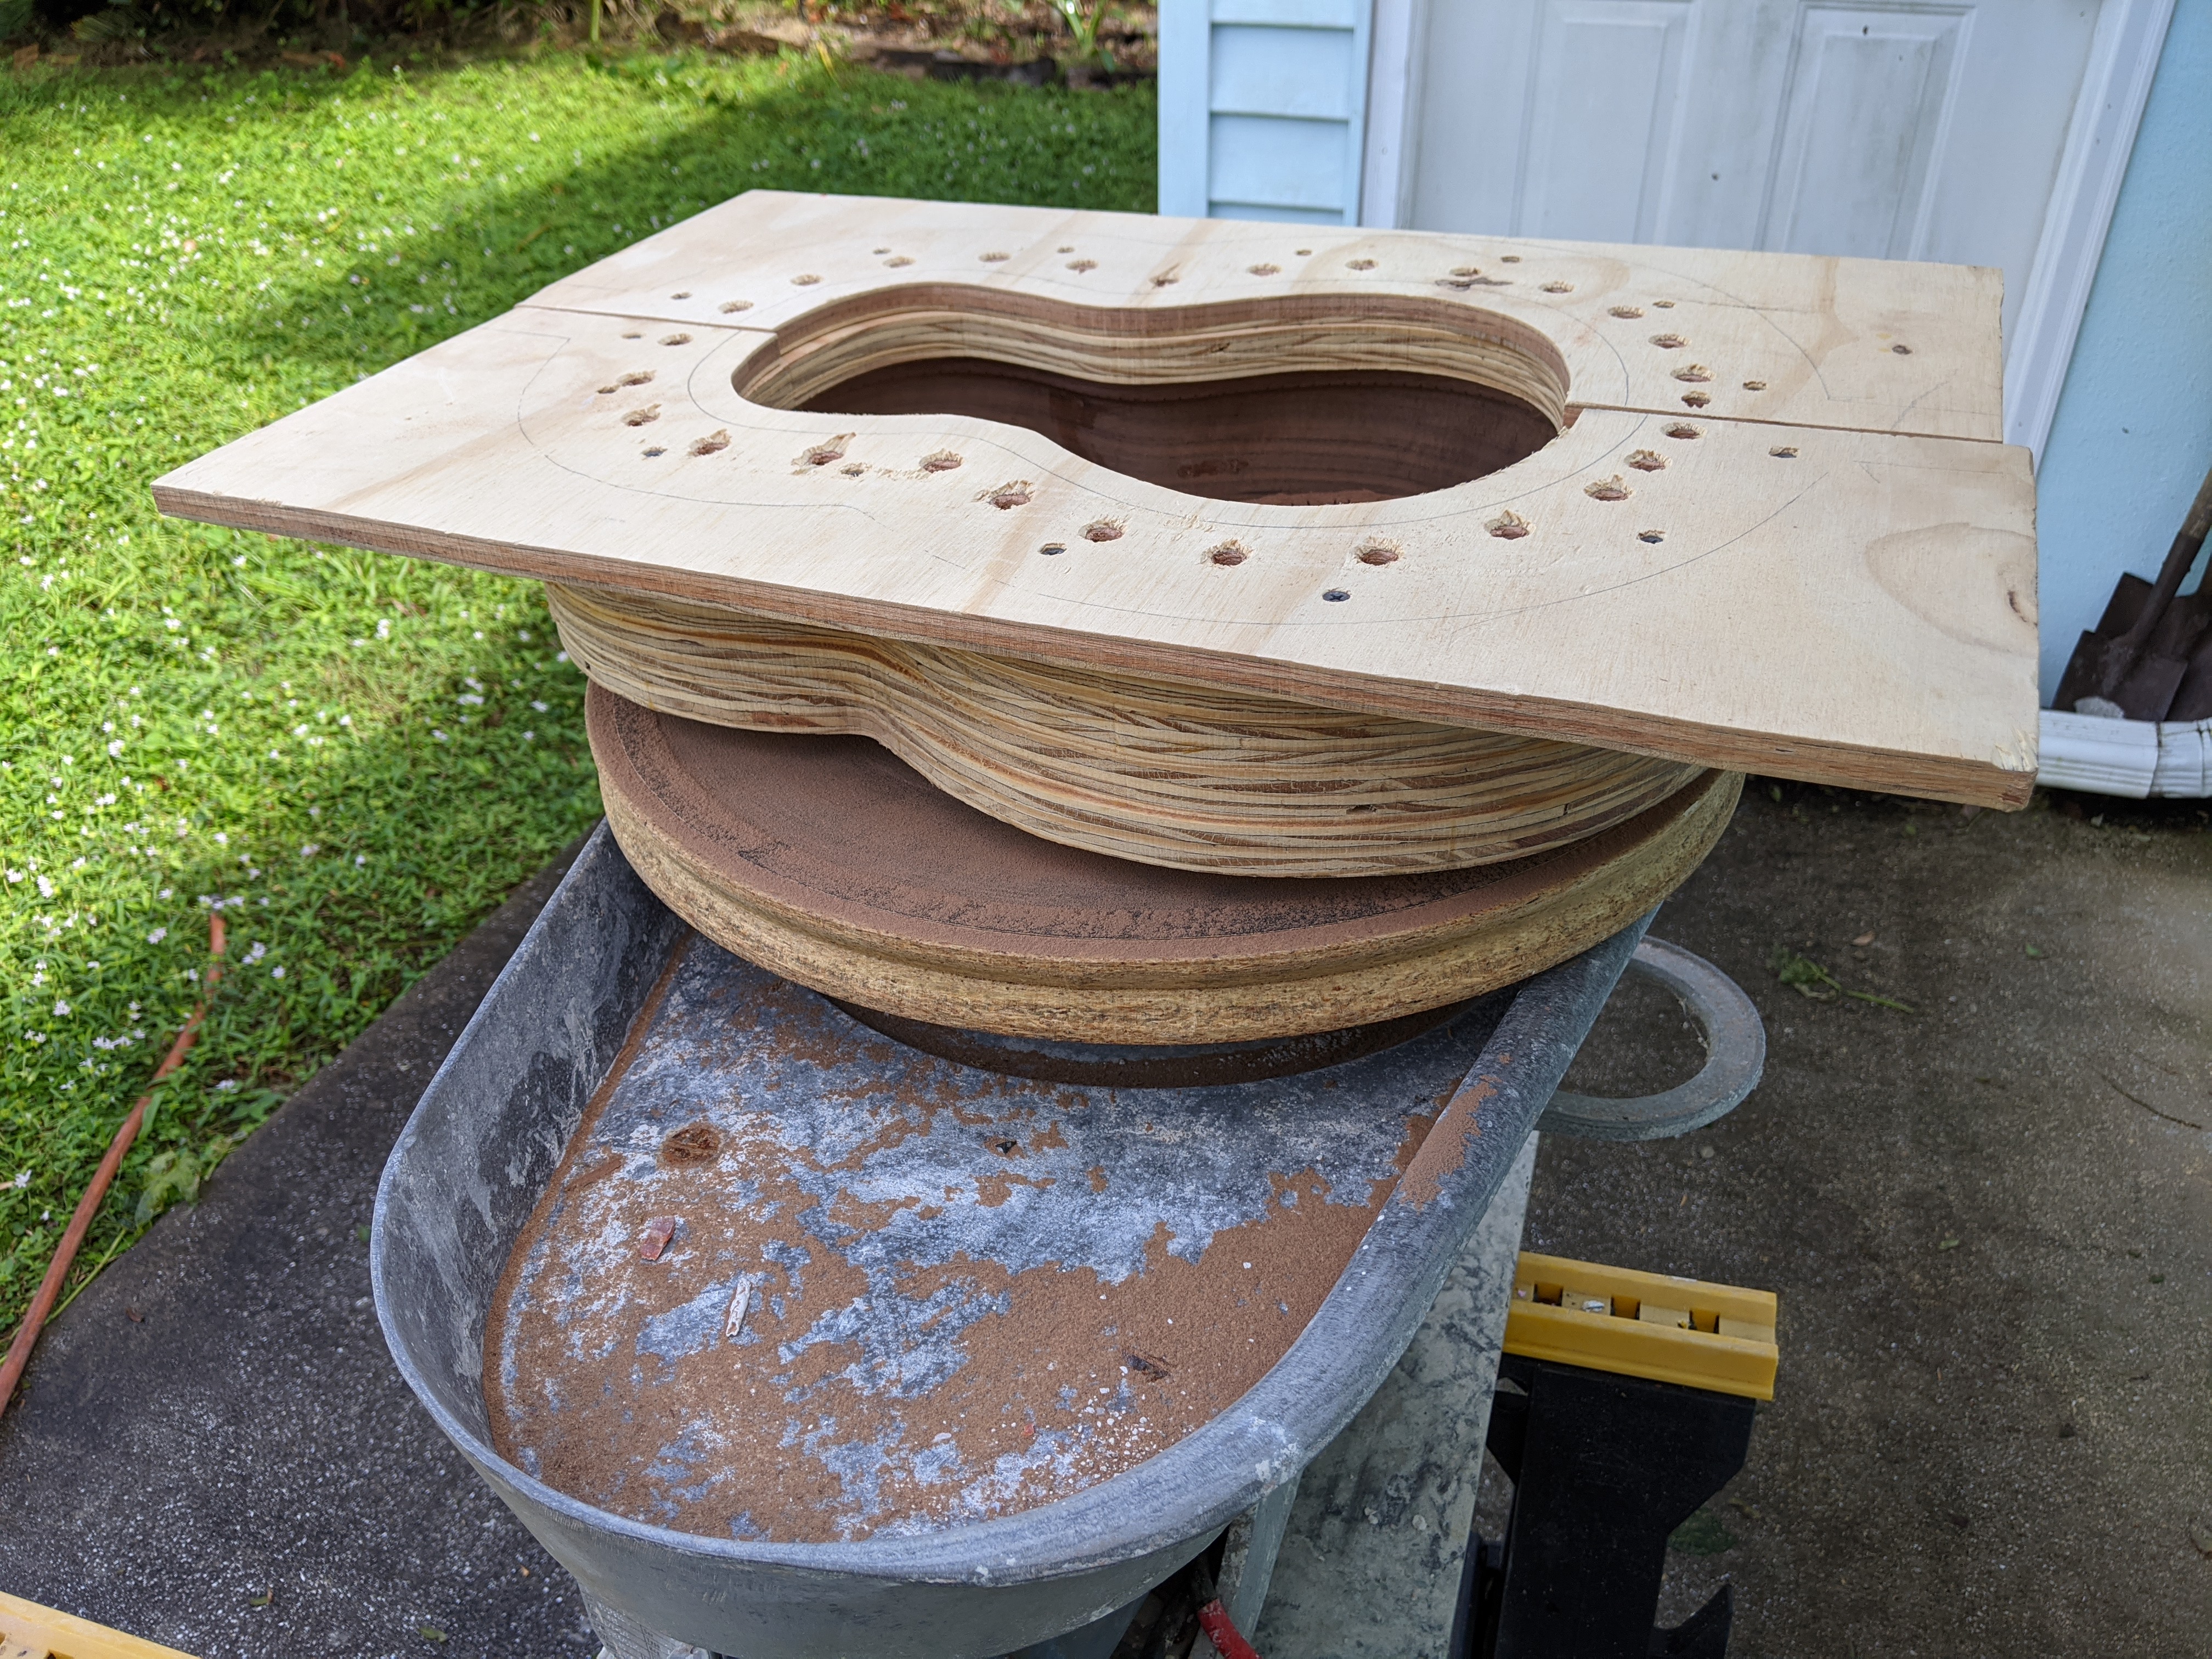
The first job is to glue the two book-matched halves of the top and back together. To do this one must create a perfectly straight edge along the gluing surface. To do this I use a spiral router bit with a bearing and a sled that holds the two pieces. There is a good quality straight-edge set into the sled that rides on the router bearing so I cut a perfectly straight edge.
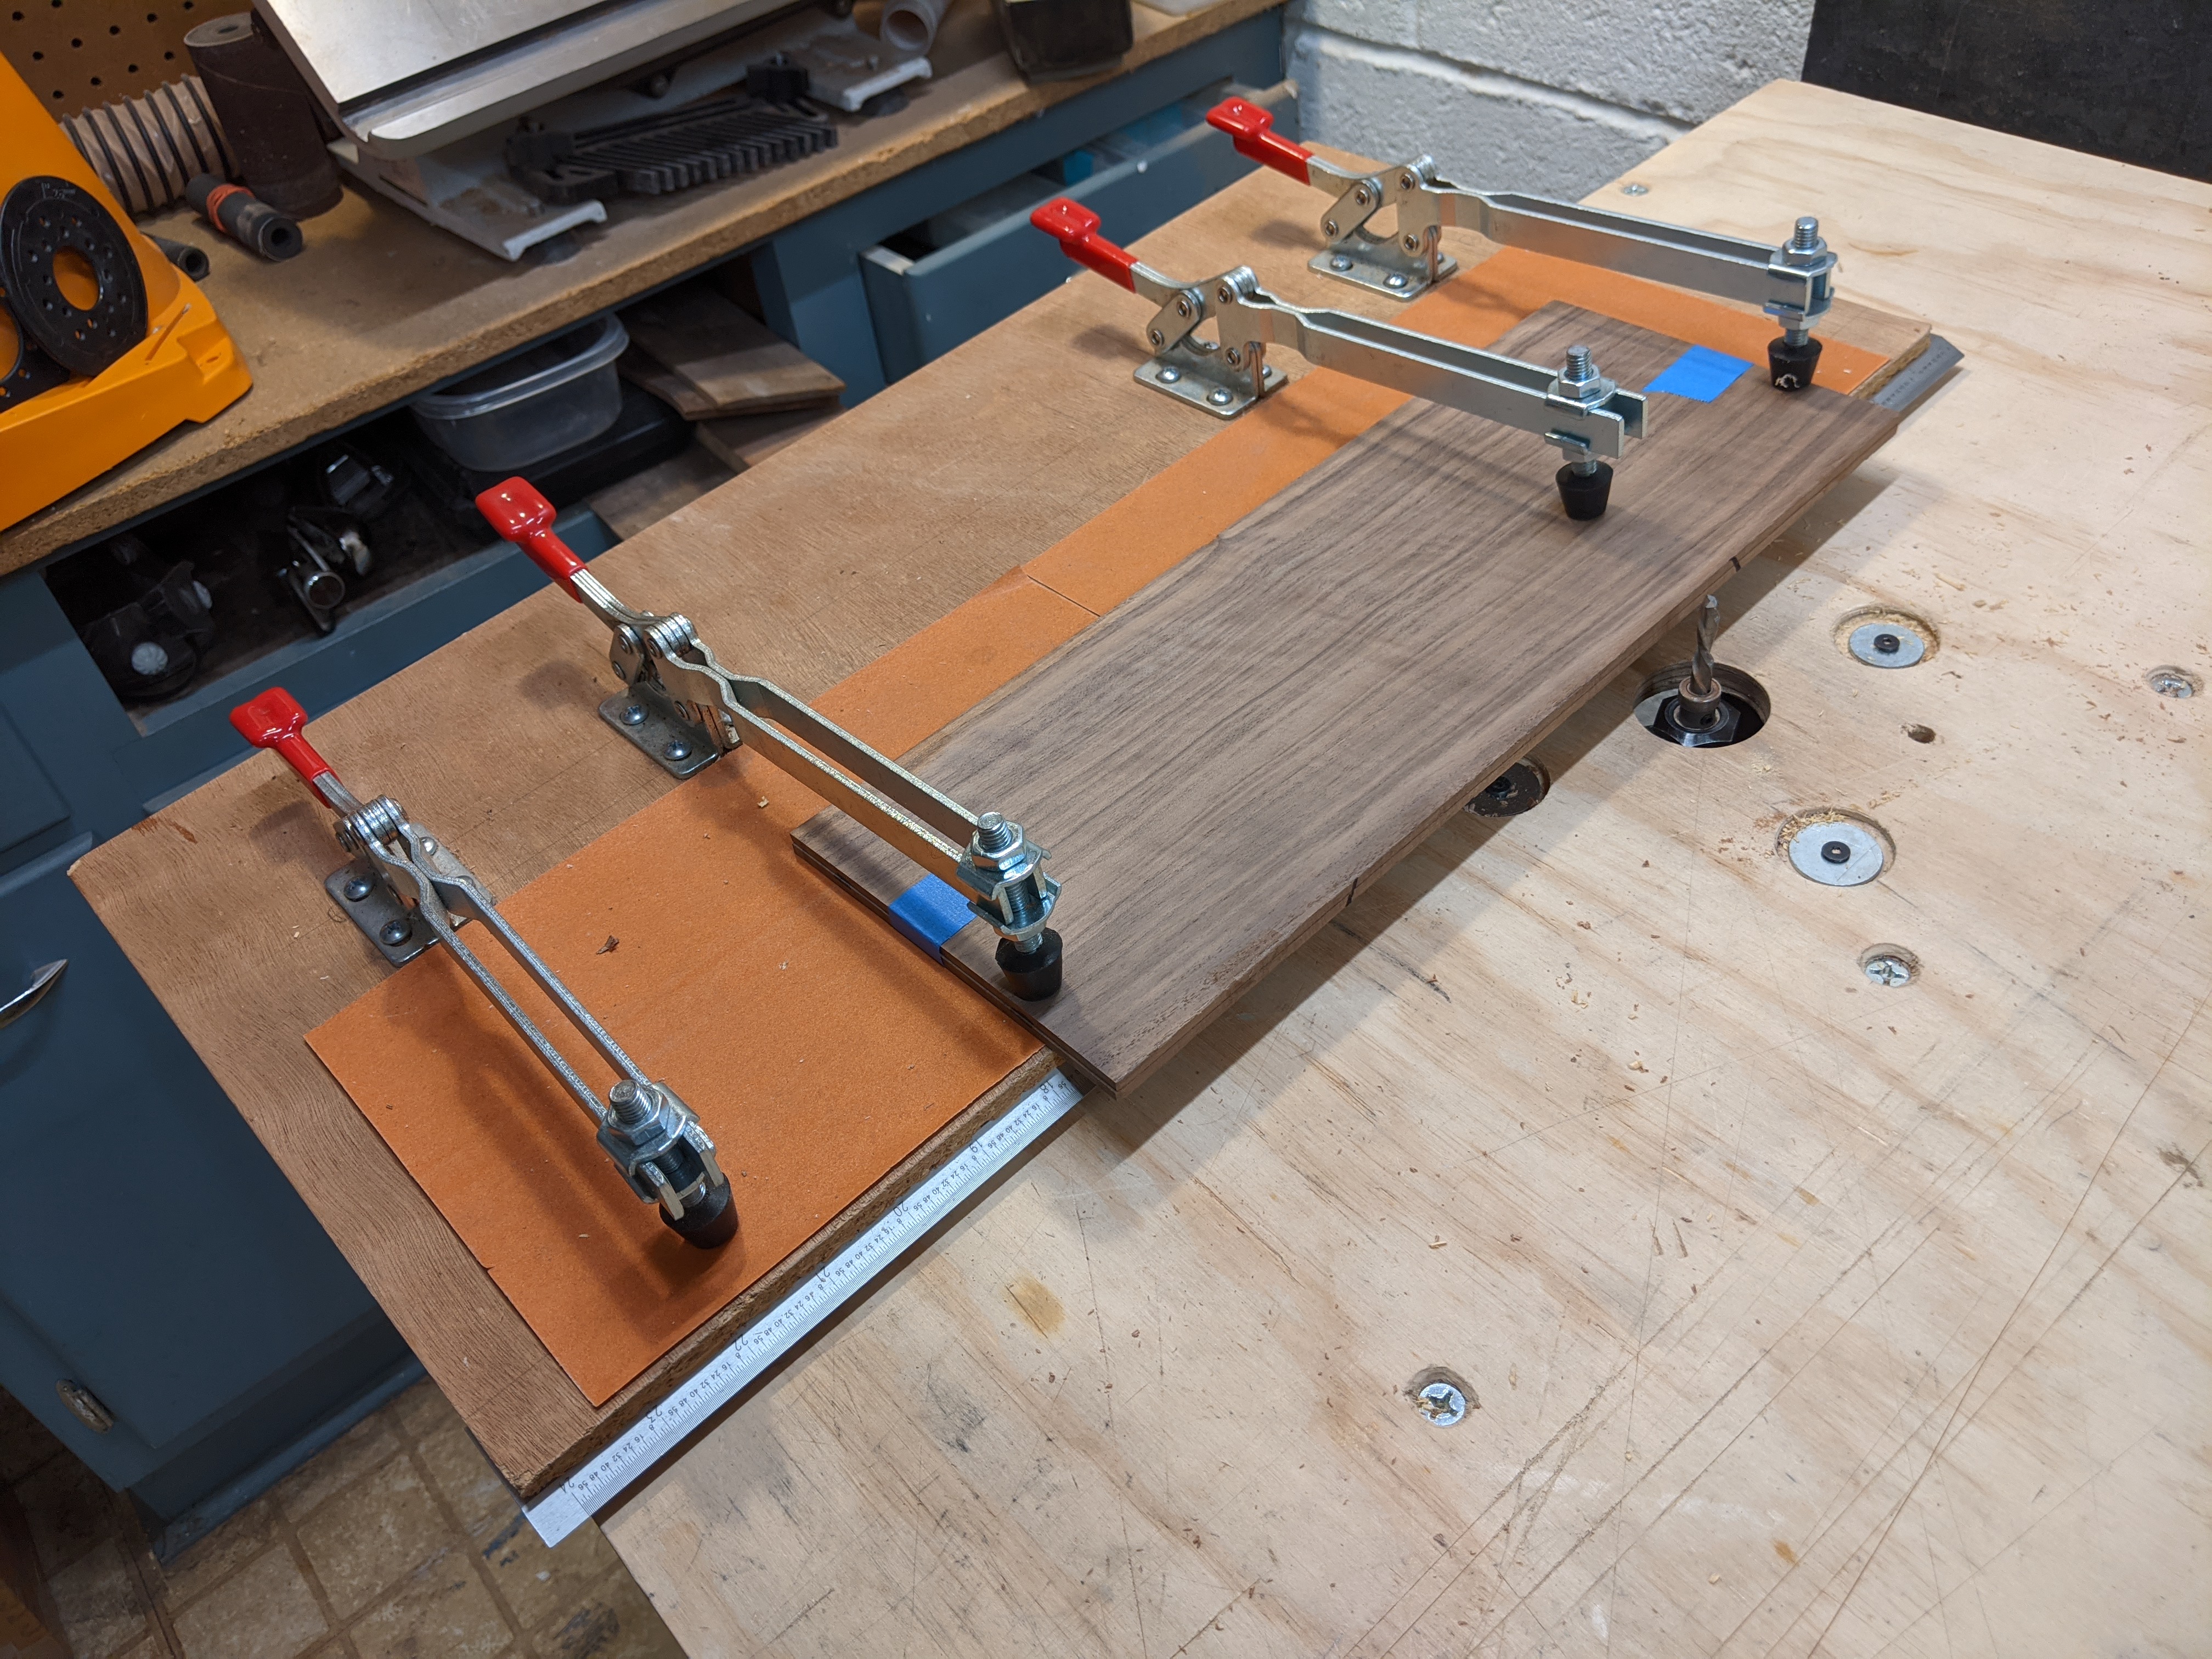
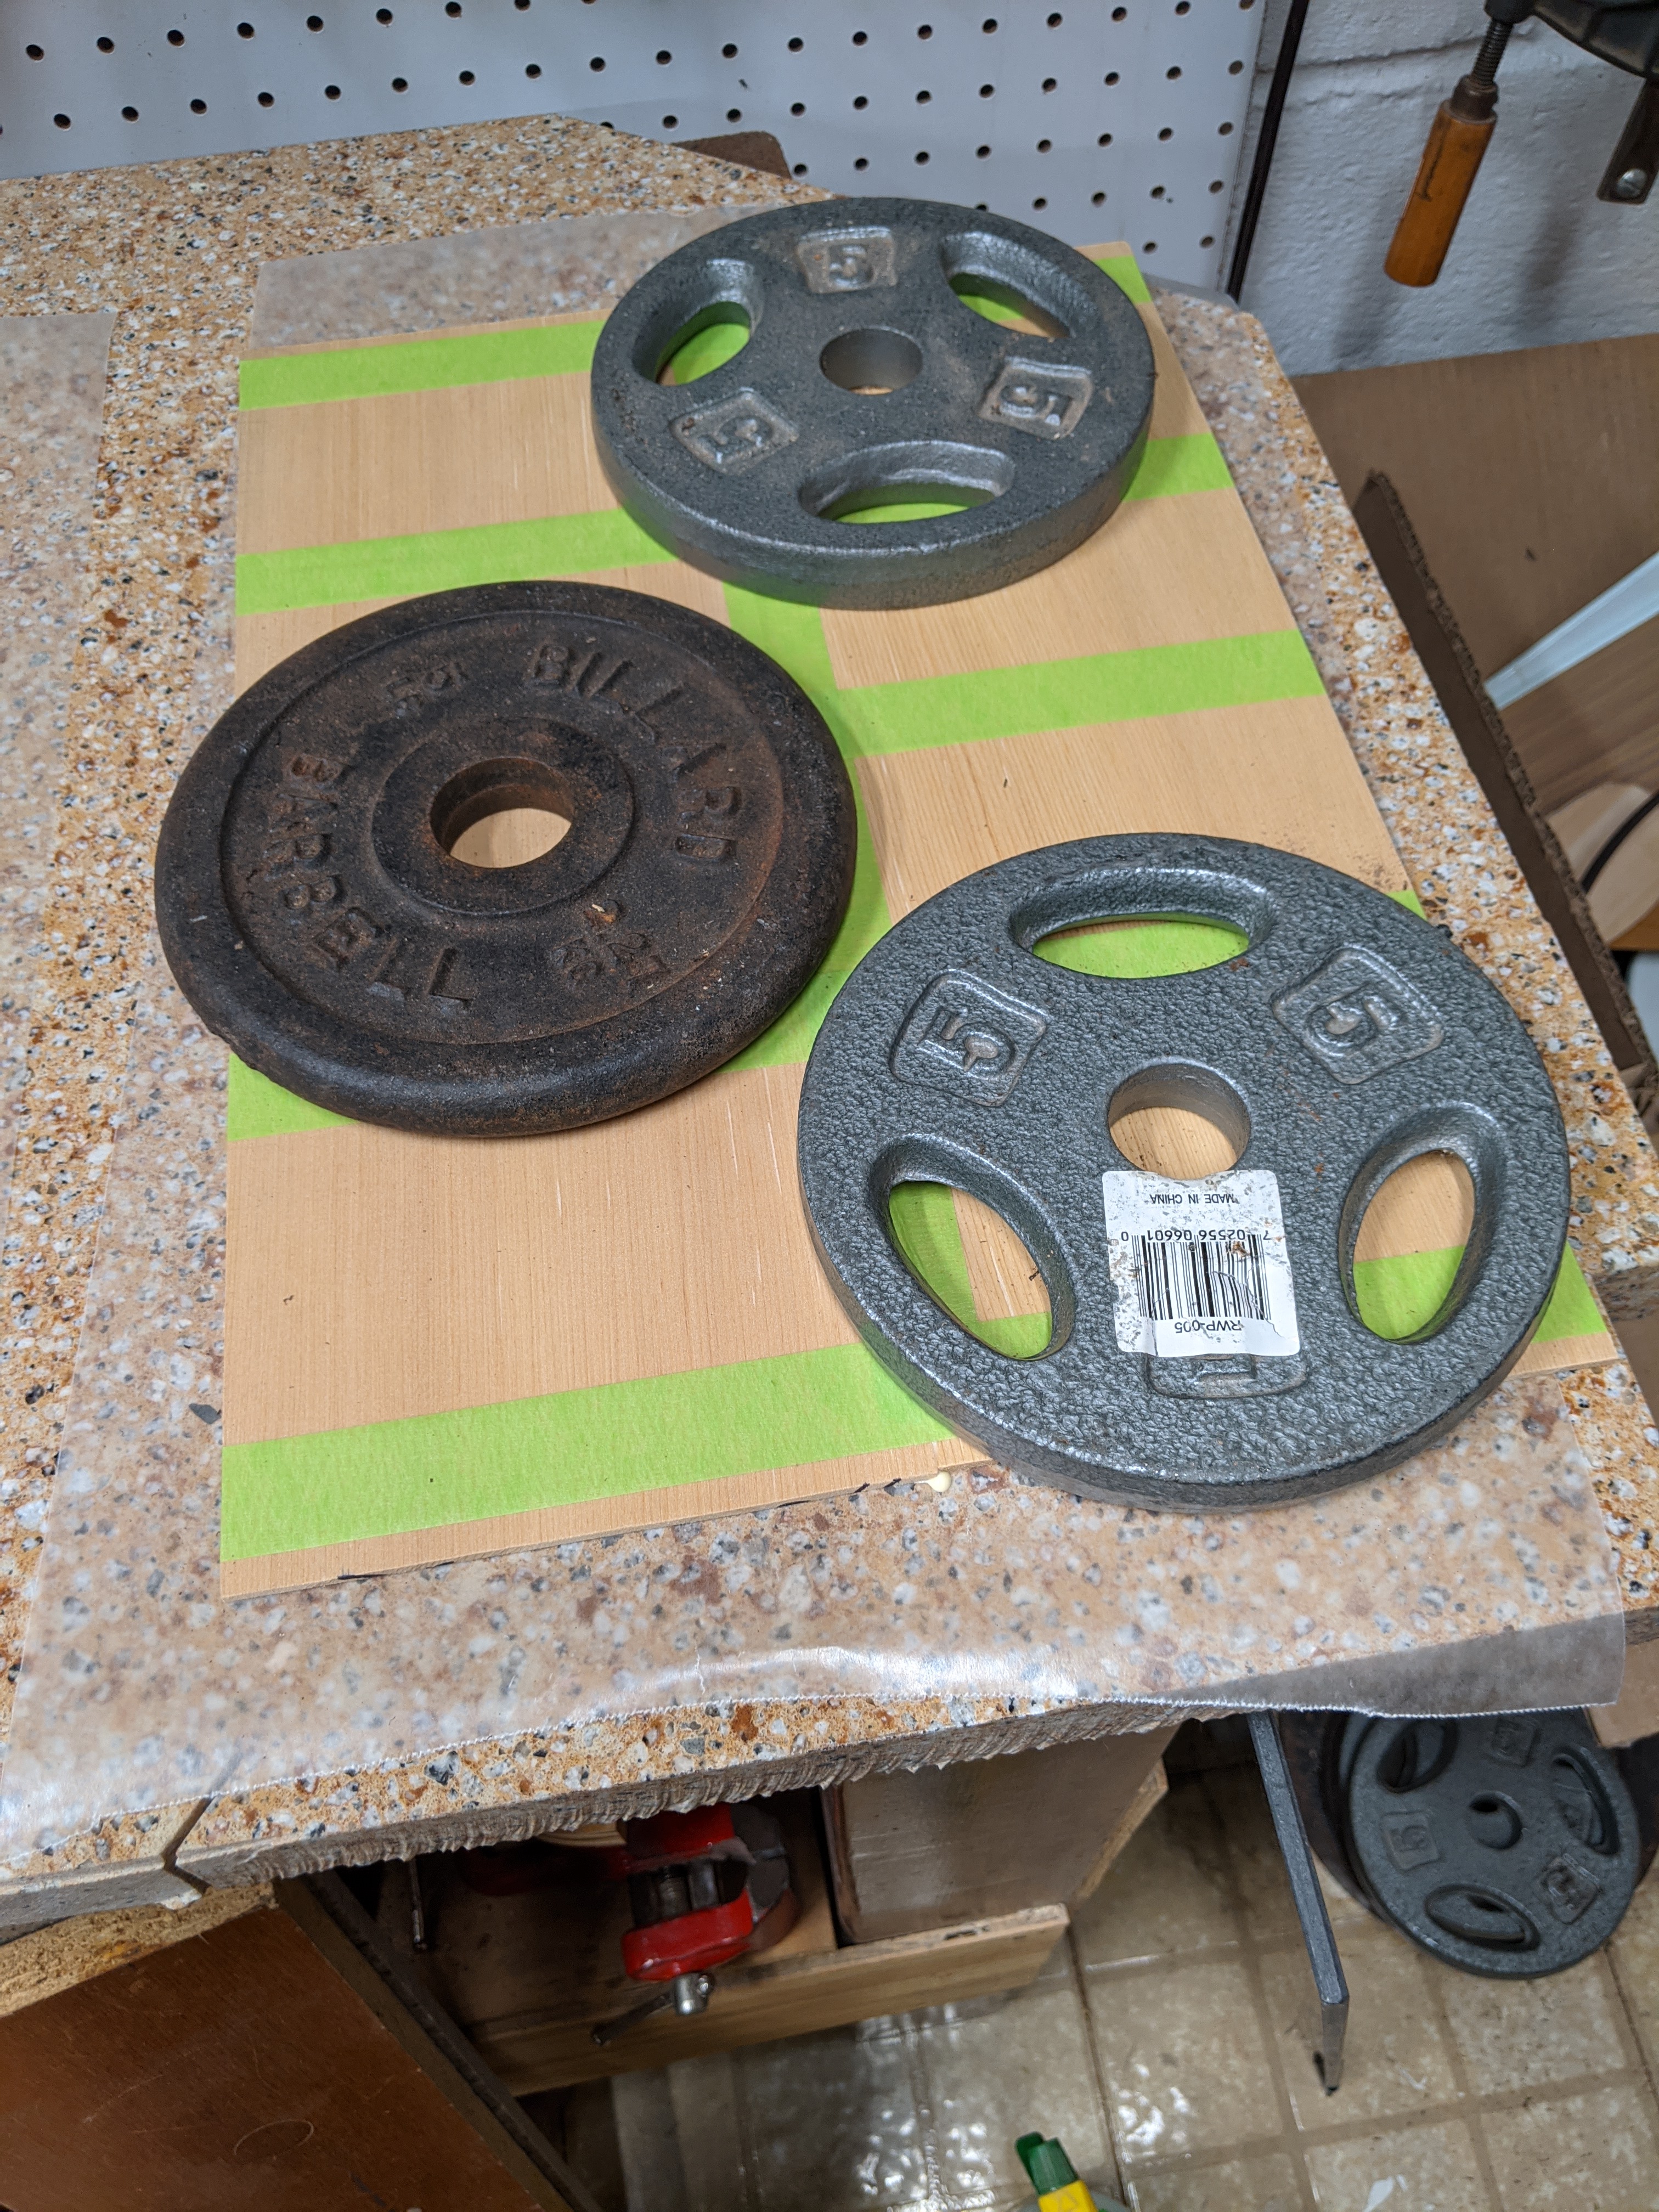
To glue the halves to get I have tried a number of different ways of clamping the halves together. I’ve made jig boards etc. but what I do now is the utmost in simplicity, works very well, and allows me to do a couple of things at a time, limited by how much really flat space I have. My method is to use tape of all things. Specifically 3M 233+ tape which is green and rather stretchy. I put strips of tape across the halves, leaving them in a ‘V’ shape. The ‘show’ side, the side that will be out and be seen, is down.
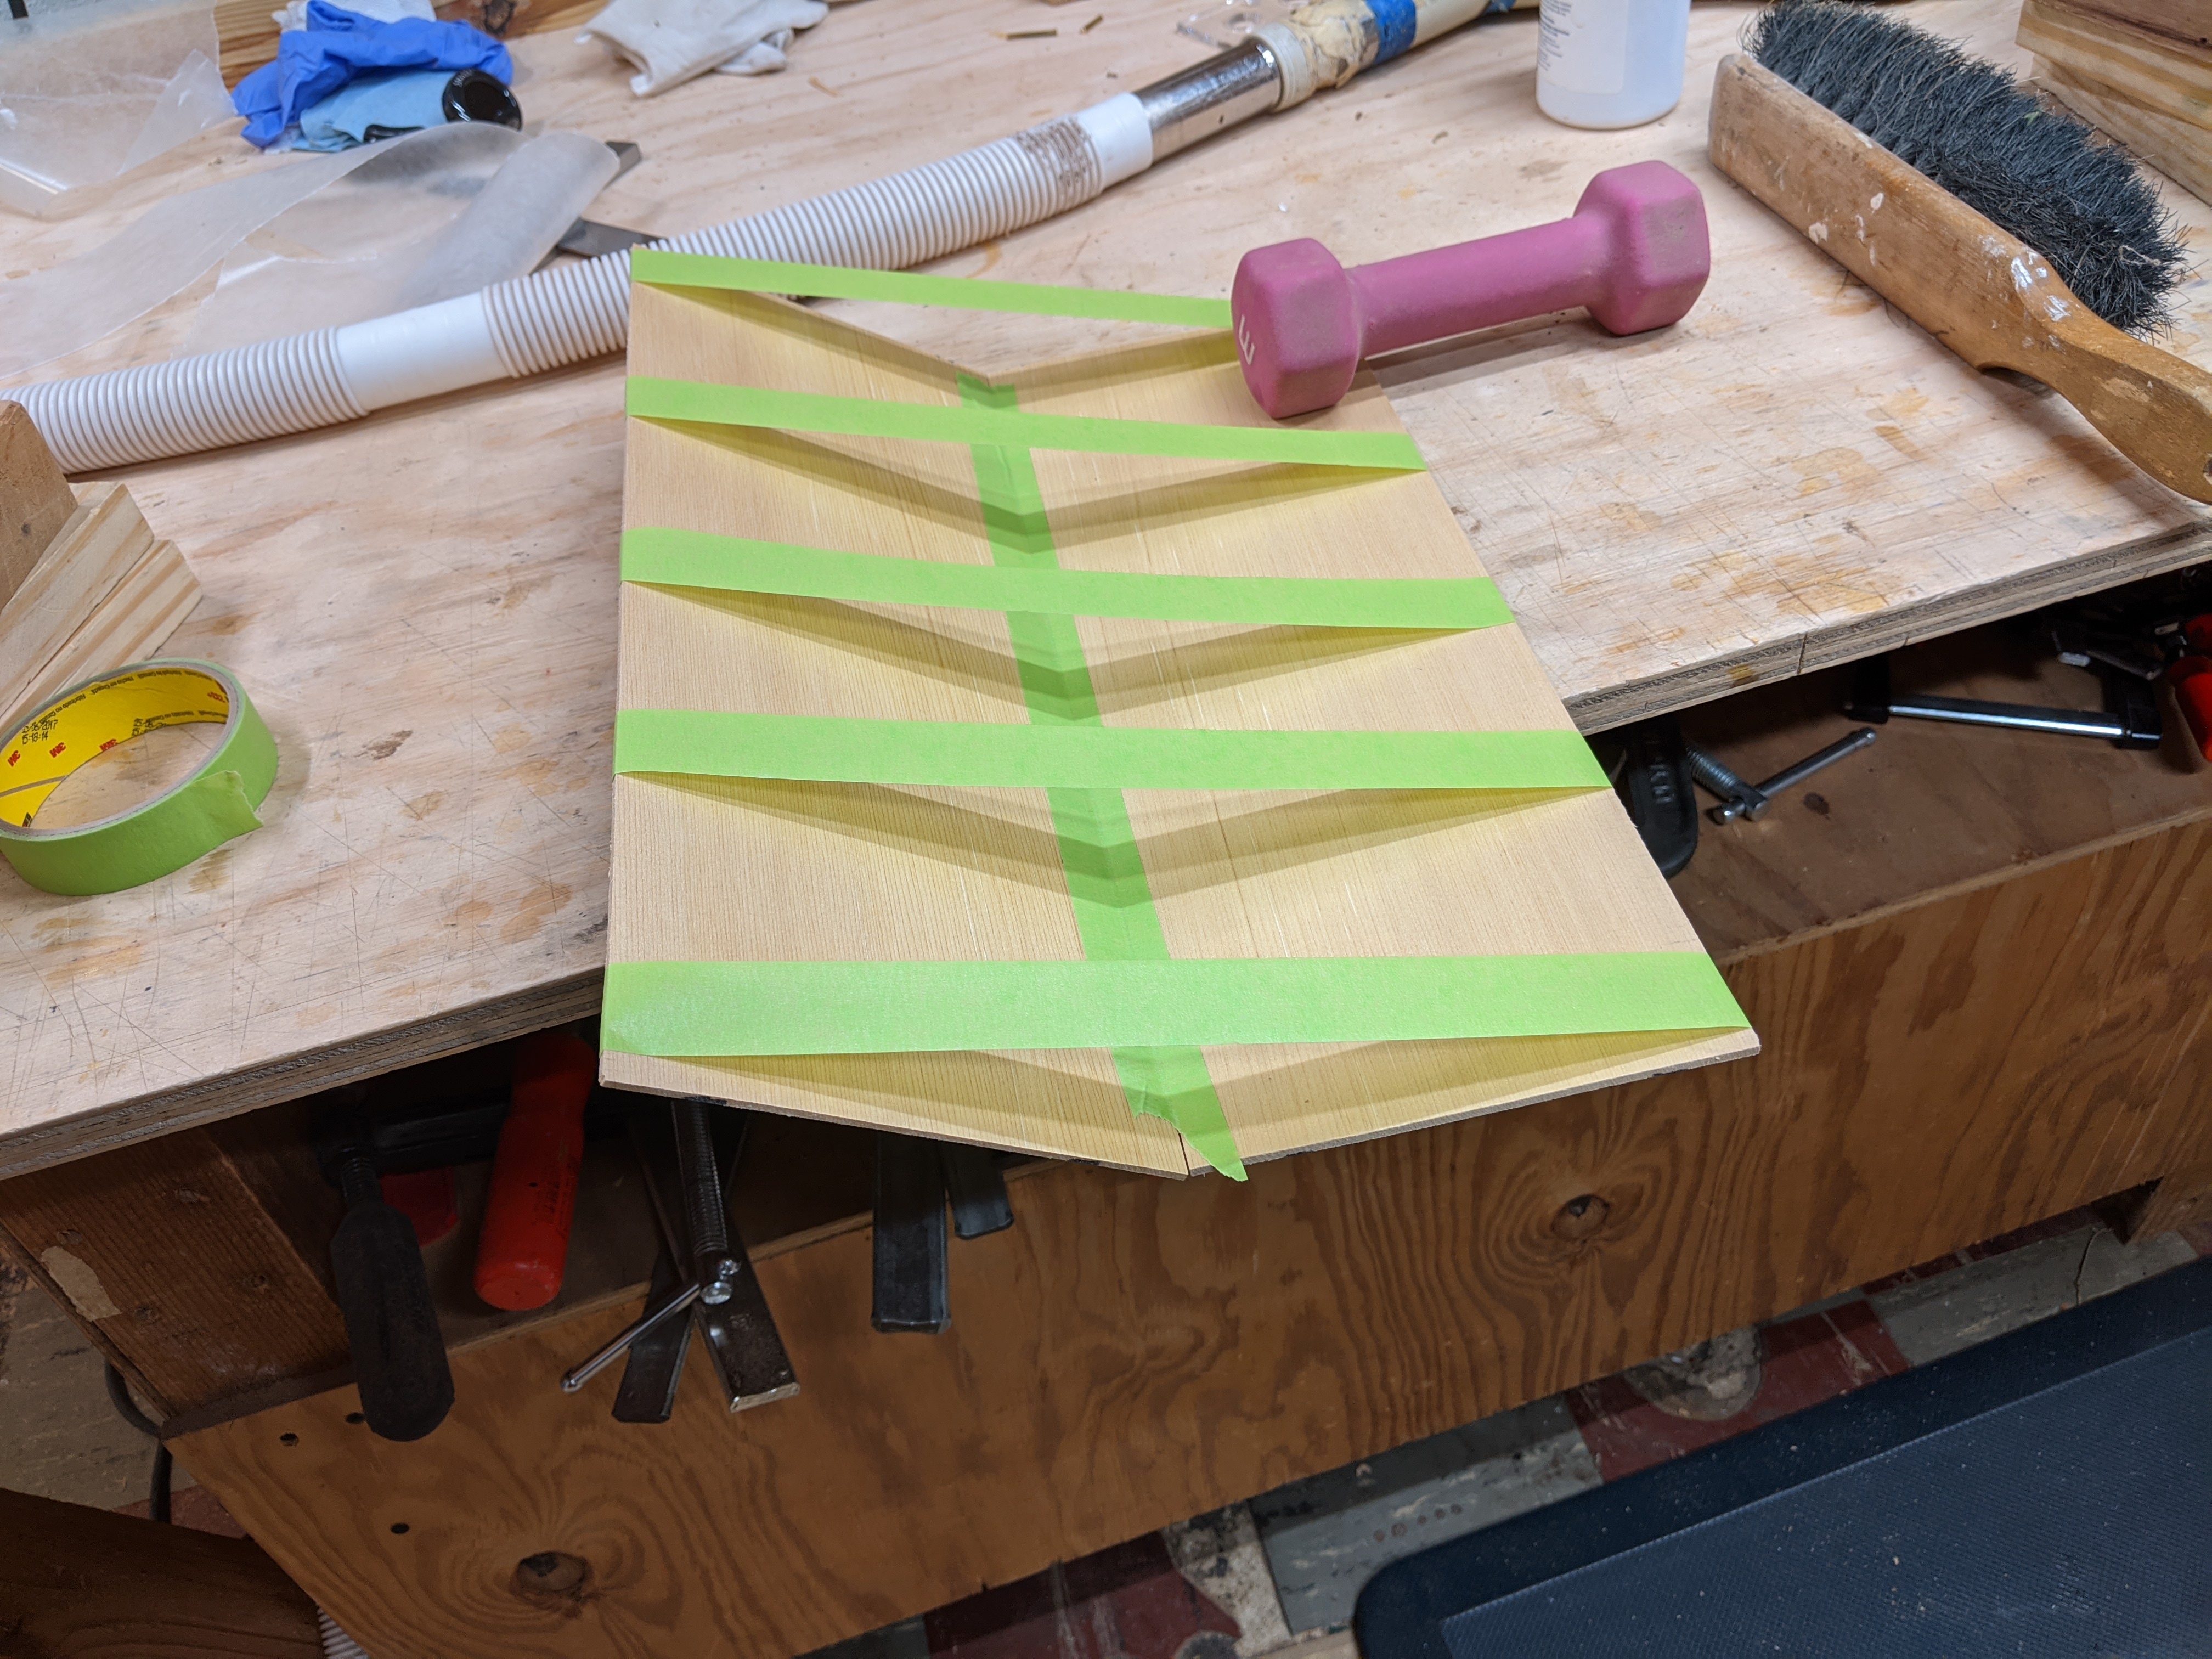
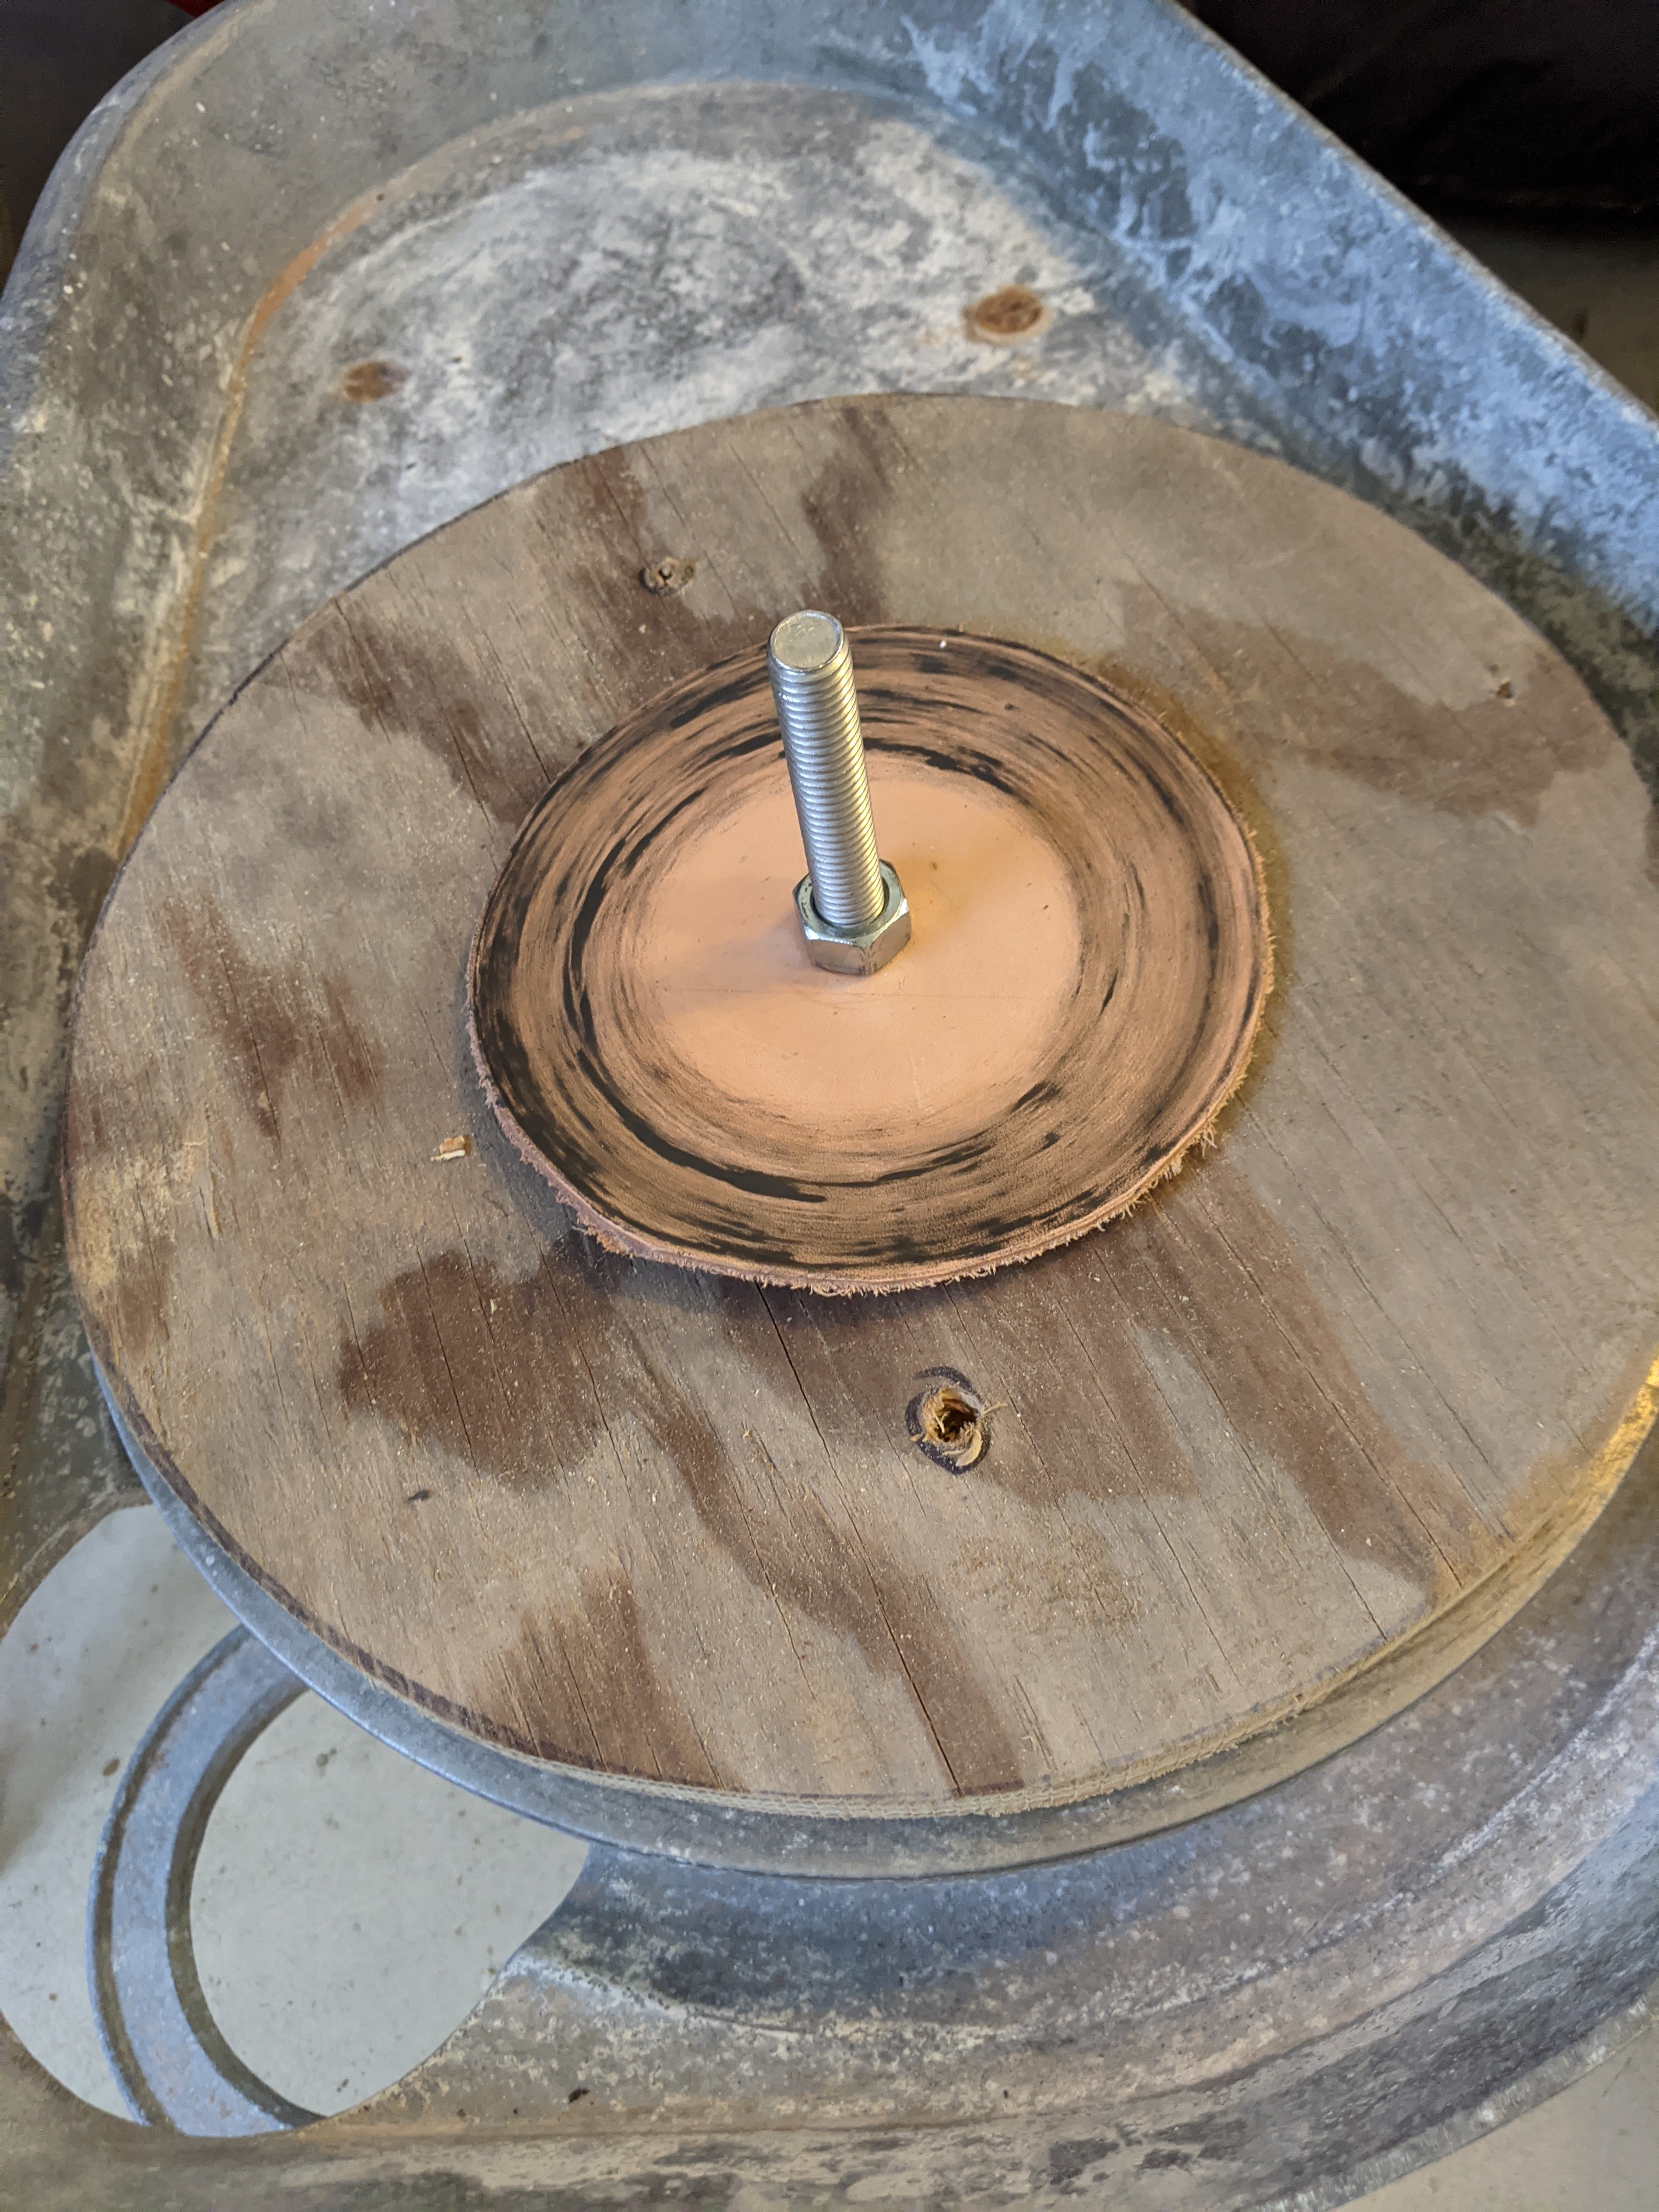
I flip this over, apply glue along the crack, and then press it down on a really flat surface (I have a number of pieces of quartz counter top that is very flat, great stuff around the workshop). Since the ‘show’ side is down the ‘show’ edges get lined up and any unevenness will be sanded off the back. As you press it down the tape stretches and creates quite a lot of force. A couple of barbell weights to keep things flat and that is it.
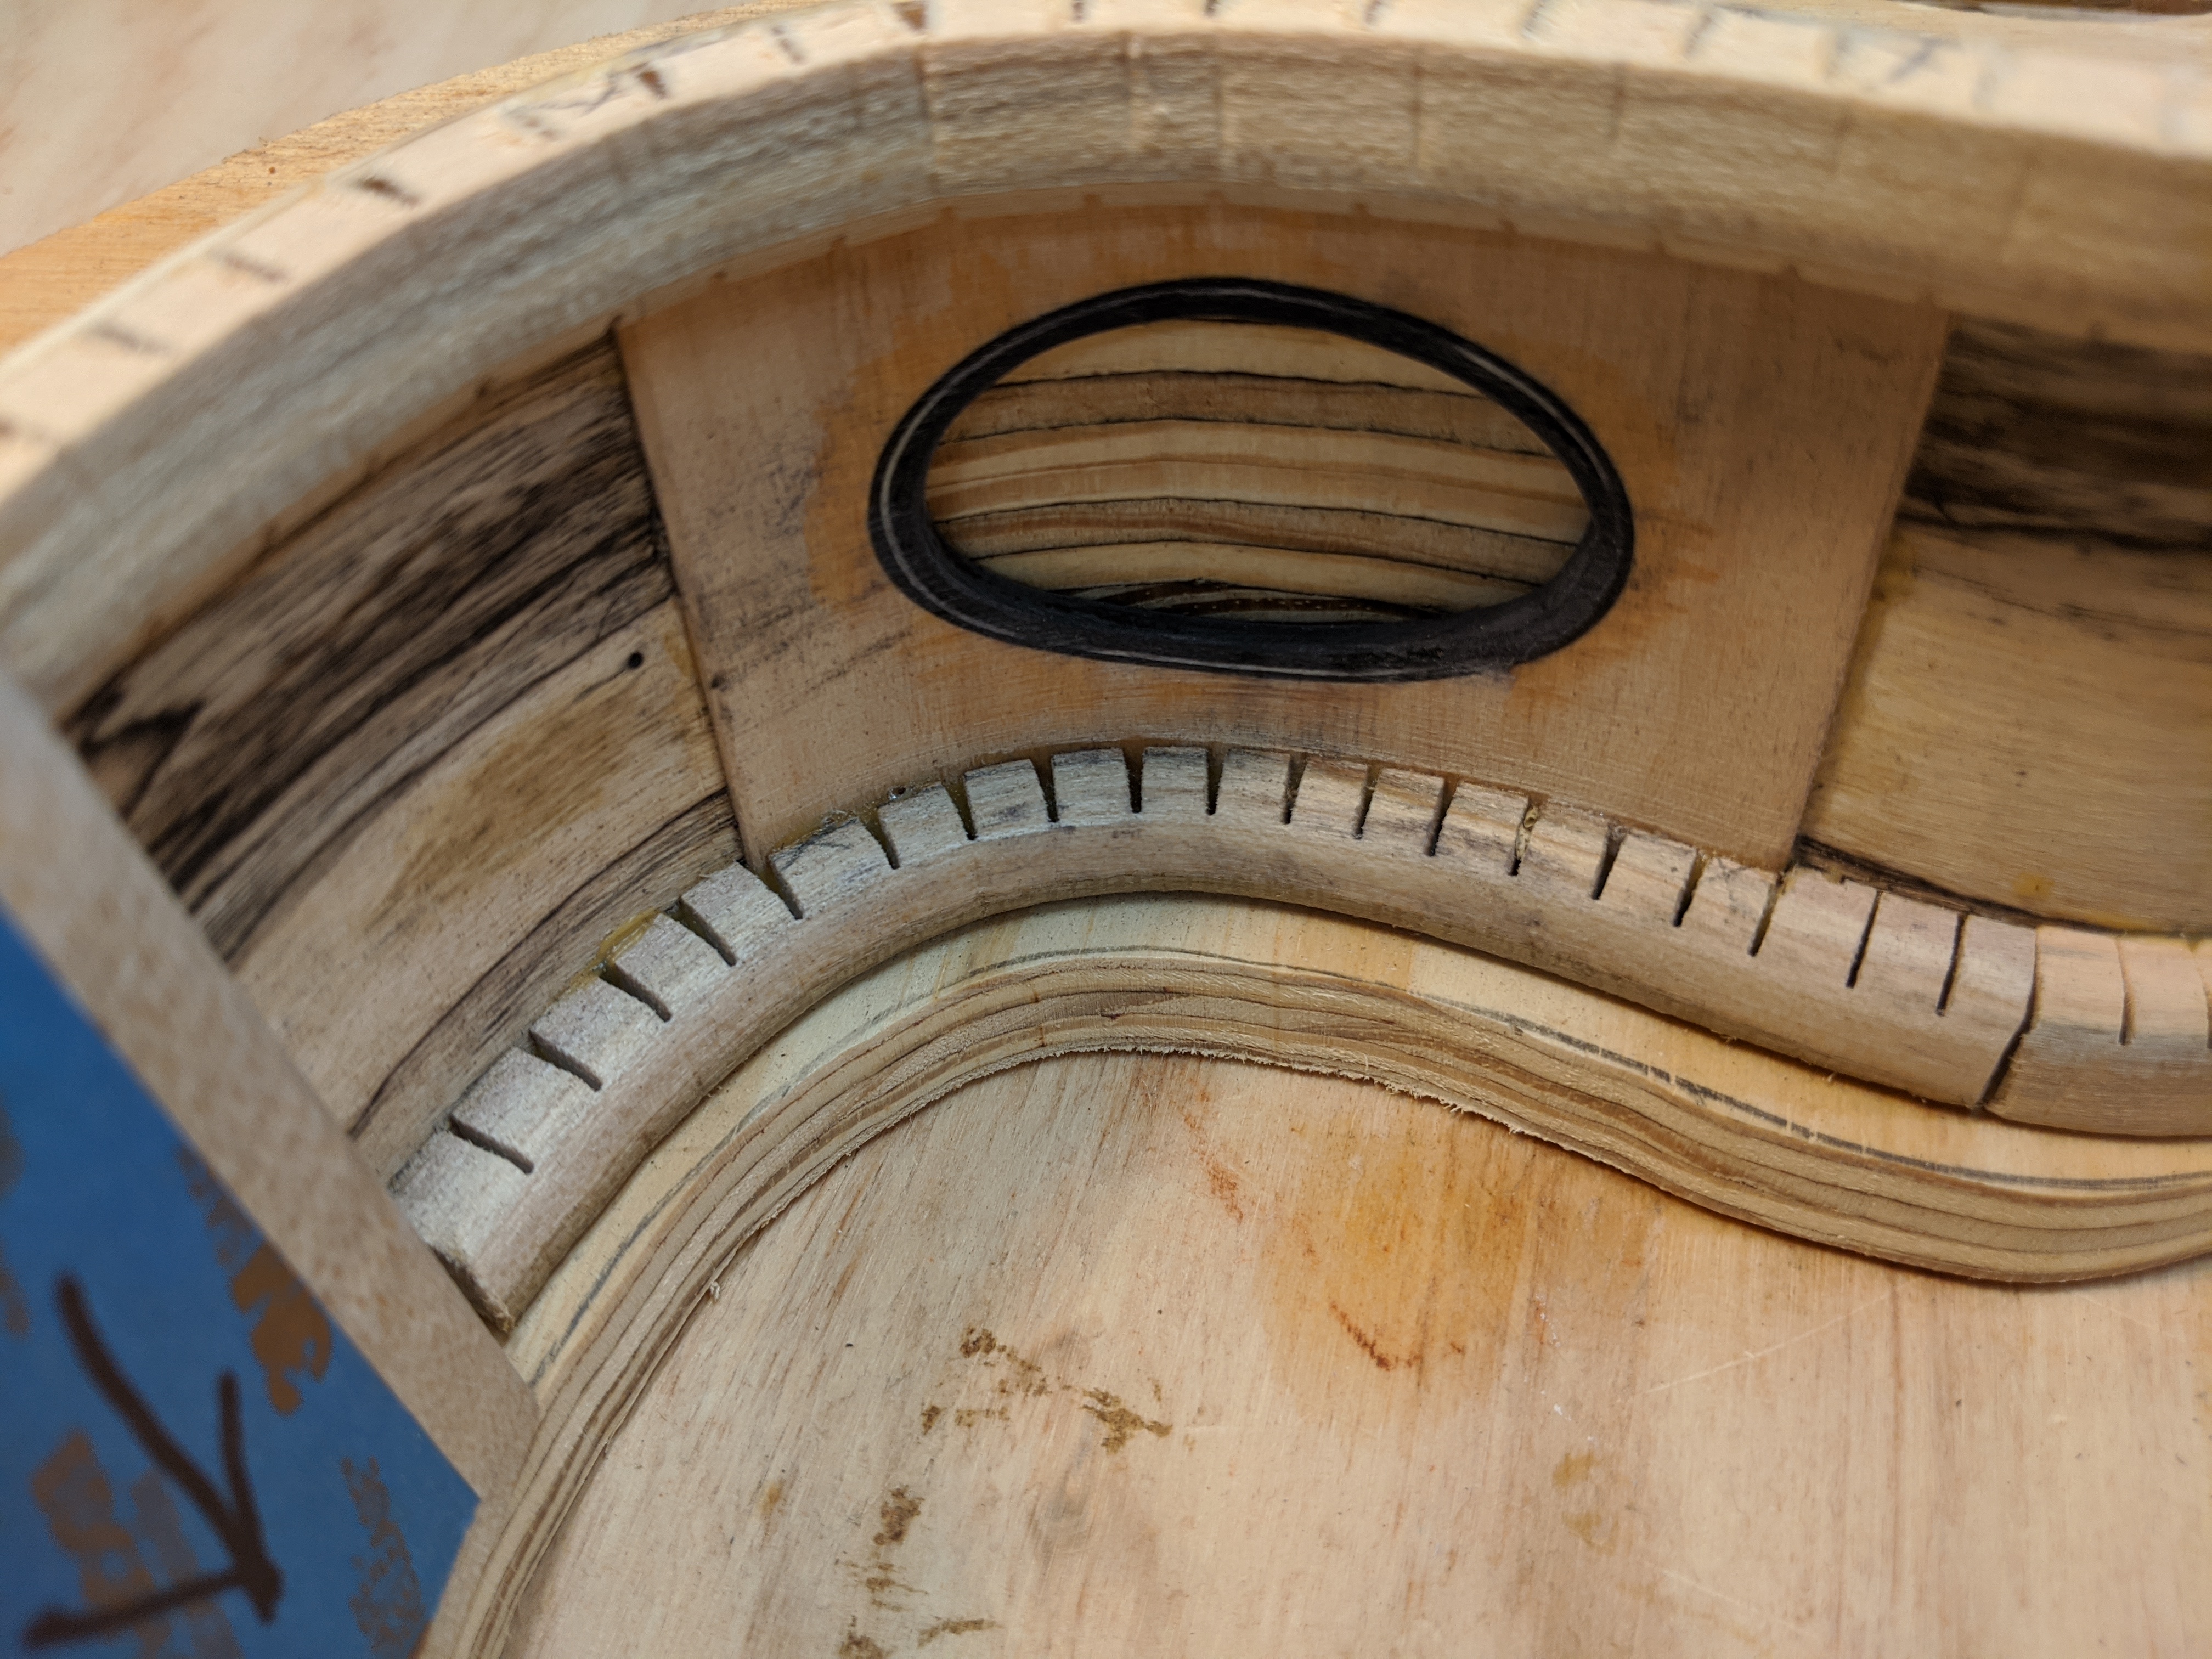
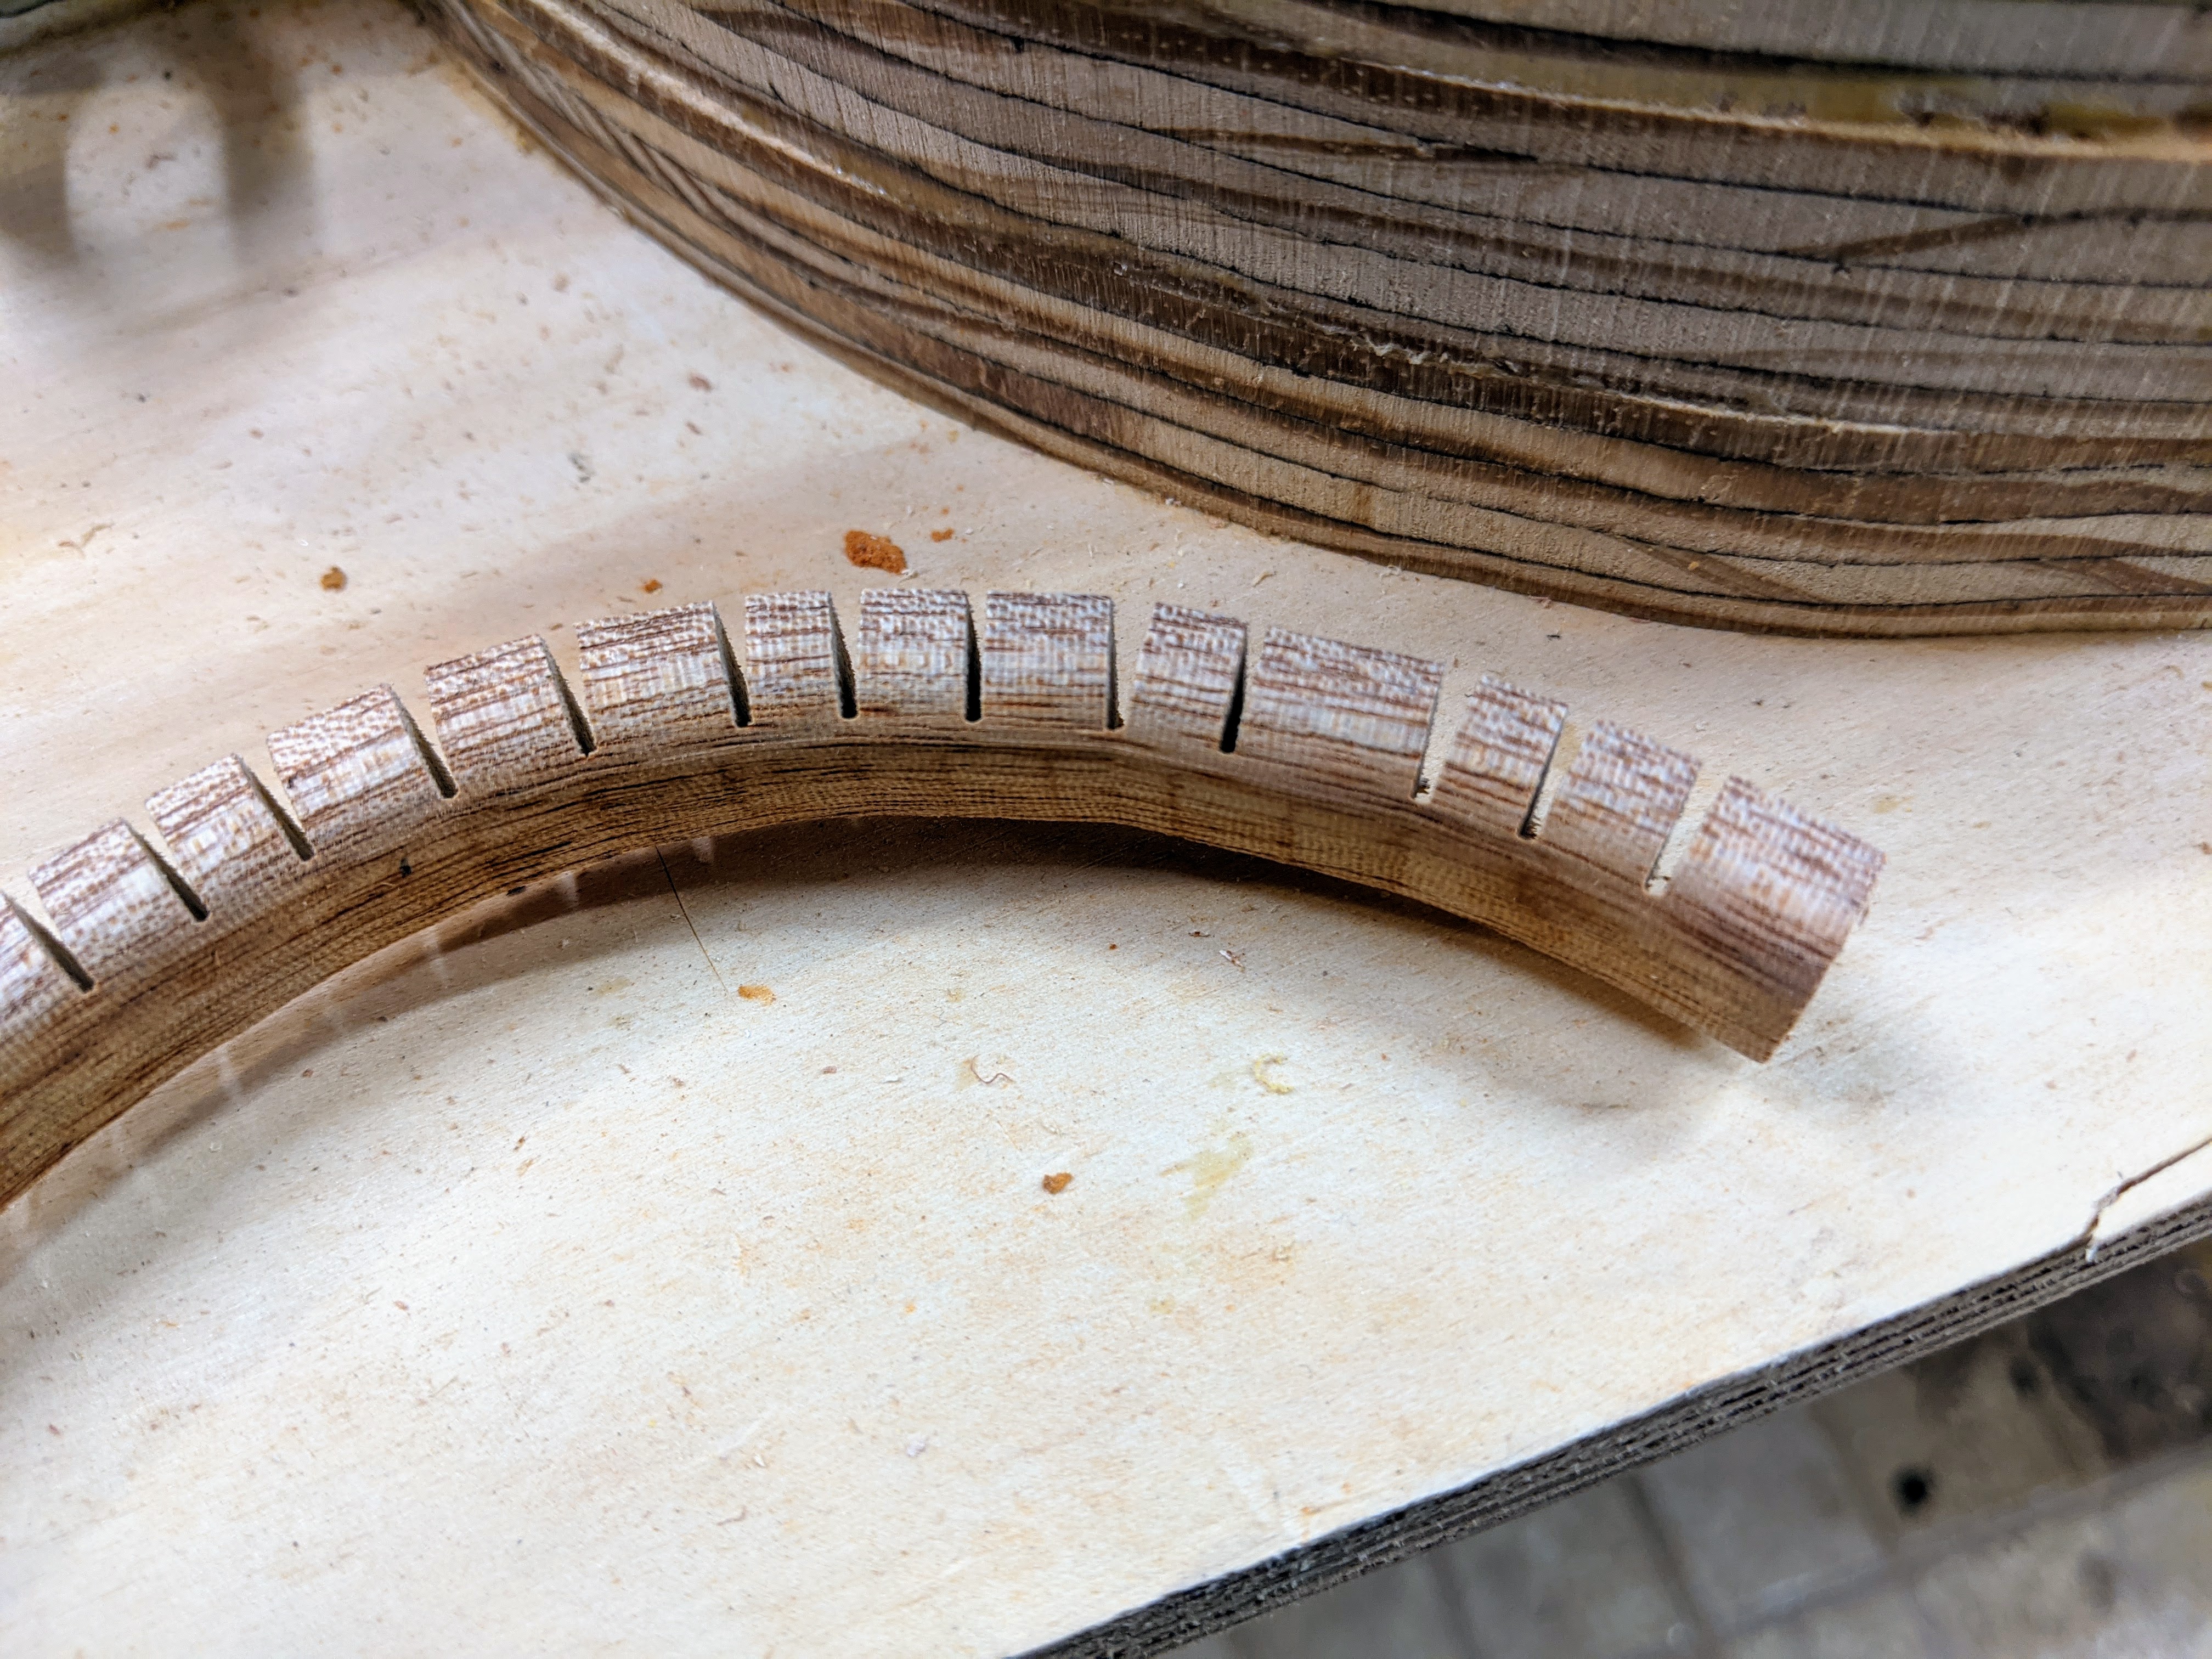
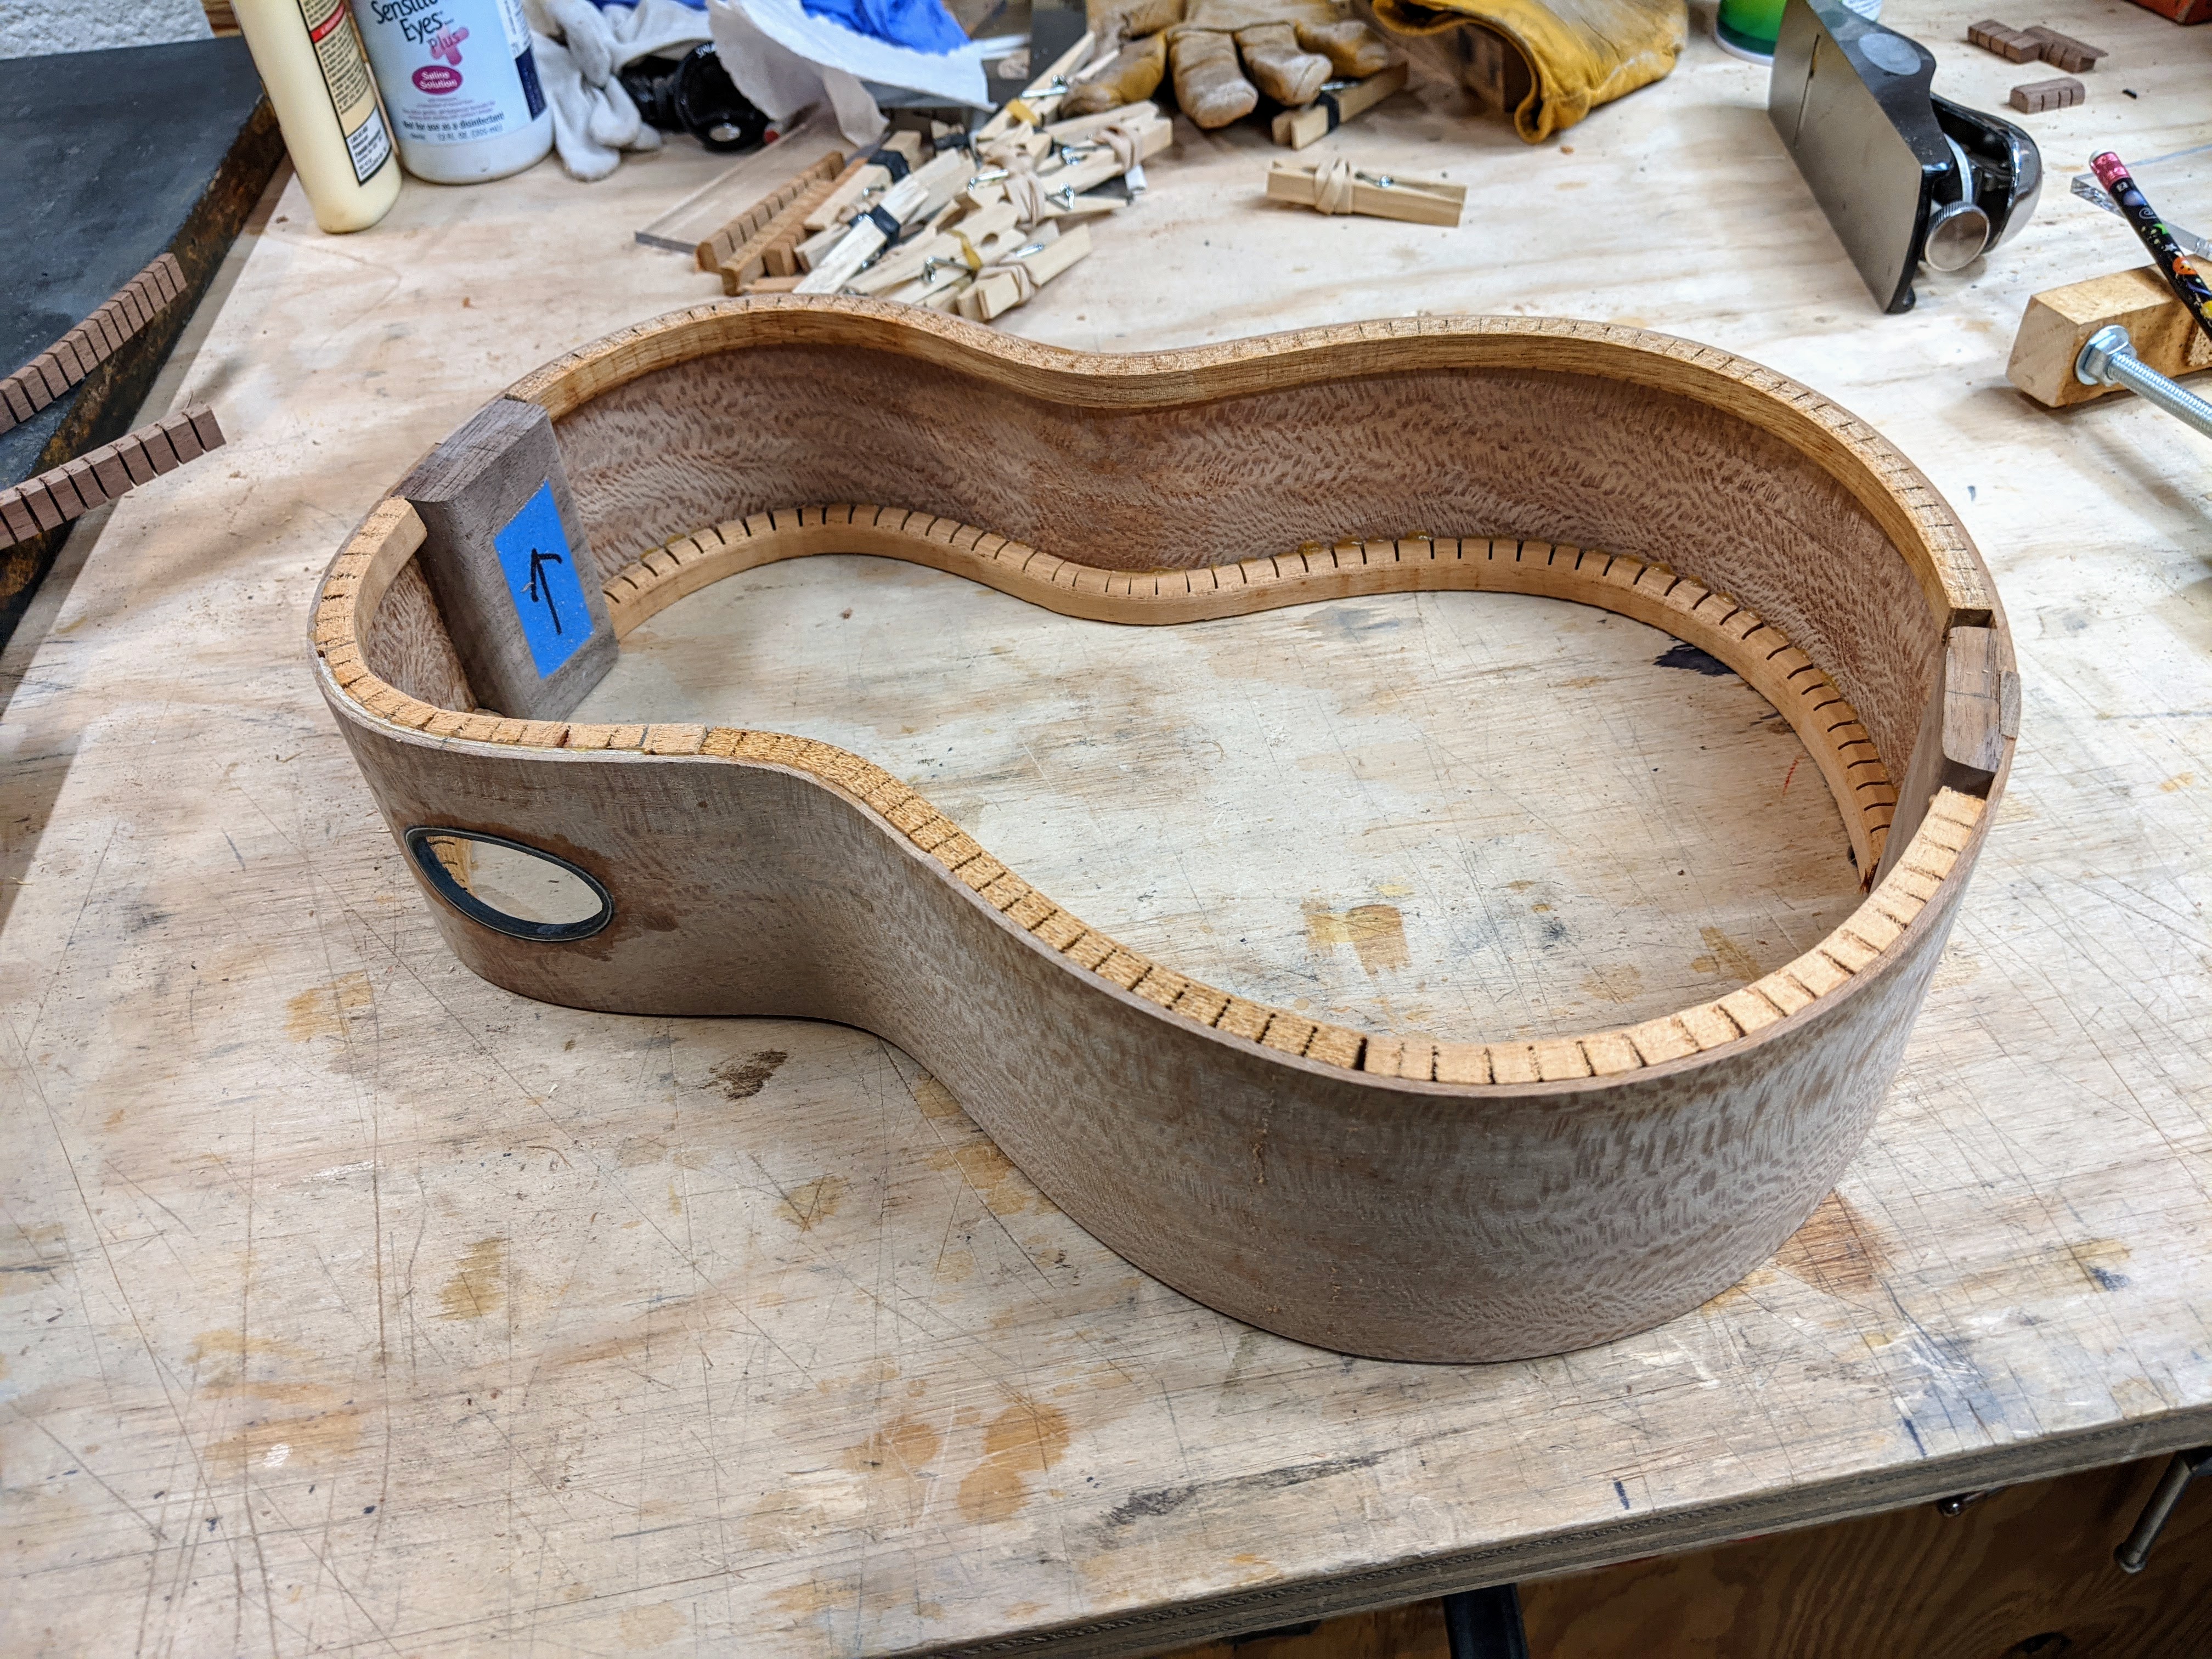
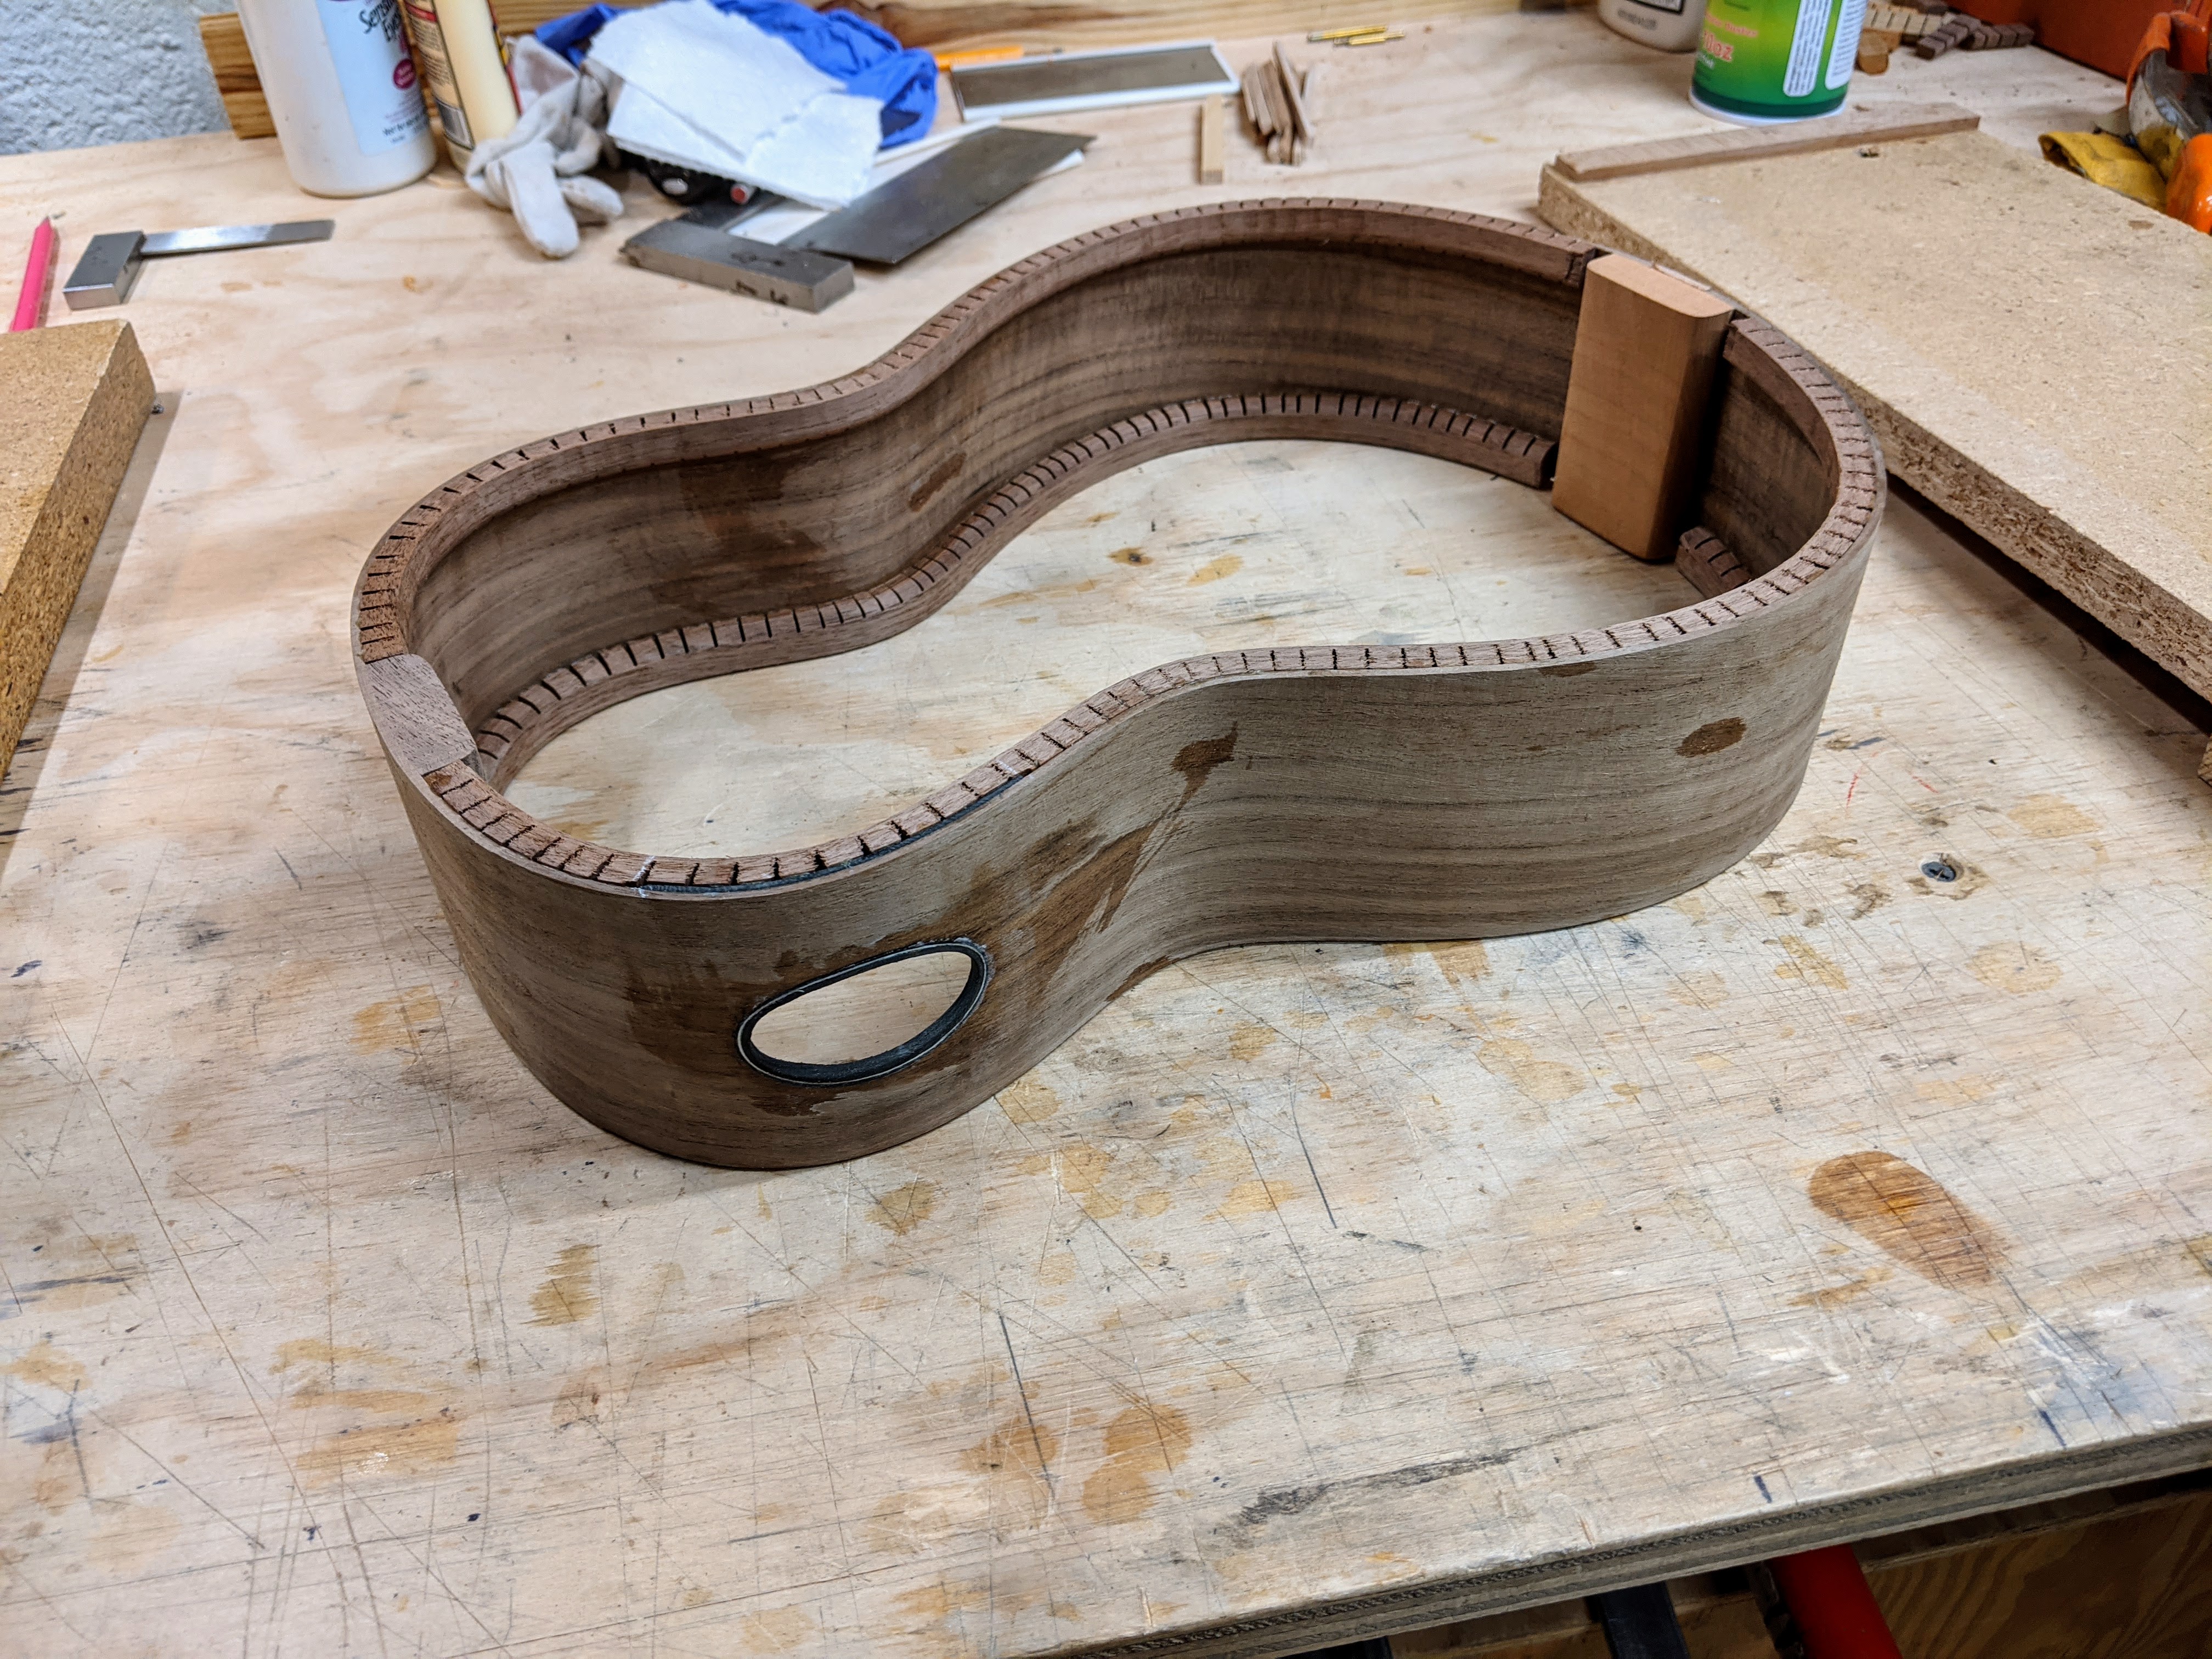
I, like many builders, like to put a cross-gain patch along the inside of the side where one is going to cut a side sound port. The cross grain patch strengthens the side, and helps prevent any splitting problems that might arise from cutting a hole in the side. I make my patches out of thick veneer which bends easily because the grain is across the curve of the side.
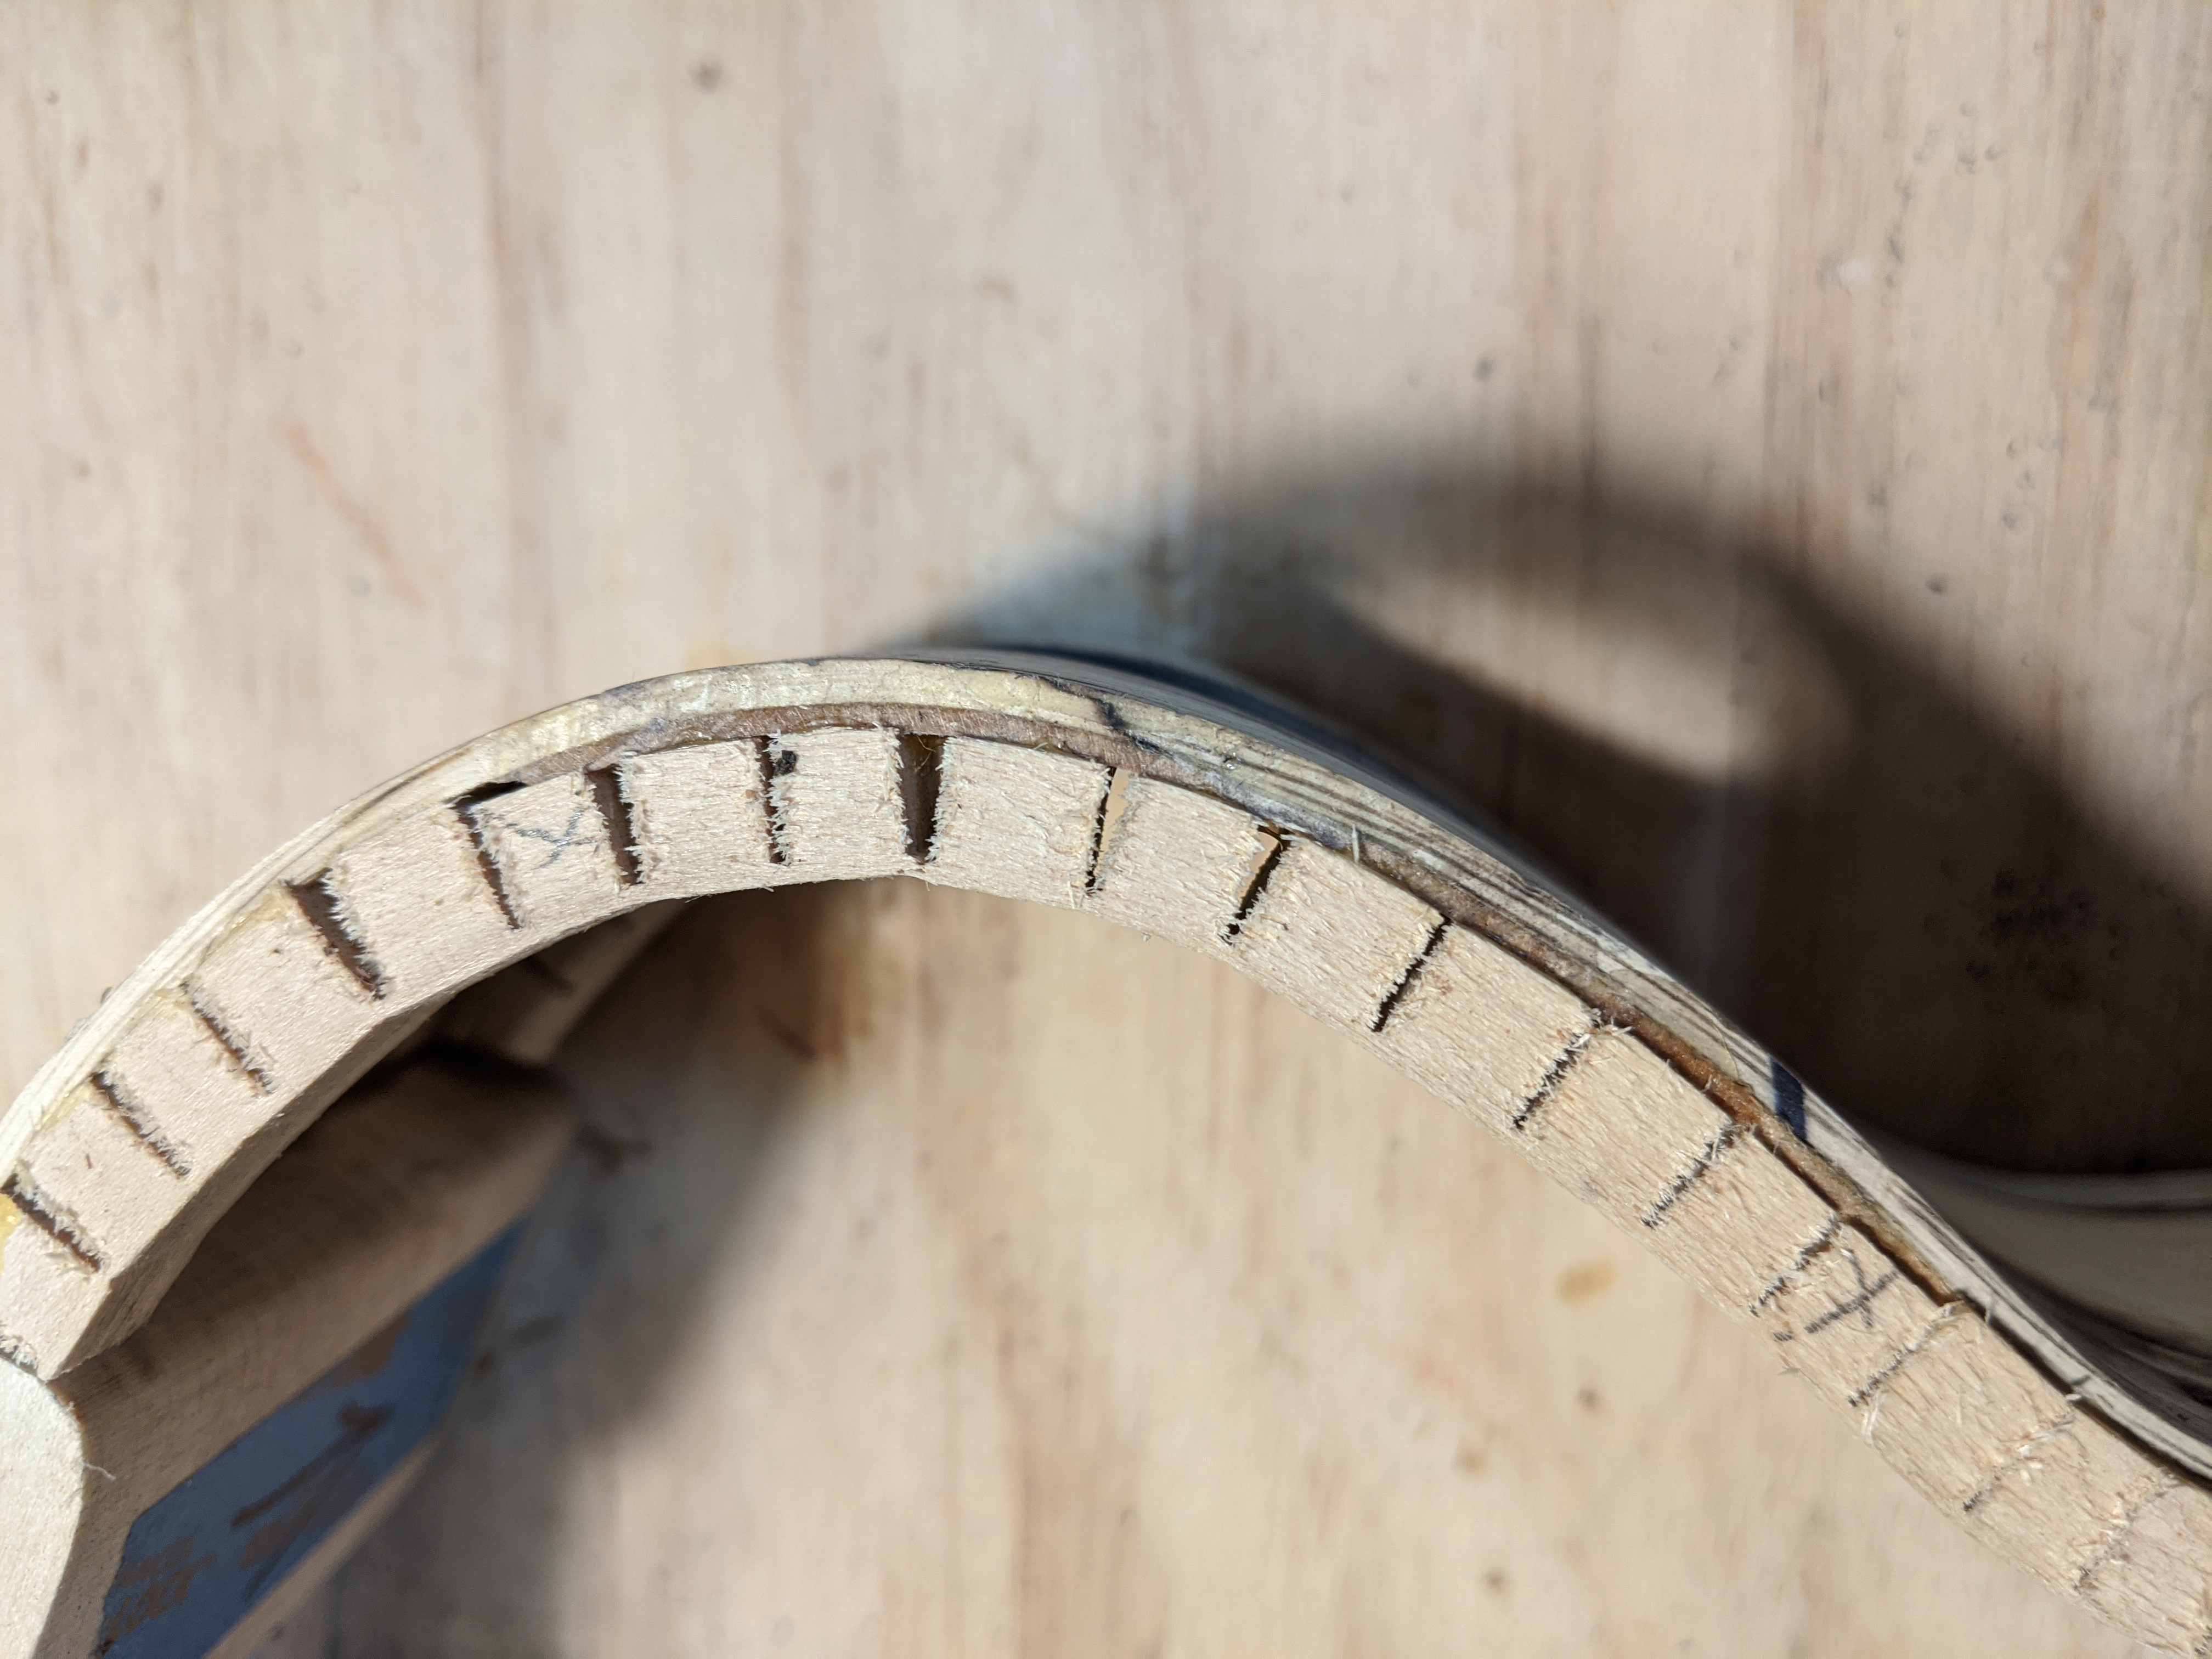
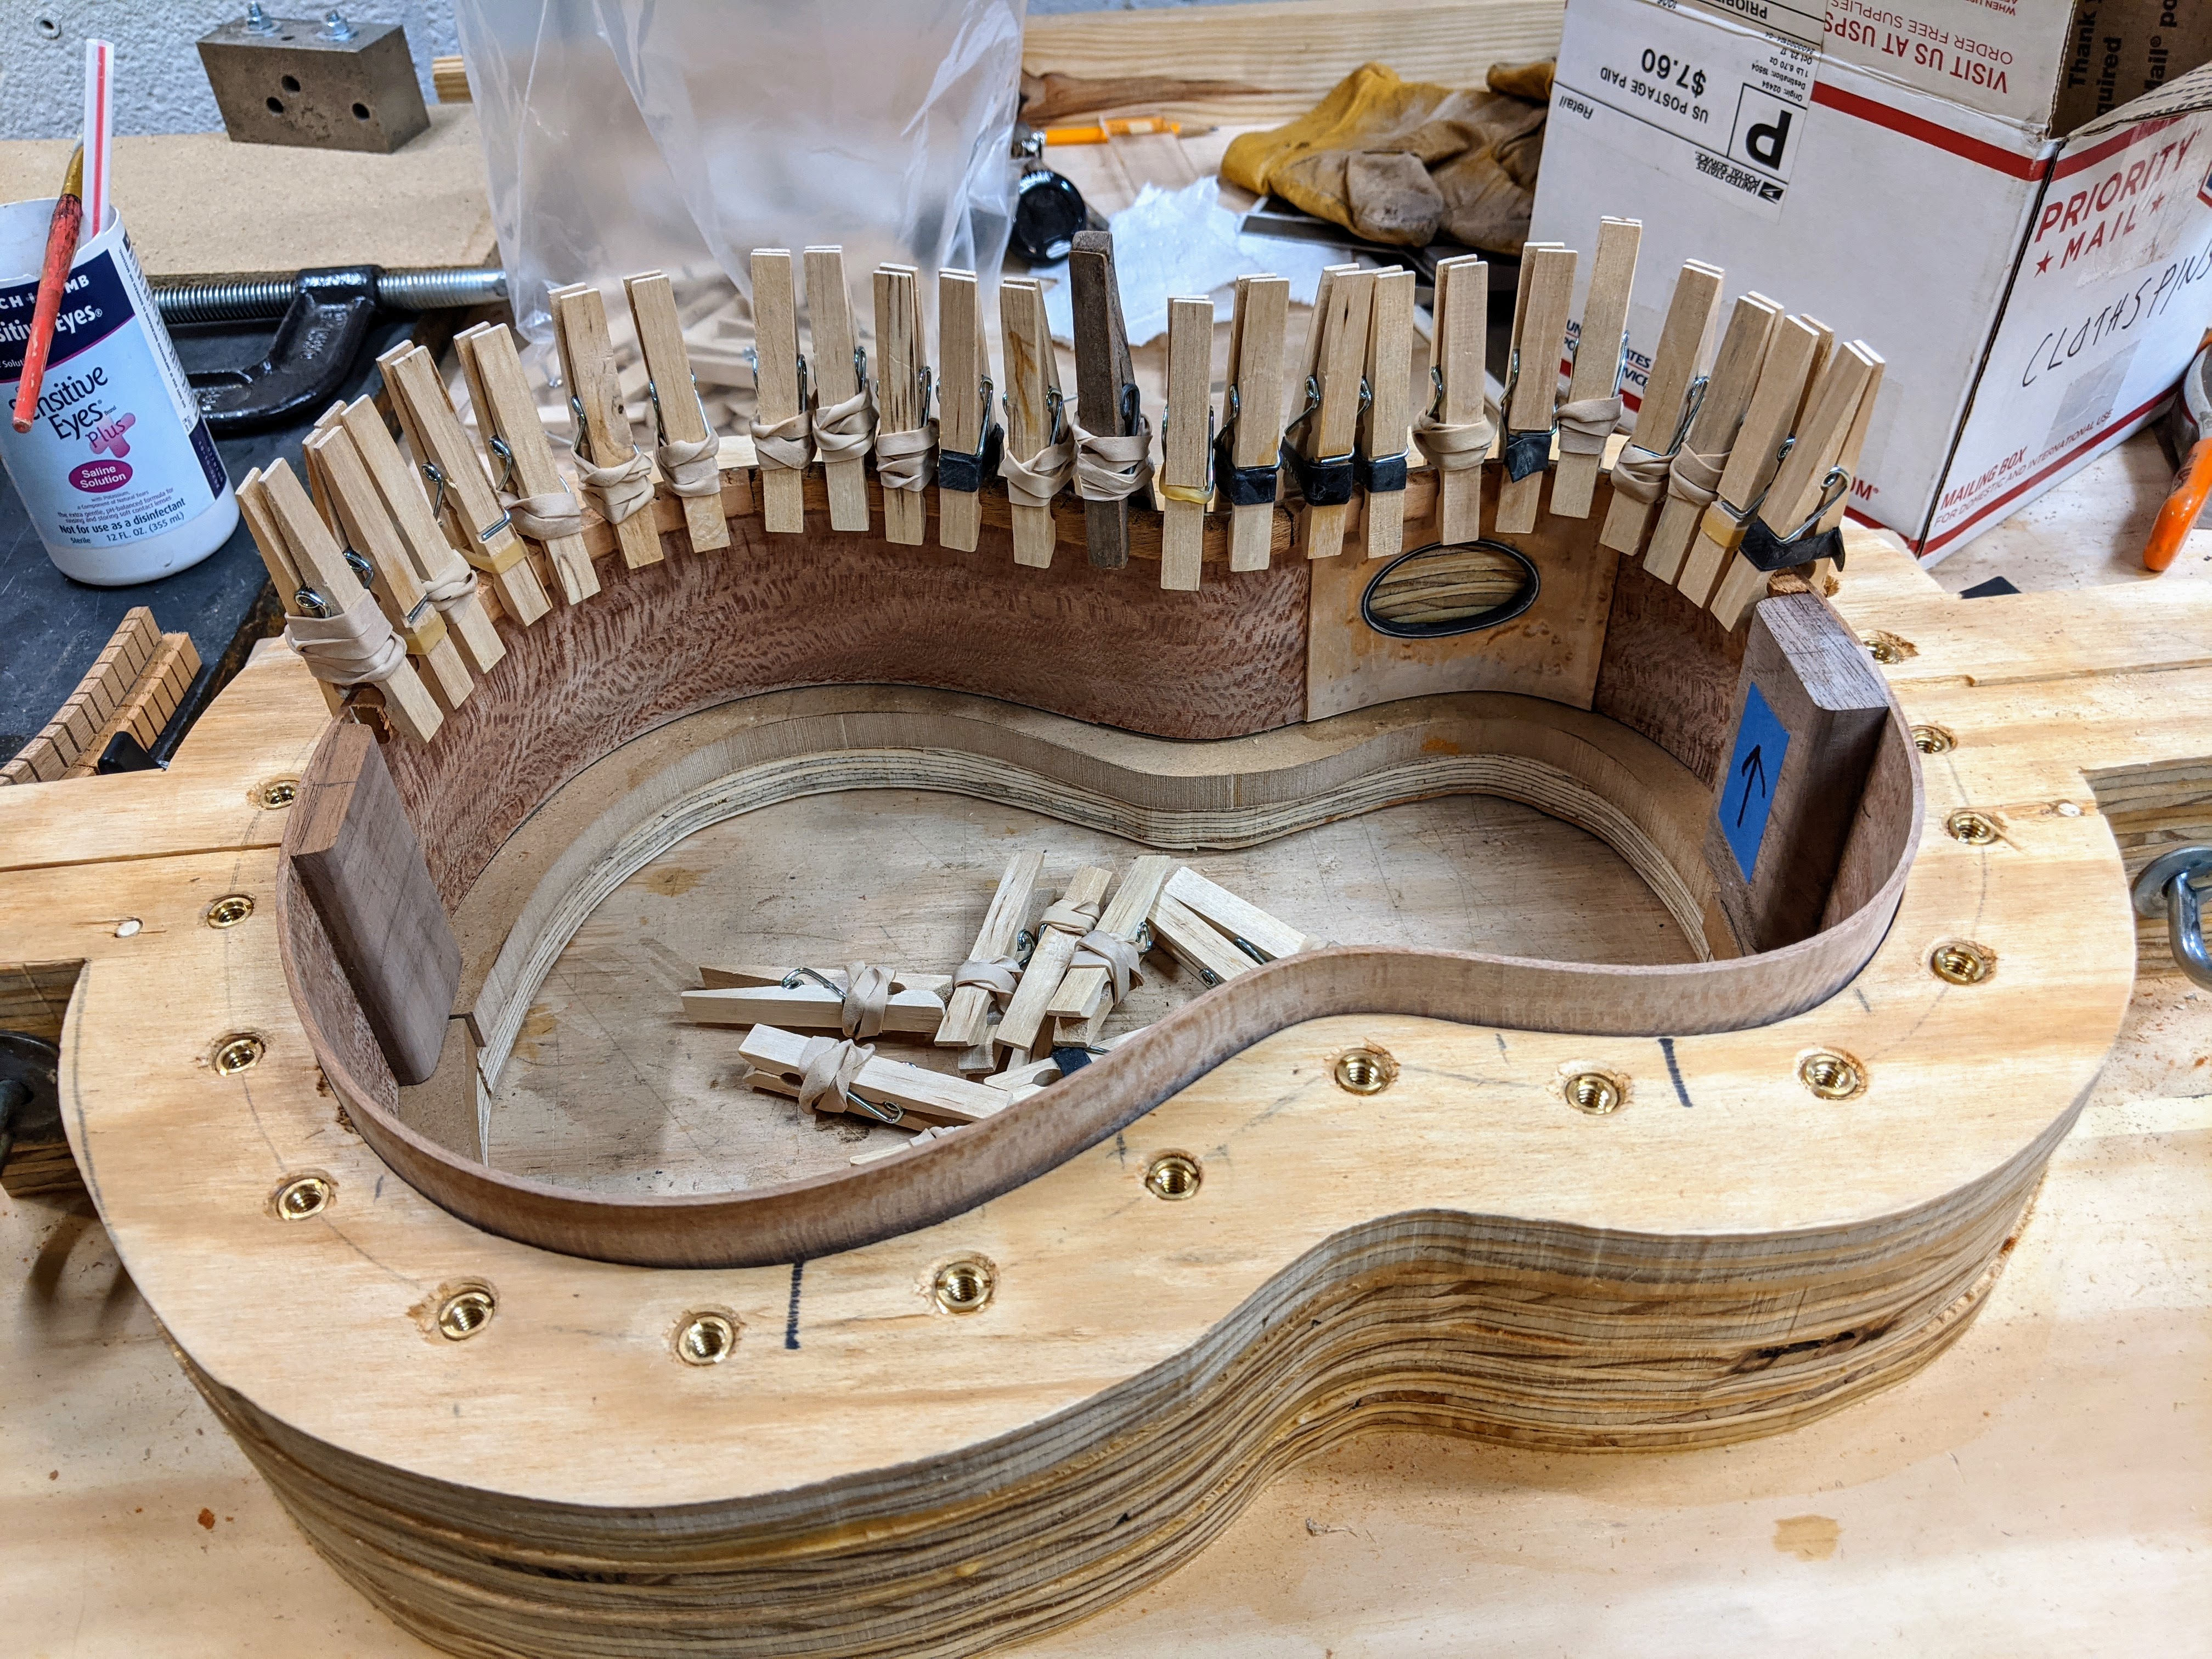
For additional strength I now run the cross-grain patch all the way to the edge of the side, so that there is the maximum amount of cross-grain gluing area. I put the patch in, and cut the sound port, before the kerfed lining is installed. Not having kerfing along the edge of the side makes it much easier to trim the inside of the sound hole edging veneers as they are installed.
I have found a very fast and easy way to notch the kerfed lining to account for the cross-grain patch veneer using the disk sander. The disk is a little proud of the case edge so it is possible to simply put the kerfed lining against the disk to take off a little on the inside, and leave a nice sharp edge. Takes seconds and makes a very neat job.