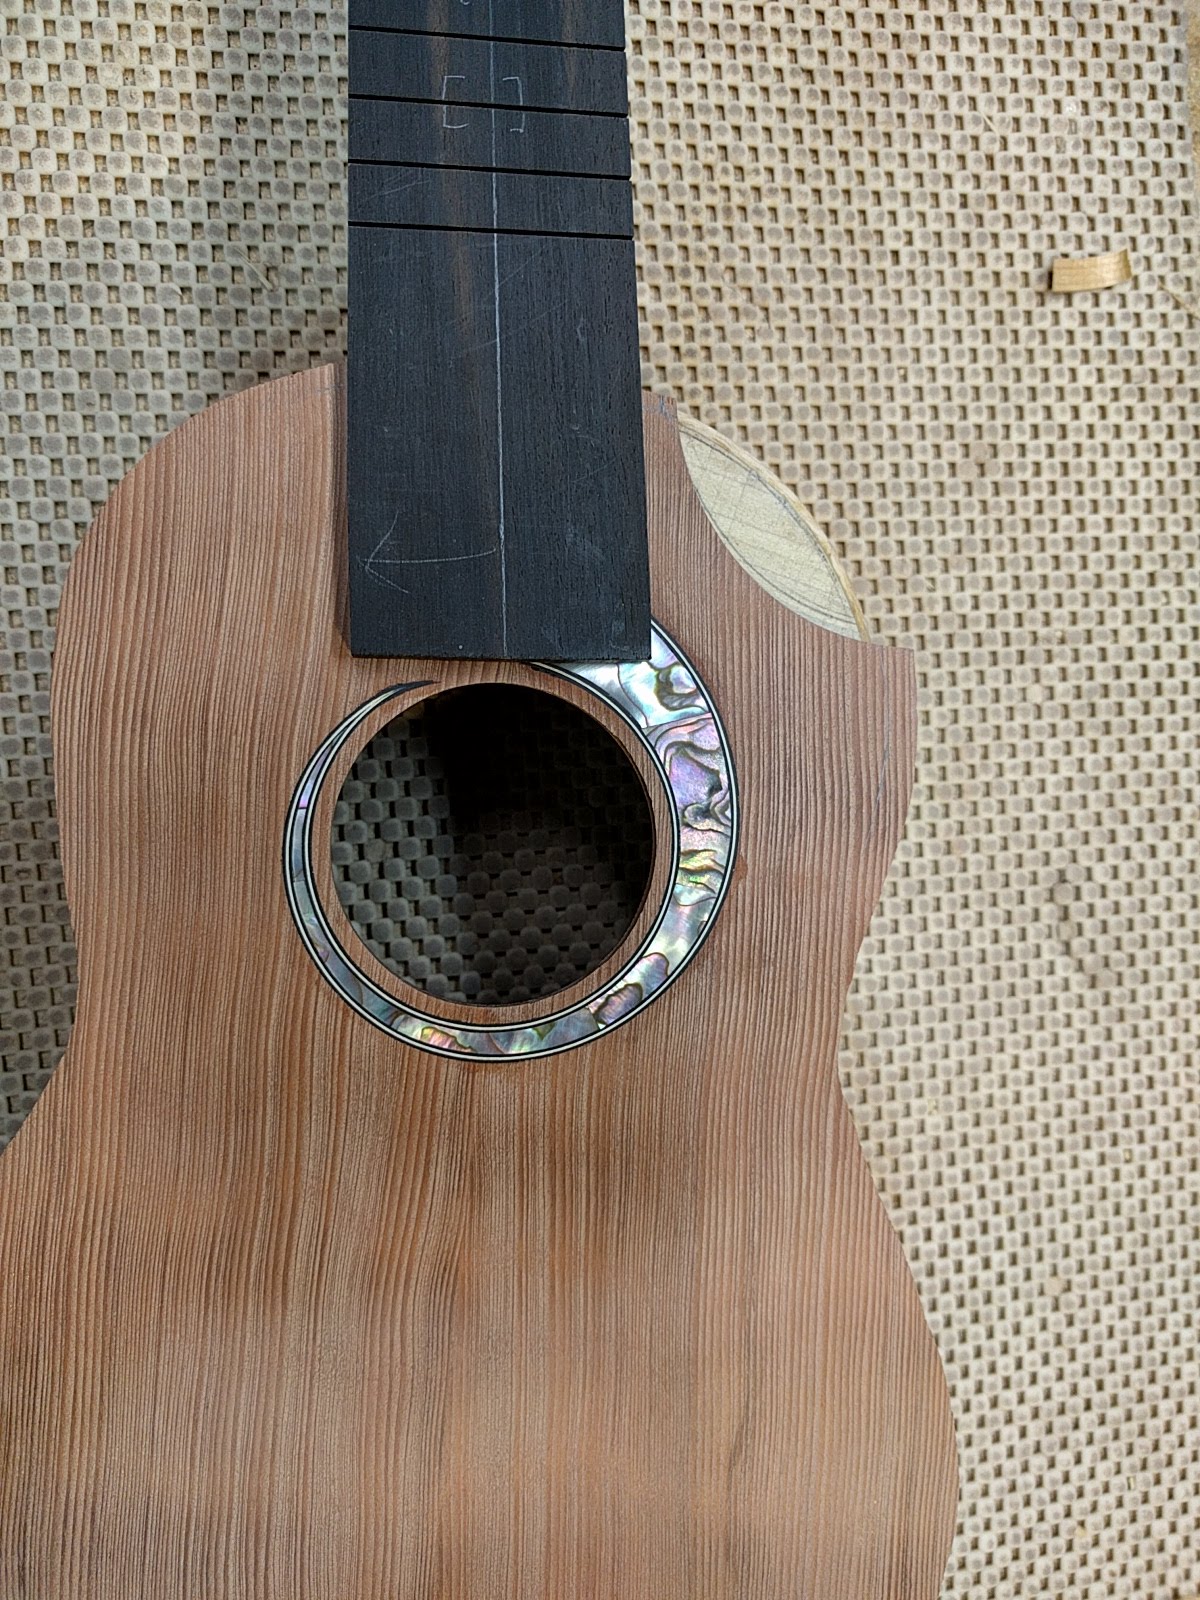
My first scoop. Went pretty well. On a concert ukulele, curly mahogany binding should end up finishing well with the pomelle sapele veneer on the scoop.
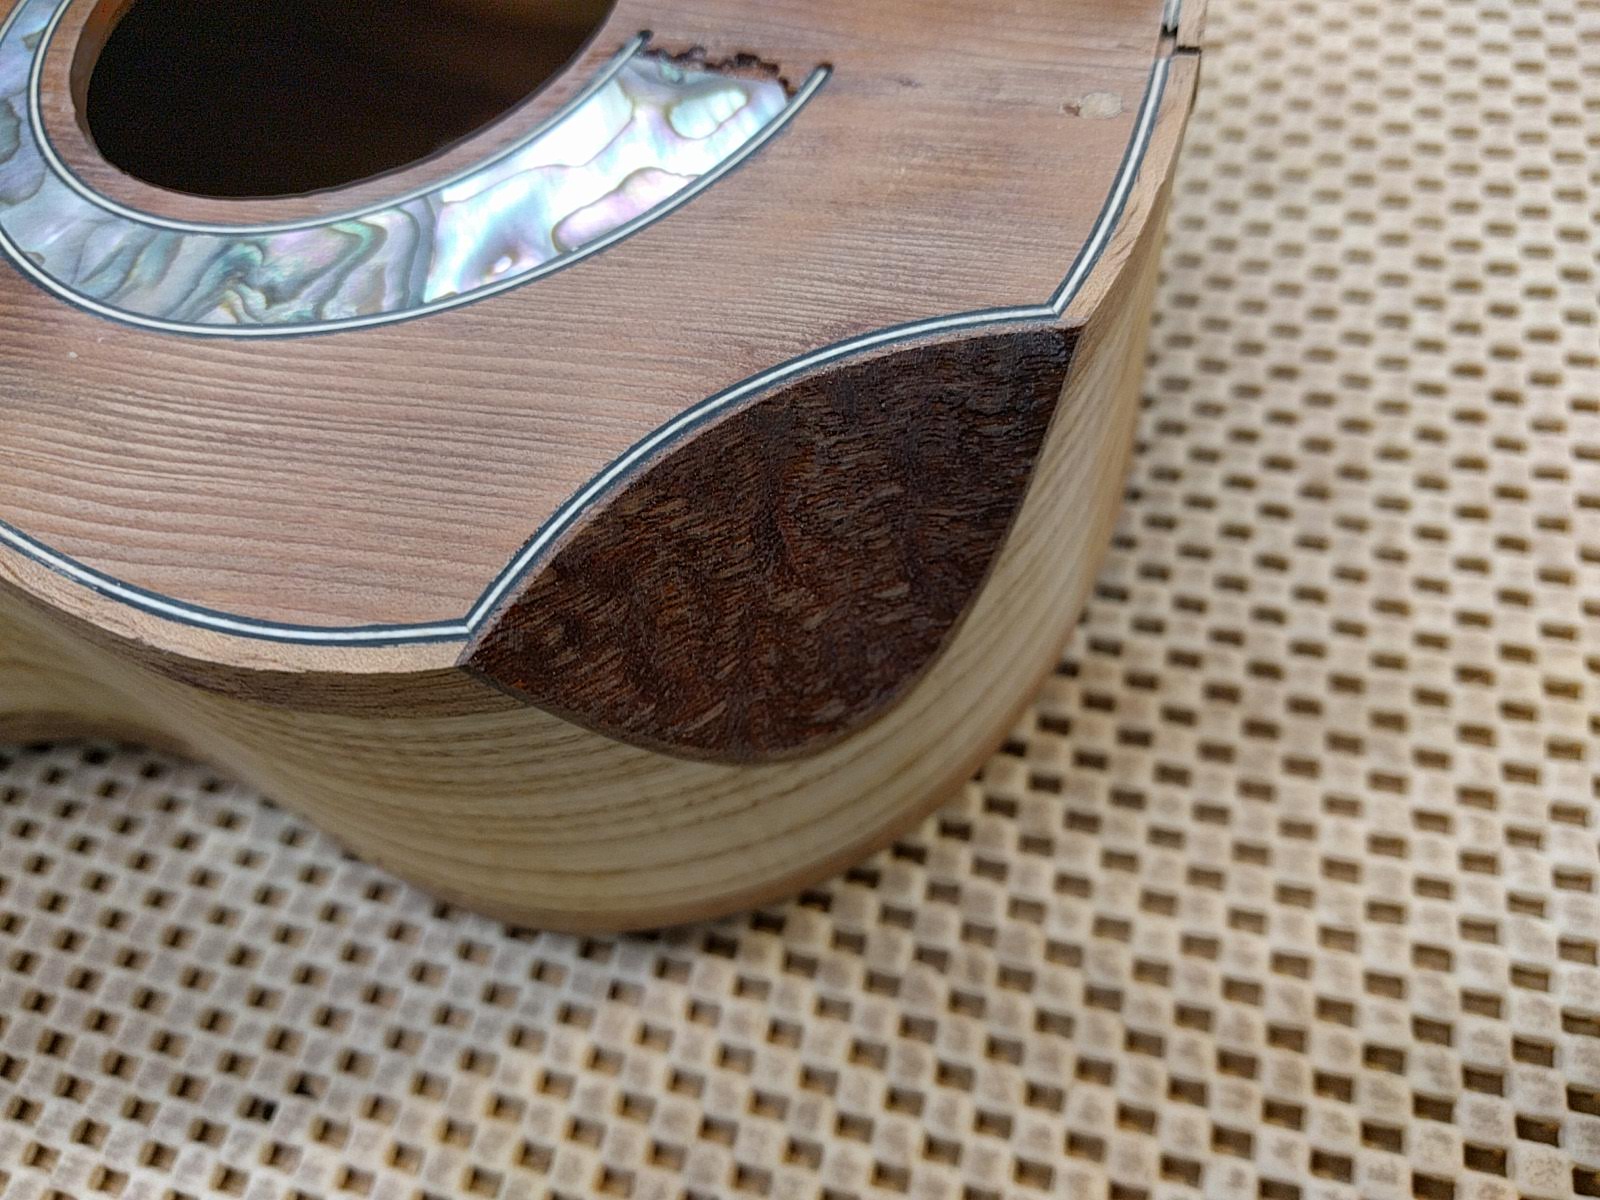
My first scoop. Went pretty well. On a concert ukulele, curly mahogany binding should end up finishing well with the pomelle sapele veneer on the scoop.
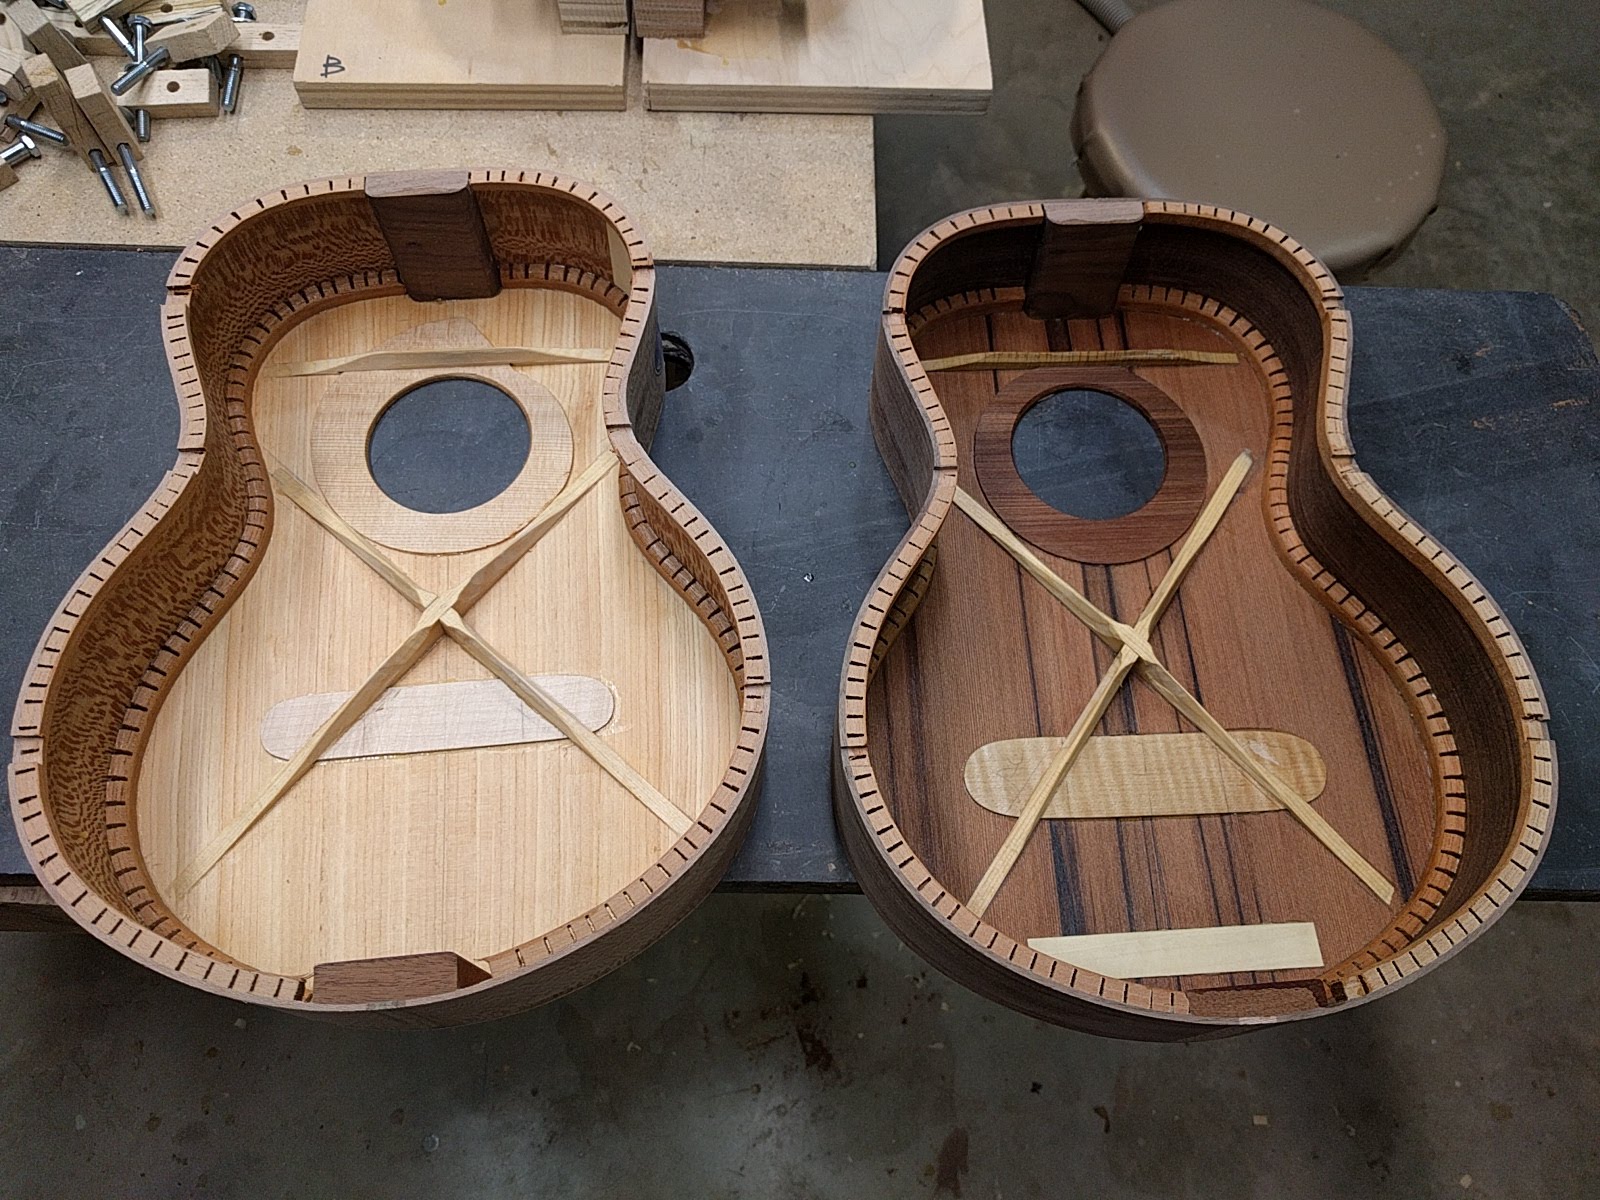
All four instruments are ‘closed up’, meaning the top and back are glued on. They also have the first coat of grain filler, so the color of the wood begins to show.
I use CA glue (cyanoacrylate) as a grain filler. It ‘wets’ the wood like shellac, meaning that it really brings out the color and grain, it dries fast, and sands to a fine powder, never clogging up sandpaper. The only problem is the fumes. I do put it on outside with a box fan and the wind behind me. Then things are hung up outside for a couple of hours to let the CA fully cure and off-gas..
Now on to bindings, scoops, starting to get the necks ready, and getting out the pearl for the fingerboard and headstock inlays. More detailed post of doing a complex inlay to come …


The builds are getting to the point where the ‘boxes’ are getting closed up. Before I glue on the backs I shellac the inside of the instrument. Not necessarily traditional, but I started doing it some time ago, and have since found that some luthiers who are much better than me also shellac the inside. From my wood upbringing I was always taught that one must finish both sides of a piece of wood to balance things. For an instrument, a coat of shellac should slow down moisture transpiration, which means that changes in humidity around the instrument will not result in as quick expansion/contraction of the wood, which should increase the stability of the instrument. The inside of the back is also shellaced, all except where it will be glued down.
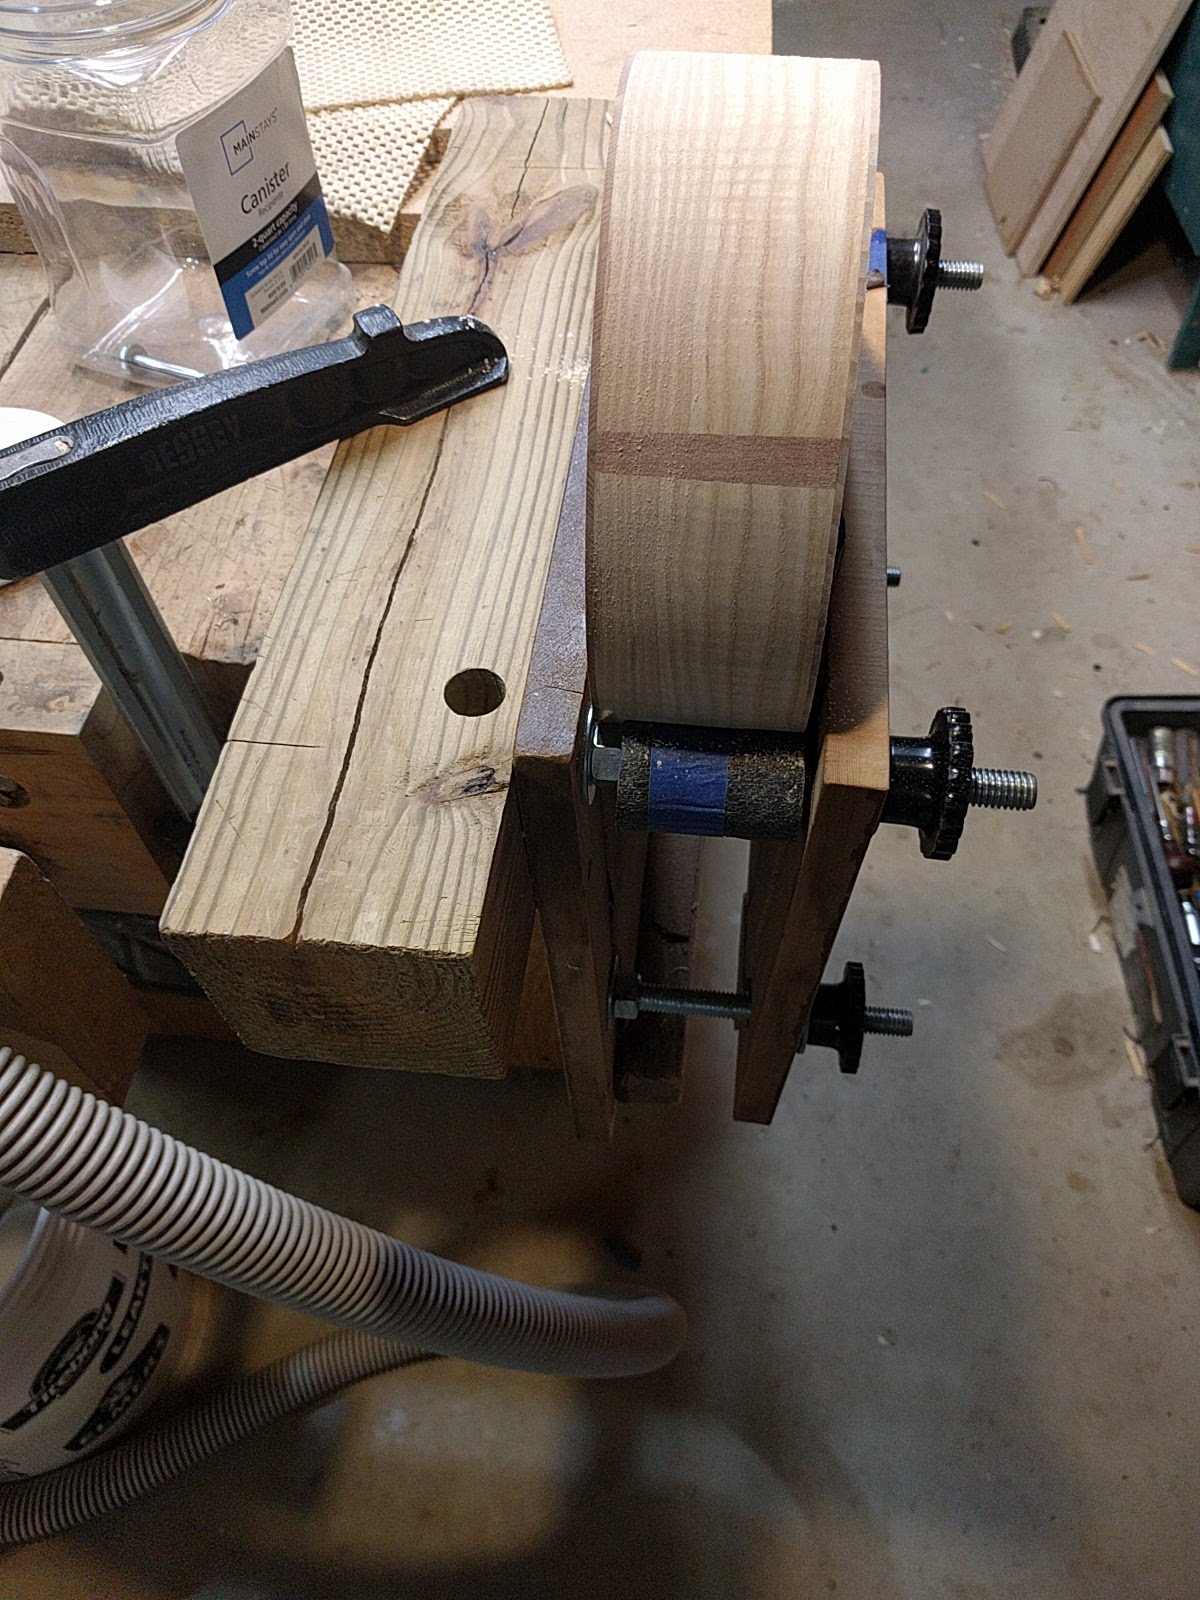
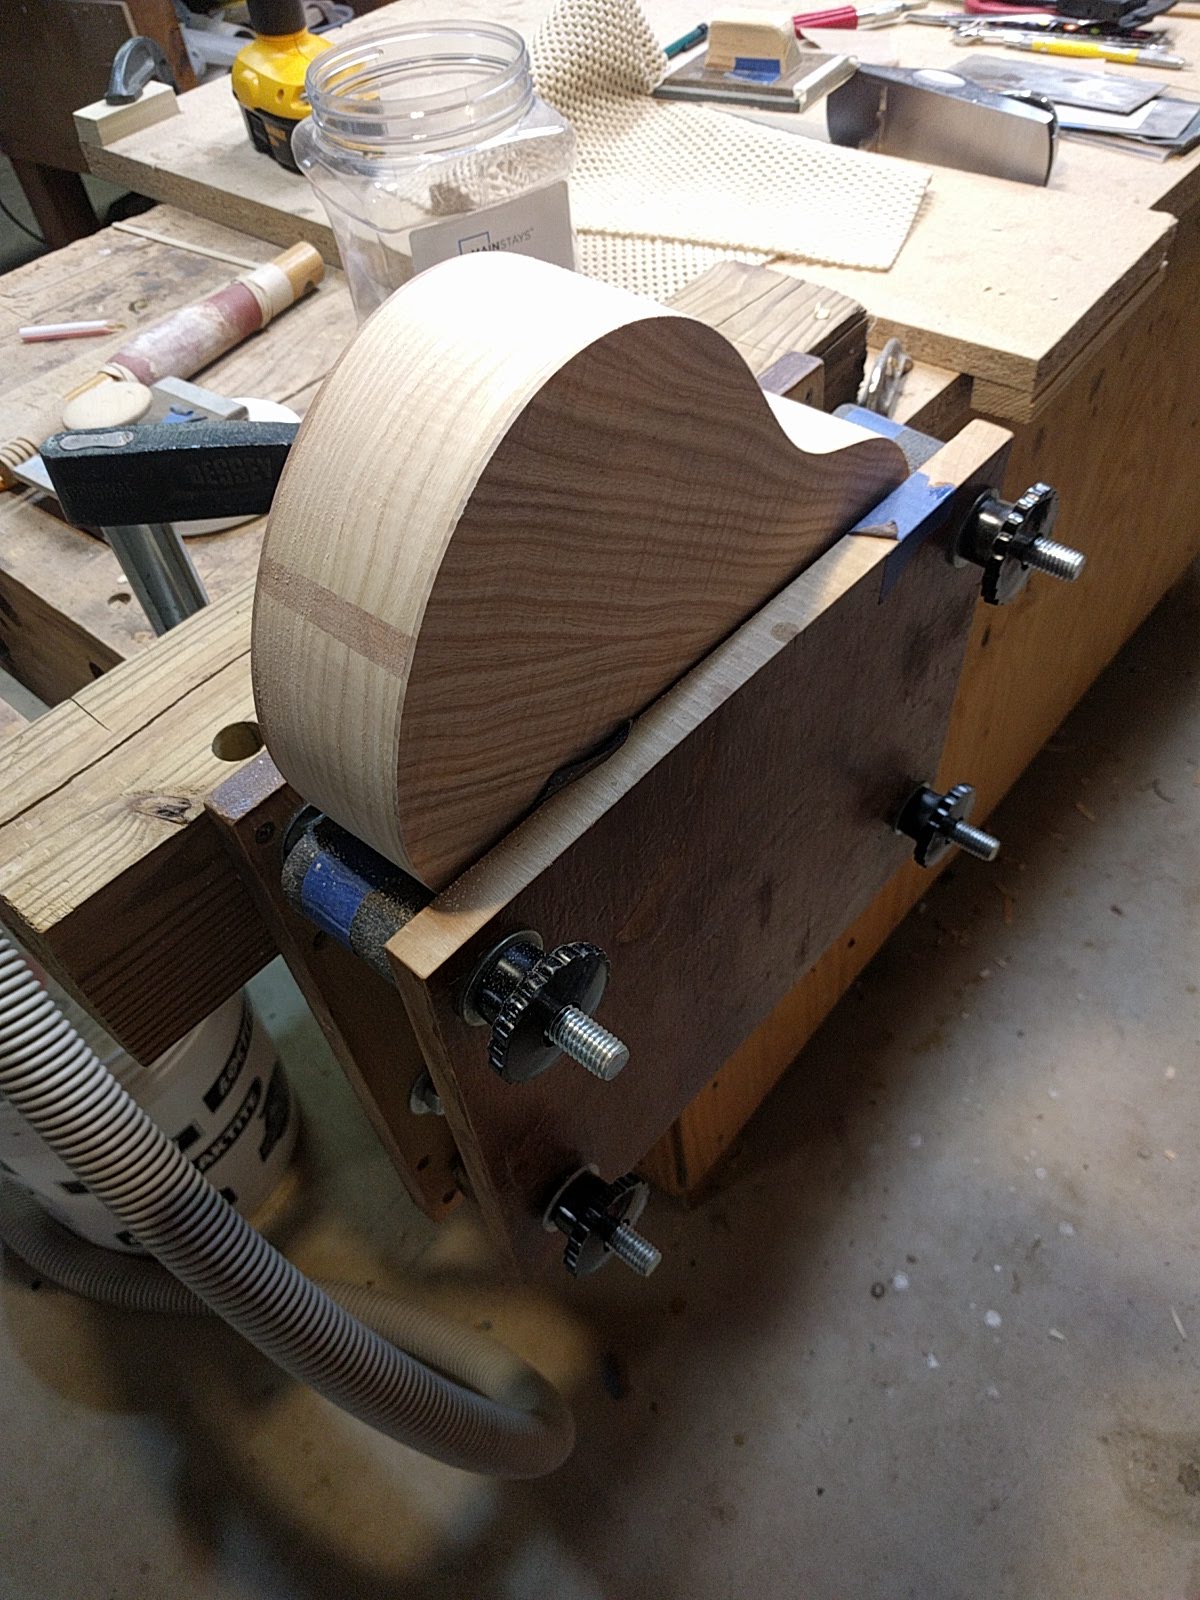
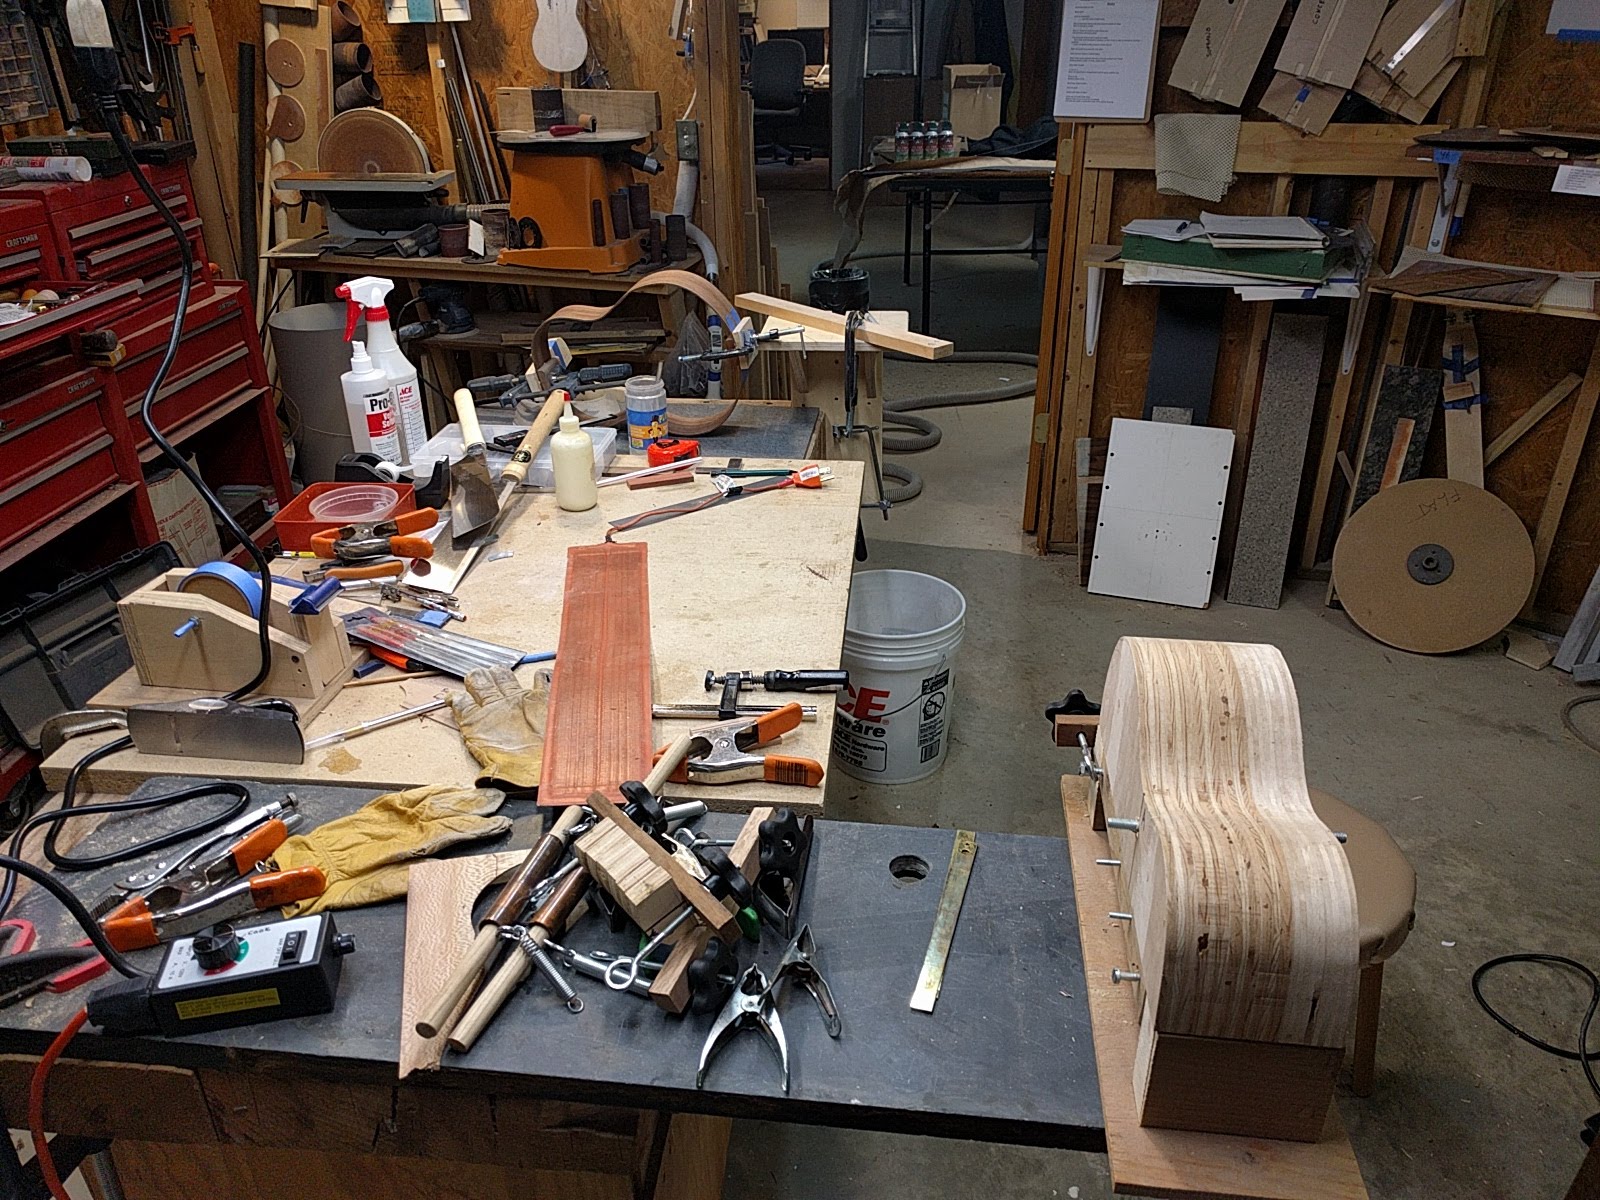
Once the back is glued on, I sand the sides to get them nice and flat and to make the edges of the top and back flush with the sides. I do this before doing the binding since when the binding channel is cut the router bearing is traveling along the side, so if the side is a little out-of-whack the binding channel will be a little out-of-whack. To sand the sides (and do other operations) I use a bit of a bench-side clamp I made out of some boards, bolts, and knobs. I bring it out and clamp it to the bench when I need it, and otherwise it does not take up bench space. The inside of the ‘jaws’ are cork lined, with one side being just a cork perimeter to allow clamping of the radiused back. Makes work on those pesky curved sides very easy and stable.
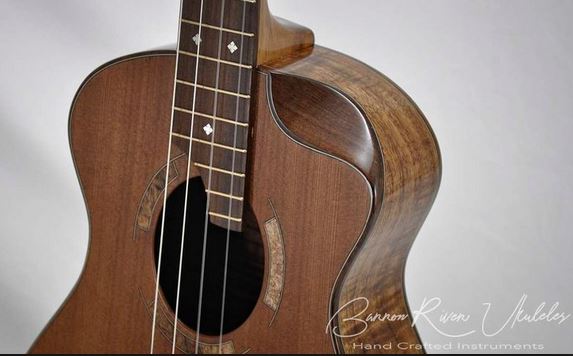
I have received some inquiries over time as to whether I would make a cut-away instrument, to allow better access to the upper frets. Well … I have never really liked the looks of a cut-away and it greatly increases the complexity of the build. Also, being a non-player, who needs those upper frets anyway? I did have some more detailed discussions this last winter with a real player, and it seems that on a smaller instrument like a ukulele all that would be required is a ‘scoop’ to allow the side of one’s hand space so the fingers could get to the upper frets. Something like:
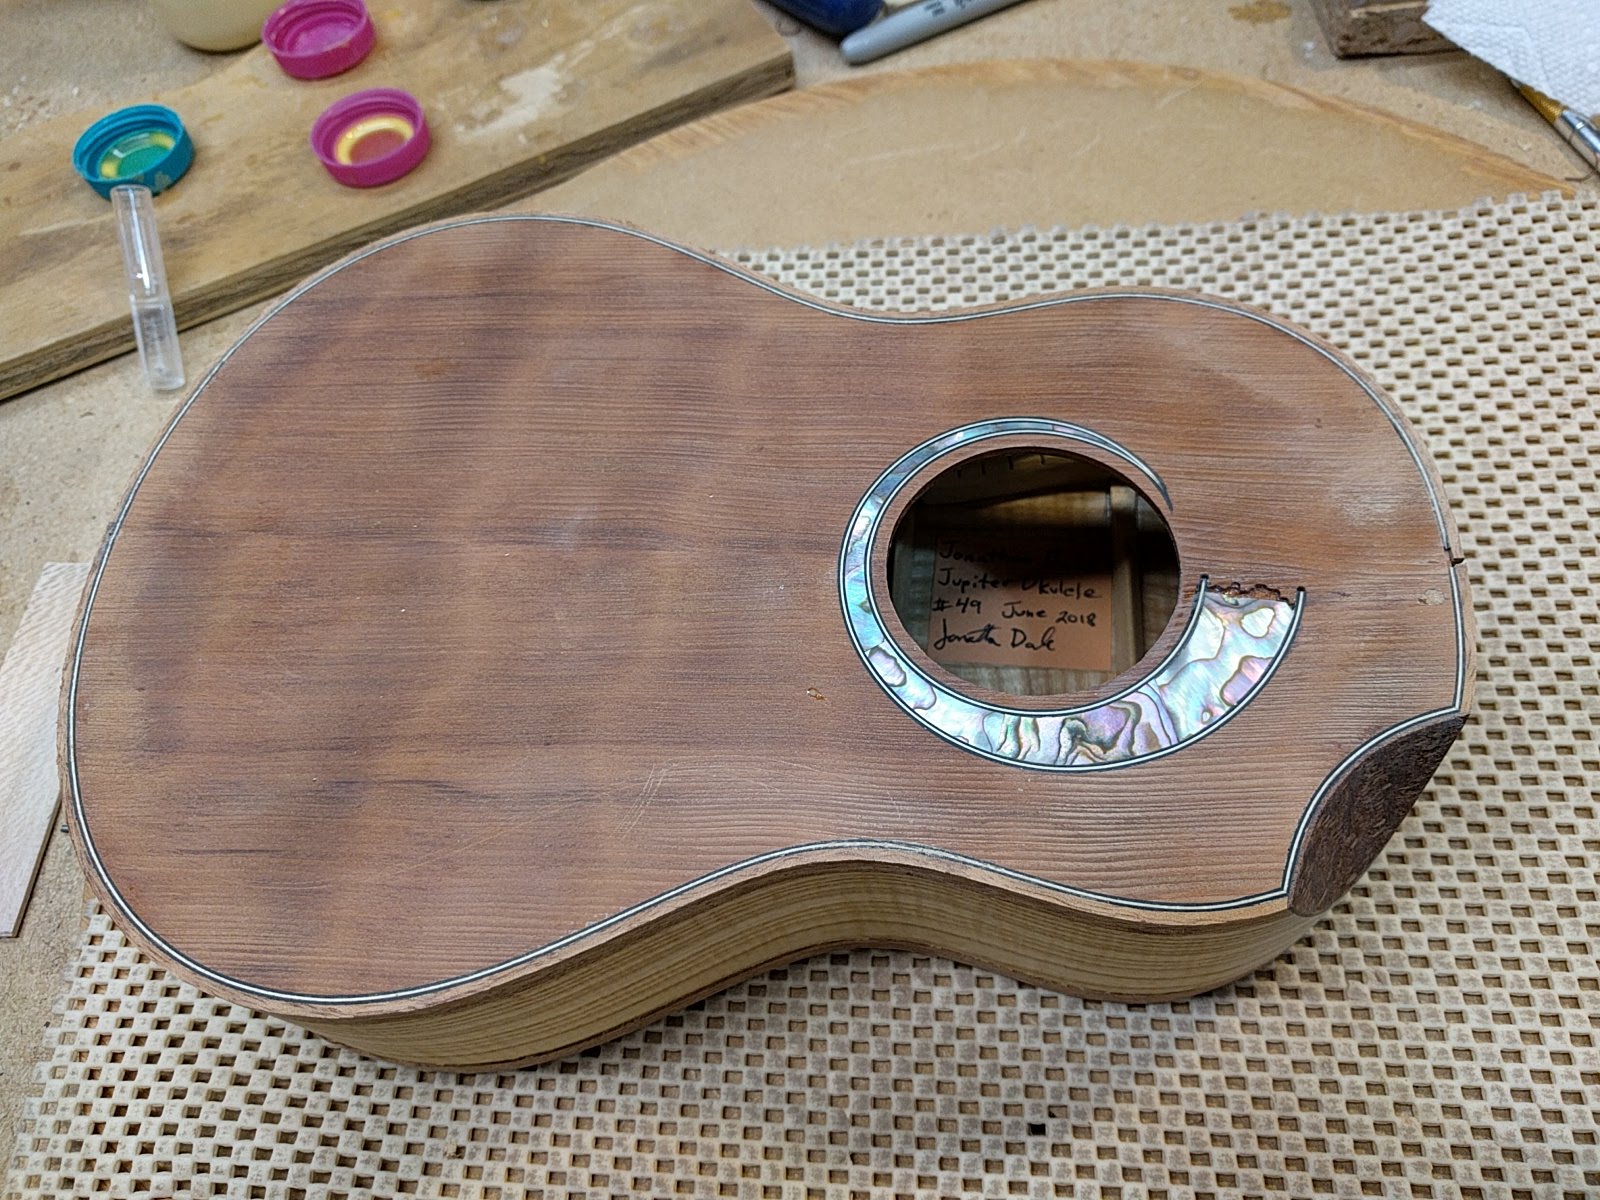
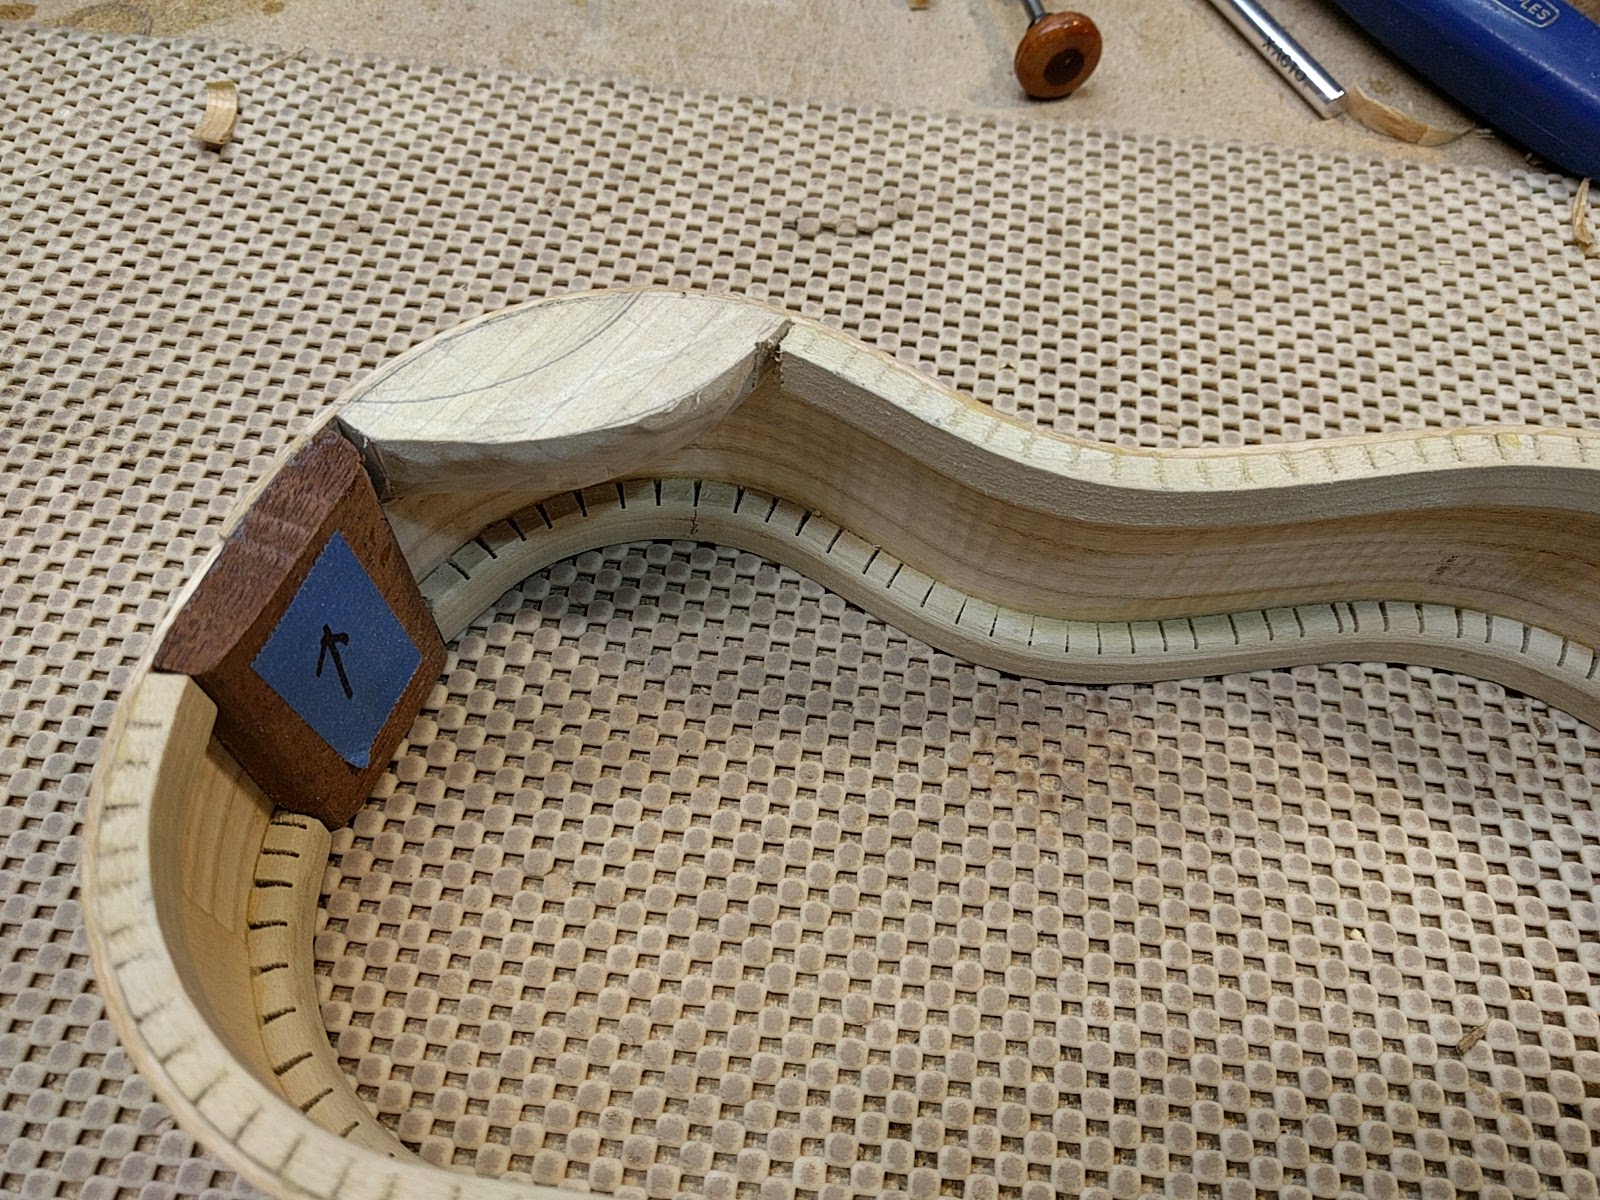
After doing a bit of research and video watching, I am attempting my first scoop on an experimental concert. To make a scoop, using one method, one shapes a block of wood to fit the inside of the upper bout and glues it to the sides. Then the top of the block is leveled along with the rest of the side linings. Meanwhile, the top has been cut out for the scoop. Once the top is glued on, the top purfling is added along the top edge, some spacer wood is added, and then the scoop is hollowed out by cutting into the block glued on the inside. Finally a nice bit of fancy wood veneer is put down on the surface of the scoop.
Here is the start. Block glued in, top cut out but not glued down yet. Just for illustrative purposes.

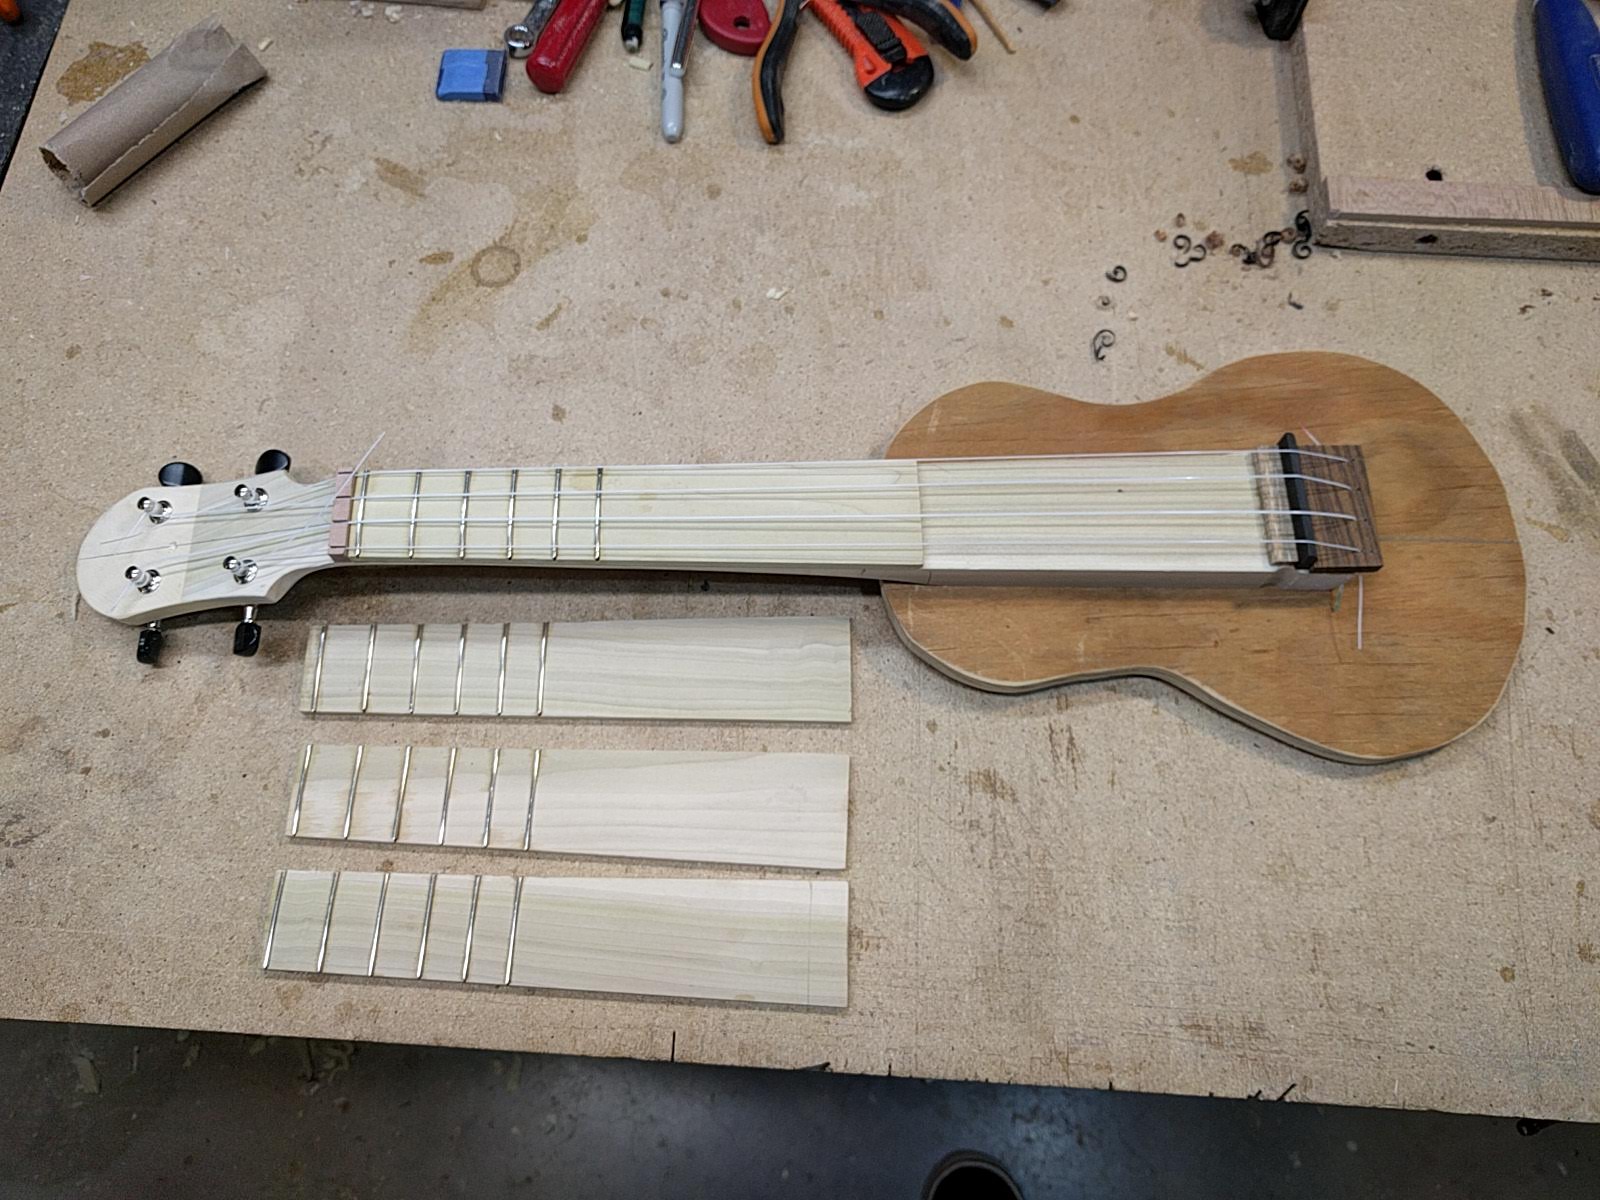
I currently make fingerboards with a 12 inch radius, which is somewhat subtle. I have designed a radius cutting jig so that cutting alternate radii is not a big issue. It might be good to have in my ‘toolbox’ as it were the setup for a 10 inch radius or even a 9 inch radius. Might be interesting to see what these more curved fingerboards feel like, but I am not a player, so am not really one to judge. So …
I have cooked up a little test ‘instrument’ (the world’s worst ukulele!) that has interchangeable fingerboards with different radii. (7, 9 10, 12) The test platform is based on a concert sized ukulele, and the fingerboard has only 5 frets, but I figure that should give one some feeling for noting and playing bar chords.
To use it you slack the strings, lift the existing fingerboard, put on another, and tune up the strings. The fingerboards fit over two small placement pins placed in the neck. The nut end of the fingerboard is held down by the string pressure over the zero fret, and the bottom end is held down by a single bolt and wing-nut. I have sent this out to a customer for his feedback, and have another who is interested. I’ll be interested to see if anyone finds a big difference. I find that the different radii make little difference, but again, I’m not a player. Since you are a dedicated reader of this blog, if anyone else is interested in this experiment, send me some e-mail, and I can send the test “ukulele” out when the first two experiments are done.
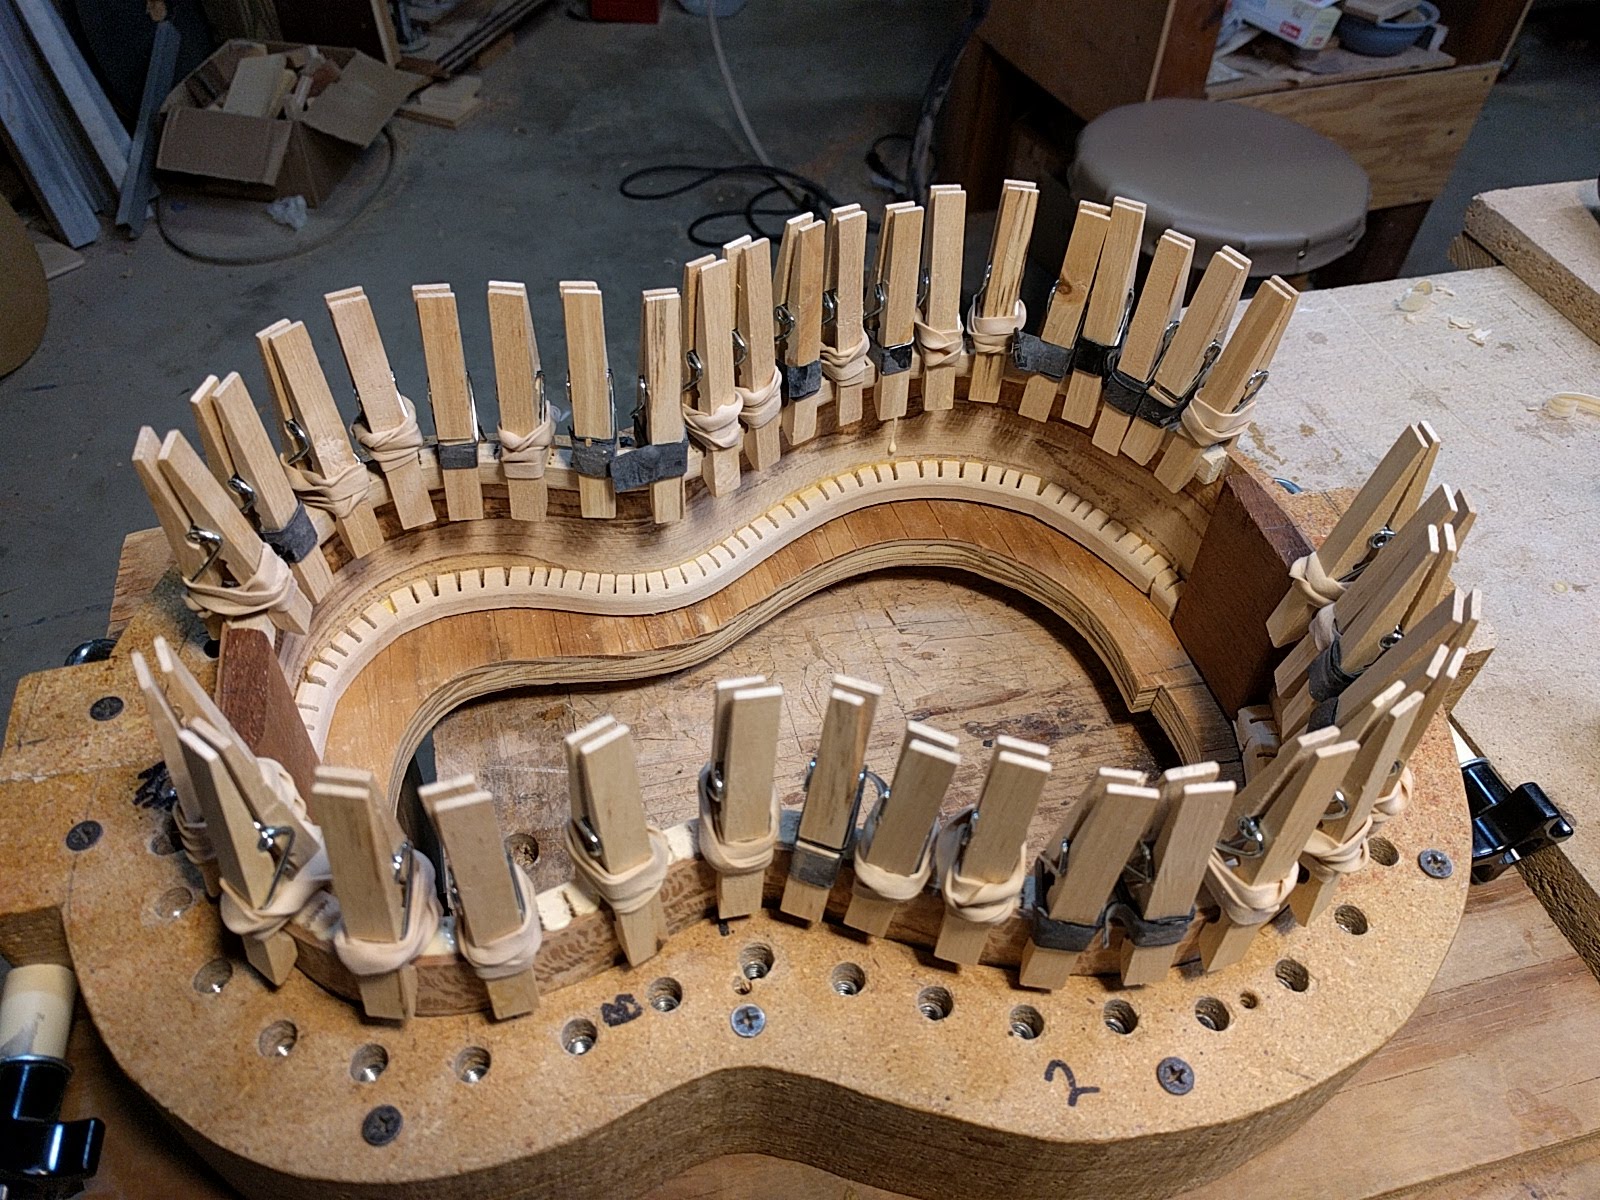
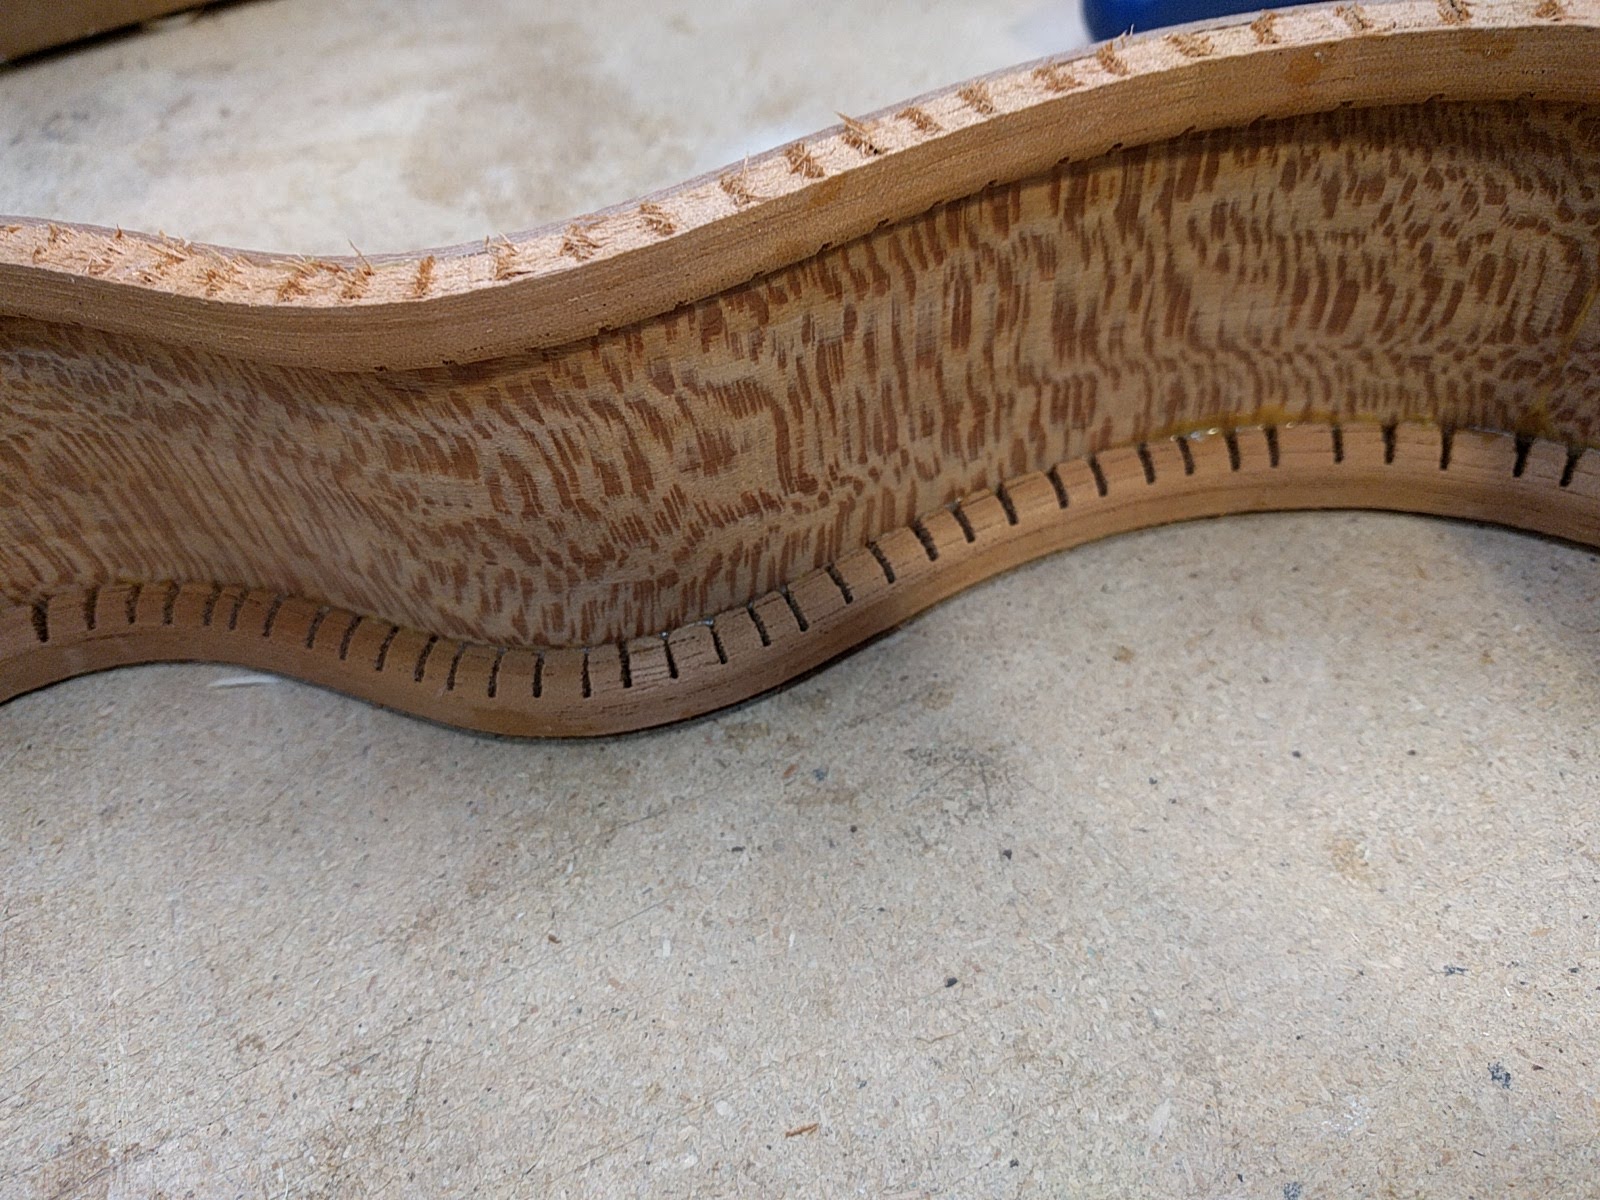
The kerfed lining is a strip of wood, with many saw cuts (kerfs) cut most of the way into it leaving only a thin strip of continuous wood. This makes it flexible, so it can be bent around and glued to the inside edges of the sides providing a gluing surface for the top and back.
The lining can be done in one of two ways. The ‘standard’ way is to have the kerfs facing out with the thin strip of wood glued to the side. The other is ‘reverse’ where the kerfs face inwards, and the thin strip of wood is facing out. I do reverse kerfing for two reasons. One – I think it makes a nicer, cleaner look inside the instrument to have that continuous strip of wood. Two – (this is the most important) – when reverse kerf lining is glued onto the side it makes the side very stiff. Before the lining is added, when the sides are just glued to the end blocks, the sides are springy and bouncy. After the reverse kerf lining is glued on the sides are totally stiff, with no bounce or flex at all. An amazing difference from the addition of some little pieces of wood.
I also like to do kerfed lining that goes with the sides. Darker for darker sides and lighter for lighter sides. I cut all my own kerfing to I have some selection of alternatives.
At least the four rosettes. Now that the pearl work is done, it is back to woodworking. A good looking and varied group. The results from the last set of 4 builds were very good, with great clarity and sustain so I think that I am going in the right direction bracing wise on the tops. I am excited to think about these instruments coming together.
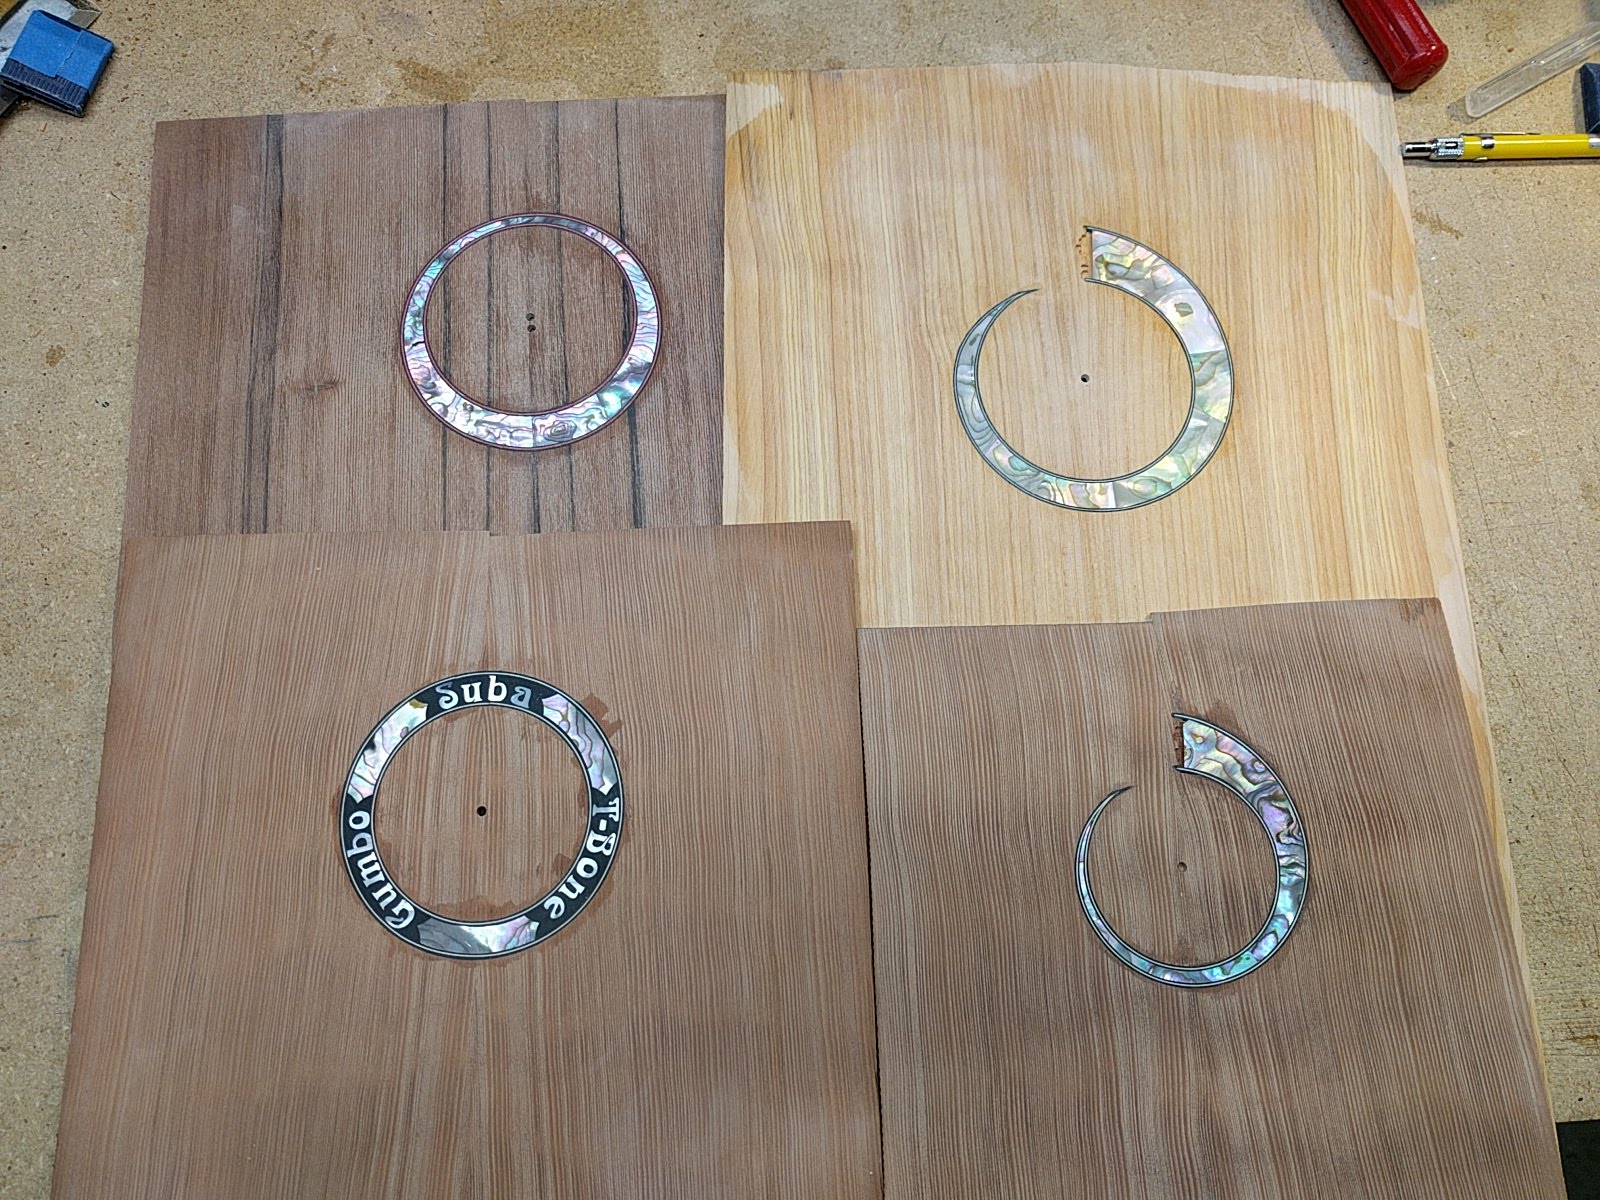
One of the current instruments in a custom tenor for a fellow who wants to celebrate his three dogs. We decided to put the dog’s names around the rosette. After a bit of design experimentation, this is what the rosette looks like. Very successful if I do say so myself.

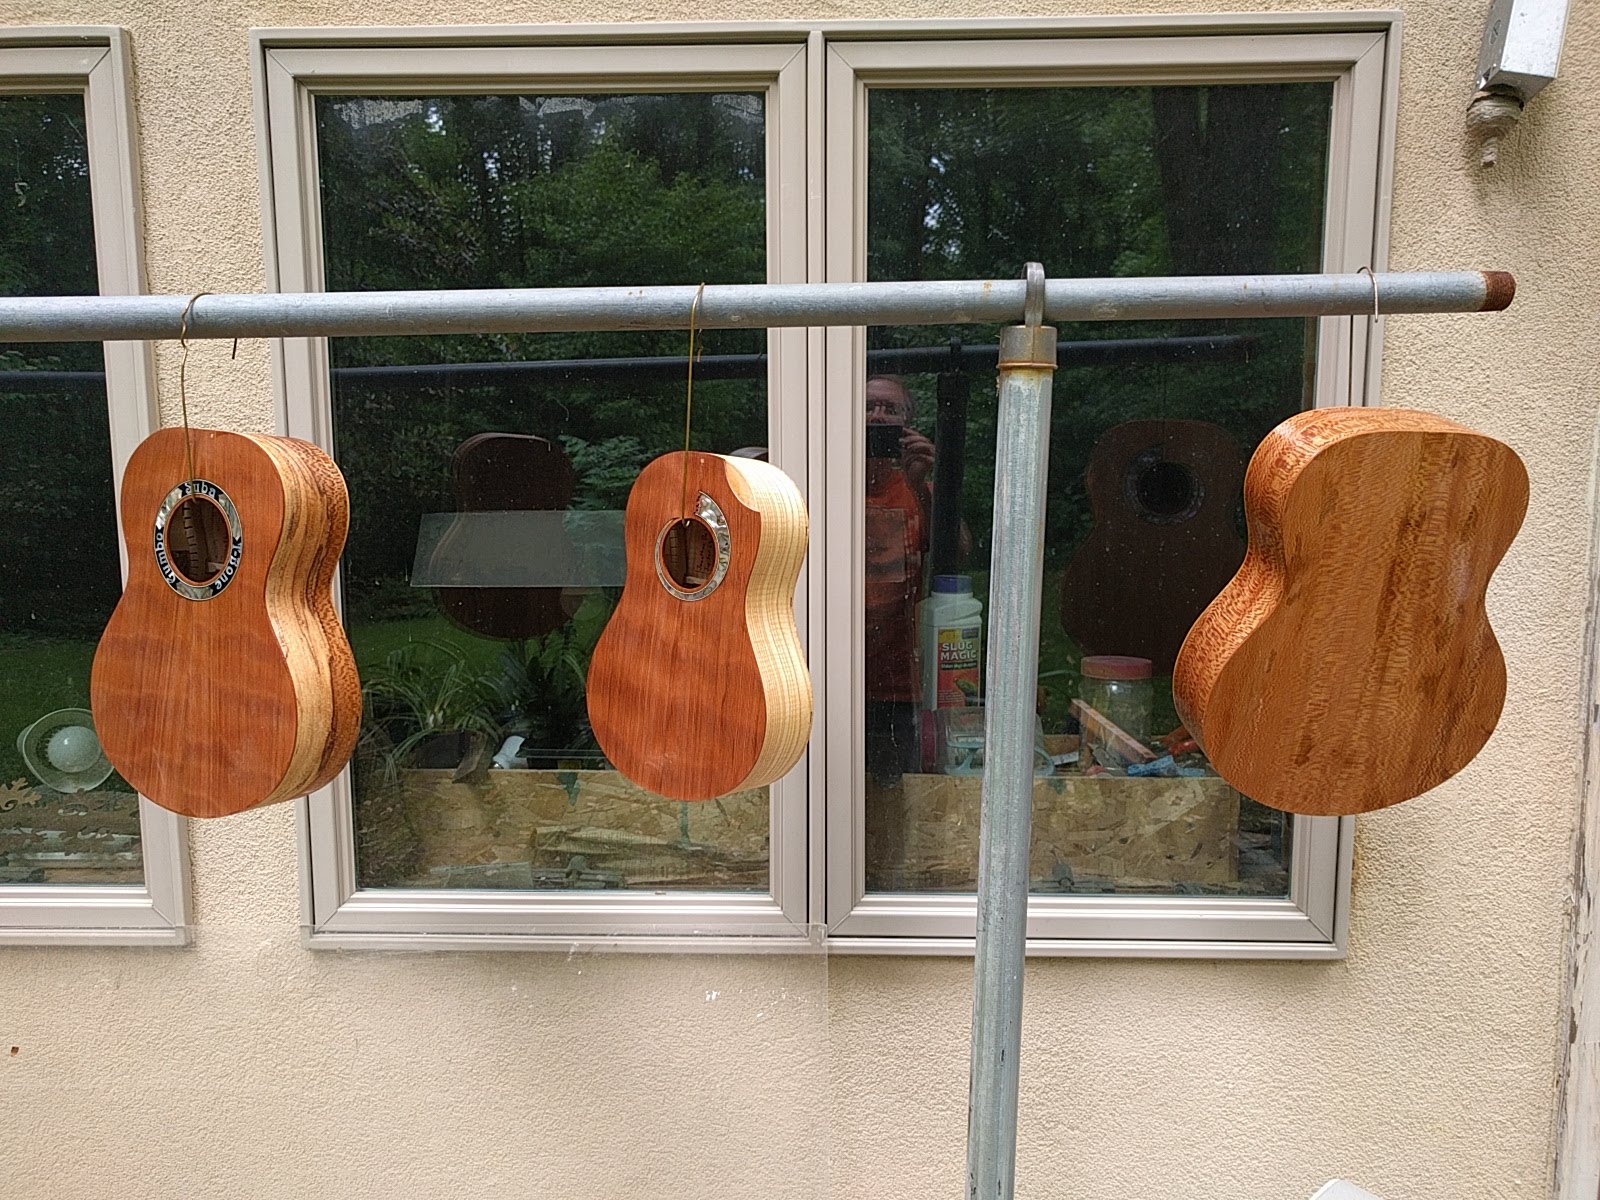
Now that my bender is put back together, I have been bending sides, and gluing on the end blocks to make what is beginning to look like the 4 instruments in this batch. In order: black walnut parlor guitar, sycamore guitalele, spalted sycamore tenor, curly ash concert.
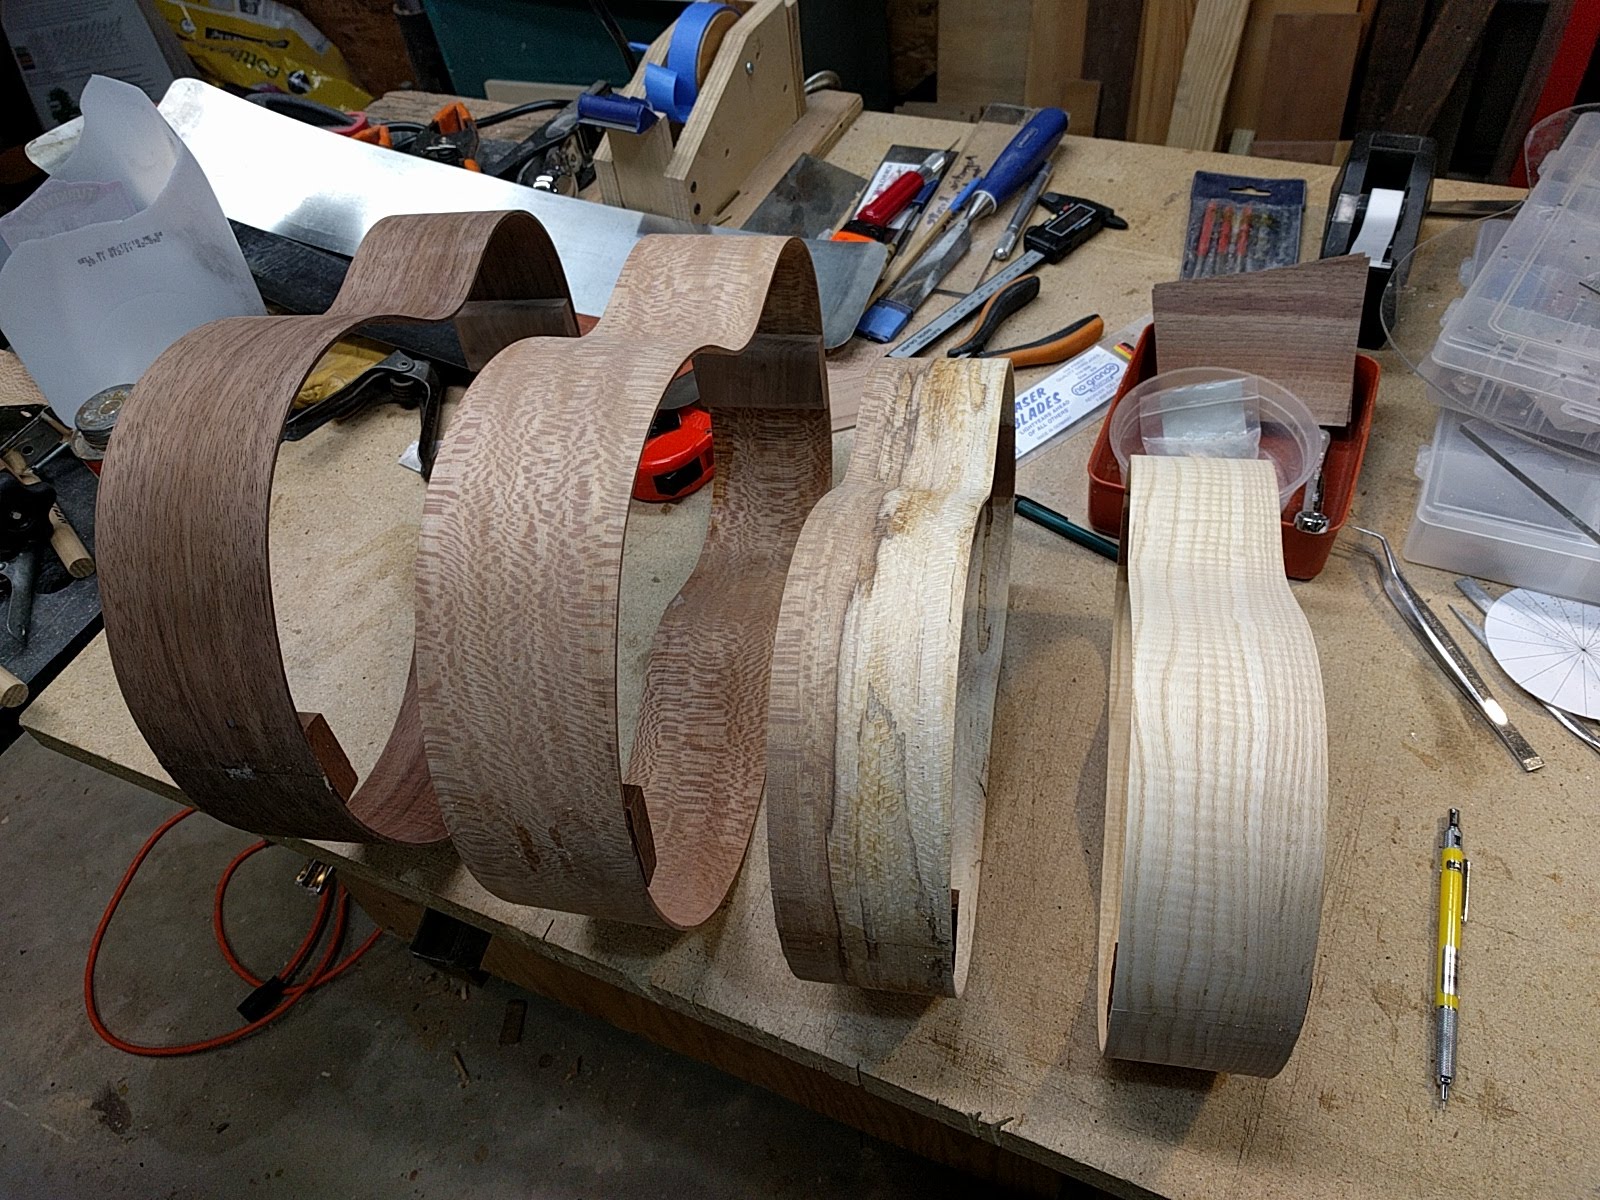
Because by bender was out of action for a couple of days, I did other stuff that did not require the sides, like soundhole rosettes, getting the back braces glued on, choosing binding, etc. All of this has left the workbench a complete wreck. Hopefully now I can get back into a more ordered process.
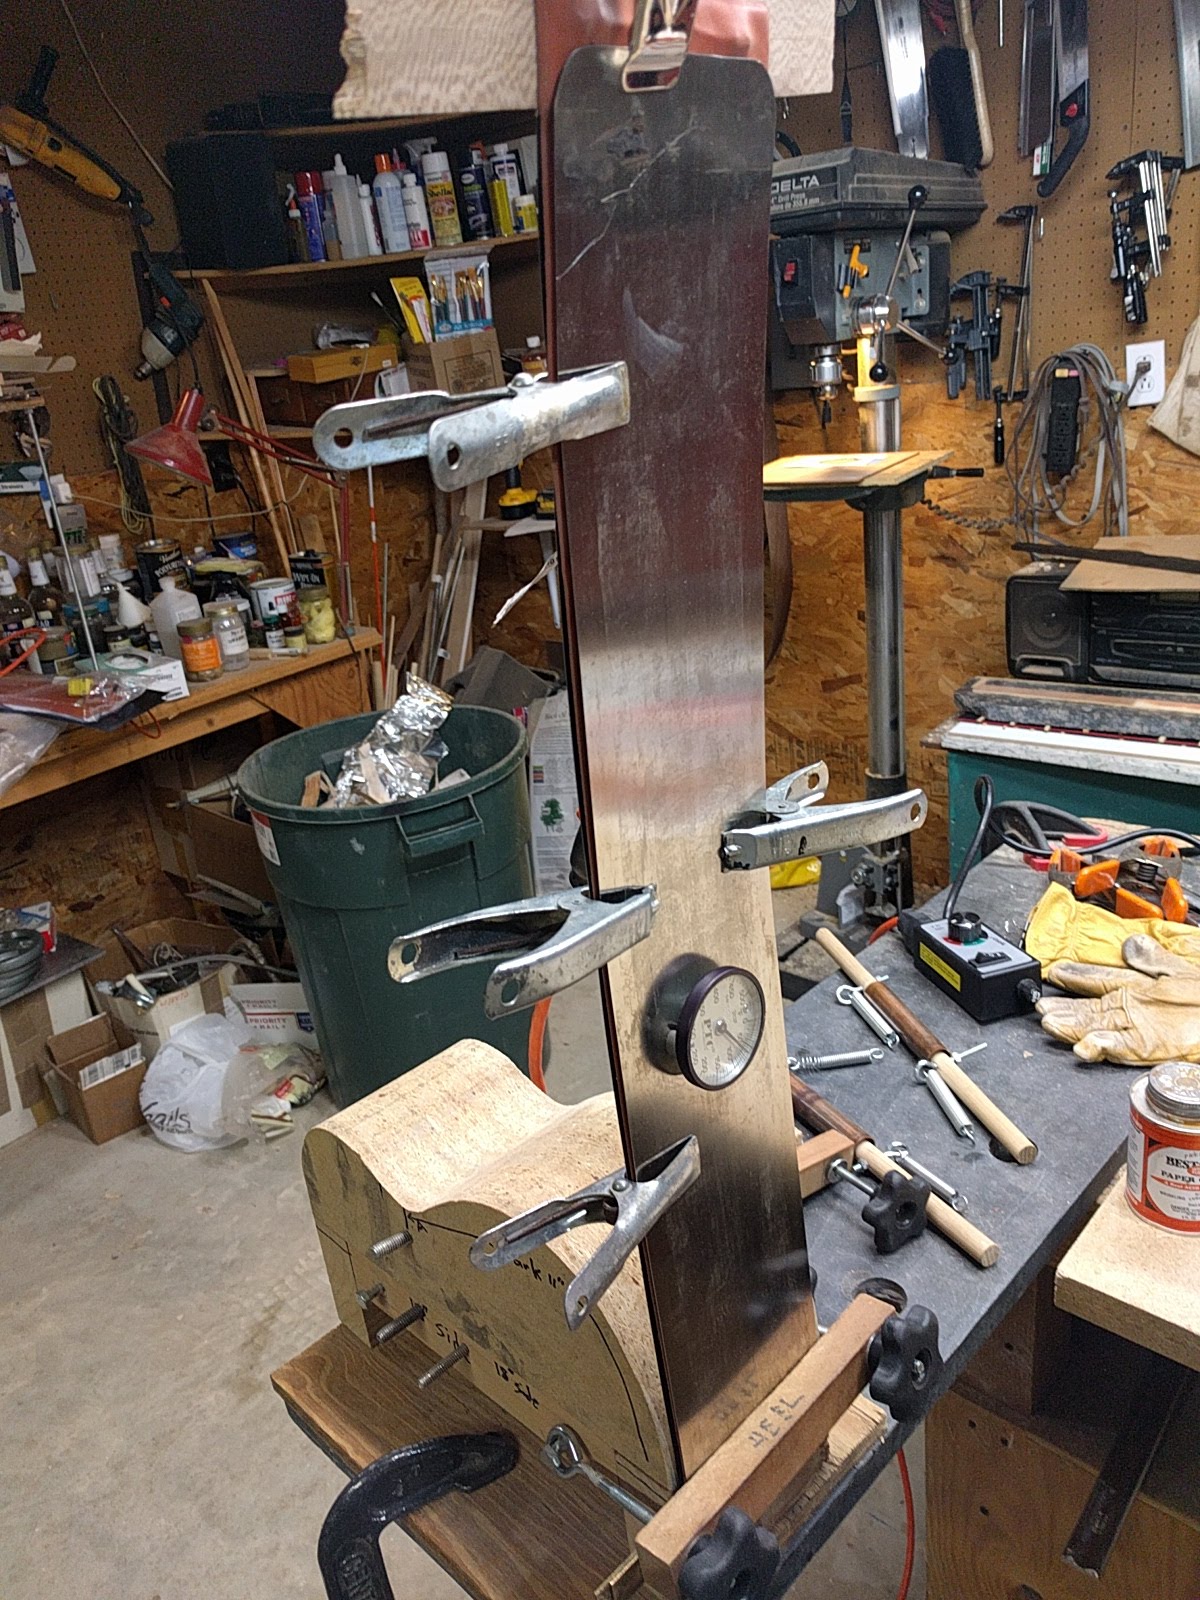
I bend using a silicone hear blanket, over a home-built form. Here is basically how it is done.
I wrap the side (or in this case a set of binding) in brown paper. I wet the paper, and wet the side, and then roll them up. This is then rolled up in some aluminum foil to help keep the moisture in during the bending process.
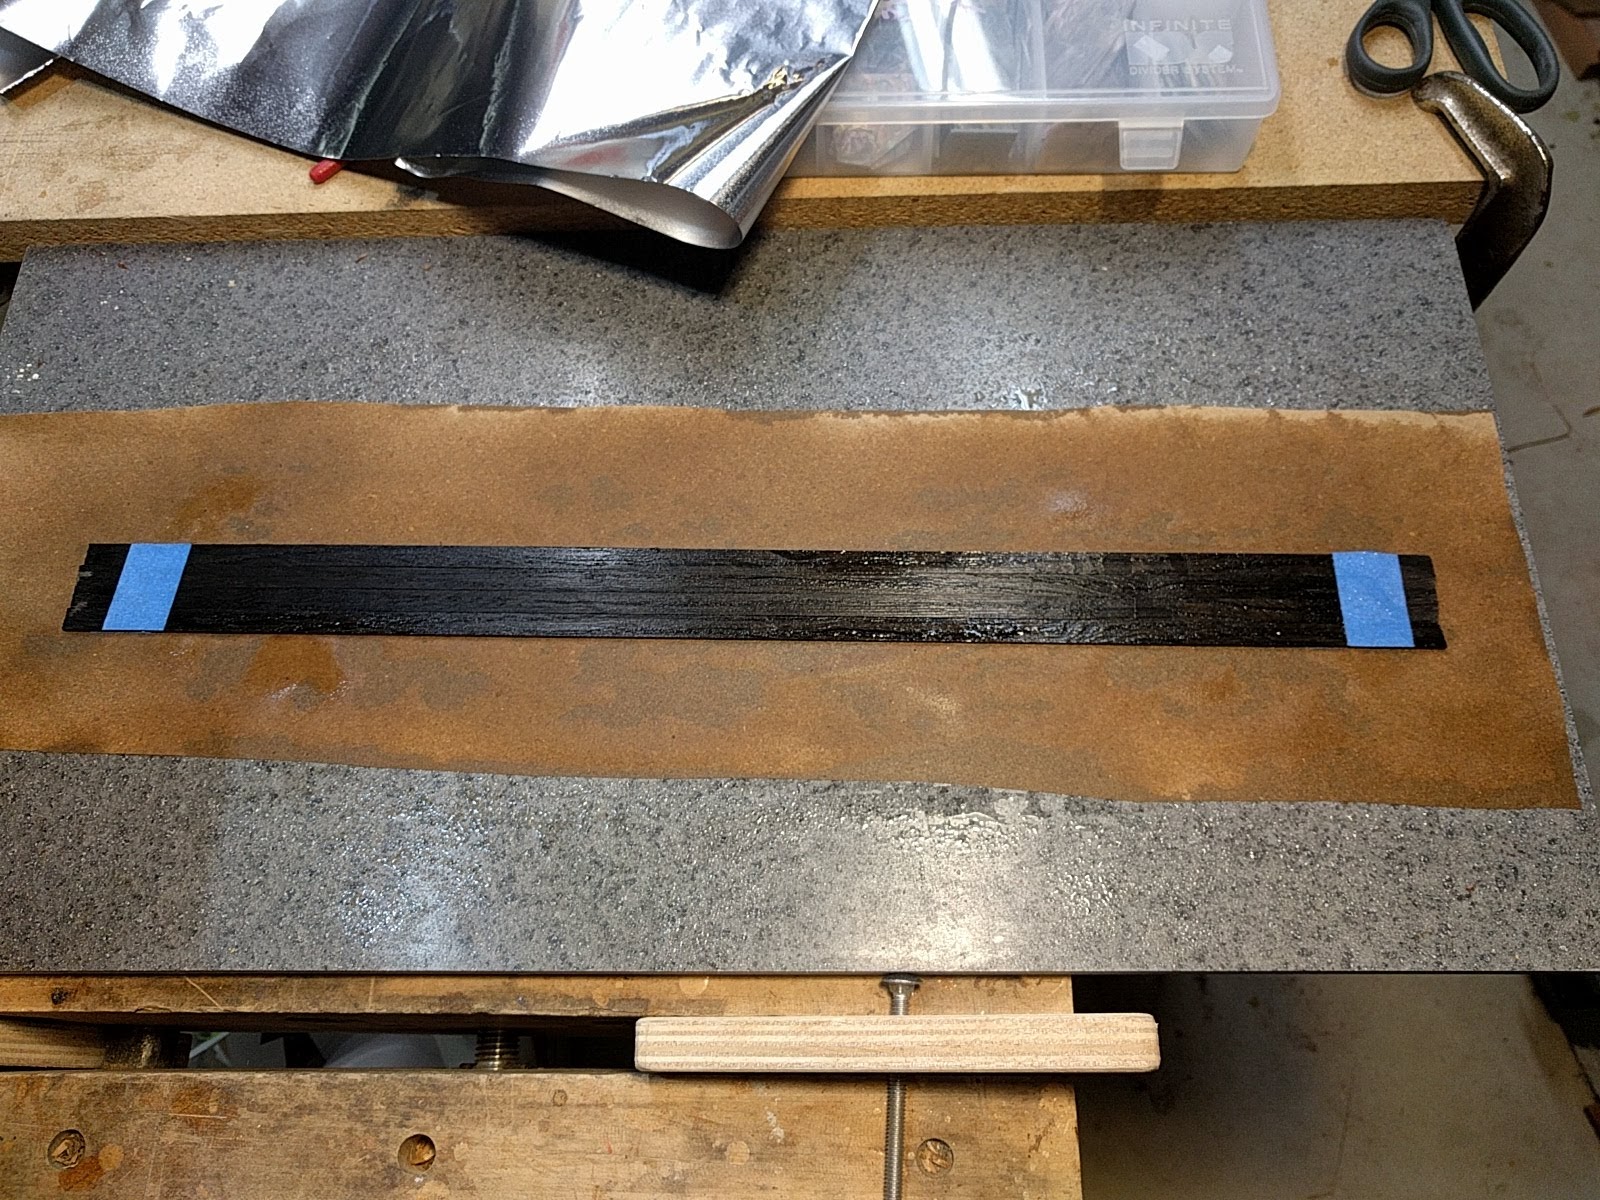

Then one puts together the ‘sandwich’ which is a flexible stainless steel slat, on top of which goes the wood, then the heating blanket, and finally another flexible stainless steel slat.

This sandwich is then put onto the bending form. I start the bend from the end, rather than the middle as some people do because by doing this I get a very good registration of where the end of the side lies, which means that the book-match on the end of the instrument is as good as it can be. So the sandwich is stood up on the end of the bending form, and the clamp tightened down. All ready to turn on the heat. Notice the surface thermometer used to monitor how hot things are.
Turn on the blanket through the controller, and let things heat up. As they get up to around 250 degrees Fahrenheit things begin to get soft, and the bend starts by itself due to the weight of the sandwich.
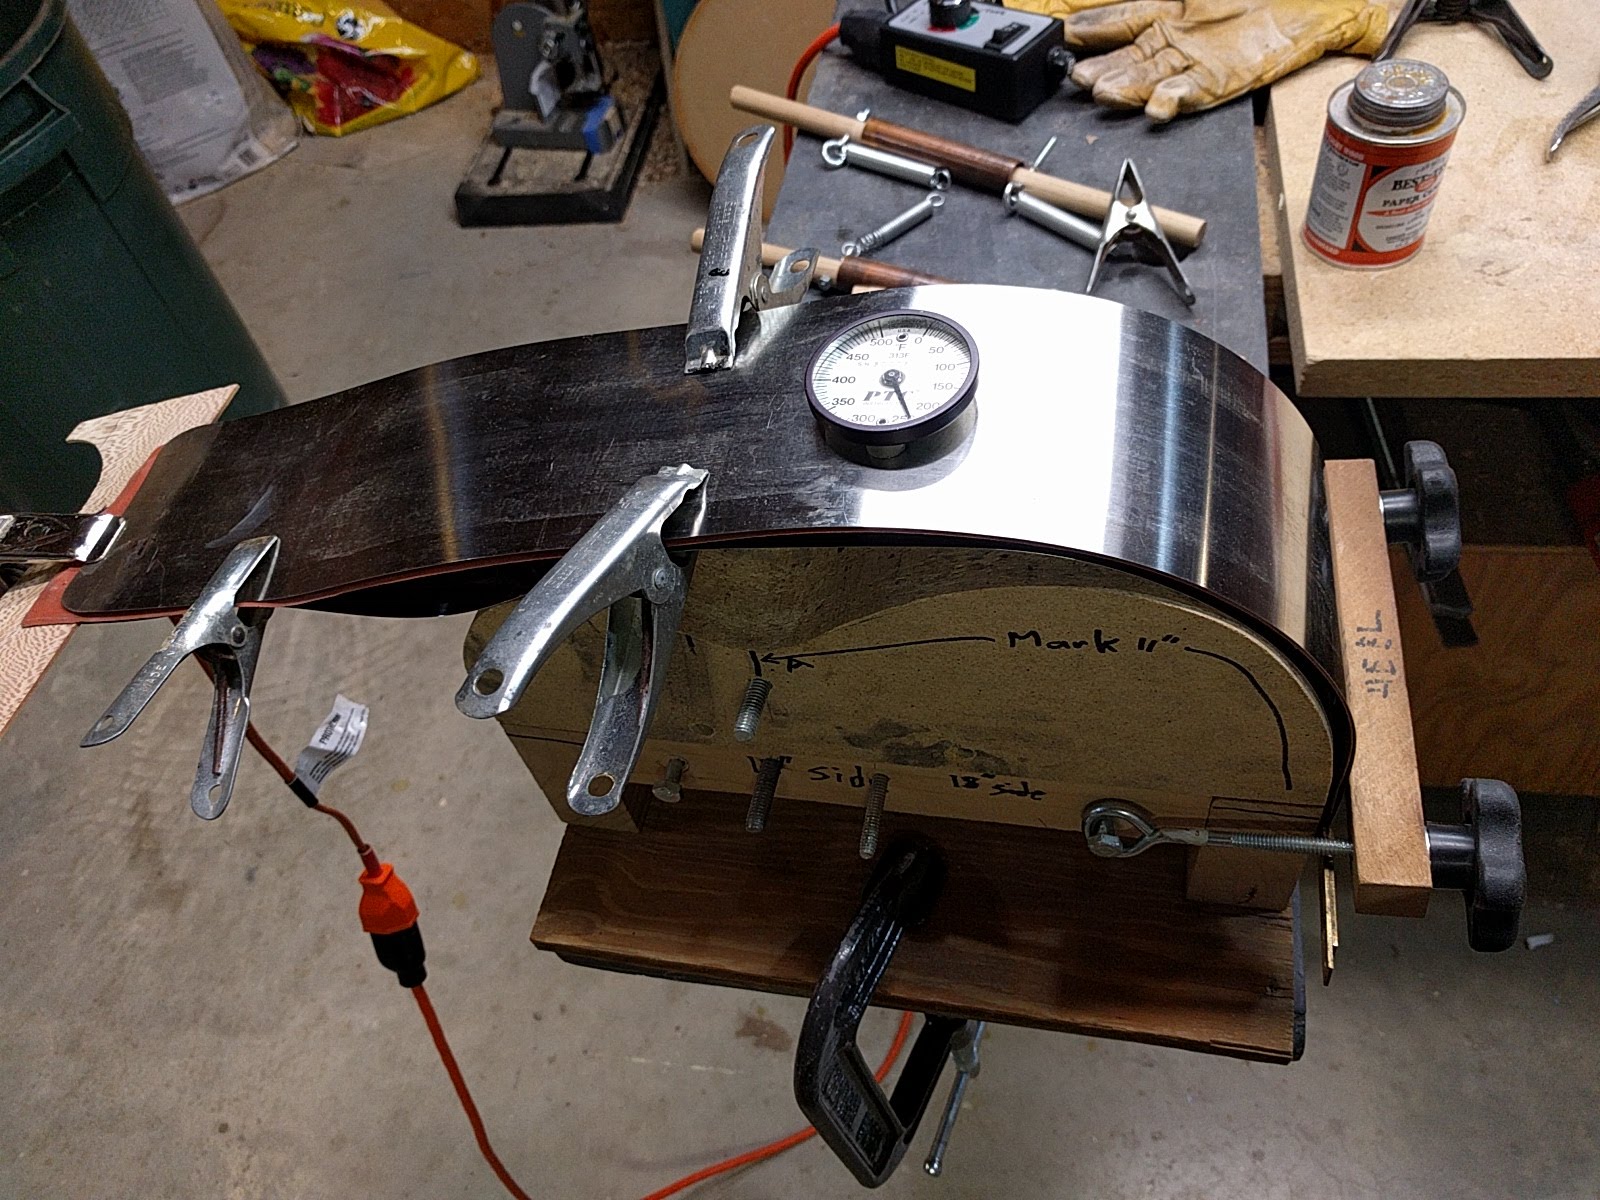
One then puts on the clamp for the waist, and tightens things down slowly, hoping that one does NOT hear a crack! Attach the handle used to roll down over the upper part of the side and bend it down. This handle is a dowel with a piece of loose copper pipe and is attached with fairly strong springs, so it is just a matter of slowly pulling the whole thing down over the curved form.
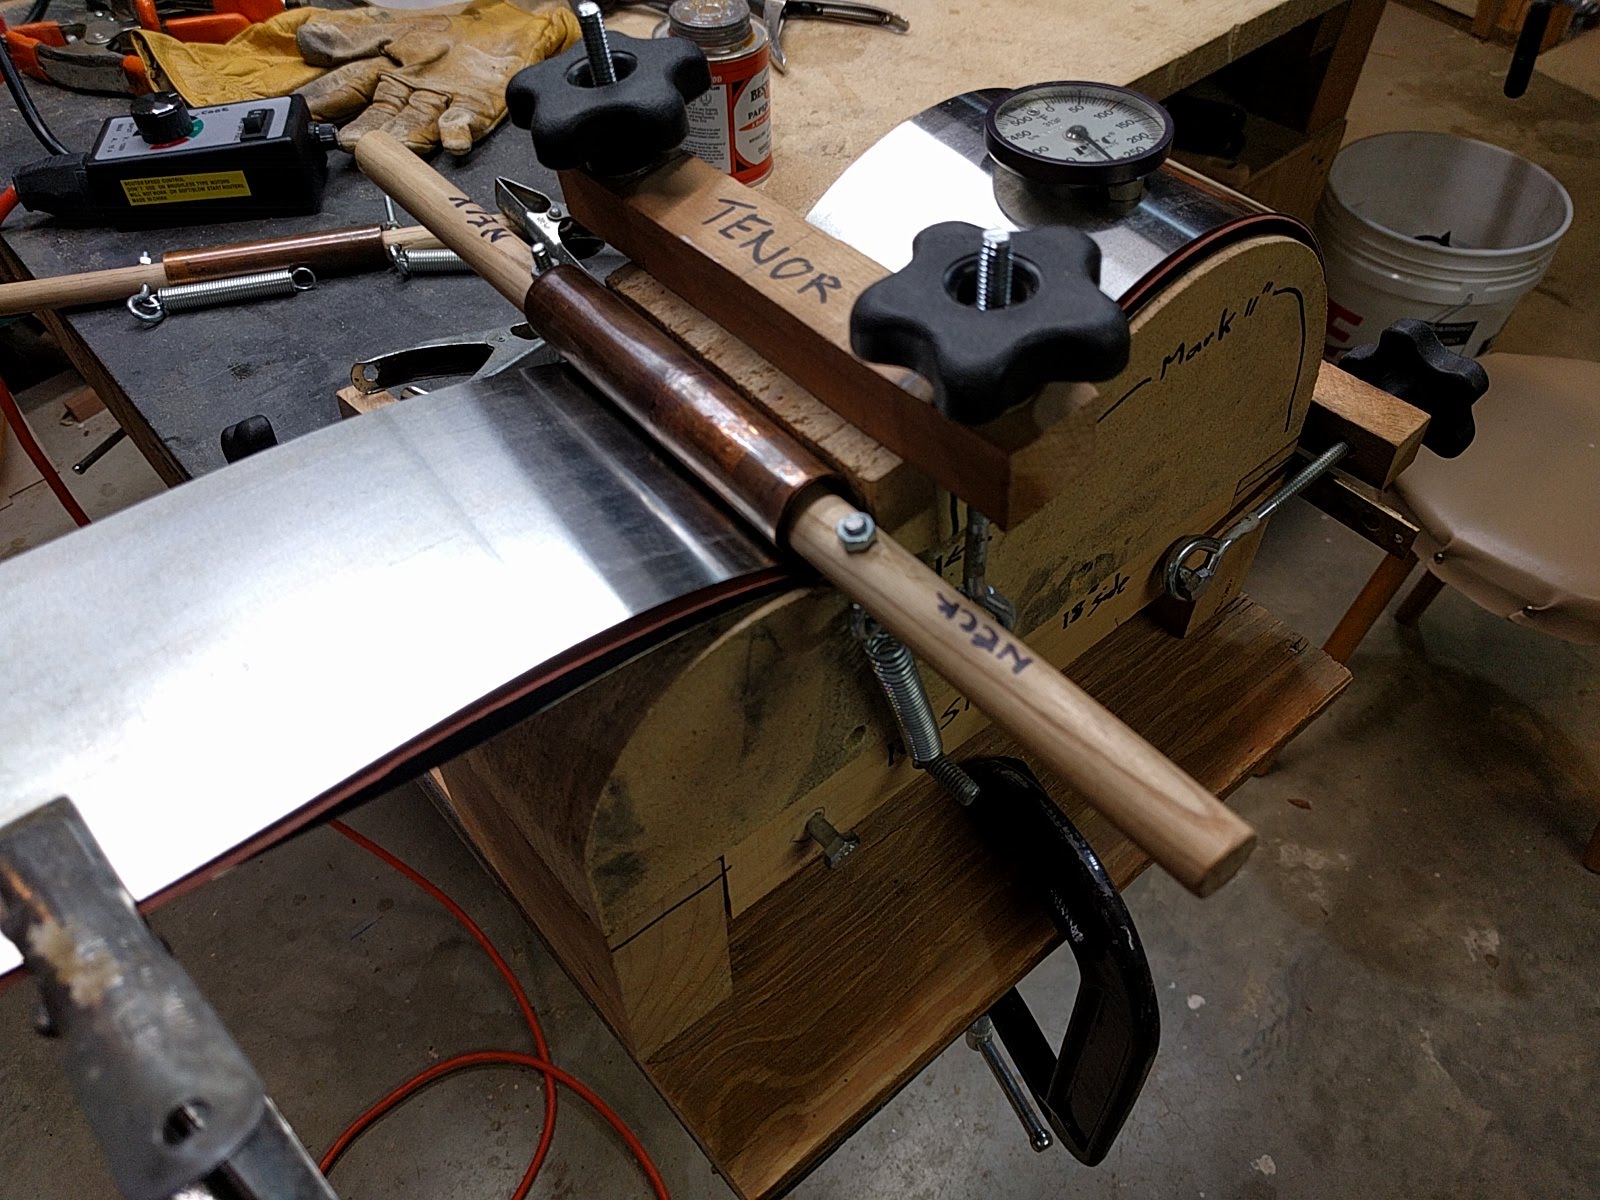
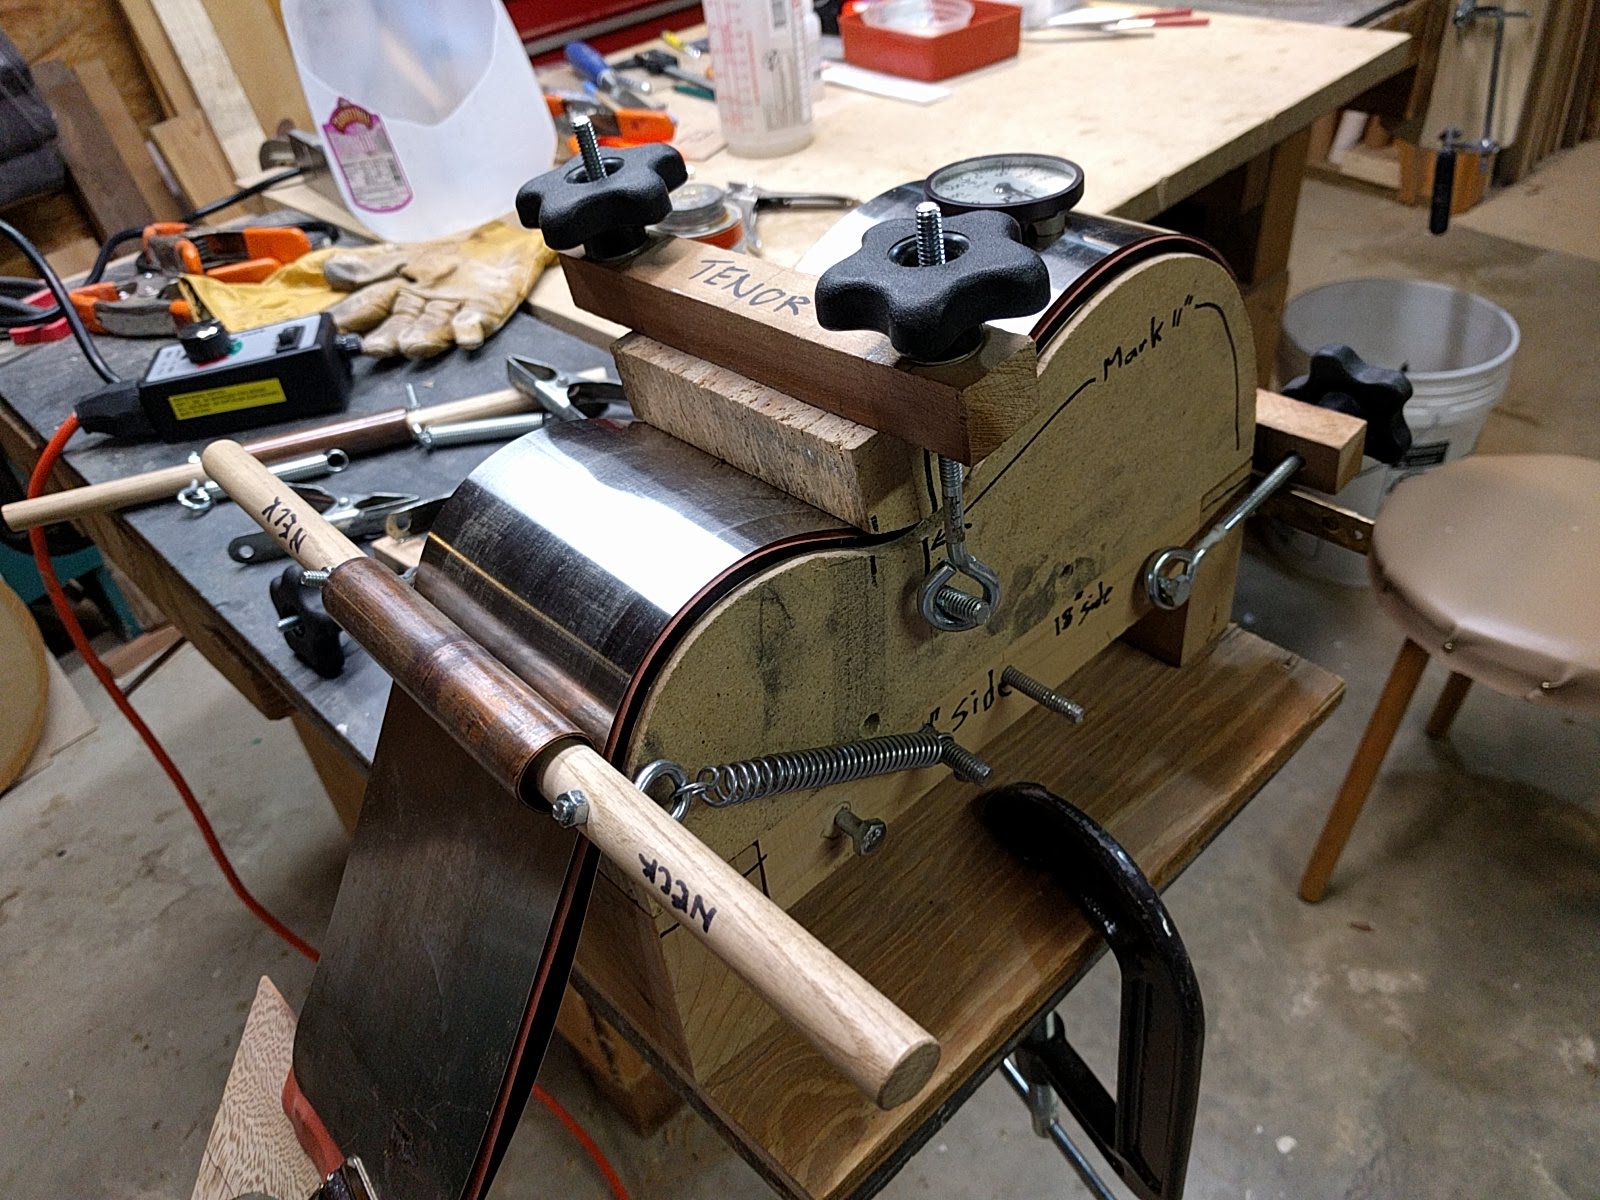
Put on the upper side clamp, and you are all done
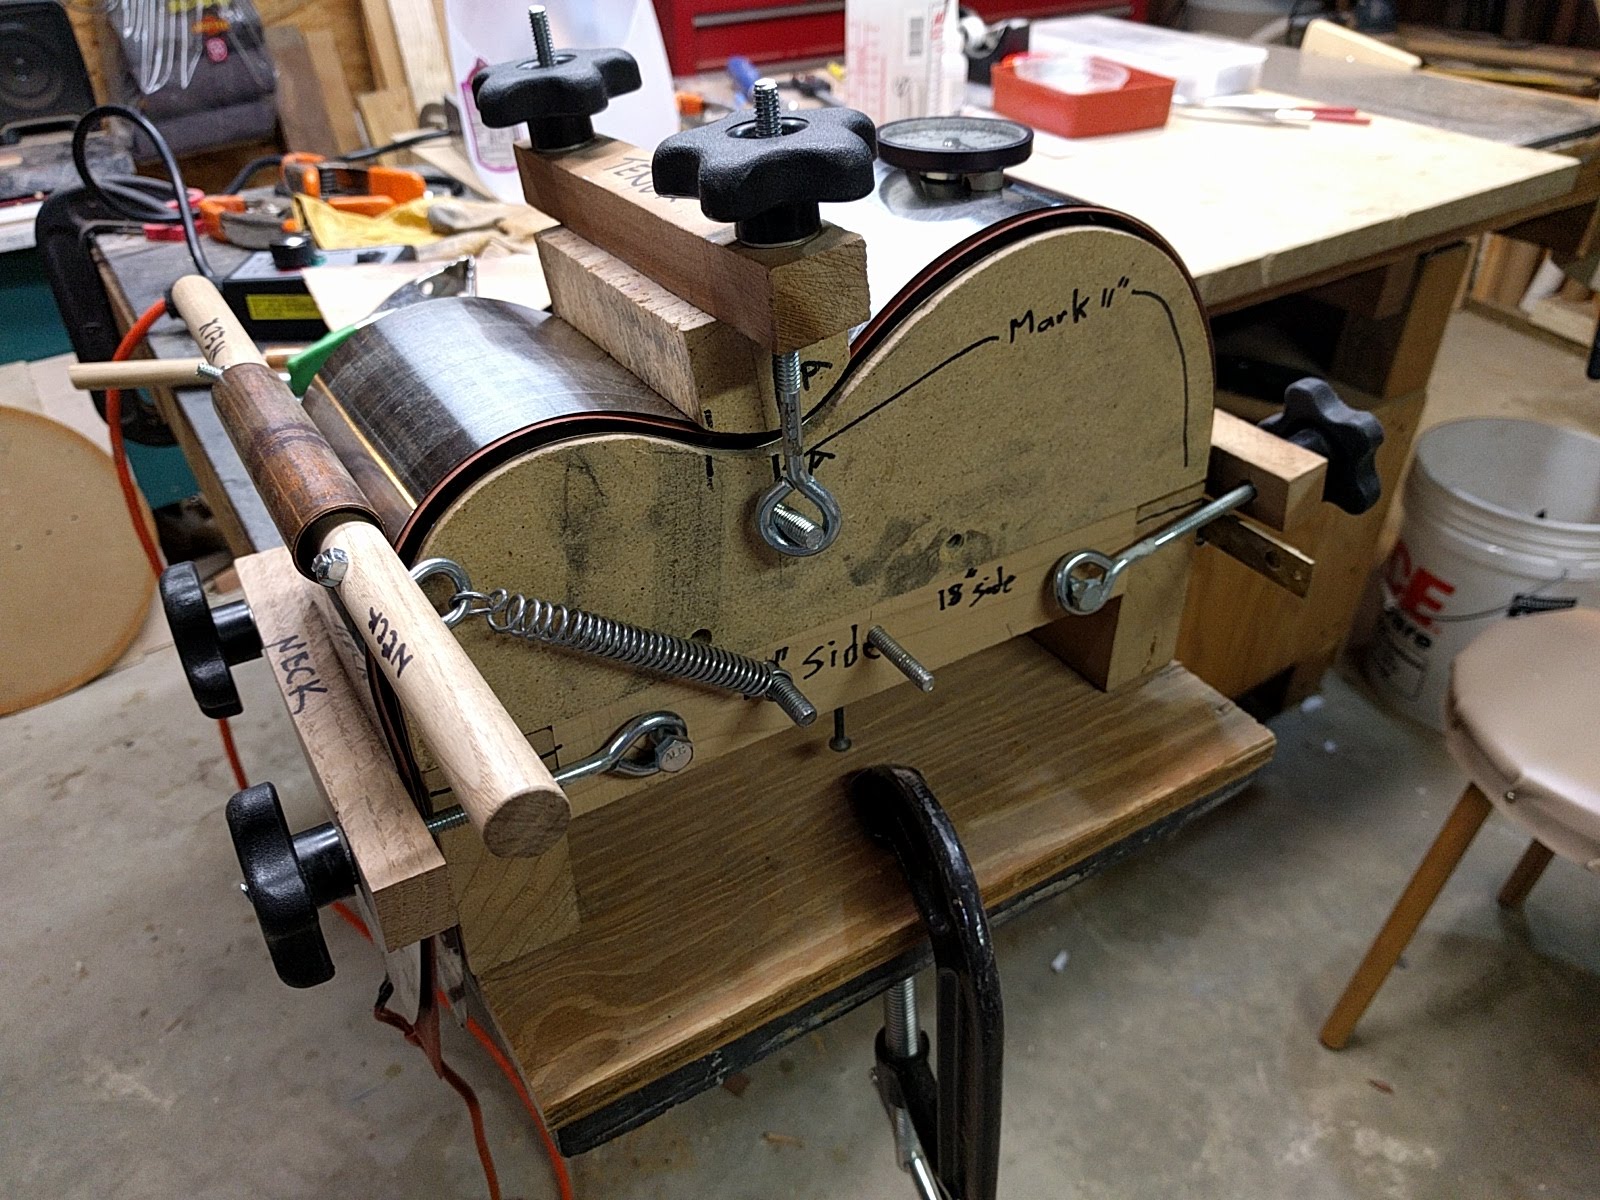
I let thing ‘cook’ for 5 minutes at around 280 – 300 degrees to set the bend, then turn things off and let it cool.