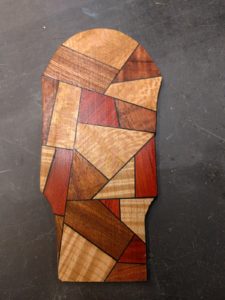
I have a whole pile of scraps from nice wood that went into backs and sides. I just can not use these as stove kindling. I was thinking, and based on some ideas from the luthier conferences I went to this summer, I have come up with a way of using the scraps to make up headplates. It looks pretty neat (I think) and is really pretty easy to do, with no trial-and-error fitting of pieces. One is always just gluing a straight edge to a straight edge. For the moment I’m calling these “Picasso” headplates (for the cubist look) but maybe I’ll call them “stained glass”. Here is the first one, with a quick coat of shellac to show some color.
Kimo Hussey plays one of my ukuleles
Was at a local ukulele festival, and Kimo Hussey came by (he was the headliner). I asked him to try out the XL tenor, since he had liked the normal tenor at the Guild Of American Luthiers convention. Sorry about the background noise, but an impromptu tune. Click on this link to play the video. (You probably have to click on the video itself to get the sound.)
https://goo.gl/photos/58ESDK36E7qcPhXW7
Kimo brought his own (hand made) instrument by to show me. It was also a 19″ scale tenor (though he likes it tuned down one step). The really interesting thing to me is that the back and sides are sycamore, one of my favorite local woods both from a looks and sound perspective. Here was some evidence from both a high end builder and player that sycamore can hold its own!
A little show
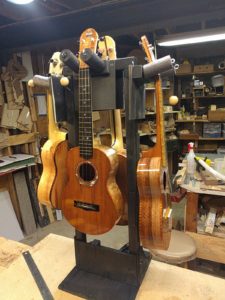
I have been invited by a guitar & ukulele making friend from New Jersey to share some exhibit table space at a ukulele festival being held this coming weekend, Aug 25-27. http://folkproject.org/njukefest I made up a little stand that holds 4 ukes but only takes up a square foot of table top space. I had a lot of the pieces left over from the Palm Beach show I did in Feb. 2016 that I recycled into this stand. The collection looks pretty good together, and they sound very good too.
Rosettes
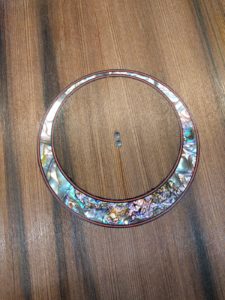
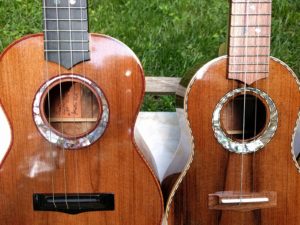
I like mother of pearl rosettes. With the router base I have developed it is easy to cut an asymmetric rosette (thicker at the bottom than the top) and this has become a bit of a ‘signature’ design element for my instruments.
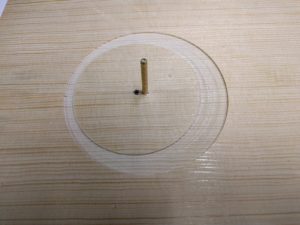
I first cut the rosette channel using a 1/8 inch down-cut carbide bit in the dremmel router base which rotates on a pin sticking up through holes in the soundboard. The top hole becomes the center for the sound hole (parallel to the inner circle of the rosette), and the lower hole (3/16 of an inch offset) with a larger diameter makes the asymmetric rosette.
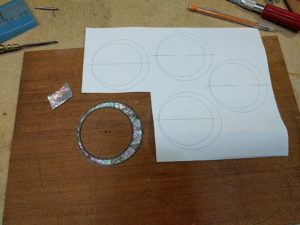
I measure the inner and outer diameter with a digital caliper (to 3 decimal places), and use this with a drawing program on the computer to make circles of the exact diameter. I then increase the inner circle diameter and decrease the outer circle diameter to account for the purfling thickness. Then I can print out an exact pattern for the pearl.
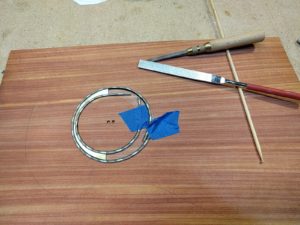
The operation then becomes gluing pieces of the paper pattern onto pearl blanks, sawing them out, and fitting them end-to-end in the rosette channel. The pearl is cut with a jewelers saw, and refined with some diamond files. Lots of small tools. In addition, it is actually easier to cut the pearl for an asymmetric rosette than a simple circular one. When doing a simple circular rosette the pearl has to be cut to exactly the right width, and one has to work it into the channel, without damaging the side purfling. With an asymmetric rosette each piece is tapered, so one can slide it along the channel, which really tightens up the side purfling. Only the last piece needs to be fit exactly.
There are tricky parts like joining the ends of the purfling as invisibly as possible, and the fitting of the very last piece.
Then the whole mess is glued down with CA glue, and sanded flush with the top.
The next four
The next four are going to be an interesting, somewhat different collection, using different local woods. I am building two concerts and a soprano to build up a little ‘smaller’ ukulele inventory as most of what I have are tenors. So, the lineup is:
soprano – dogwood back and sides, redwood top
concert – spalted sycamore back and sides, local aromatic cedar top
concert – apple back and sides. I cut this a while back from a local orchard that was replacing a row of trees. It is surprising to me how hard and stiff apple wood has turned out to be. Should make a very nice instrument. Streaky water-tank redwood top.
????? – The last one is a ‘surprise’, both because I have no idea how it will work out (a completely new thing) and it is going to be a present and I don’t want to ruin any surprise if they happen to be reading here.
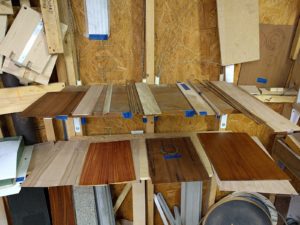
The wood layed out and started to be made into ukuleles. I build in sets of four since that is what fits in my little workshop.
A teaser
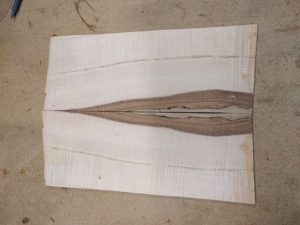
Ok campers, I am still on vacation, and have been to another luthier conference last week. Came away with some really interesting ideas that I’m going to try out. In the week I had back in the shop between ‘events’ I did some re-sawing of some local curly maple I harvested from a neighborhood tree a few weeks back. It is as nice as I expected. Nice tight curls, and some contrasting, slightly spalted heartwood to boot. Sugar maple is quite hard, makes a very nice sounding ukulele, and then, isn’t this going to make a pretty uke too:
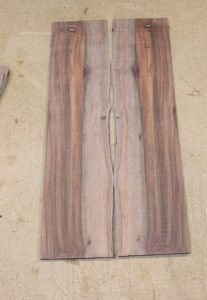
Also did some re-sawing of cashuarina which has made some really nice sounding instruments (though it is much more difficult to work with than maple). There is a whole lot of potential in here:
It will be a while until these pieces of wood turn into instruments, as one want to let them dry completely, but the future looks good ……
Shipping troubles
Beware of UPS
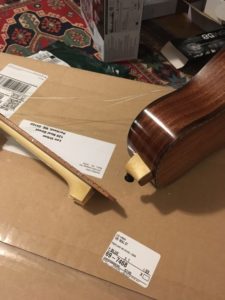
Shipped to a customer … Packed with extra padding inside a hard case, inside a larger box filled with packing peanuts. They must have dropped this from a pretty great height, onto a concrete floor, to generate enough momentum and sudden stop to crack off the neck. (My necks are “bolt on”, attached by a bolt through the body of the instrument, not glued, so at least I think I’ll be able to fix it.) Still waiting on the UPS ‘investigators’ to make some sort of pronouncement on the insurance. (Why am I skeptical that they will pay for anything but a pittance, with some reason as an excuse?)
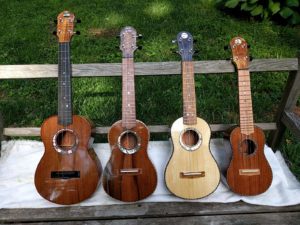
The latest “gang of four”
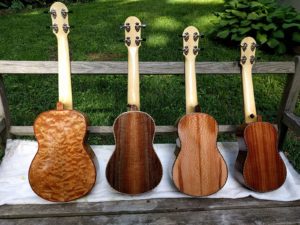
The latest gang of four.
Redwood & quilted maple tenor with Richlite fingeroard, pink abalone asymmetric rosette, ebony bridge, koa binding and headplate, black-red-black purfling.
Redwood and local black walnut concert, pink abalone asymmetric rosette, local (Florida) casuarina fingerboard and bridge, curly walnut headplate, curly maple binding, black-white-black diagonal purfling.
Local spruce & local sycamore concert, red sea snail asymmetric rosette, bocote fingerboard and bridge, east indian rosewood binding and headplate, black-white-black diagonal purfling.
Redwood & sapele soprano, local dogwood fingerboard and bridge, dogwood root burl headplate, east indian rosewood binding, black-white-black diagonal purfling.
All of the redwood is old-growth redwood recycled from water tanks.
It is kind of interesting that at this point, with all of these finished, and seeing them together, I kind of forget that I made them. I have been too close for too long and did not see the forest for the trees (can’t escape the wood metaphor). They seem like beautiful objects that some how sprang into existence from somewhere else, and I am merely the very lucky recipient. Kind of hard to believe that these came out of my little basement workshop and my hands were responsible.
Time to really clean up the workshop and then go through the wood stash and see what will be next.
Fretting
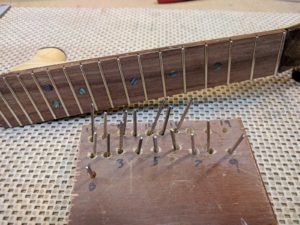
I pre-finish the ends of my frets before installing them. I started doing this when building banjos which have bound fretboards. I find that even with a non-bound fretboard, by pre-finishing the fret ends if get a very nice smooth feel and a nice polished look.
I just got back from a 3 day luthier convention put on by the Association of String Instrument Artisans (ASIA). I learned all sorts of new tips/tricks, often as side things to what a builder was actually presenting. There was one fellow who also pre-finished his fret ends, and a simple method of working I learned from him, plus noting how he had some things on his bench arranged, has cut my fretting time down by at least 20%.
ASIA does however leave one with some unanswered questions, such as: “Do I really need a $100 chisel?” It is a really really nice chisel, and it is just the thing for some new things I may try out.
Neck carving
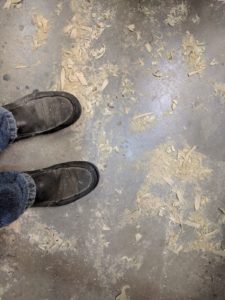
Wow, a picture of the shop floor, how exciting is that! I have been shaping/carving the necks of this latest batch. I mostly use Alaskan yellow cedar for necks as it is light, stiff, domestic, and not endangered. (Not actually a cedar, really in the cypress family). It has a very distinctive cedar-like smell when cut (some say it smells like raw potatoes, but I disagree), so the whole workshop is perfumed with a very distinctive woodsy cedar-like scent as one works.
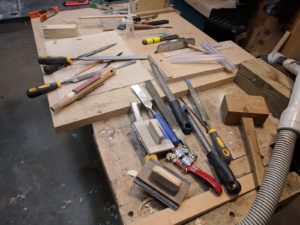
Carving necks I get out a wide variety of tools: rasps, files, spoke-shave,chisels, micro-plane, sandpaper.
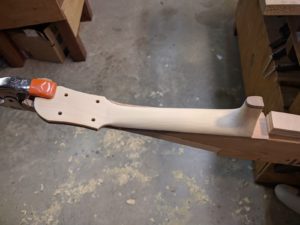
Work away a bit and you get (basic, lots of finish sanding to come):
