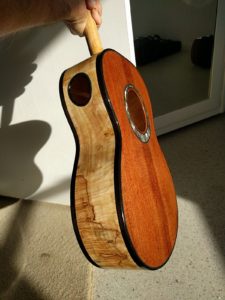
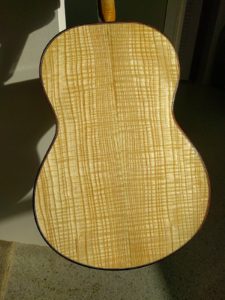
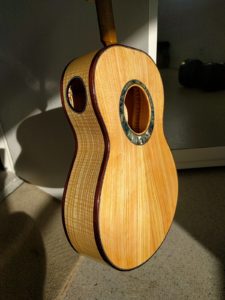
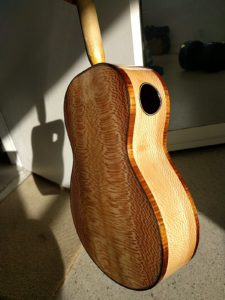
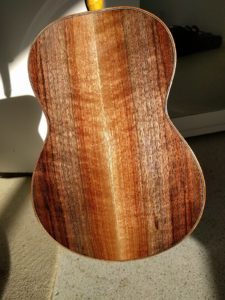
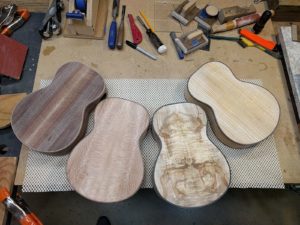
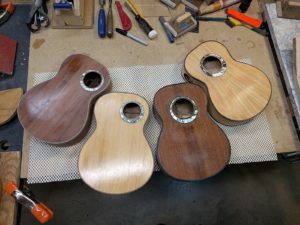
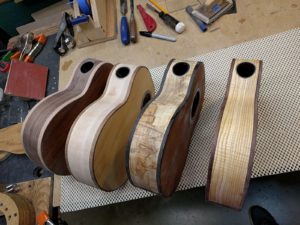
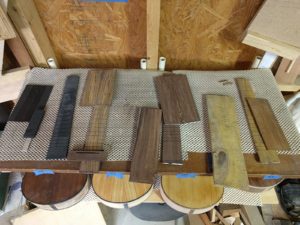
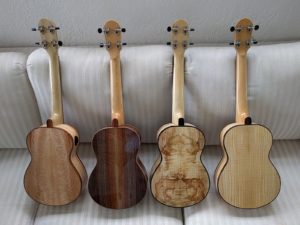
The latest set of four

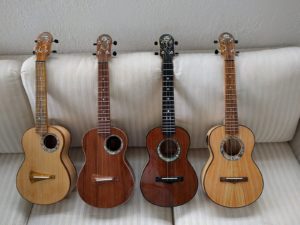
The latest set of four is really good.  The best set I have made to date.  They all sound great.  Two of them, the walnut & redwood kasha and the ambrosia silver maple & redwood are already spoken for, but it is hard to let them go.  A mother hen likes to keep the new chicks close.

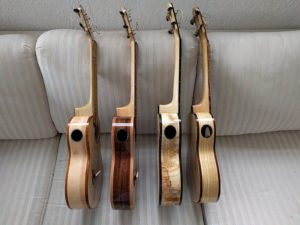
All the instruments in this set involve two new structural elements.   They all have radiused fingerboards and side sound ports.  A radiused fingerboard is supposed to make playing, particularly the playing of barre chords, easier since a slightly rounded fingerboard cross section mirrors the shape of a finger.  Not being a player, I can not really comment on this, but on the small scale of a ukulele I kind of have to question whether it really makes much of a difference.  A radiused fingerboard does complicate the build process however.

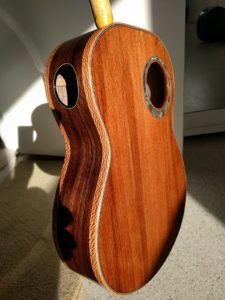
A side sound port is designed to project more sound up to the player.  I was a bit skeptical, but with these four there is a really noticeable difference in the sound between having the sound port open, and covering it with your hand.  A sound port seems to make the instrument sound more lively and also seems to increase the volume.  They seem to add a lot and are not that difficult construction-wise once I got things worked out.

For most of what I build these days the back and sides started with me and a chain saw, along with fingerboard and bridge material. Bold items below started with me and a chain saw or at least started with rough boards from a local source.

The latest four, from left to right:
Kasha tenor – Port Orford Cedar top, sycamore back & sides, koa binding, radiused Florida black olive fingerboard & bridge, koa headplate, side sound port.

Kasha tenor -recycled redwood top, black walnut back & sides, sycamore binding, radiused casuarina fingerboard, bridge & headplate, side sound port.

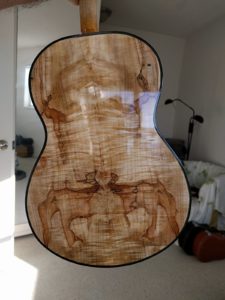
Tenor – recycled redwood top, ambrosia curly silver maple back & sides, ancient bog oak binding, radiused Richlite fingerboard, ebony bridge & headplate, side sound port.

Tenor – Pennsylvania red cedar top, curly ash back & sides, east indian rosewood binding, radiused bocote fingerboard, bridge & headplate, side sound port.

[Note: the blog pages show pictures in a reduced ‘fuzzy’ way.  Click on the picture to see the real thing.  This applies to any picture in this blog.]
Mycology meets ukuleles

I have had an interest in the fungi, wild mushrooms, etc. for many years.

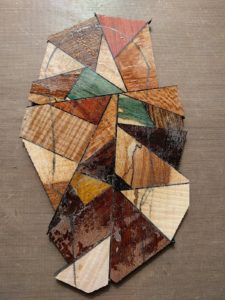
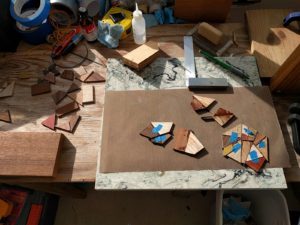
I have been working on making the roughs for “Picasso” headplates. These allow me to use all of those little pieces of really nice wood I could not bear to throw out. These constructions also allow me to use more unusual things. In this construction, notice the blue-green elements. This is tulip poplar stained blue-green by the fungus Chlorociboria aeruginascens (or Chlorociboria aeruginosum, the two species can only be told apart microscopically). I have found this staining before, but usually on small bits of wood on the forest floor. One rarely sees the actual fruiting bodies, which are small cups the same blue-green color.

When splitting up some old poplar which had been sitting outside recently I found a piece that had a rather large area of blue-green stain. So I saved it, cut it into plates, soaked it with thin CA glue to harden it, and now can use it for a bit of unusual color. This is not a new use by the way. The use of this blue-green stained wood for decorative marquetry and intarsia goes back to the 15’th century.  It is  used today in decorative woodworking such as Tunbridge ware.   The blue-green color is very stable over time.

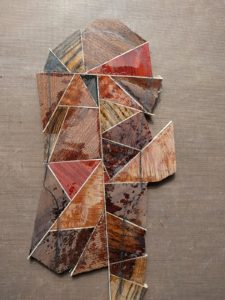
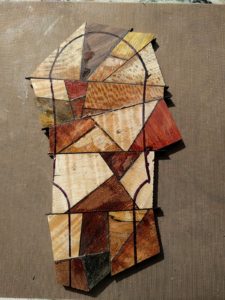
Here is another headplate, this one made with white veneer inter-panel strips, and primarily darker woods.

Not the usual direction

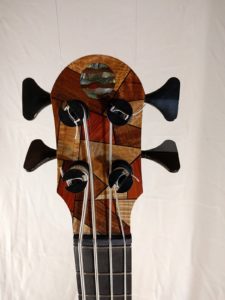
Usually the process of making instruments is a process of turning big pieces of wood into smaller pieces of wood, with a fair amount of cutting going on.  Well, for once I am turning little pieces of wood into bigger pieces.  I developed a way to use all those little scraps that I could not bear to throw out to create what I have been calling ‘Picasso’ headplates.  One starts with little pieces, and using CA glue and some colored veneer (black in this case) one build up bigger pieces.  I have worked it out so that I am always gluing a straight edge to a straight edge (easy to produce).  There is no ‘fitting’ of pieces, just slapping two straight edges together.  I think the result is pretty neat, and looks even better when it is cleaned up.  (The blue tape is so I remember which side is ‘up’)  I have made one so far on a finished instrument, (a U-Base I made for my sister)  shown below.

By the way, for anyone working with CA glue, I got some teflon baking sheets (cheap from Amazon) and the CA glue does not stick to them at all.  I can press things down, smush glue around, and the pieces come right off.  Even bits of dries CA glue scrape right off with the edge of an old credit card.


Finishing

As one begins to apply the finish, many layers of hand applied Tru-Oil (which is not an oil, it is a catalyzed varnish), the color and grain really begins to come out.  An exciting time, though somewhat frustrating because you can see every little pit or scratch in a shiny surface.   Still, this set of four are all looking good.

Southern work

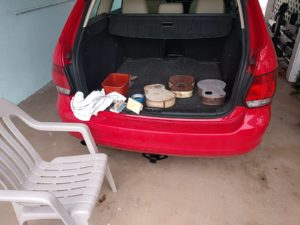
I am now at our little house in Florida for the winter. I do not have much ‘shop’ space here, though I brought 4 mostly finished ukes with me. They need final sanding and then finishing, which I can do here as I use a hand-applied finish. I do not like to sand inside because of the dust. The weather is sort of gray, with a little spotty rain, so I elected to work in the carport. Great place to sand, with a nice breeze carrying away the dust. For a ‘worktable’ the back of the station ago works fine.
 
I had not seen these 4 for a few days as I was preparing to come south. Getting them out and seeing them ‘fresh’ I really like all of them.

Making a mess

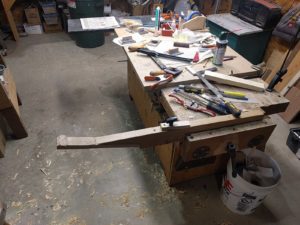
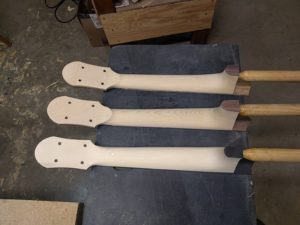
Chips and sawdust on the floor.  Bench covered with files, rasps, spokeshaves, sandpaper and other bits.  Must be neck shaping time.  Three out the four for this group are done, sanded to 220 grit.  One more to go.  Next I’ll add the 2mm pearl side dots.   Then I’ll seal the surface with either shellac or CA glue (have not decided which yet), re-sand off any rough spots, and things are pretty much ready for finishing.

What’s with the pearl dot on the back of one of the necks you might ask (if you are observant).  Well, that is a response to a little problem.  I was sanding down the neck, nearing the final 220 grit sanding.  I noticed a little dark spot, the size of a pencil point.  “A little pin knot” I thought to myself, I’ll just sand it out.  As I sanded a little further the spot got bigger.  Then I realized it was not a spot, but rather a hole!  There was a little bug hole deep in the middle of the wood.  Some how this is appropriate, since this is the neck for the ambrosia maple body.  Ambrosia maple is caused by burrowing beetles, and one has to patch up the bug holes in Ambrosia maple too.

The neck is fine other than one small bug hole  I tried filling the hole, but that still left a darker spot, right in the middle of things.  So I decided to drill out around the hole, and apply a white pearl dot, which matches the dots on the fretboard.  I have done this once before, when working on a banjo neck, and I sanded down to a blemish in the wood which was just going to always bother me.  So I did a little abalone inlay on the back of that banjo neck.   One can admit to the vulgarities of wood (and insects) but still make something nice looking.

Ultra-violet

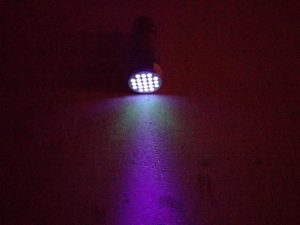
I purchased for cheap (I think it was around $6 from Amazon) an ultra-violet (UV) flashlight.  It is great fun to take it out into the woods at night to see what fluoresces.  We seem to have a species of millipede that glows quite brightly.  Even dead sections of the skeleton glow brightly.  But I digress …

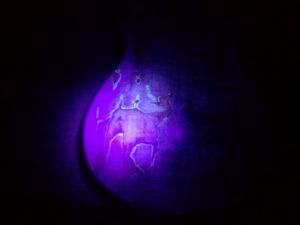
The standard wood glue I, and many other luthiers use, is Titebond.  This glue has the interesting property that is glows yellow under UV light.  What I have found is than when one is doing something like sanding bindings flush with the sides, examining the seam area under UV light will reveal even the smallest, thinnest spot of glue still left on the wood, stuff you can not see with the naked eye.  If this glue is left there it will effect the way the finish colors the wood, and you will get a light colored spot, have to sand it out, and re-do the finish (a time consuming pain).   A little UV light makes things easy.

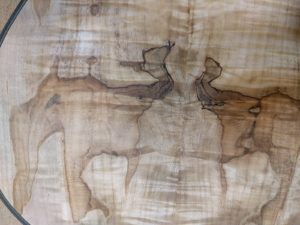
As an added ‘bonus’ one discovers how different wood reacts to UV.  Black Locust, which I have used, glows bright lime green.  You can see every bit of black locust sawdust on the shop floor because it glows like little stars.  Working on the latest uke, I discovered that the spalting lines left by the fungus that the ambrosia beetle import to create “ambrosia maple” also glows lime green.  Not all the wood, just the edge lines.

The four tenors

No, this is not Italian opera.

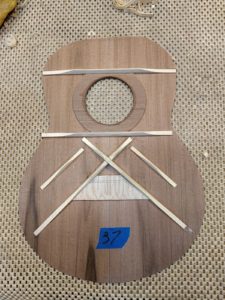
The next group of four, all tenors, is coming along. Two have a more ‘standard’ bracing, with a slight modification this time, and two use the Kasha style of bracing. They are all different combinations of woods, which is pretty exciting to see coming along.  I love wood!  The bodies, from left to right, are black walnut & redwood, sycamore & Port Orford cedar, ambrosia curly silver maple & redwood, curly ash & Pennsylvania red cedar.  Then there are the interesting features, like my first use of 2000-4000 year old bog oak for black bindings.

All have side sound ports, and will have radiused fingerboards since I have had a number of requests for these features, and I need to learn how to make them.  I made a jig to cut oval side sound ports, and figured out a process to add binding around the edge of the sound port, to make it look nice and trimmed.  Things are to the point of the first coat of sealer on the tops, and the rough sanding of the bodes is done on two out of the four.  (I get to take a break from sanding to write this blog.)

Just waiting are the other bites of wood.  Fingerboards, bridges, headplates and heelplates


Kasha

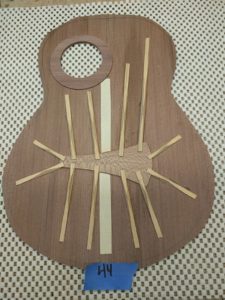
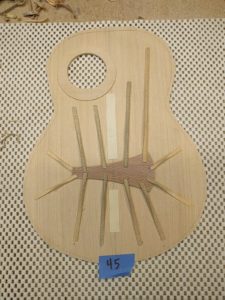
In the latest set of four, two have the Kasha bracing system. More about the Kasha system at:

http://www.jthbass.com/kasha.html

http://www.hep.fsu.edu/~berg/teach/phy3091/Talk3KashaGuitar.pdf

I built some Kasha braced ukuleles early on in my building career, and I really like the sound and volume, but there were just too many variables going on, so I decided to concentrate on the more ‘traditional’ styles of bracing, to make them better. I have achieved a pretty good sound with my current more traditional bracing systems, so it is time to apply some of those lessons to a Kasha braced ukulele. One has a redwood top and the other has a Port Orford cedar top. The Port Orford cedar is a new trial for me, I’m going to use it for necks as well. It has a very high stiffness-to-weight ratio, which allows one to make things lighter but just as strong.

The bracing in both of these Kasha ukuleles is also Port Orford cedar.  Because of its stiffness I can make the braces themselves a little thinner and lighter which should result in more volume. You may notice that some of the braces are a bit gray in color. This is because this Port Orford cedar was cut from logs that had been down for a while, and the outside of the log had weathered to a gray color. The color change extends about 1 inch into the board. From working with it a little bit, and from shaving the braces, it seems like this grayer wood is stiffer and harder than the light colored wood inside it. Maybe just my imagination, but kind of an interesting ‘feel’.

A more tradition ‘X’ braced top:

The Kasha braced tops, one redwood and one Port Orford cedar:


Bog Oak

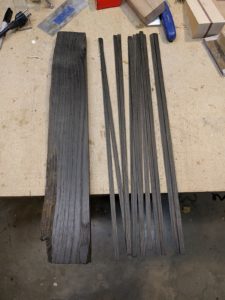
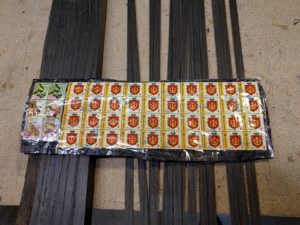
I have been looking for a substitute for tropical ebony that I could use when I want a dark/black binding.  I forget where I saw the reference, but through the wonder of ebay, I acquired a piece of ‘bog oak’, which is very black.  Bog oak is from an oak tree that was buried in a peat bog for some thousands of years (estimate 2000-4000) where the anaerobic conditions prevent decay and the tannin and iron salts in the bog turn the oak black.  This is of Russian origin, bought from a fellow in the Ukraine.  Interesting, no postage meter, just slap on a whole bunch of stamps, and wrap the whole package in lots of clear tape.   (If anyone wants the stamps, drop me an e-mail.)