I thought I would go into a bit of detail as to how I cut a spiral rosette. To do this I use three different jigs that I developed and cut out of ¼ inch acrylic on a laser cutter (which I use at out local community college, a great resource.)
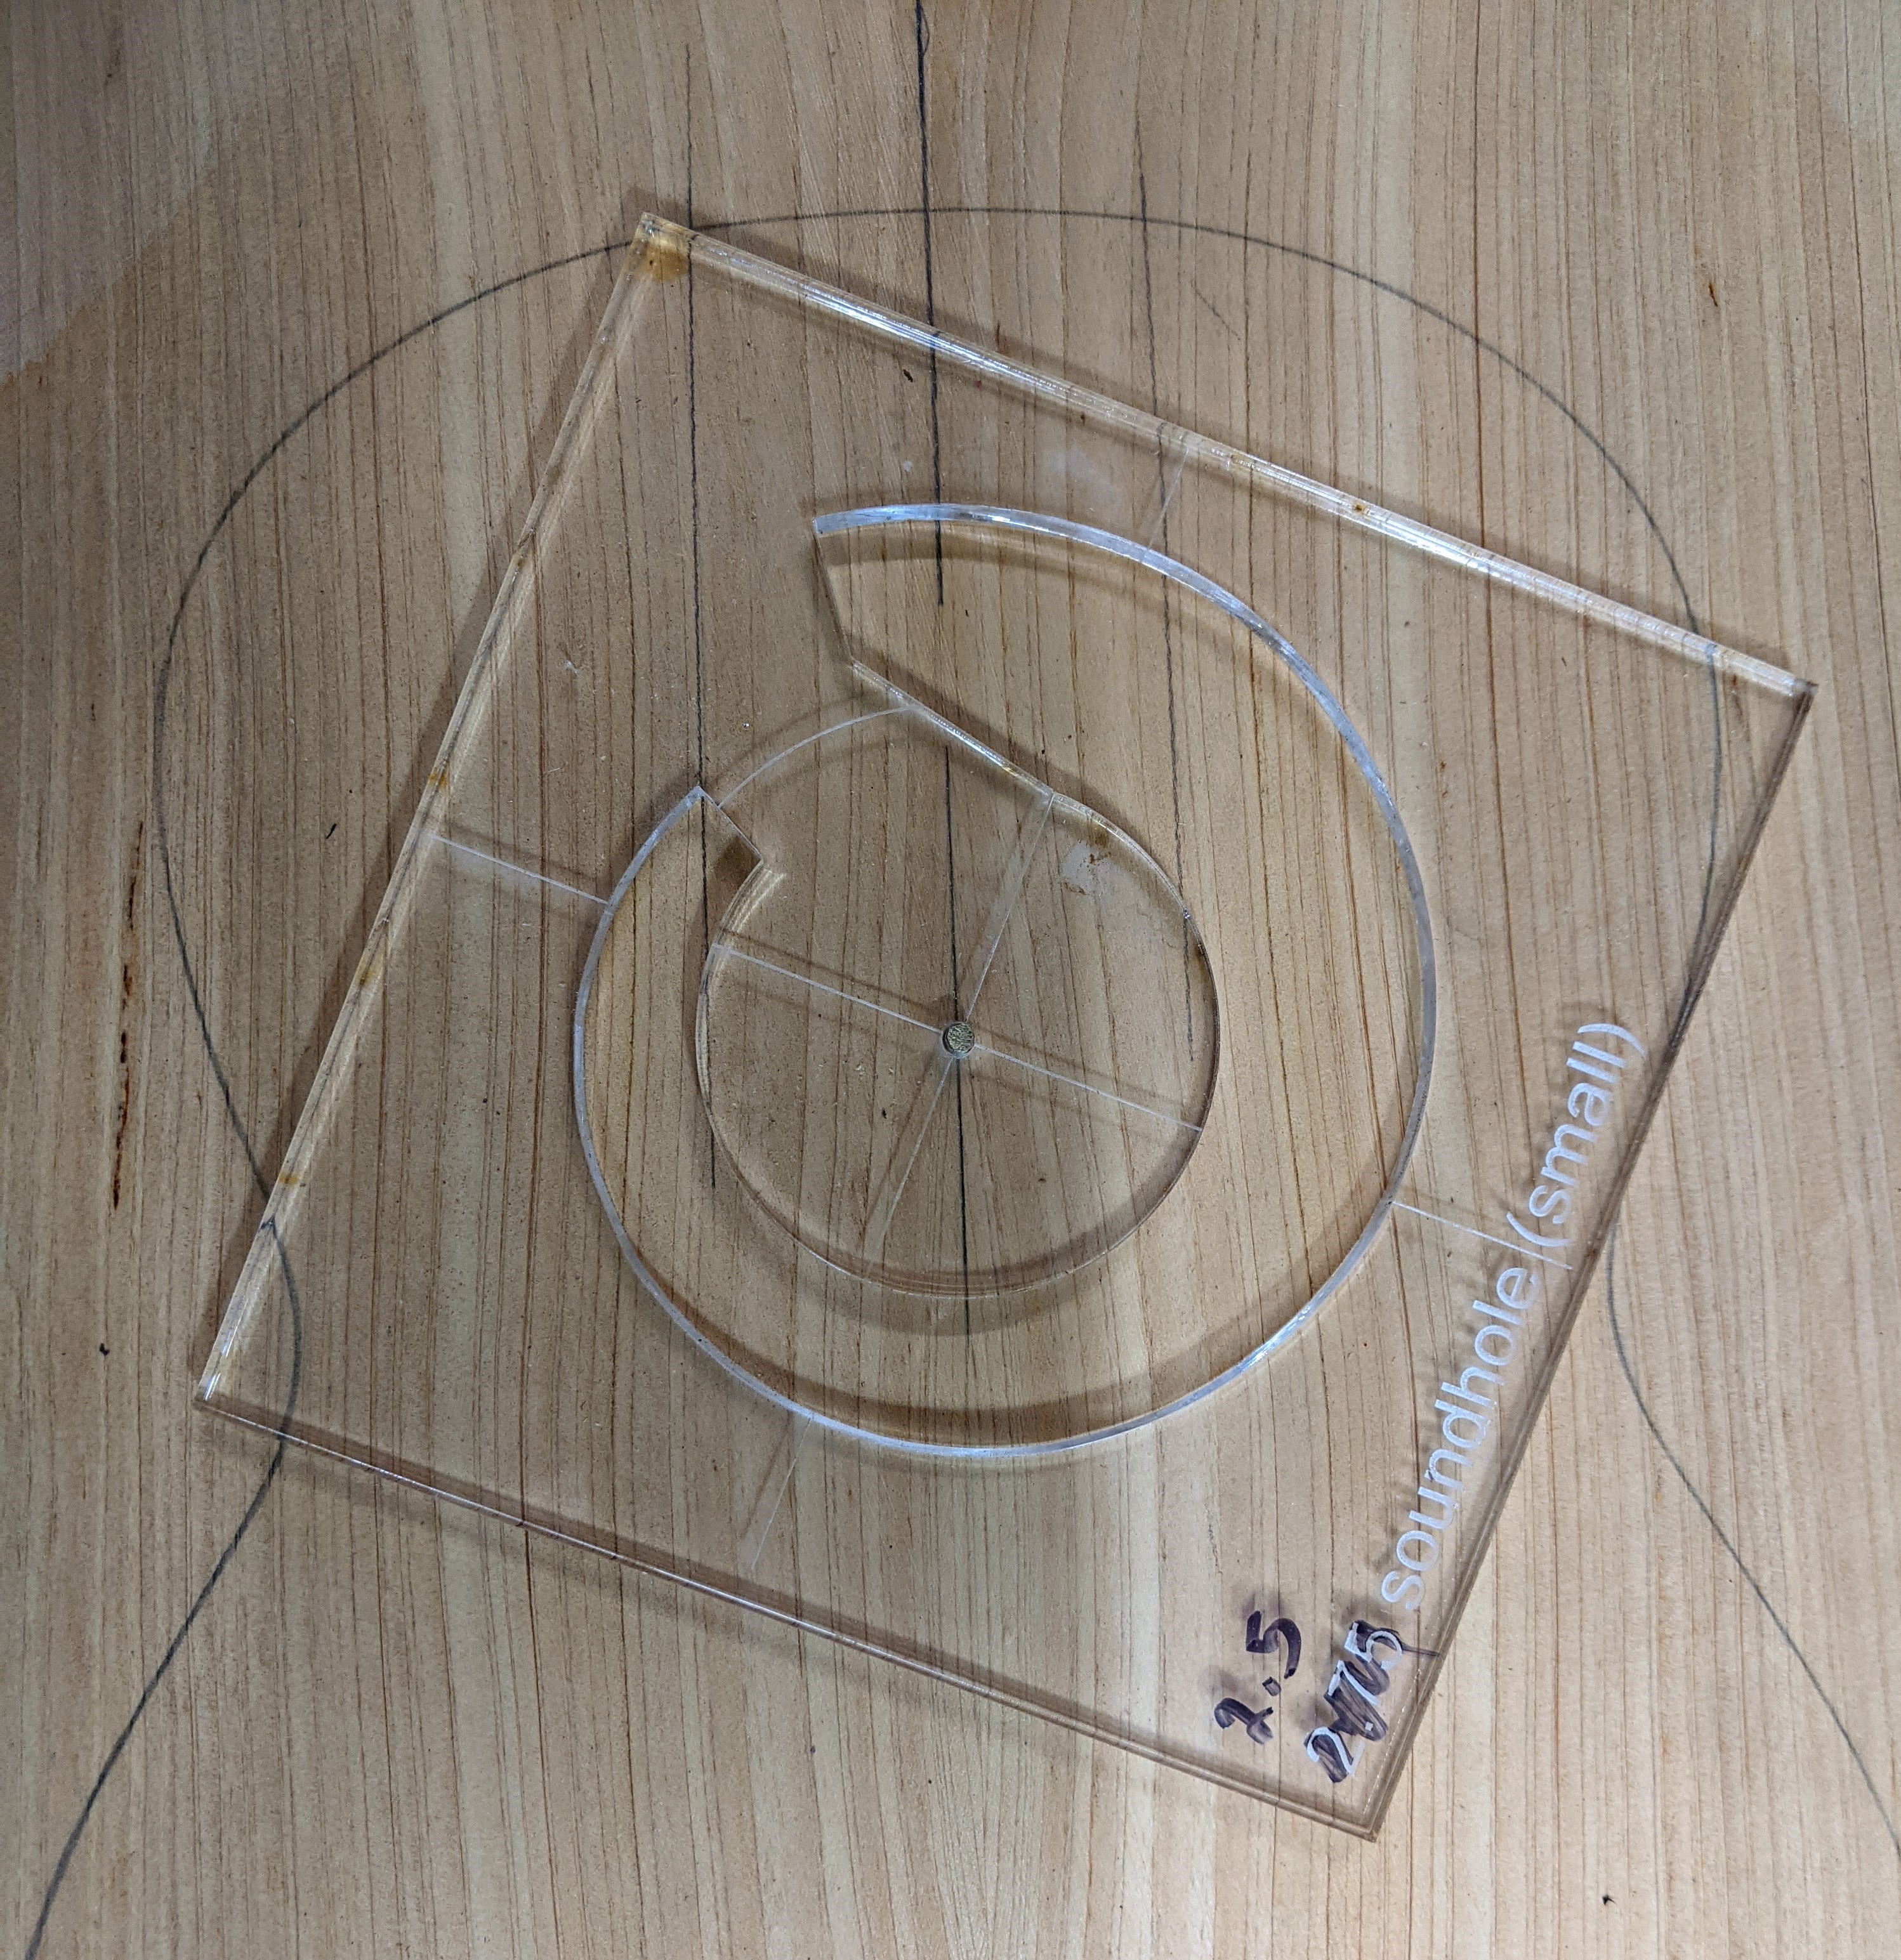
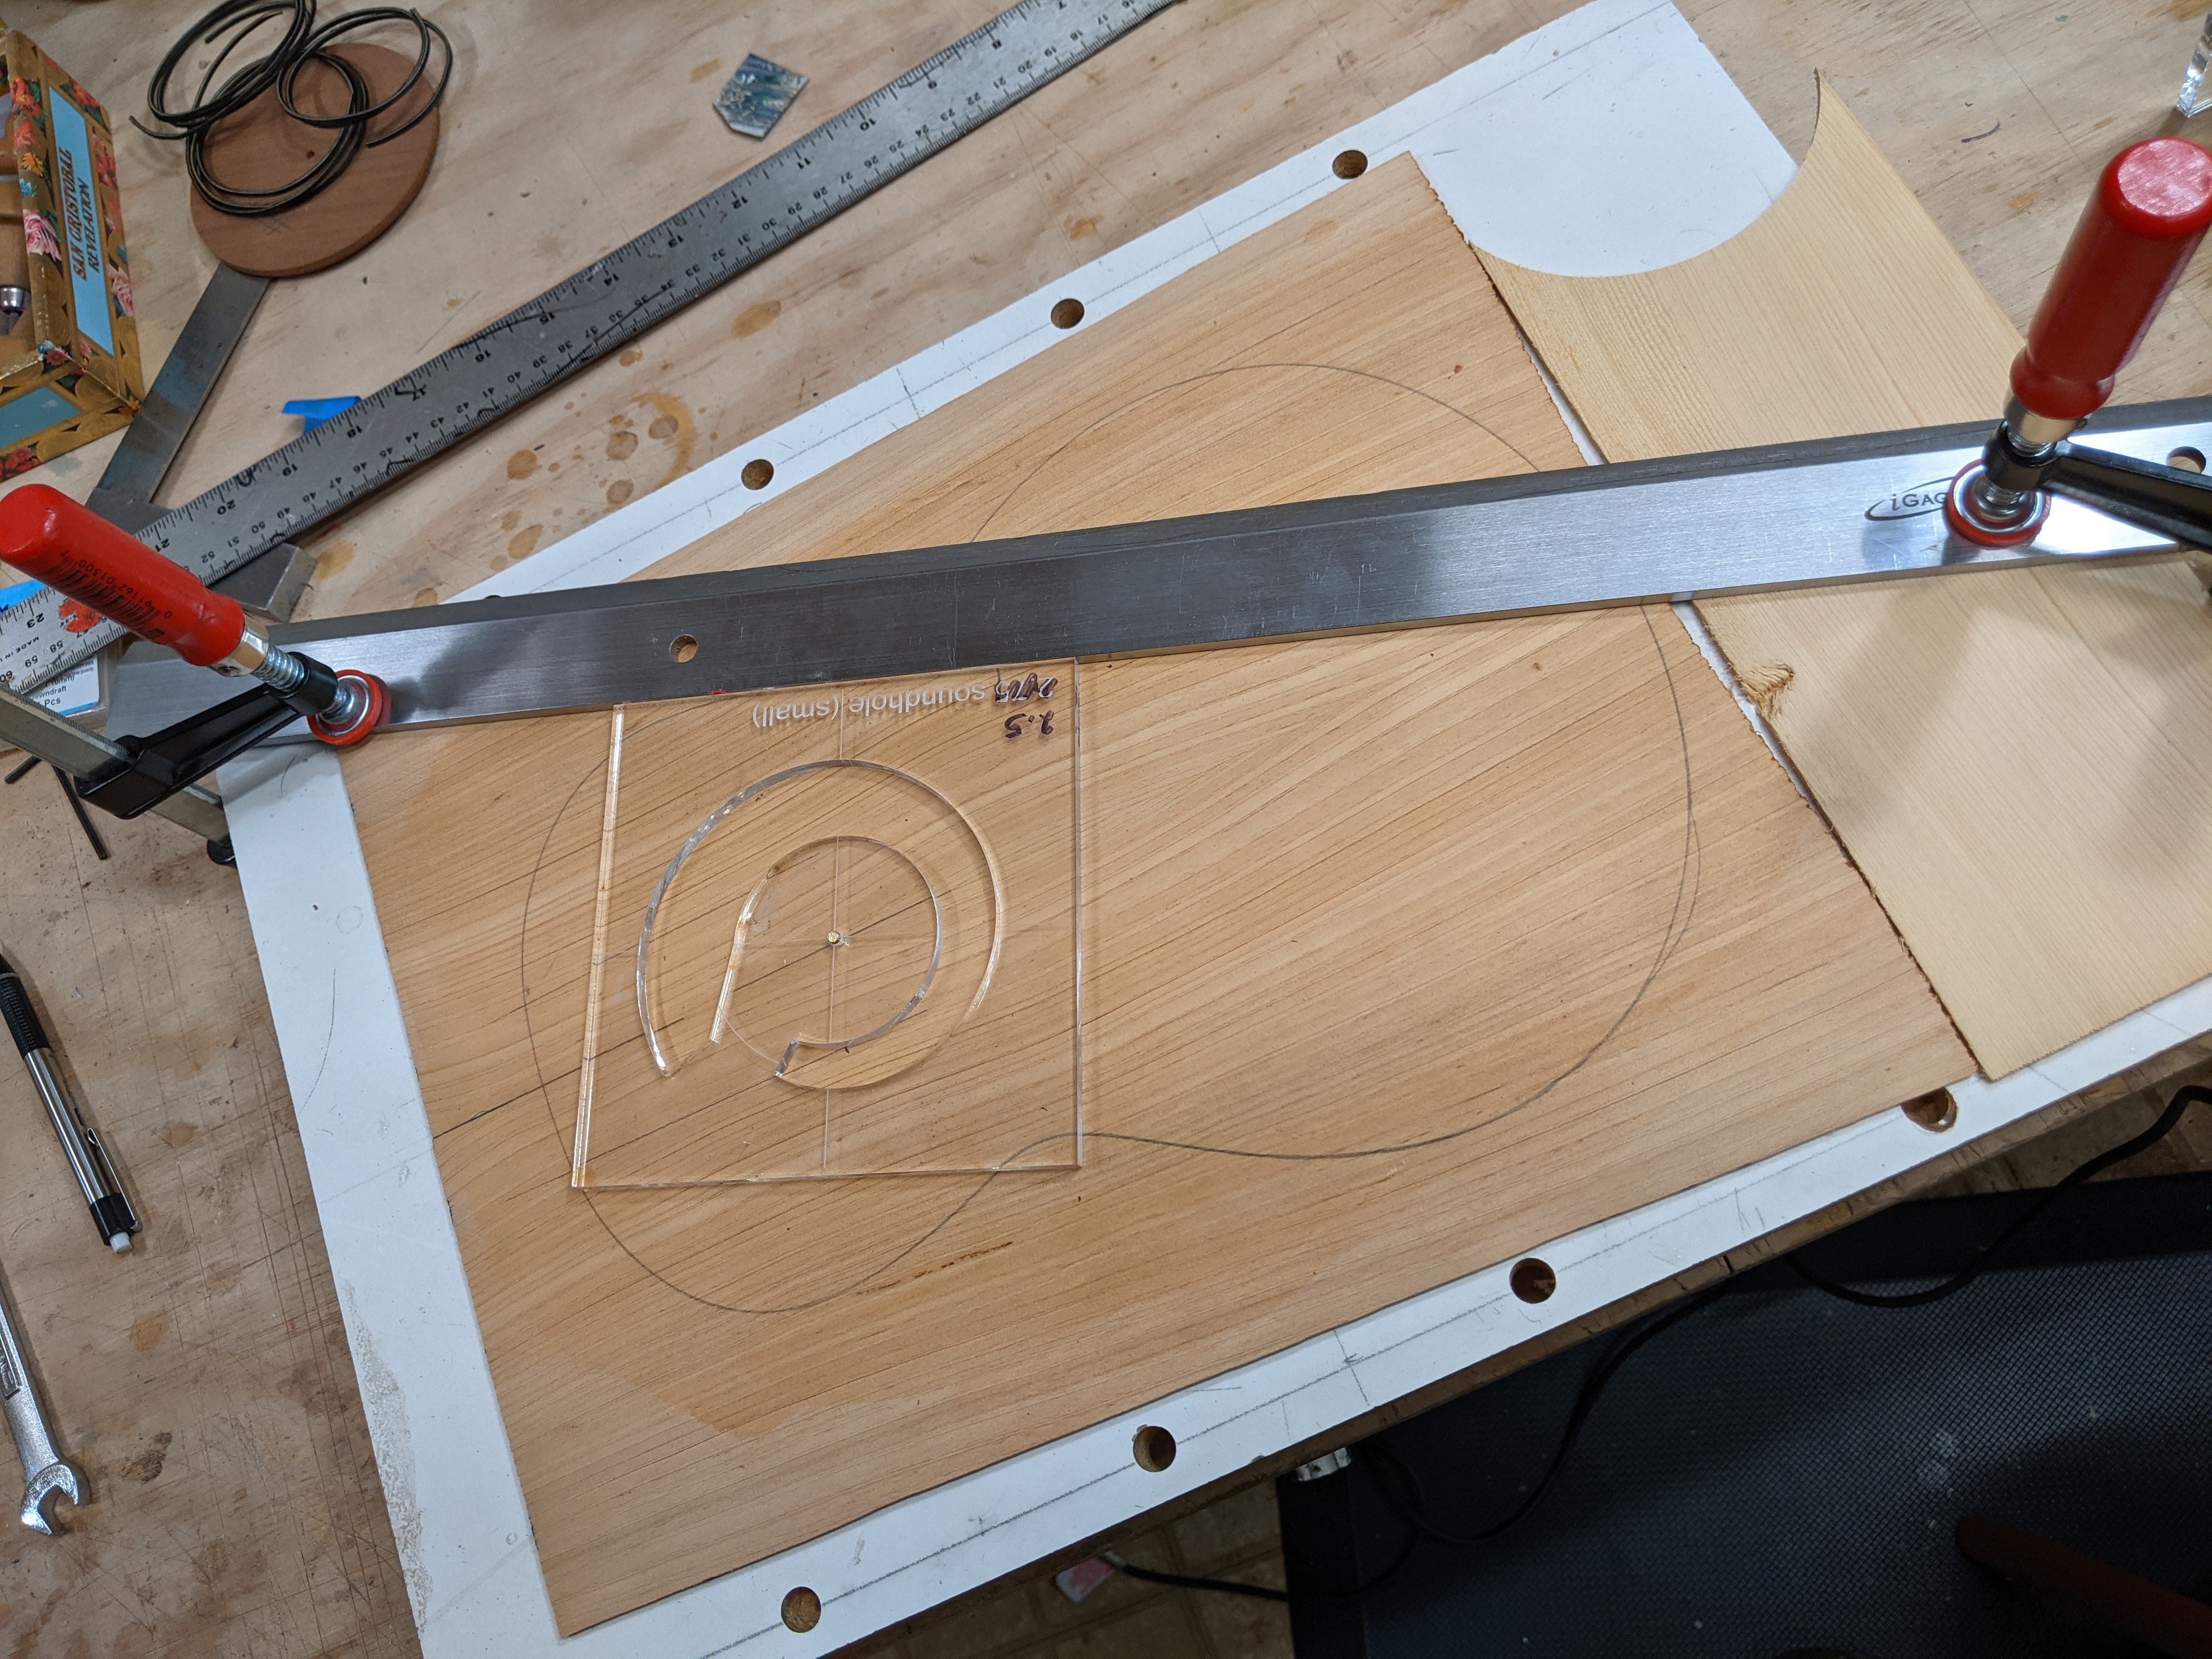
The first jig is the spiral template itself. This is used to cut the outside of the spiral. It is indexed to a center hole which fits over a 1/8” pin on a routing board which comes through a corresponding hole in the top. This pin will also be the center of the inner circle of the rosette, and the smaller eventual sound hole. The spiral jig is positioned so the the point of the spiral is out from under the area that will be covered by the tail of the fretboard. The spiral jig is held in place by clamping a straightedge to the routing board along one side of the jig. Since the jig also is fitted over the centering pin this holds it steady.
The second jig is a base for a StewMac dremmel router base. This is a simple base, with a bit of 3/16” brass tubing glued to a hole in the center. This tubing extends a bit below the base allowing the base to ride on top of the spiral jig and follow the outside profile. A small dremmel bit is fitted to the dremmel and extends through the tube just far enough to cut the desired rosette channel, the depth of which is set by the thickness of the pearl which will make the rosette.
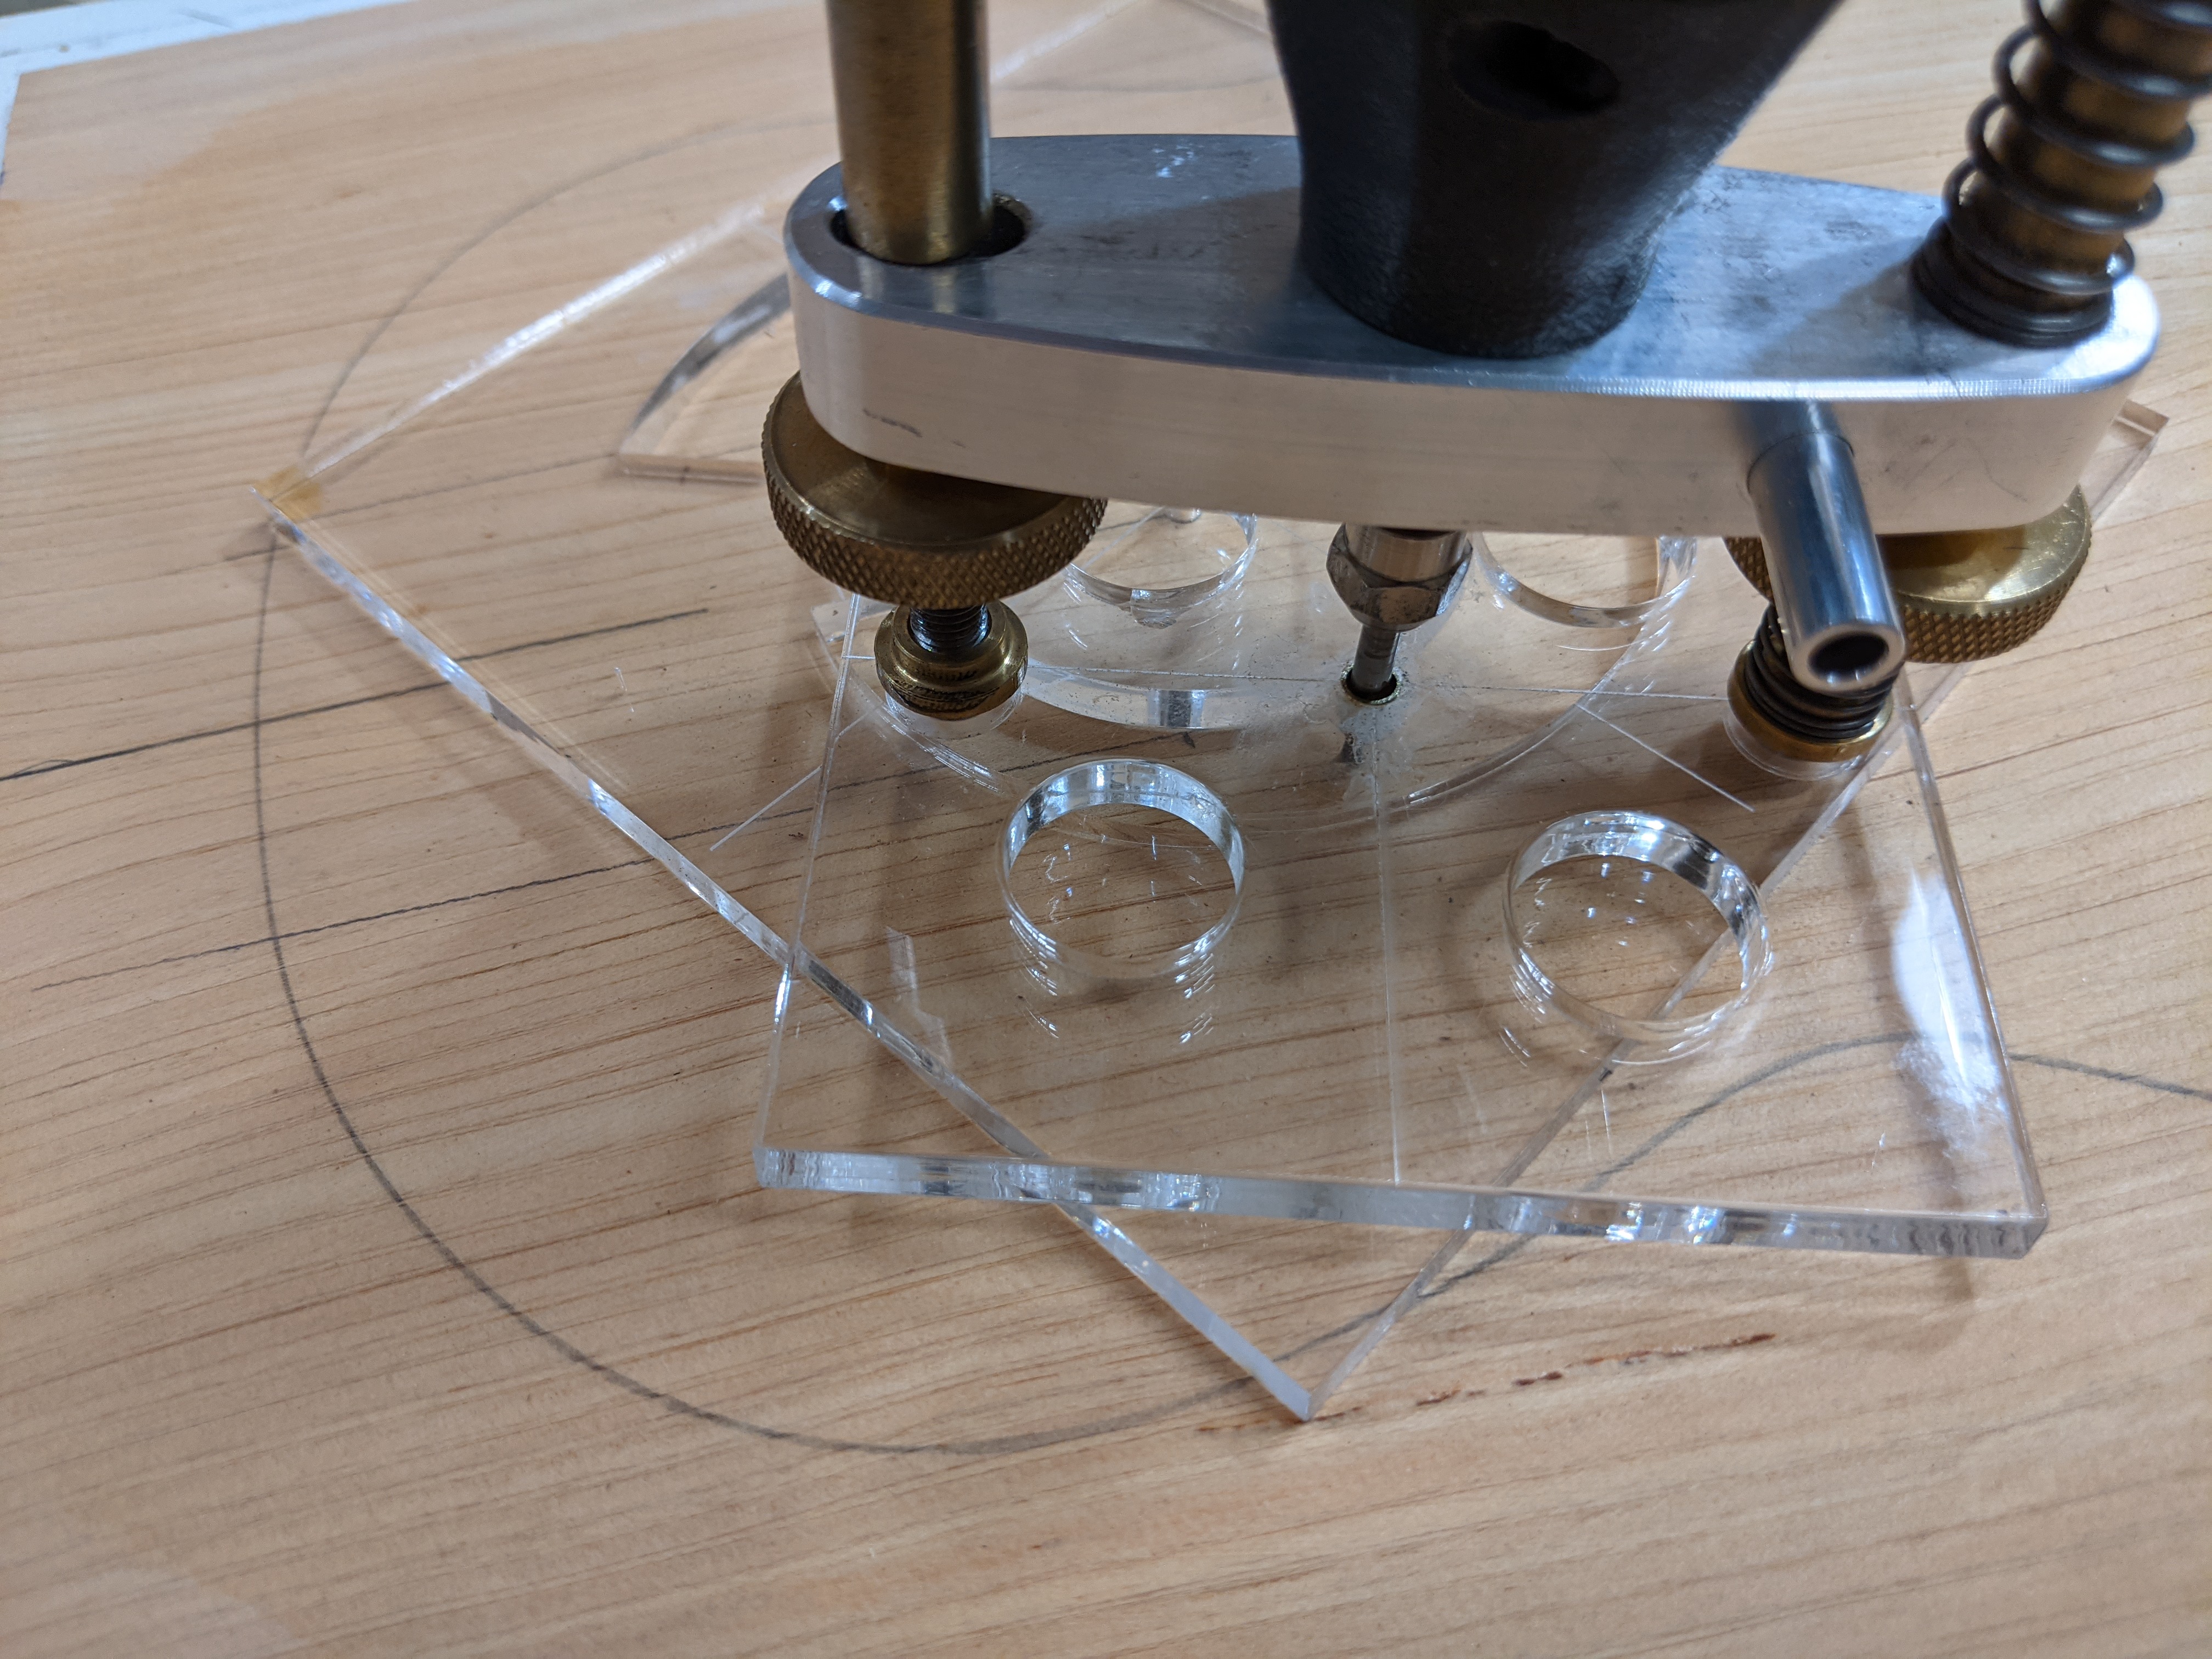
Using this setup the dremmel router is run along the outside edge of the spiral jig to cut the outside of the spiral.
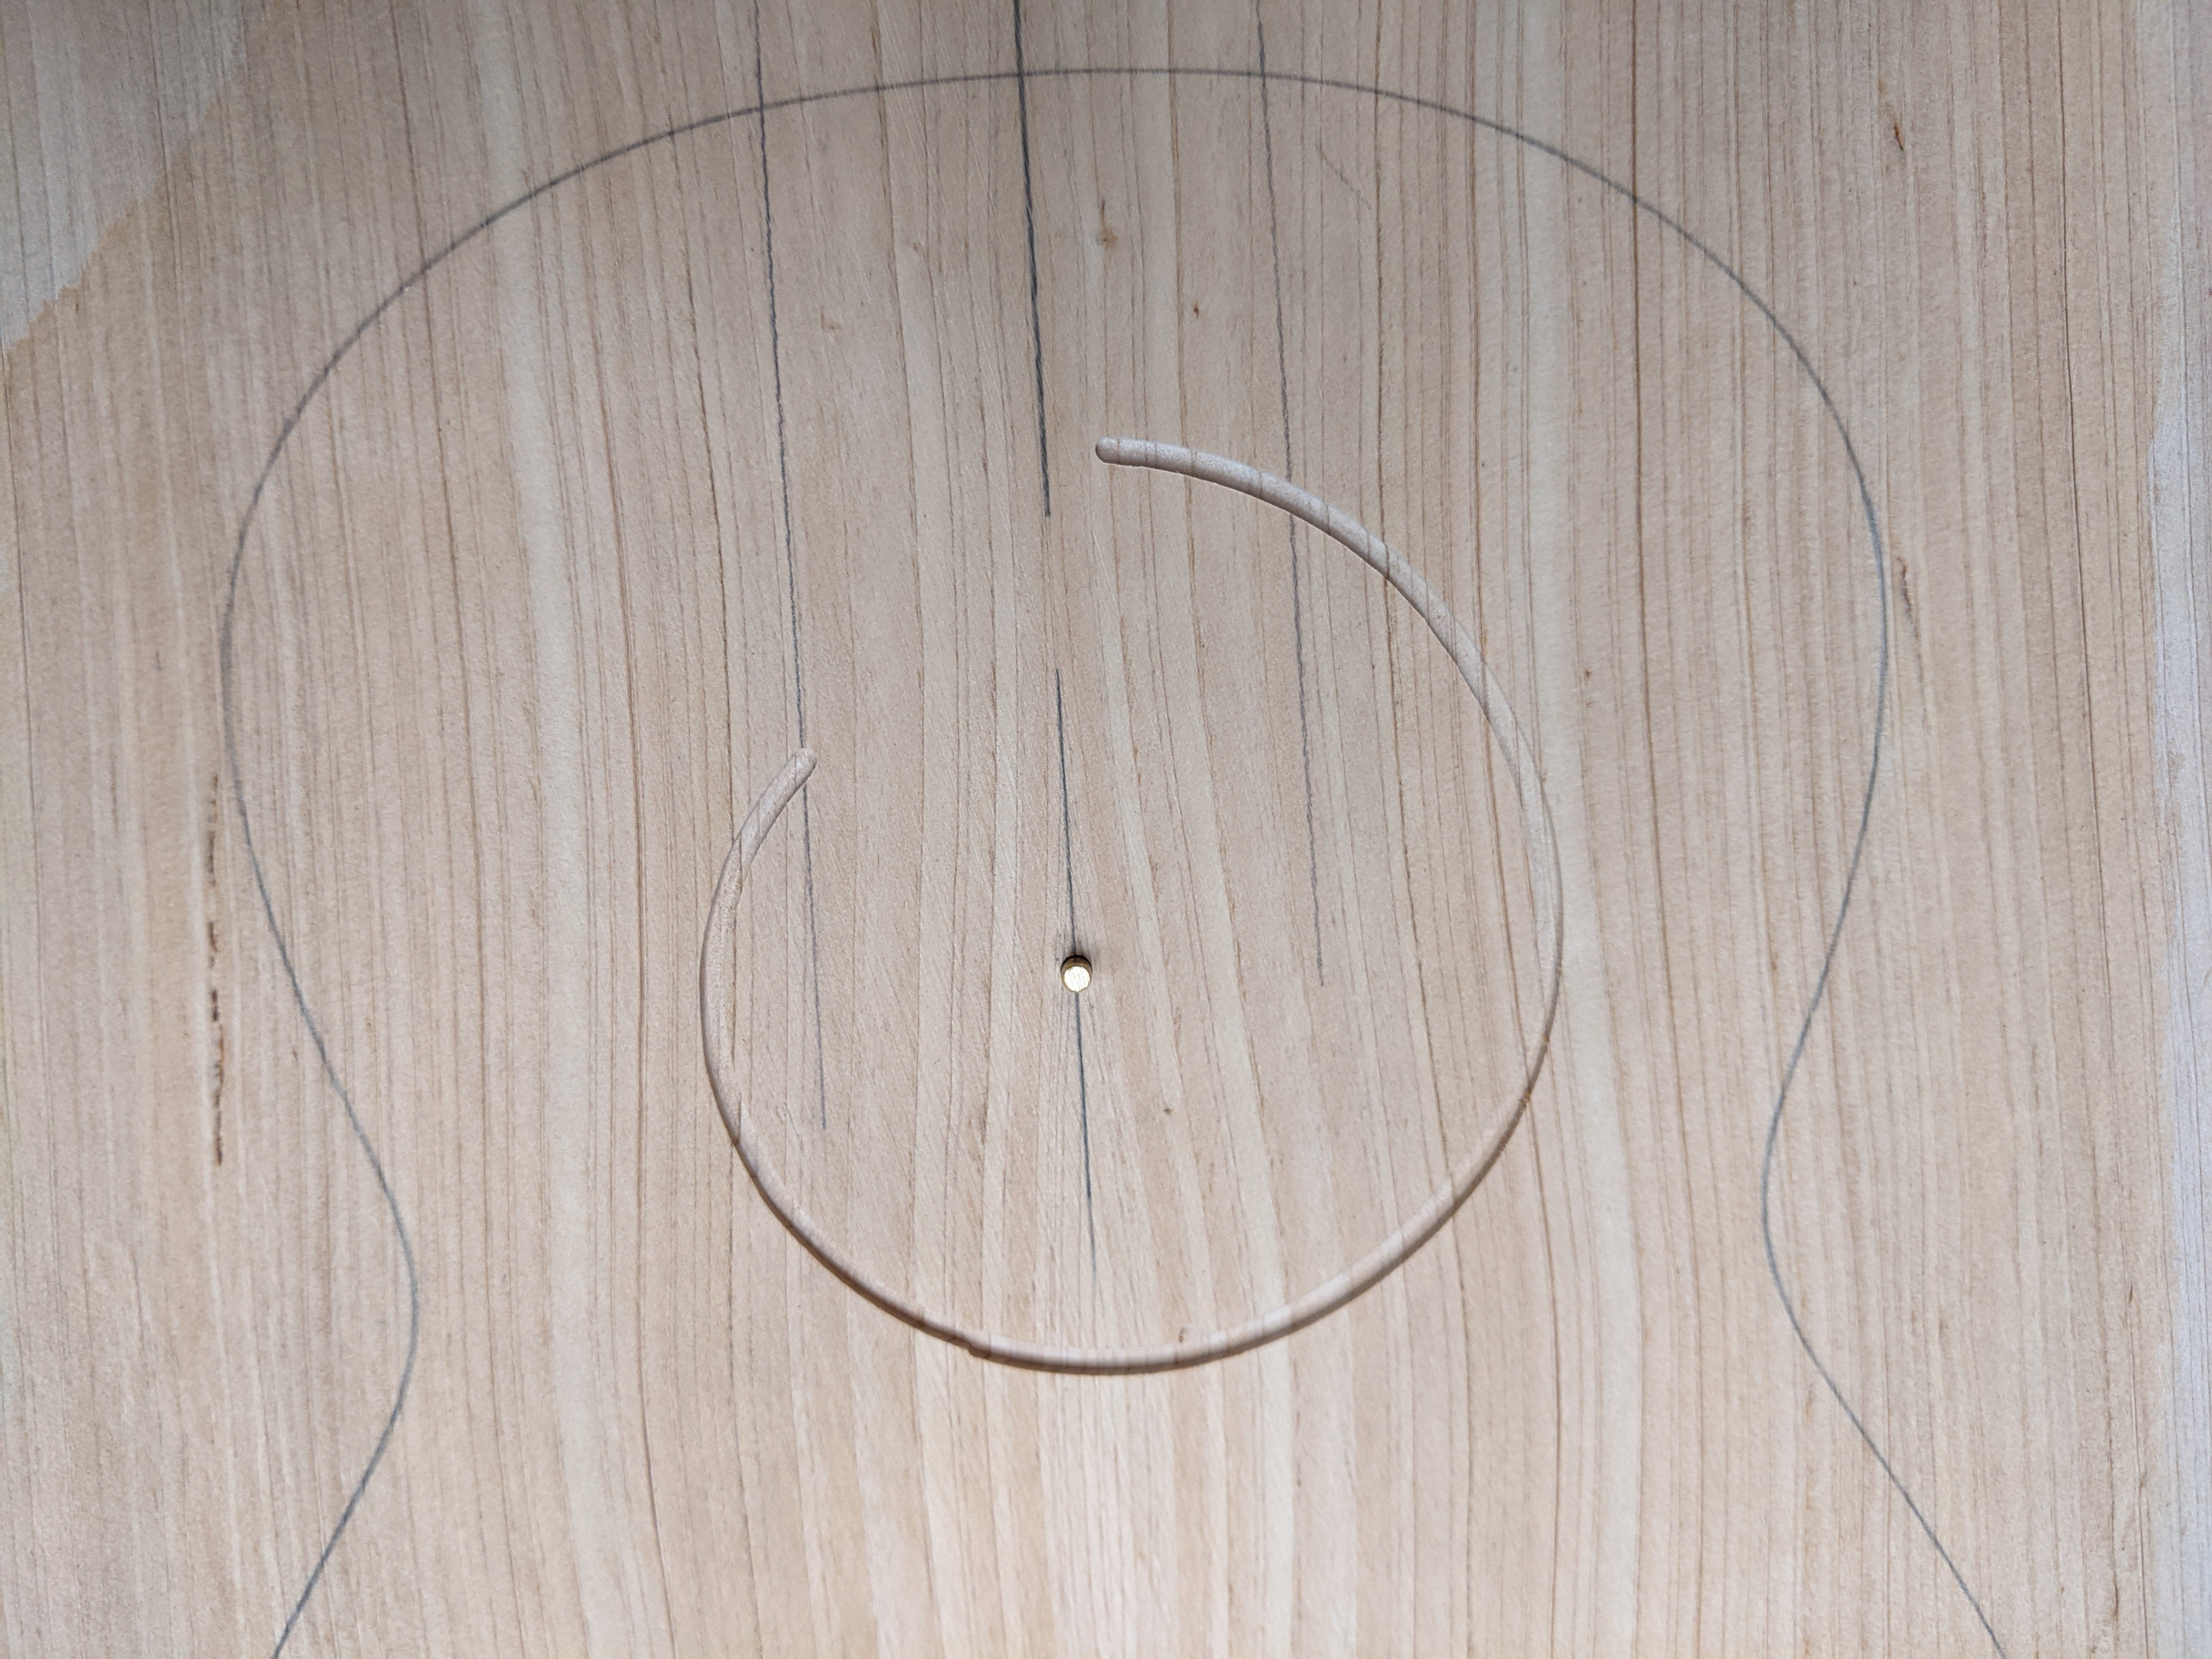
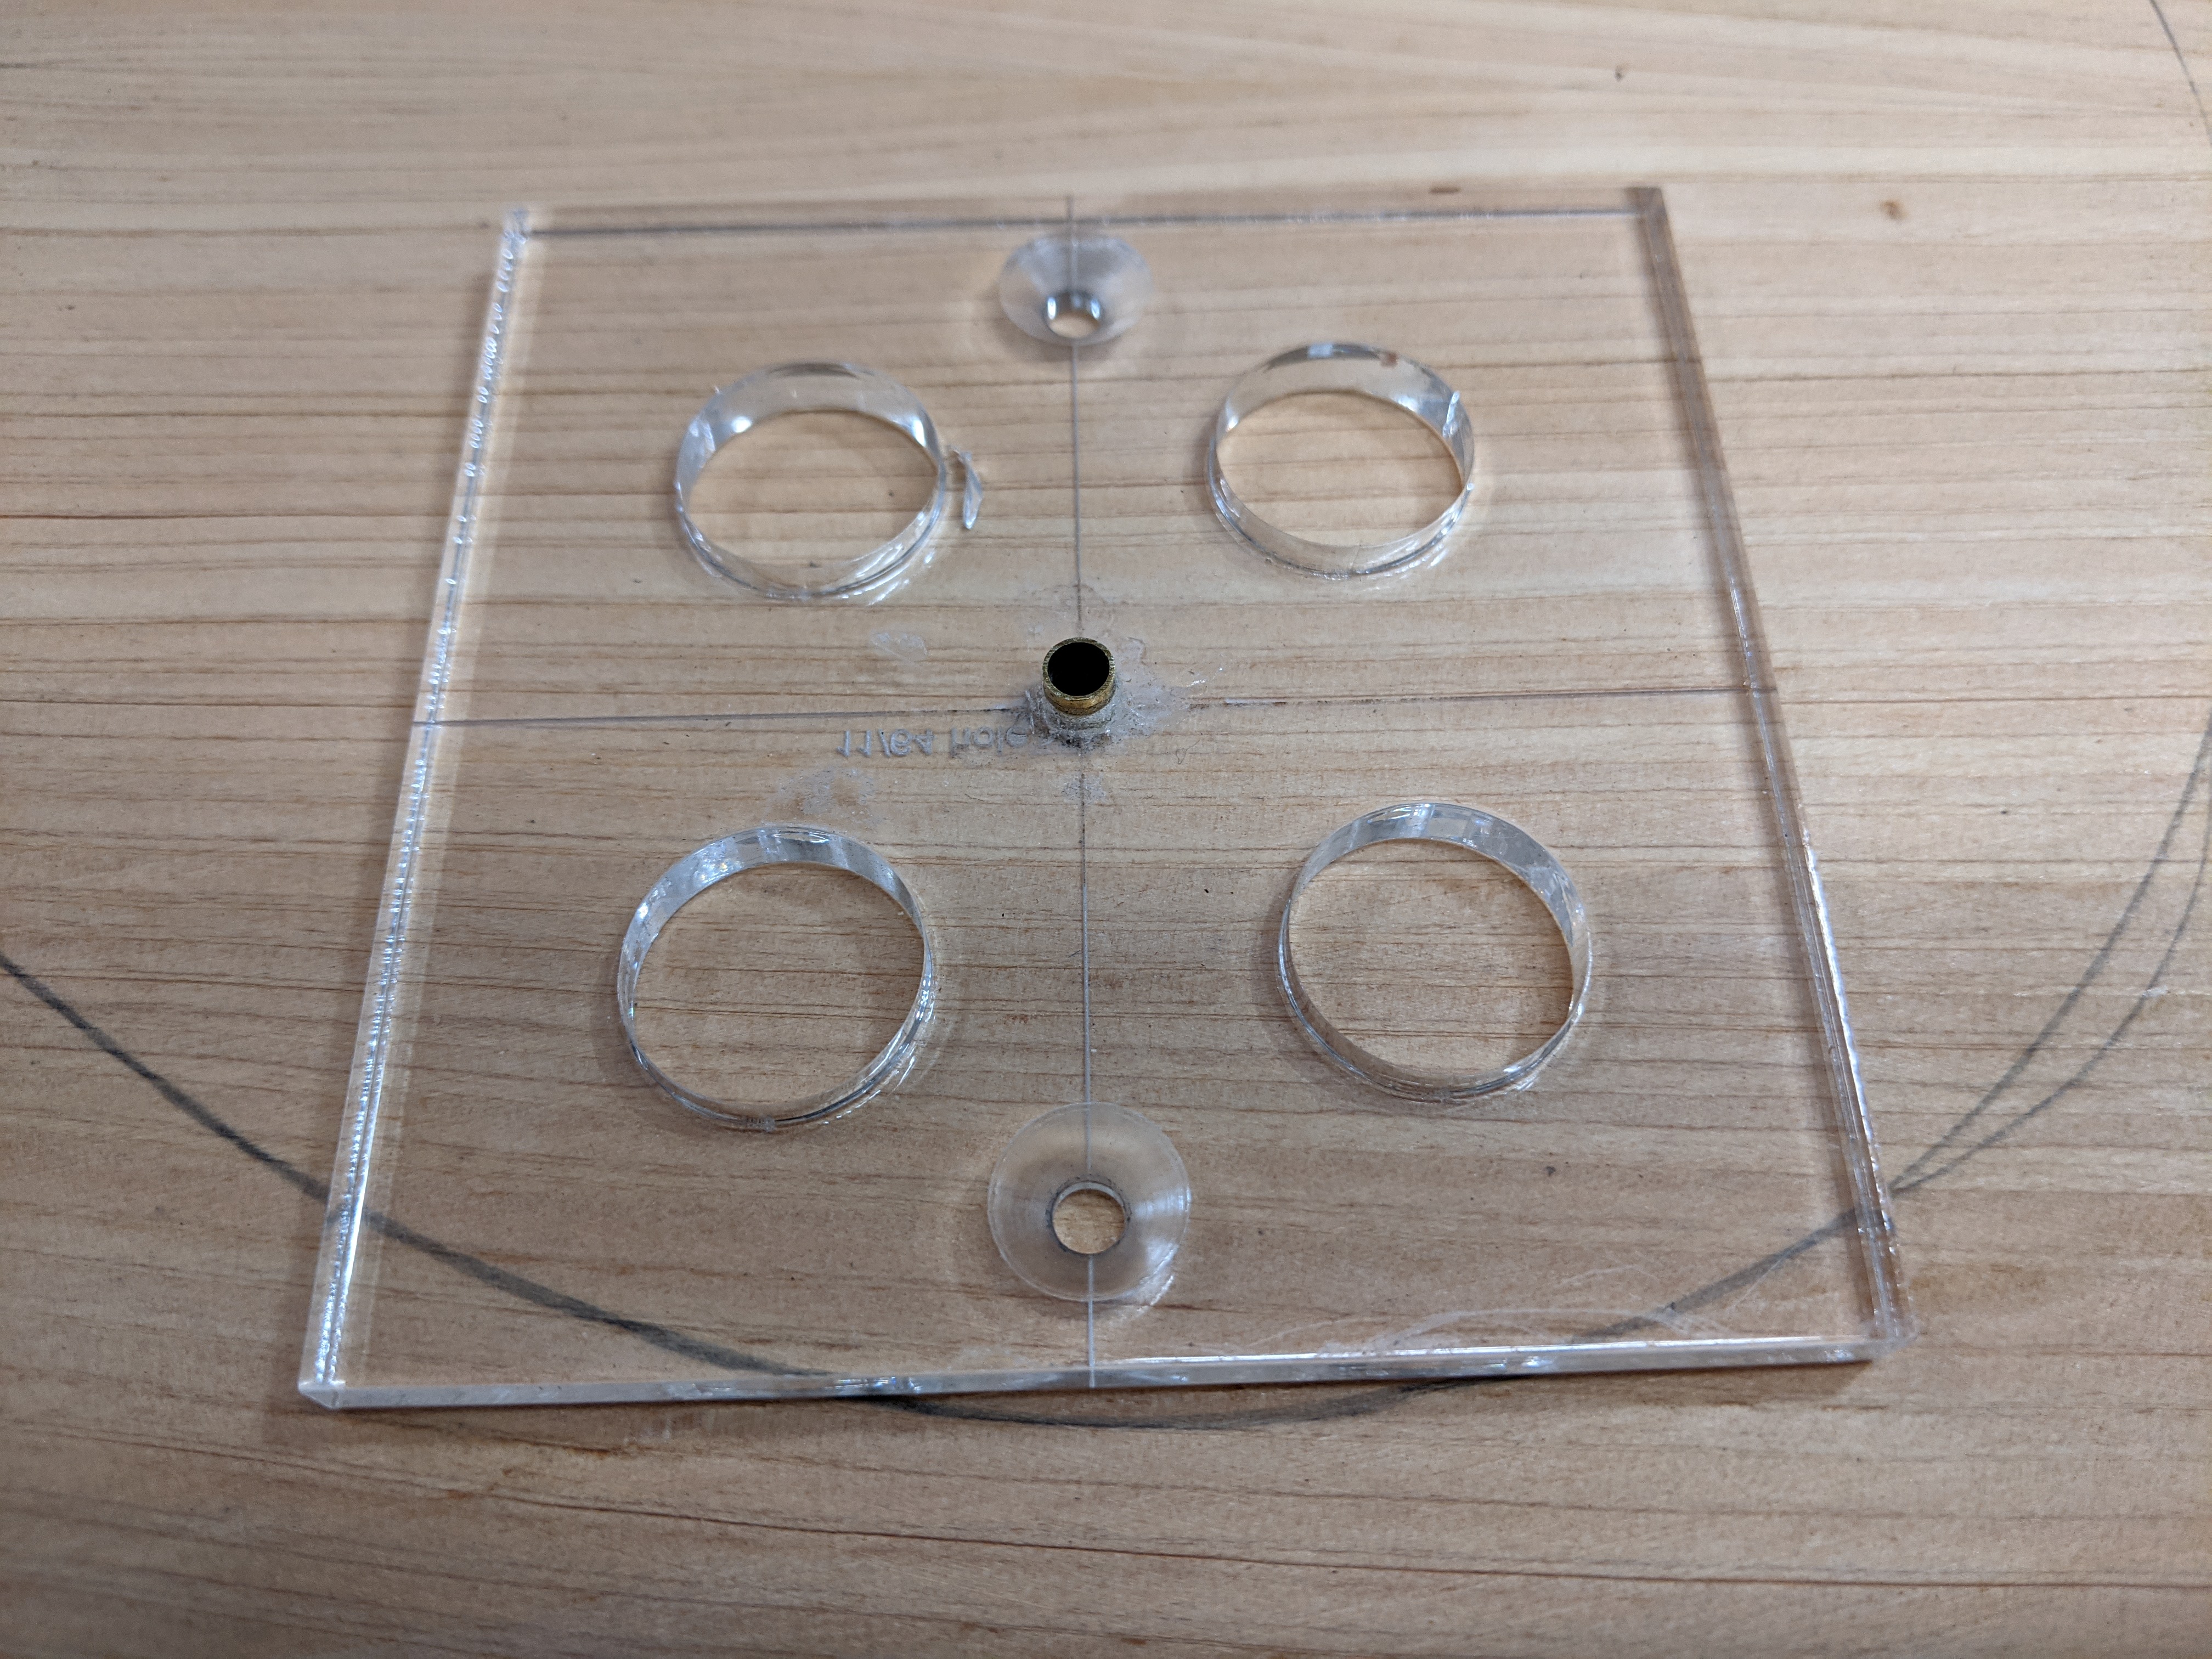
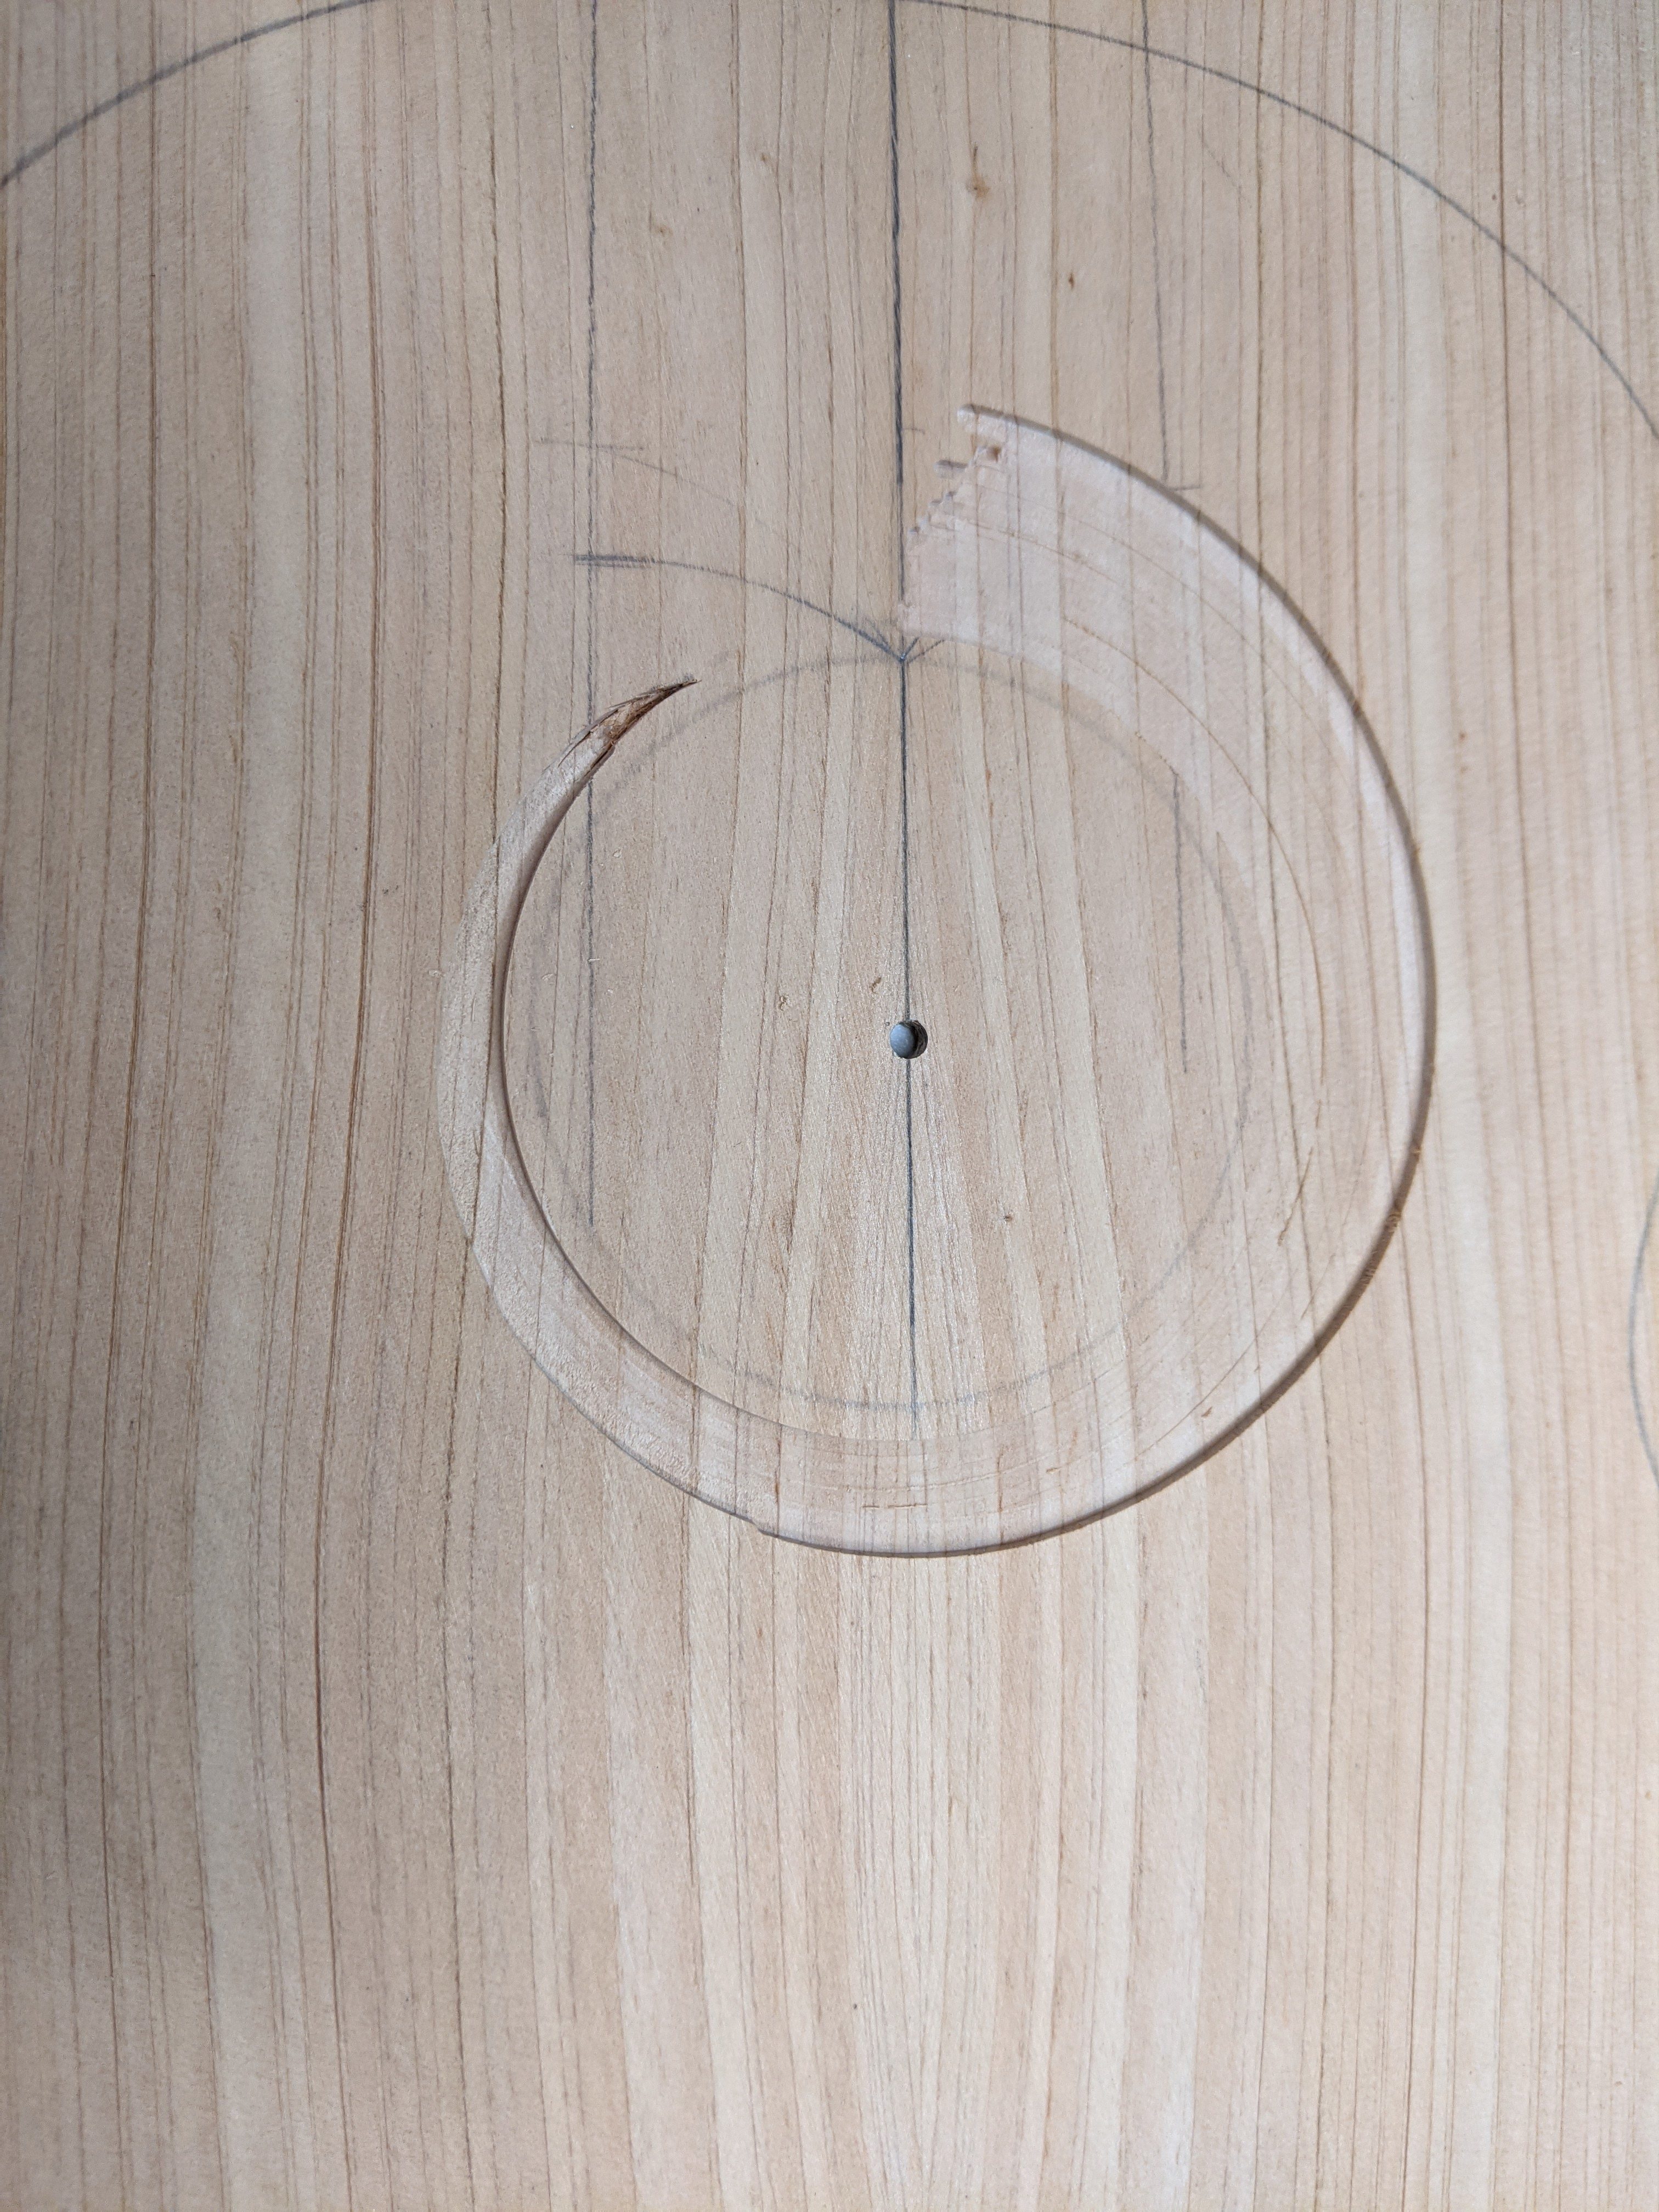
When this is done one shifts to the third jig, which is the dremmel router base with which I cut my other more circular rosettes. This base has a series of holes which fit over the indexing pin and when the dremmel router rotates around the pin a circle is cut. The holes are spaced and numbered such that moving from one hole to the next larger increases the diameter of the circle cut by 1/16”, or only 1/32” increment in the radius.
Using this base, and a small router bit, one cuts circles aiming to just meet the tip of the spiral path already cut. One can start with a slightly larger diameter and run the cutter up to the spiral path. One then decreases the size of the circle by using successively lower numbered holes till the circle just meets the spiral.
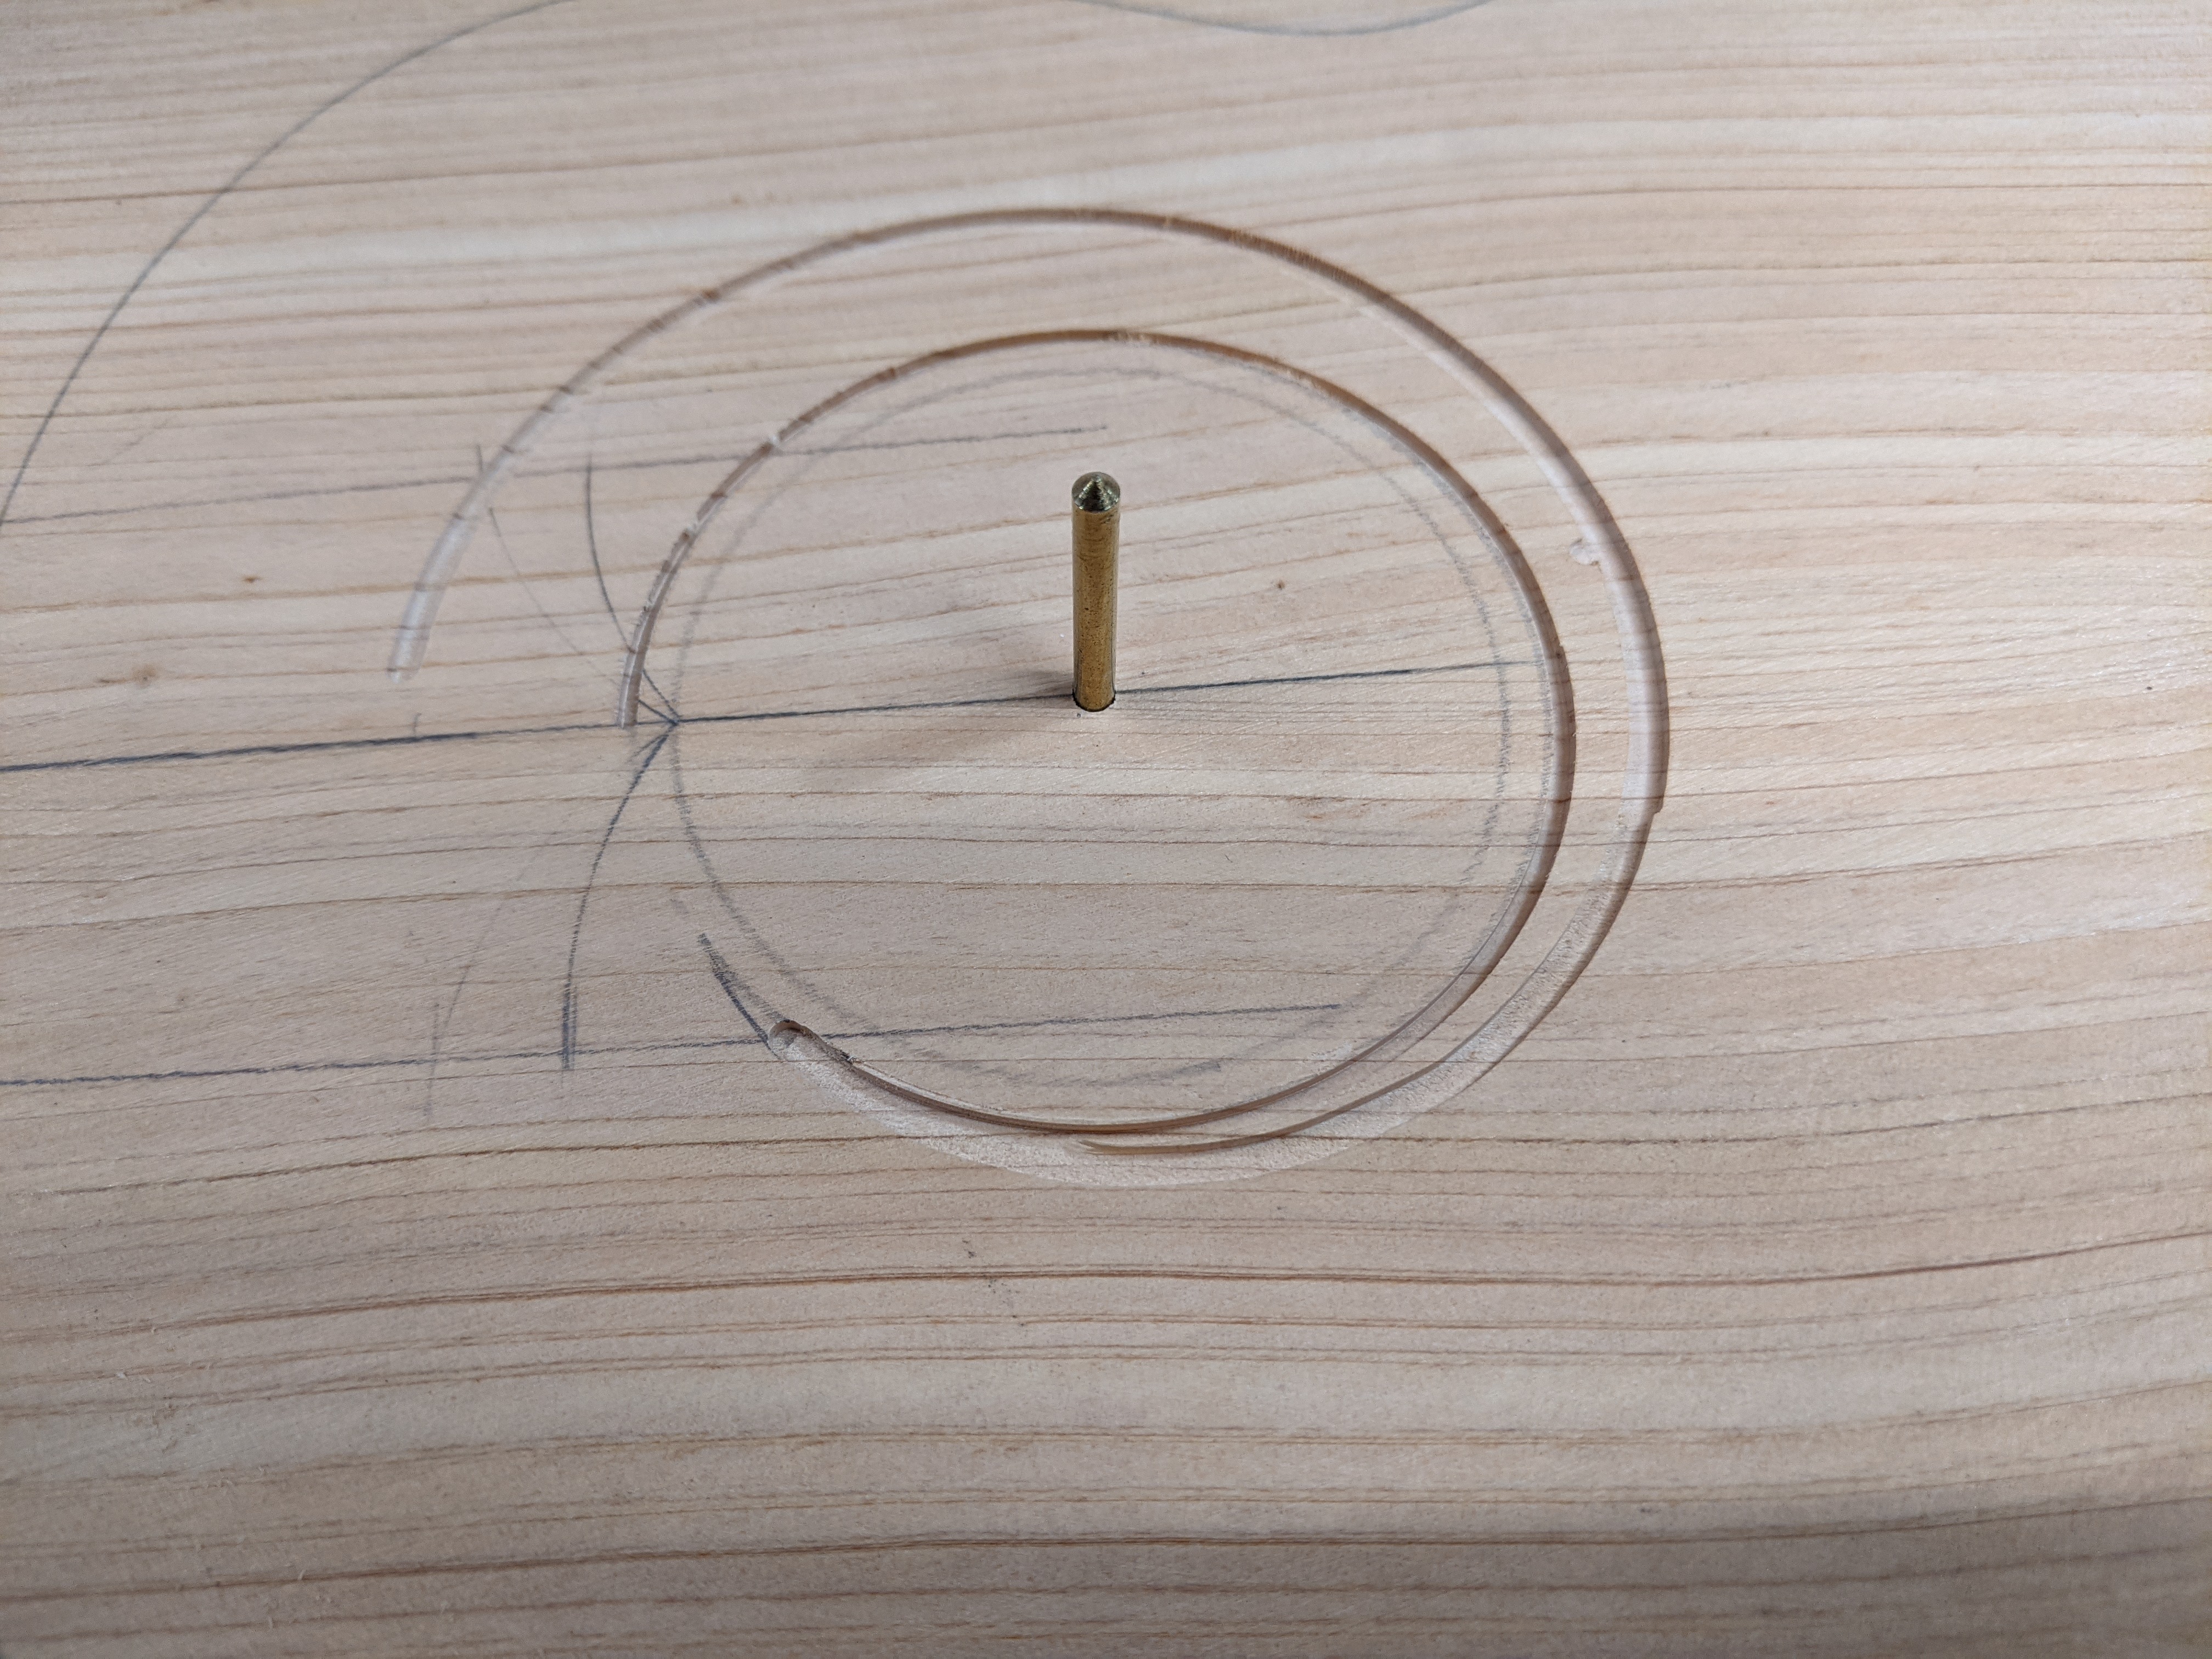
The very pointy tip of the spiral is cut out using a scalpel. When this is done you use successively larger numbered holes in the router base to clean out the inside of the spiral channel.
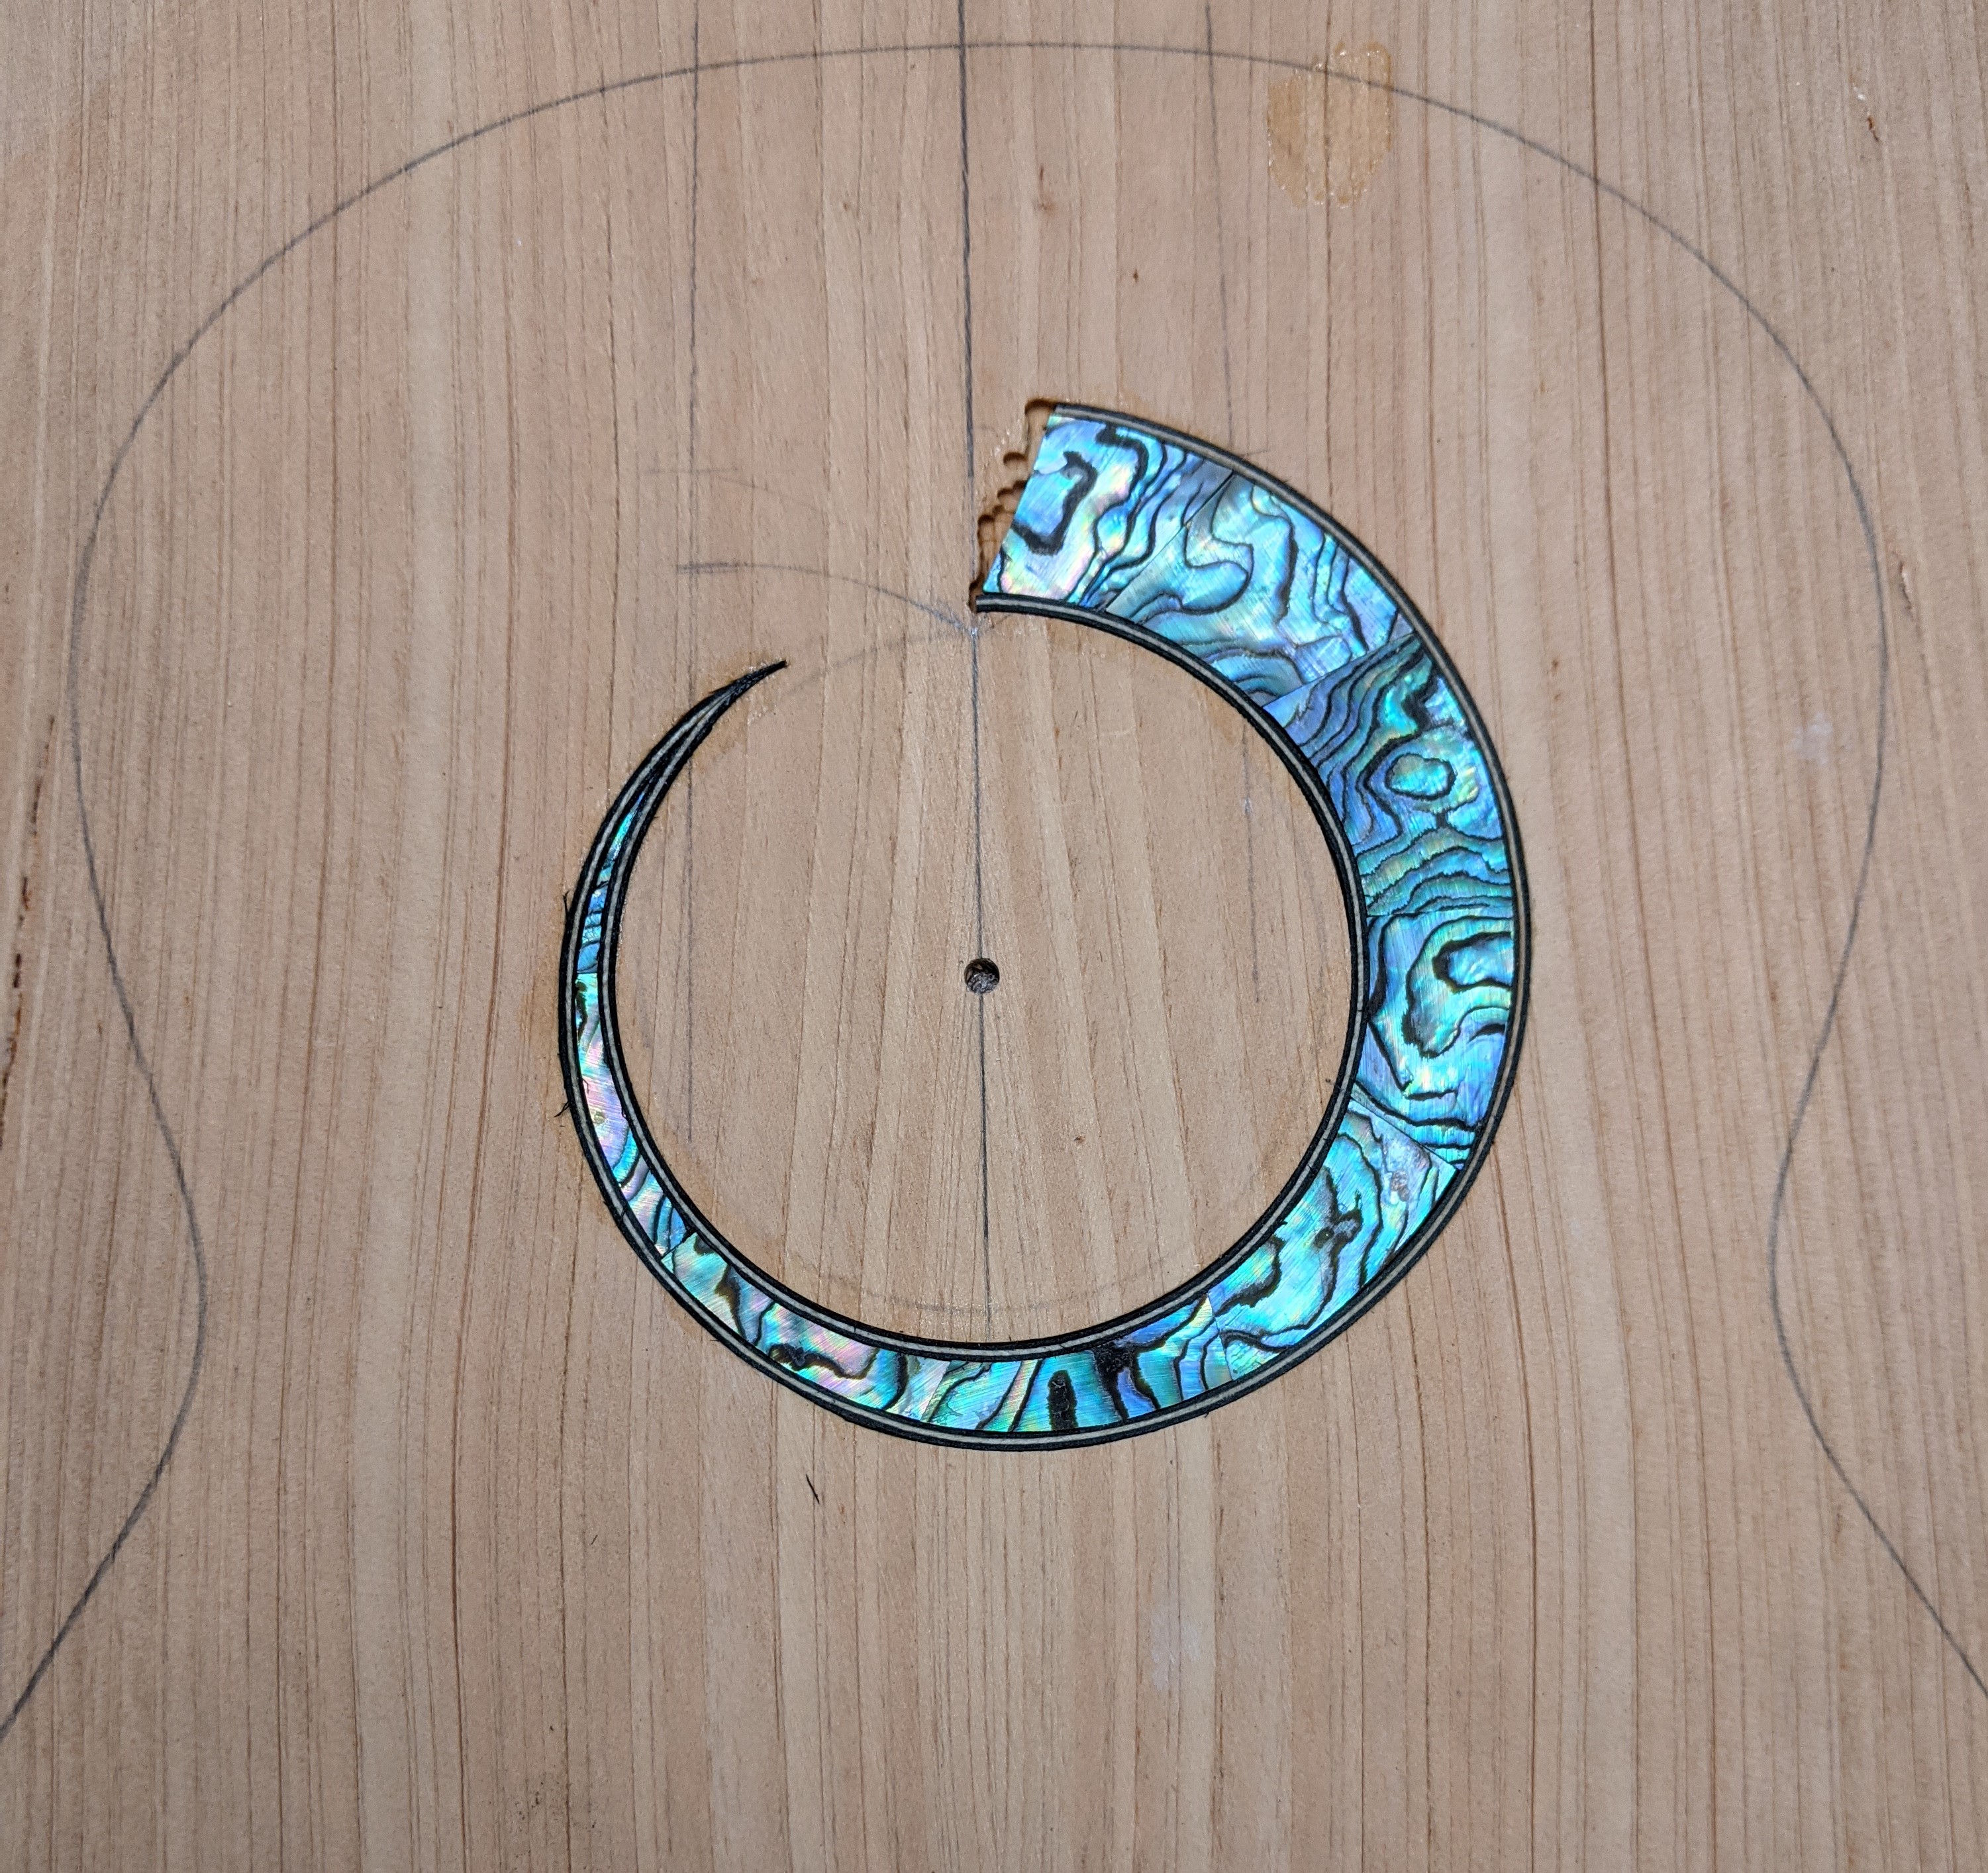
Now that the spiral channel is cut, all that remains is to line it with purfling and cut pearl to fit. Cutting the pearl is actually easier than doing a completely round, even with rosette. Since the spiral is tapered, one cuts a piece of pearl and can then slide it around from a larger part to the smaller part, compressing the purfling tight against the side of the channel. The very end of the spiral will be hidden under the tail of the fingerboard.
Result: