Fun with fingerboards

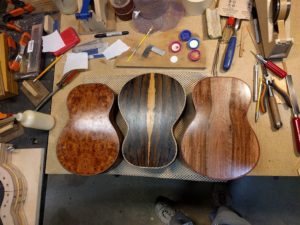
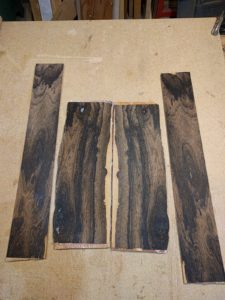
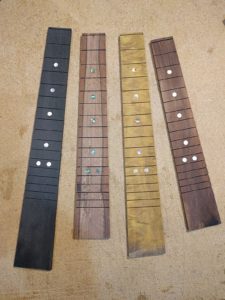
I make my own fingerboards which allows me to do just about anything.  Here are the 4 boards for the next set of ukes (not yet trimmed for length).  3 tenors and one concert.

img_20161023_2018011

The black one is Richlite, a man-made material I have been using in place of ebony which is scarce, expensive, and these days is generally not completely black.  Richlite is hard, very stable (we have some Richlite cutting boards that have been through the dishwasher for a number of years and they show no signs of degrading), completely black, holds frets well, inlays well, and does not involve cutting down the tropical forest.

The one to the right of the black one is book-matched casuarina.  I thought it would be a cool look to have a book-matched fingerboard, and this is where ‘doing it yourself’ really comes in handy.  Casuarina is my new favorite fingerboard wood.  It is very hard.  It is #21 on the list of the 100 hardest woods in the world, as hard as the ebonys, harder than the rosewoods.  It takes a wonderful polish with just fine sandpaper.

The yellow one is Florida black olive Bucida bucer which is native to southern Florida, the Caribbean, and Central America.  I traded another woodworker for a chunk that is big enough to make fingerboards.  Quite hard, has an intresting curl to the wood, and a really interesting color.  This is going on a uke with casuarina back and sides, a ‘Florida’ uke.

The concert board is more casuarina, all heartwood this time.  Lovely stuff with great properties.
“Jupiter” logo

I have been using a pearl inlay of the planet Jupiter, with its characteristic red spot, as my headstock logo.  It is distinctive, attractive, and relatively easy to make and inlay.  The process is as follows:

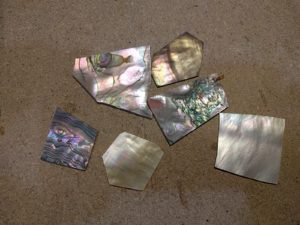
First, one gets out a number of different colors of pearl, each of which is big enough to fit the entire logo.

img_20161023_140248

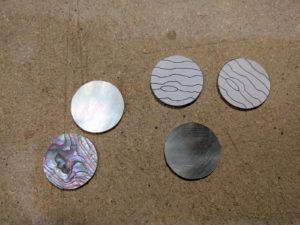
I print out multiple copes of the logo from my computer, and glue these onto the pearl plates with rubber cement.  I then cut out the logo to yield a series of circles/planets/logos each of which is identical other than the color of the pearl.

img_20161023_140310

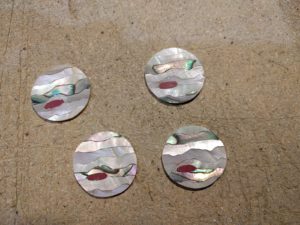
With a fine saw (jewelers 5/0 ) I then carefully cut all the ‘bands’, and cut out the hole for the red spot.  I keep all the bands from a single piece of pearl together.  When I am all done with 4 or 5 single color logos, I then mix the bands by selecting alternately from each of the single color logos which I have cut out.  The pieces, since they are all cut from the same pattern, fit together pretty well though some cleanup and adjustment with a fine jewelers file is always required.  When the pieces are all fit together I put them on a piece of wax paper and drop on medium-thin CA glue to glue the logo together.  When the glue has hardened I clean up the red-spot hole, use the hole as a pattern to cut the red spot out of recon stone, and then glue it in with CA glue.  As a final step the edge is filed smooth and the whole thing is sanded front and back to yield an even flat logo.

img_20161023_140342

Any remaining voids between the bands will be filled with CA glue when the logo is actually inlayed.  The inlay process is simple, because the logo is just a circle (or nearly so), so it is an easy cut-out.

Playing the Bitter End”

Those of you from the old days may remember a famous New York club called “The Bitter End”.  Where Bob Dylan, Joan Baez, etc. got their starts.  Well, the club is still there, and as part of an invited set of rising talent, my ukelele got to play at the Bitter End thanks to Alyssa Garcia who is certainly a rising talent.

First ‘color’

I use CA glue as a pore filler, and it ‘wets’ the wood to bring out the color as will be seen when the instrument is finally finished.  So, here are three of the next batch of 4 after the first coat of CA filler.

Two are veneer laminates with a ‘fancy’ wood over black locust (a very good local tone wood).  These are the amboyna burl and ziricote.   The other one is casuarina, about which I am pretty excited.  I think it will be a great sounding wood, the looks are not too bad, and it is cut as an invasive species in Florida to boot.

img_20161010_204201

Seen and not heard && heard and not seen

Making instruments there is the odd dichotomy between how and instrument looks and how it sounds.  We like to have beautiful things, and indeed, instruments often sell because of the way they look.  However, the real purpose of an instrument is to sound great, regardless of how it looks.  (For example, curly wood adds nothing to the sound, only the looks.)  Inlay, fancy wood, etc. is just ‘decoration’, and not the real purpose, which is the sound.  I find myself in a bit of a tug-of-war between these two facets of building.  (It does not help that it is far easier to post and compare nice pictures than really good sound samples.)

Seen and not heard:

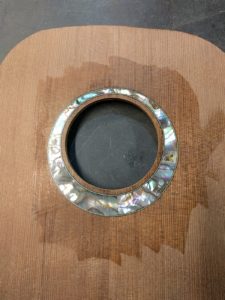
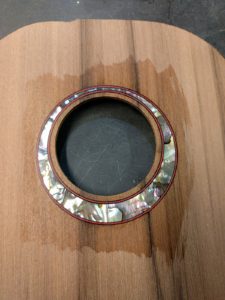
With the new rosette cutter I made, it is easy to create off-center asymmetric rosettes.  I have some really nice pink abalone pearl which has a lot of pink highlights which goes really well with the redwood tops.  (It is very hard to take a picture of iridescent pearl!)  This is still ‘decoration’ however, nice to look at but not part of the sound.

img_20160926_093444 img_20160926_093459

Heard and not seen

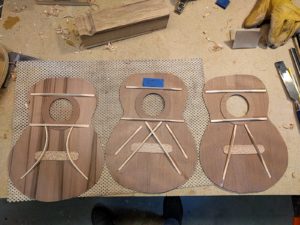
The bracing on the top has a very large influence on both the structural stability of the instrument, as well as on the sound.  The bracing is however completely hidden from view unless you get out a small inspection mirror and go in through the sound hole.  On this set of ukuleles I am building 3 tenors, all with redwood tops, and am trying out three different bracing styles.

  1. – A more traditional fan brace, using 2 tall thin fans that I have used with great success in the past.
  2. – An ‘X’ brace style, based on a Kala uke that I repaired, and which had a rather nice sound when I was done.  (It got sat on, and the top crushed, so I replaced the top, replicating the ‘X’ bracing I found.)
  3. A more radical ‘fulcate’ style bracing, which uses thin laminated curved braces.  These are very stiff and light and open up a large area in the lower bout to vibrate.  Should be interesting.

img_20160926_093617

Reverse kerf lining

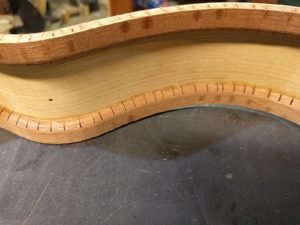
To attach the sides to the top and back one adds a ‘lining’ to provide extra gluing surface.  This ‘kerfed lining’ is a strip of wood into which a bunch of saw cuts have been made that go almost through the wood, leaving a thin strip intact.  This kerfed lining is then very flexible and is easy to bend around the sides as it is glued on.  The most common kerfing used is placed so that the saw cuts are ‘out’ and the narrow strip of connecting wood is glued against the side.  I have gone to what is called ‘reverse kerfing’, where the saw cuts are towards the side, and the thin strip of connecting wood is on the ‘inside.

img_20160923_083423

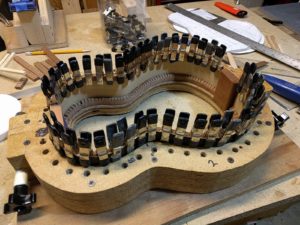
I use reverse kerfing for two reasons.  One is aesthetic, I think it looks better when you look in through the sound hole.  A cleaner, more finished look.  The other reason is structural.  I have found that reverse kerfed lining, when it is glue on, makes the sides extremely stiff.  Once you glue on this lining you can not flex the sides at all, even without a top or back being glued on.  Reverse kerfing seems to add a lot of structural stability all by itself which I like.  I glue on this reverse kerfed lining with the sides in the outside mold since the shape will be fixed by the addition of the lining.

img_20160923_162858

Making and gluing the end-block

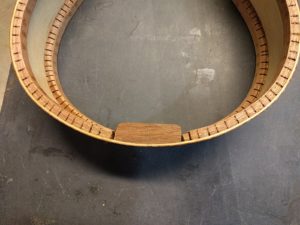
The end of the uke shape I build has a 5 inch radius curve.  This means that the end block on the inside, to which the sides are glued, needs to have a 5 inch radius curve.

img_20160923_083405

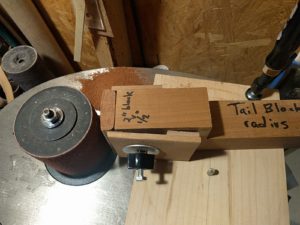
To do this I made up a simple jig with a 5 inch radius pivot that clamps to my oscillating drum sander.  I just clamp an end-block blank in the jig, rotate it against the sanding drum, and I get a perfect 5 inch radius face every time.  (The jig is next to the piviot pin in the photo)

img_20160922_083849

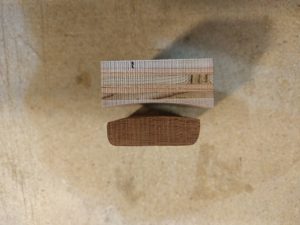
When gluing the sides to this curved end block, one also needs a matching clamping caul with a corresponding 5 inch radius hollow for the outside of the sides.  One could manually make a hollow with chisels and/or a sander but here is a much simpler way.  Get some auto-body putty (bondo), mix some up (it is a very thick paste), put a blob on a piece of plywood, cover with a piece of wax paper, and press a radiused end block into the bondo.  Let it harden, cut off the extra, and you are left with a perfect matching curve.

img_20160922_083941

bending challenge

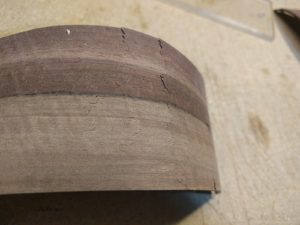
One uke in the next set is to be built out of a wood Casuarina equisetifolia which I ‘harvested’ in Florida, known locally as Casuarina or Australian Pine.  Casuarina has been planted all over Florida, and is considered an invasive plant species.  It is very hard and dense but has a reputation for twisting and cracking as it dries, so there is no commercial lumber market.  (It apparently makes great charcoal and is one of the worlds best firewoods.)  I cut up a tree that had been taken down as part of an area restoration to native plants.  The tree was growing with its roots in the salt water (Casuarina is very tolerant of a wide variety of conditions).  The wood I harvested is very hard and very dense.  Harder and denser than any of the rosewoods I have used.  It feels very much like an ebony.  This may have been because it grew slowly with its feet in the salt water, or the wood may all be like this, that I’ll find out in the future.

Any way, my first attempt at bending sides from this wood was an abject failure.  The sides cracked in a whole bunch of places:

img_20160922_085003

Rats!  Time for plan ‘B’.   I have some veneer softener which is designed to soften curly, warped veneer like burls so that one can flatten the veneer before one tries to glue the veneer down.  I took another set of Casuarina sides, soaked them in veneer softener, wrapped them up in aluminum foil and let them rest for an hour or so.  I then cranked up the bender extra hot, and bent slowly.   Thank goodness, things came out perfect, not a crack.  Guess I can work with this wood after all.  The hardness and density should yield an outstanding uke.

I’m going to be using it for fingerboards too.  Will make fabulous fingerboards.  Hard, dense, lovely rich streaky brown color, and it is an invasive species in Florida, not a wood out of some tropical jungle.

Up next …

To go with that nice curly redwood top wood, I have been picking out back and side wood for the next set of 4.  I am interested in using local, sustainable, wood as much as possible.  A while back I was talking to a fellow who sold guitar wood, with a particular emphasis on local north-eastern woods.  He said that the best local tone wood was black locust.  He also said that if you ask any builder what is the most important thing about a piece of wood, they will all say ‘the way it sounds’ but, he said, they buy it by the way it looks.

I have accumulated quite a bit of black locust in my wood stash, from some local sources.  It is hard, resilient, and stiff, a good tonewood.   The only problem is that is boring, a kind of olive yellow that never gets curly, birds-eye, wavy, or otherwise ‘interesting’.  Great sounding wood that is under utilized because of the way it looks.  To remedy this situation I have figured out how to apply a veneer to the locust.  I have started to use the term ‘laminated’ since when the side is taken down to it final thickness, the veneer is 25% of the overall thickness.  Using veneer I can put any sort of fancy wood on the outside of the ukulele for looks, and have the locust on the inside for the way it sounds.  Veneer is a very sustainable way to use fancy tropical woods, since one can make a huge amount of veneer from a log that would yield only a few boards, and after all, it is really only the surface of the wood that we look at.

So, in the next set will be 2 locust ukes, with veneer. One with ziricote:

IMG_20160823_084730

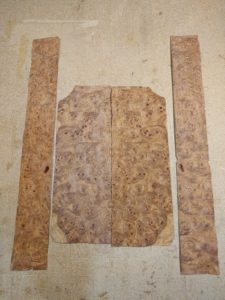
and one with amboyna burl (you could not build a solid wood burl ukulele)

IMG_20160822_162740

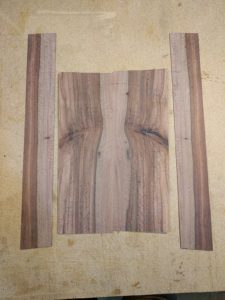
I spend the winters in Florida, and there is an invasive tree that was planted all over south Florida called a Casuarina or Australian Pine (it is not a pine).  The wood is very hard, dense, takes a wonderful polish, and rings nicely when you tap on it.  As good or better than any rosewood I think.  I managed to find some trees that had been taken down as part of a ecological restoration (it is after all, a foreign invasive species) and cut some billets.  I have cut some of this up to make fingerboards (it is going to be an absolutely wonderful fingerboard material) and got a few pieces that are big enough for back and sides.  So one of the next set is going to be a casuarina uke:

IMG_20160822_163031

Finally, I am going to build another concert so I have one ‘in stock’.  I going to use some dogwood from some big dogwoods that got taken down by the power company on the back of my property here in Pennsylvania (we grow big dogwood).  Dogwood is very fine grained, hard, bends well and should make a nice instrument.  This will be paired with a spruce top from a large spruce that came down in a storm a couple of miles from my house.  A truly ‘local’ ukulele.  It will also have a casuarina fingerboard and bridge, not local but harvesting invasive species.

IMG_20160822_162908

curly redwood

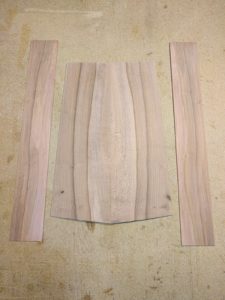
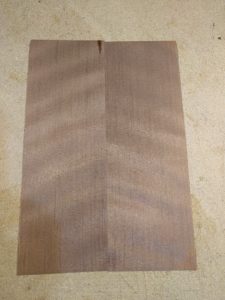
I went down to the old water tank place to get some more redwood a while back as I find redwood has a really nice tone, and before something makes it disappear from the water tank place.   I figured I would get enough to last me for a long time.  I bought a couple of planks, and had them leaning up in the garage.  It was a about 2 weeks later (maybe they dried out a little bit) that I looked at the big plank, and realized that the banding on the plank was not surface stains, but was the result of the redwood being curly!  I have now milled out some of this wood, and have started to make some tops.  I think it is going to be fabulous.

IMG_20160817_175827