Doing the rosette for #46

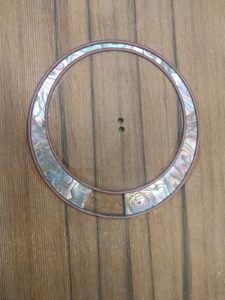
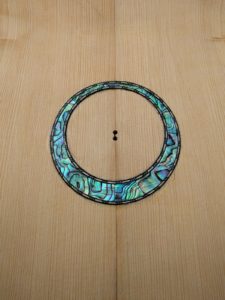
#46 is a parlor guitar, and has a standard asymmetric rosette in pink abalone (Haliotis corrugata) which is my favorite type of abalone.  It varies between mostly green and mostly pink.  I go through the box and pick out pink pieces to go with the redwood top and the black-red-black purfling.  Here is a little synopsis of the process.

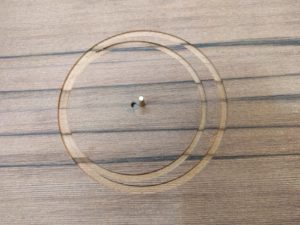
First mark the center of the sound hole and drill a 1/8 inch hole.  This will be the pivot hole for for cutting the sound hole and the inner band of the rosette channel.  Then, using a jig, drill another hole 3/16 of an inch down on the top.  This will be the pivot hole for the outer band of the rosette.

Here is the inner band

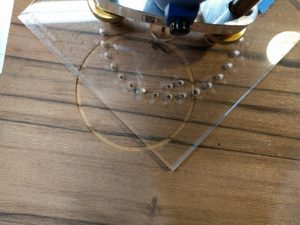
The bands are cut using a jig I designed to fit the Steward-MacDonald Dremmel router base.  This jig allows me to cut exact circles, of exactly repeatable sizes, with no adjustments.  It rides on a 1/8″ pivot pin, and the difference between one hole and the next (they are all numbered) is 1/16 of an inch increase in the diameter of the circle cut.

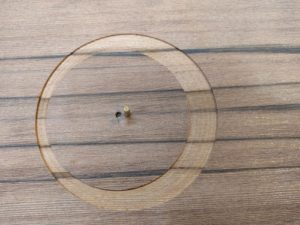
Moving to the second pivot hole, cut a larger circle, resulting in the basic asymmetric rosette.

They clean out the rosette by using a series of smaller holes in the router base.

I pre-bend the purfling by wetting it and pressing it around my rubber cement can.  Works perfectly.  I have not broken a piece yet.

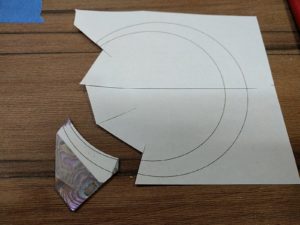
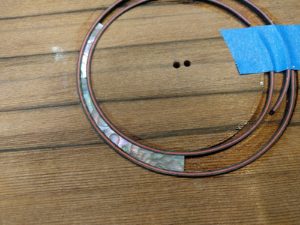
Cut two pieces of purfling to go around the inside and outside of the rosette, with a little extra so that the final fit can be done when most of the pearl has been inlayed.  To cut the pearl using Corel Draw I offset two circles of the actual diameters by the 3/16″ offset of the pivot holes, account for the thickness of the purfling, and then print out a pattern.  Parts of this pattern are then pasted to pearl pieces with rubber cement, and the piece is cut out along the printed lines.

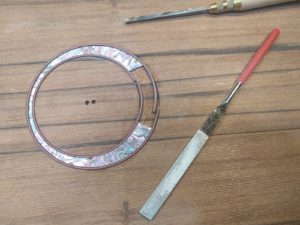
The tapered pieces are then put in the rosette by putting them in the wider part and sliding them up into the taper.  One wants a really tight fit.  If the piece is a little large, file the edges down just a little so it goes in.   It is important to keep the ends flat, so that one piece can be mated to the next piece with no gap.  When you get most of the pearl in place, then you can trim the ends of the purfling so that the ends fit together tightly to make an invisible joint.


When you get nearly done, there is one last piece.  This is the tricky one because it has to fit exactly on both ends.  File a little, test, file a little, test, ….

When the last piece is in place, flood everything with CA glue to glue things in place and harden the purfling.  Then sand it all flush with the top and you are all done.


Stiff is good

In the latest batch are two parlor guitars, which means 6 strings, which means more tension in the instrument, more tension trying to rotate the bridge.  It is the braces under the top that keep everything stable.  However, you can really deaden the sound by over-bracing things, with too heavy/thick braces.  The goal is to find the right balance of stiffness to resist the pull of the strings, and lightness to let things vibrate freely and produce sound.

With this as one goal in mind, some time back I acquired a plank of Port Orford Cedar.  This grows in a small area on the west coast, and has a very high stiffness-to-weight ratio.  I have cut some tops from this plank, and the instruments sound great.  Given that I was building two parlor guitars I set about updating my bracing stock with some of this Port Orford cedar as very stiff and light is just what is wanted for guitar bracing.

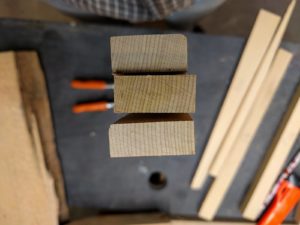
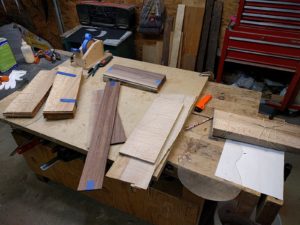
The plank, at least one end of the board, is pretty ‘flat sawn’ meaning that the growth rings arc through the plank.  For bracing stock one wants to have the growth rings vertical in the brace, as that is some 20% stiffer than if the growth rings were across the brace.  So, I cut off a chink of the plank, and then I set the bandsaw table on a angle, and cut off sections so that the grain would end up vertical in the brace stock, along these lines.

After cutting off the odd corners, planing them to a constant thickness, I got some really nice brace stock, and just trying to flex it between two hands, it feels very stiff.

These will be sliced up vertically to make a number of braces from each piece.


Go big or go home

In the latest set of builds I am going to build a concert as a base for a number of experiments, aka, learning some new skills.

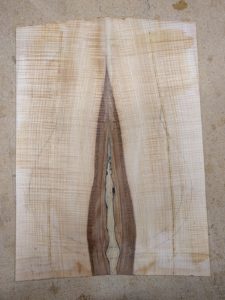
I thought I would try out some really nice curly maple I cut from a tree a fellow in the neighborhood took down.  It has a really fine, even curl.  My favorite kind of curly maple.  It also (at least some chunks) has a little brown heartwood with a little bit of spalting (rot down the middle of the tree).  When I got the back glued together, it looked so nice, that I was unwilling to cut it down to a concert size.  Better to save it for a larger tenor sized instrument in the future, to save as much of that really nice curly grain as possible.

I decided to make the concert out of some curly ash (nearly the last of the stash) that is just concert sized.  No wasted wood.

The next set

I am back up north in Pennsylvania after a winter sojourn in Florida and starting on the next set of 4.  It will be an interesting set.  3 of the 4 are special orders, each of which has some different aspects which will be fun.   The three are:

1) A parlor guitar in black walnut and redwood.   Maybe some custom pearl inlay, still in discussion.

2) A short scale Guitalele.  Baritone body in sycamore and Pennsylvania red cedar top, 19 inch scale, 6 string neck, Picasso headplate, side sound port, radiused fingerboard.

3) A tenor in spalted sycamore with a curly redwood top and somewhat extensive custom pearl inlay.   Some new things here that should be interesting to work out.

The fourth instrument will be a concert, on which I want to conduct some experiments with some new build procedures.  Have not decided on the wood just yet.   I’m leaning to some local curly maple I cut a while back and a redwood top but I might go casuarina back and sides.

In all of this it is fun to go through the wood pile to pick out parts, and discover things you have forgotten about.    Wood is wonderful stuff!

A little pearl work.

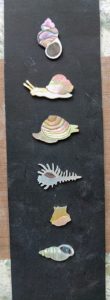
Down here in Florida for the winter I do not have much in the way of shop facilities.  One of the things I do is experiment, particularly with things involving mother-of-pearl inlay since cutting pearl and doing inlay does not require much in the way of tools or space.  It is a long story, but one of the things I have been thinking about is a seashell/mollusc themed ukulele.  As part of that thinking I decided to make up mollusc based fretboard position markers.  This was also an opportunity to work on some pearl handling techniques for thin, quite small pieces, and building a small ‘light box’ to make fitting one piece of pearl to another easier and more exact. The fretboard markers (I forgot to add something for scale, but the largest of these would fit on a quarter):


Spiral rosettes – which direction

I have been experimenting and developing some jigs and templates to create ‘spiral’ rosettes. (Thanks to Beau Hannam for the idea & inspiration.) The question arises, should the spiral go counter-clockwise (fat part under the first string) or counter-clockwise (fat part under the 4’th string)? Does it make a difference if the instrument is low-G or high-G?

Rosette

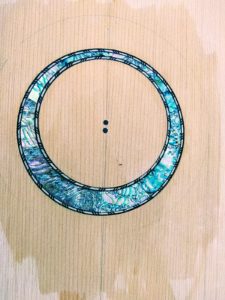
I have been working on doing the rosettes in tops, so the tops are more ready-to-go when I get back up north to the ‘big’ shop.  Here is one that (as of this moment) is destined for a parlor guitar.  It is Port Orford cedar, which has yielded very good results for both me and a friend, Brian Griffin.  The rosette is made of green heart pearl from red abalone (Haliotis rufescens).  The green heart is where the abalone’s muscle was attached.  It accounts for only a very small amount of the mother of pearl that can be cut from an abalone shell so it is rather scarce but it is sure beautiful stuff.

New rosettes

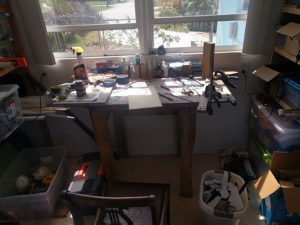
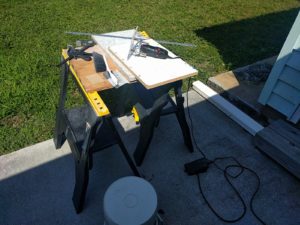
Down here in Florida I have only a small ‘shop’ area and I try to do operations that create sawdust outside, where my workbench is a couple of sawhorses.  It is kind of like camping, doing things with limited resources.  I do however bring down a selection of small tools with me from the main shop in Pennsylvania.  Doing pearl inlay takes very little bench space, and uses only small tools, so I try to bring down a number of glued together tops, and do the pearl rosettes while I am here, so that they are ready-to-go when I get back up north and start real builds.  The ‘shop’ and outside shop:

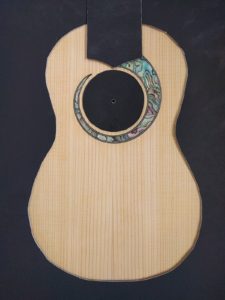
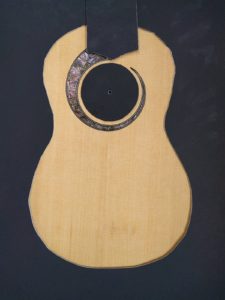
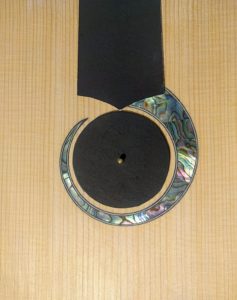
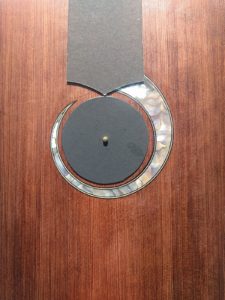
Using these I have been experimenting with a new rosette style.  Thanks to Beau Hannam, luthier extraordinaire, with the inspiration and challenge to create some jigs that would make these easier.  I cut some basic jigs up in Pennsylvania before I left, and have been developing a process to use these, in a particular order, to create the desired result.   Here are the first two, with black cardboard overlays to show how the soundhole and fingerboard will be.

Pearlworks – how I spent part of my winter in Florida

I like to do pearl inlay, and I like different types/colors of mother of pearl.  One of my favorites is from the California red abalone (Haliotis rufescens).  Unfortunately for the species its numbers have been drastically impacted due to historic over-fishing.  There is currently no commercial red abalone harvest, and private ‘sport’ harvest is very limited.  Because of this there is very little red abalone pearl available, if any at all, from the usual inlay suppliers.  This fact, plus the fact that part of me likes to start with the ‘basics’ and work ones way up from there, leads me to cut my own red abalone pearl.

I have, over the years, acquired some abalone shells here and there, yard sales, friends who gave me some, etc.  All of this is old shells that have been kicking around for a while, holding incense, being ashtrays, etc.  I finally got around to processing these shells.  Many of the shells were filled with lots of tiny holes, which are caused by a boring sponge that attacks the abalone.  The shells, or portions of shell, that have all these tiny holes are useless for inlay.  This means that the ‘yield’ can be pretty low.

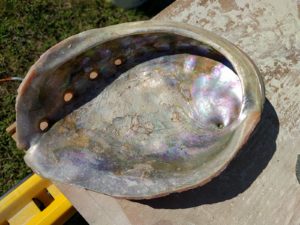
One starts with a shell, the bigger, thicker, and flatter in shape the better:

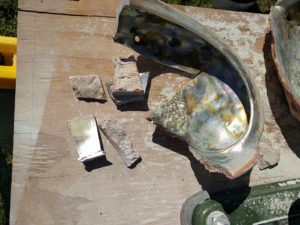
I mark out what I think are the biggest areas that are reasonably flat, and then cut the shell up with a diamond cut-off blade on my angle grinder.  Makes a lot of dust.  Back yard with a nice breeze at ones back is a must.  This gives shell pieces:

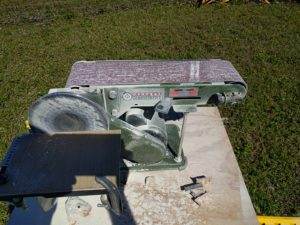
Then one flattens the inside, which is concave from the shape of the shell.  I have used various methods to do this flattening, but this time I used a small bench-top belt sander with 80 grit paper.  Works pretty well but I rotated through pieces multiple times to try and keep the heat build-up to a minimum.   Again, lots of dust.

Once things are flattened you have pieces with a nice flat side, but there is lots of the outside of the shell, ‘bark’ if you will, left that must be dealt with.

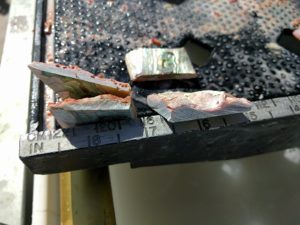
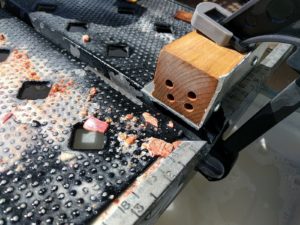
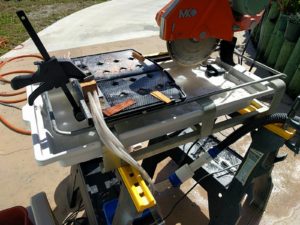
To cut the pearl down to a nice flat, thin, blank I devised a setup to use on a rented wet diamond tile saw (Home Depot).  These diamond tile saws cut granite tile easily, so they cut pearl just fine.  Also, since the saw runs with a good water flow over the blade there is no dust and no heat.  To hold the pearl as it is being sawn, I made a little piece which has aluminum ledges for the bottom and side, and holes that lead to tubes, that are connected to a wet/dry shop vacuum.  This produces good suction against the flat side and holds the piece of pearl nicely while you run it through the saw.

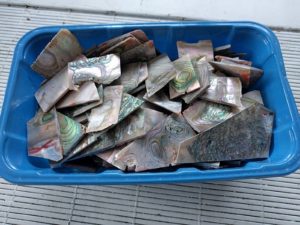
The net result is 22 ounces of red abalone pearl blanks:

The places that still have some red abalone pearl for sale charge $35 – $40 per ounce, so these 22 ounces make it worth renting the tile saw and I can say, when I sell an instrument, that I cut the wood from a tree with a chain saw and I cut the pearl from a shell.  I kind of like that notion of starting with the basic materials and ending up with a musical instrument.